
Articles:
Learn how to set up automations on KWIGA to manage course access, send reminders, assign tags, and issue certificates without doing it manually.
In this article:
- How automation works
- How to create a workflow
- Workflow list
- What steps make up a workflow
- How delays add up
- What you can't automate: events that haven't happened yet
- Goal: when the result matters more than the path
- Re-entry: can a contact go through a workflow twice?
- Example: reminding a student who hasn't accessed a course
Automations let you set up a sequence of actions once. The platform then guides each contact through the right path: granting access, assigning a tag, sending a reminder, or issuing a certificate. You don't have to do this manually for every student.
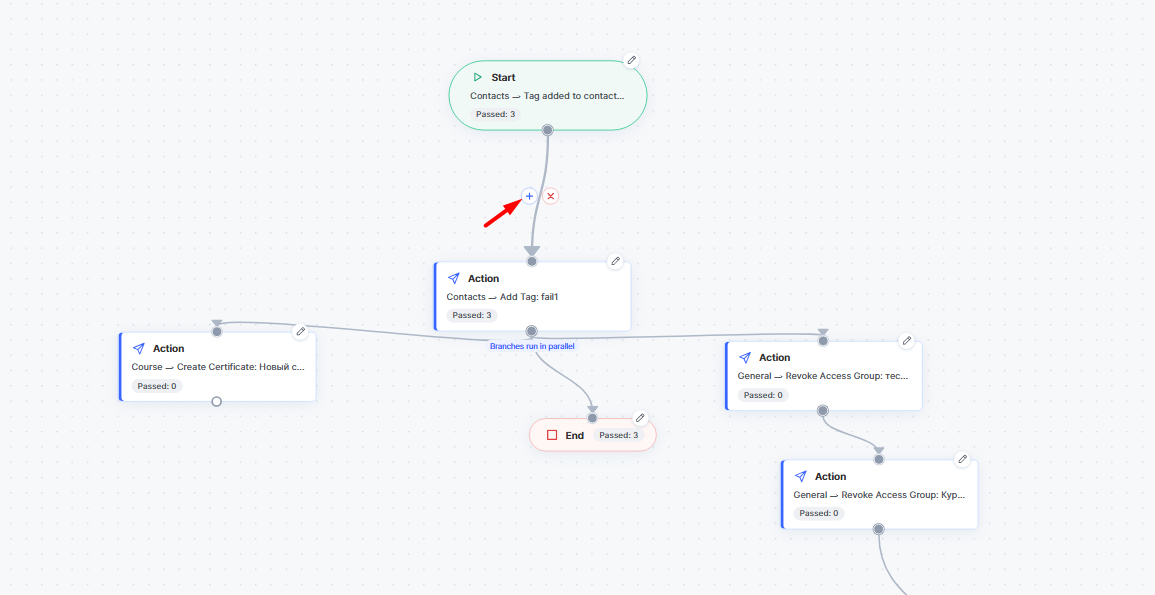
A scenario appears as a flowchart: each step is a separate card, and the lines between cards show where the contact goes next.
How automation works
To automate a process, first choose the start event that triggers the scenario. It could be a user registration, a course payment, access being granted, or any other event on the list. From there, you build what happens next: check conditions, wait for a set time, and perform actions.
Note that a configured scenario only runs for events that occur after you publish it. If an event happened before you set up and published the automation, the scenario won't run for that contact. For example, you want everyone who registers on the platform to receive a new email. Contacts who have already registered won't receive it—only those who register after the scenario is published will. To take action for contacts whose event has already occurred, use other tools, such as email campaigns or bulk actions.
How to create a scenario
-
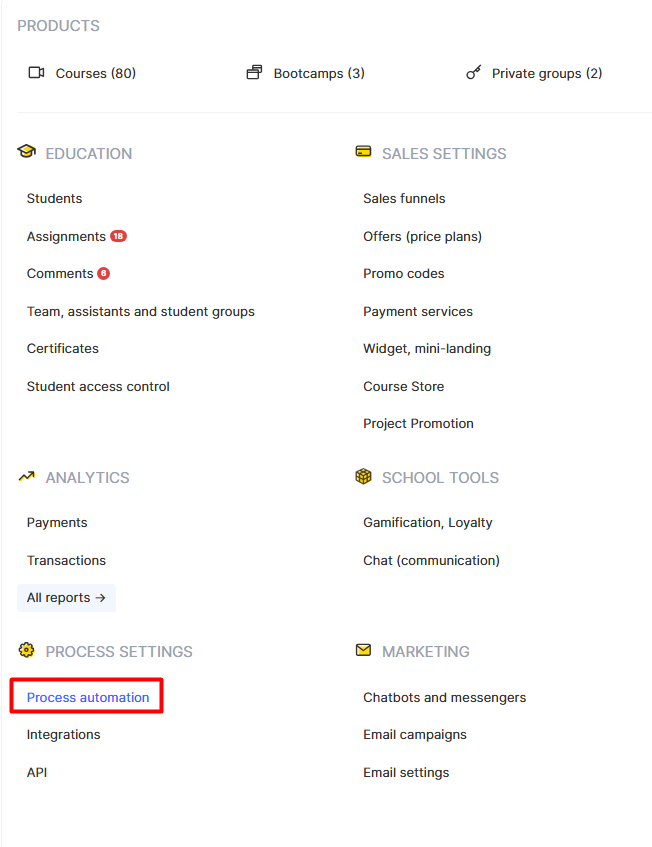
Open the Process automation page in the Courses menu and click Create scenario.
-
Give the scenario a clear name so you can easily find it in the list.

-
On the Start card, click the pencil icon and choose the event that will trigger the scenario.
-
Use the Add step button to add the steps you need: Action, Delay, Condition and others.
-
Connect the steps with lines in the order they should run, and end each branch with an End.
-
step. Click the pencil icon on each step's card to configure it.
-
If needed, open Settings and choose how re-entry works.
-
Click Save, and when the scenario is ready, click Publish.
You can stop a running scenario with the Pause button in the editor or the toggle in the Status column on the Process automation.
Scenario list
All created scenarios appear on the Process automation. Use the search above the table to find the scenario you need. The table shows the following for each scenario:
-
Status (Draft, Running or Paused) and a toggle you can use to stop or restart the scenario;
-
Name of the scenario;
-
Entered: how many contacts entered the scenario;
-
Currently in the scenario: how many contacts are going through it right now;
-
Completed: how many contacts completed the scenario;
-
Reached the goal: how many contacts reached the goal;
-
Modified: date and time of the last change.
Previously created scenarios are available via the Previous automations. The three-dot menu next to the scenario name offers three actions: Edit, Duplicate, and Delete.
What steps make up a scenario
Each step type has its own role, and you can combine them to build any scenario.
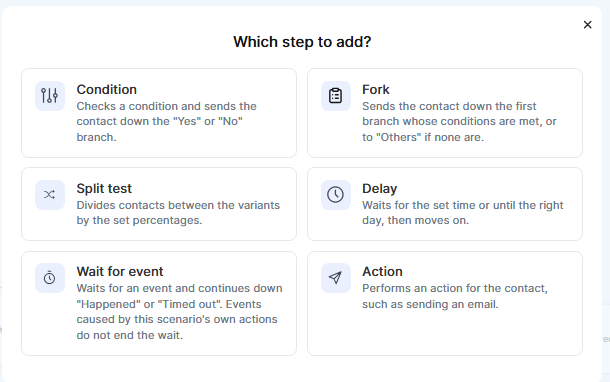
Start starts the scenario. Here you choose an event, such as adding a contact, a successful payment for an offer, or granting access to a product.
Action performs an action for a contact: sends an email, adds a tag, grants or revokes access to a product, issues a certificate, or sends data to an external service. The action card shows its category and name, such as Contacts, Add tag. You can add as many actions as you need to a scenario.
Condition works like a junction with two paths. The platform checks whether the condition is met and sends the contact down the Yes or No branch. You can combine conditions using the AND and OR operators.
Branch works when there are more than two options. The contact takes the first branch whose conditions are met. If none match, the contact takes the Others branch. We recommend ordering branches from highest to lowest priority, because the first matching branch is the one used.
Split test distributes contacts among options according to the percentages you set. Use it to find out which email or path works better instead of guessing.
Delay waits for a set amount of time or until a specified day, then moves the contact forward. For example, you can send a reminder about the first lesson the morning after payment rather than immediately.
Wait for event holds the contact until a specific event occurs. If it occurs, the contact takes the Occurred branch, and if the waiting time runs out, the contact takes the Time's up branch. Note that events triggered by actions in the same scenario do not end the wait. In other words, a scenario cannot trigger the event it is waiting for.
Goal records when a goal is reached. We'll cover it separately below.
End ends the workflow for the contact.
How delays add up
Each delay is a separate Delay step, so a workflow can have several. Delays run sequentially from the moment the contact reaches each step. If you set a 2-day delay after an event, check a condition, and then add another 3-day delay before an action, the action will run 5 days after the event. Keep this in mind when planning, especially if your workflow has several delays in a row.
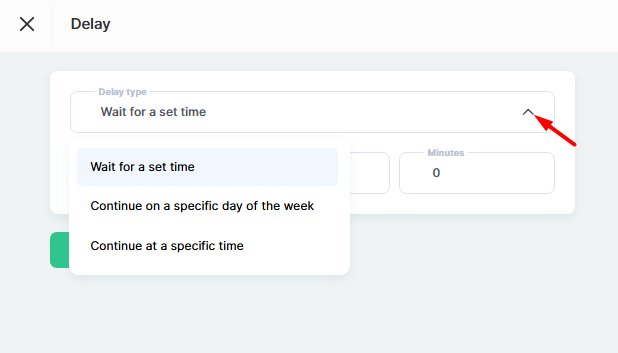
The Wait for a set time type adds the specified time to the total delay. The Continue on a specific day of the week and Continue at a specific time types wait until the specified day or time, so the total delay depends on when the contact reaches that step.
What you can't automate: events that haven't happened yet
You can't build a workflow around an event that hasn't happened yet. Suppose a bootcamp starts in 1 November, and you want every member to receive an email with preparation instructions the day before it starts. Choosing the event that grants access to the first stage under Start would be a mistake: the email needs to go out before that event occurs. Instead, we recommend using a successful offer payment as the start event, adding a Delay step until the required day, and only then adding an Action step to send the email. After that day, you can pause the workflow using the switch in the Status column on the Process automation.

page. If you're unsure which event to choose for your workflow, contact platform support.
Goal: when the result matters, not the route
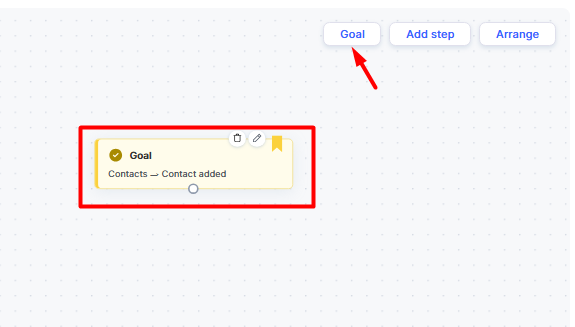
The Goal step lets you record when someone reaches a goal, regardless of where they are in the workflow. A contact reaches the goal only when the goal event occurs, from any step in the workflow. You can't draw a line to this step manually. For example, a student buys a course while waiting for a reminder email. The workflow immediately marks the goal as reached, and the student won't receive any more reminders.
Re-entry: can a contact go through a workflow twice?
The Re-entry setting determines whether the same contact can go through the workflow again if the trigger event occurs again. To configure it:
-
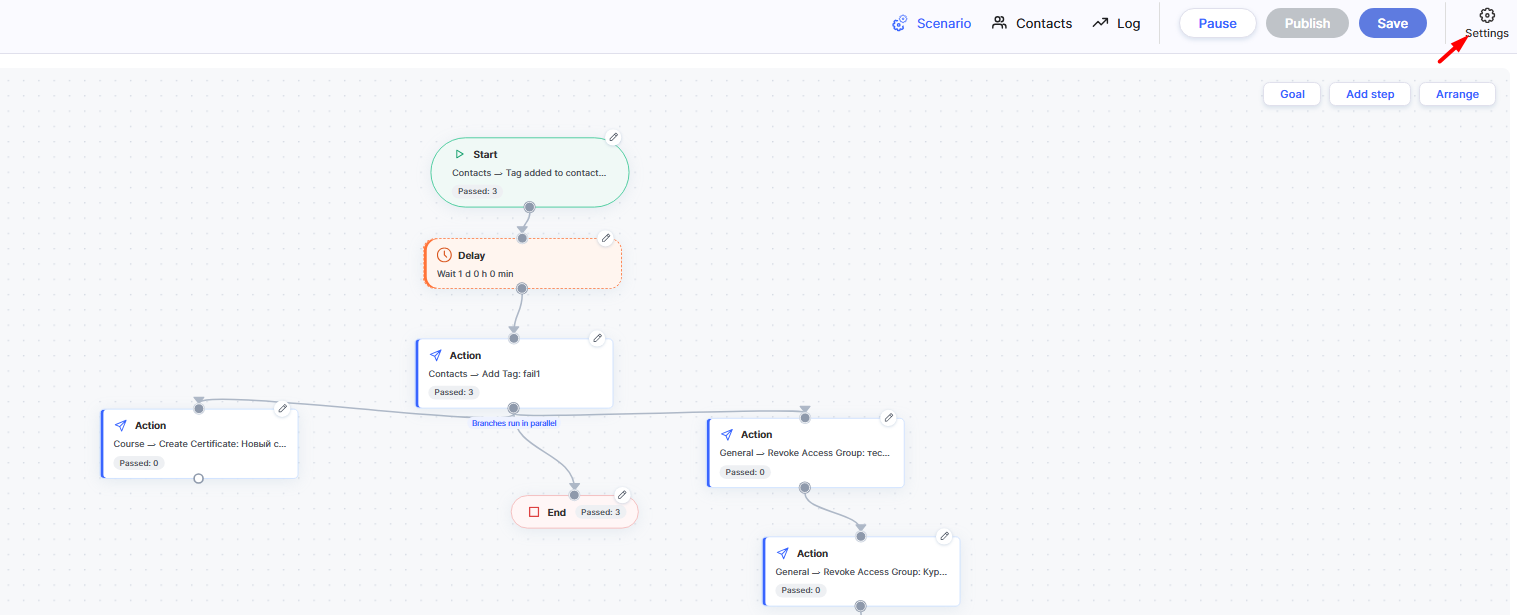
Click Settings in the upper-right corner of the workflow editor.
-
In the Workflow settings window, click the value next to the setting Re-entry.
-
Choose one of the three options from the list.
-
Save the workflow with the Save.
Which option you choose depends on your goal.
Only once: a contact goes through the workflow only once, even if the trigger event occurs again. We recommend this option for a welcome bonus that the same person shouldn't receive twice.
After completion: a contact can enter the workflow again, but only after completing the previous run. This option works for reminders that need to repeat without overlapping.
Every time: a contact enters the workflow every time Startis triggered. This option works, for example, for an email after each successful payment
Example: Remind a student who hasn't opened the course
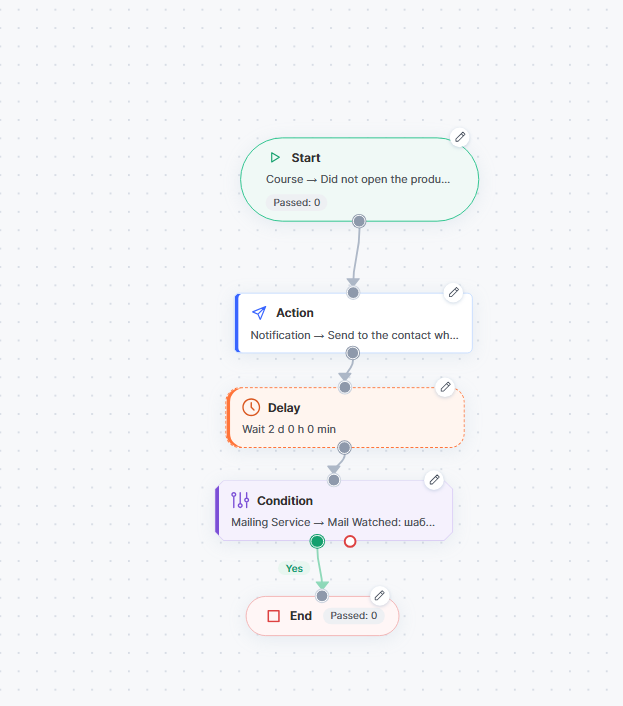
Create a workflow that reminds the student about the course and repeats the reminder if needed.
-
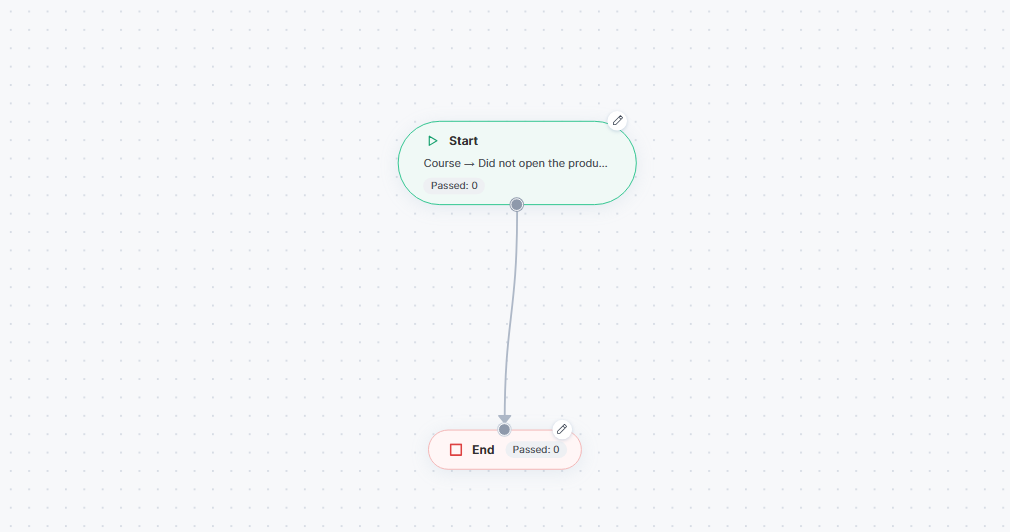
In the Start step, in the Select event field, select Course → Hasn't opened the product for X days / months, select the course and enter 5 days, then click Done.
-
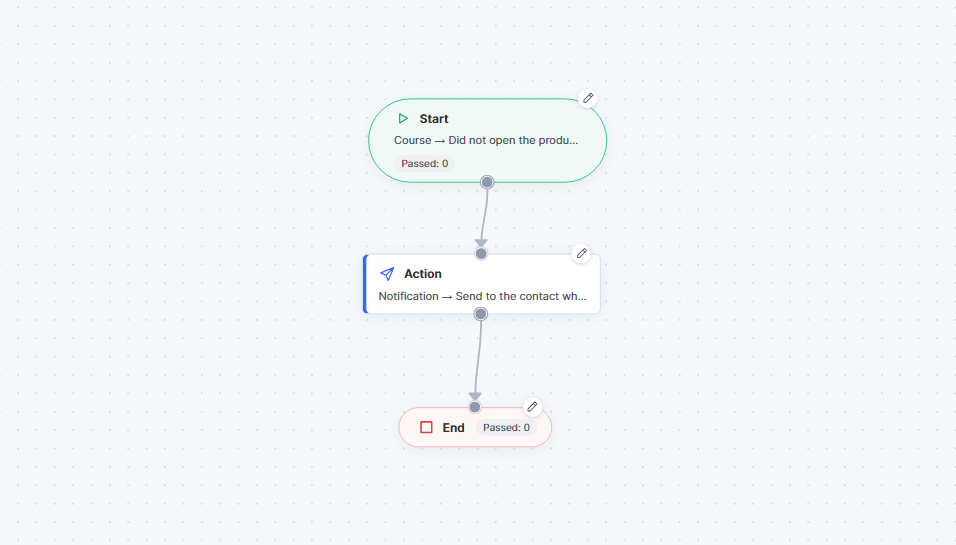
Add an Action step and choose to send a reminder email.
-
Add a Delay of a couple of days.
-
Add a Conditionthat checks whether the student clicked the link in the email.
-
End the Yes branch with an End step.
-
To branch No add another Action with a second, slightly gentler email, and end it with an End step too.
If you're not sure whether you need a complex workflow, we recommend starting with one Start step and one Action, then gradually making the workflow more complex.
Didn't find the answer? Contact the support service via online chat or Telegram