Articles:
- Import customer base
- Bulk actions in the database
- Adding Custom Fields in CRM
- Kwiga CRM basic version
- Login Log
- How to change the payment schedule for a student
- How to mark a partial payment as paid
- How to mark a subscription as paid (via the platform)
- How to Filter Contacts Who Filled Out the Form but Didn’t Pay
- How to Email a Participant
- How to Collect Additional Information During Registration or Purchase on the Platform
- Adding Contacts from Google Forms and Google Sheets to the Kwiga CRM
Learn how to add fields for contacts to store important customer information and customize crm for your needs.
In this article:
There are two types of fields in a CRM: default (system) and custom (global or individual).
System fields are created by default and contain key information about a contact — name, email, phone number, etc. These fields are immutable and cannot be deleted.
Custom global fields allow you to tailor the CRM to your specific needs. They can be created once and will be available for all contacts. This is convenient for data structuring, filtering, form creation, and analytics.
You can also add a custom individual field for a specific contact — via the +Add Field button in their card. This option is suitable for exceptional cases.
We recommend using system or global fields to ensure data in the CRM remains consistent, searchable, and useful for further customer interactions.
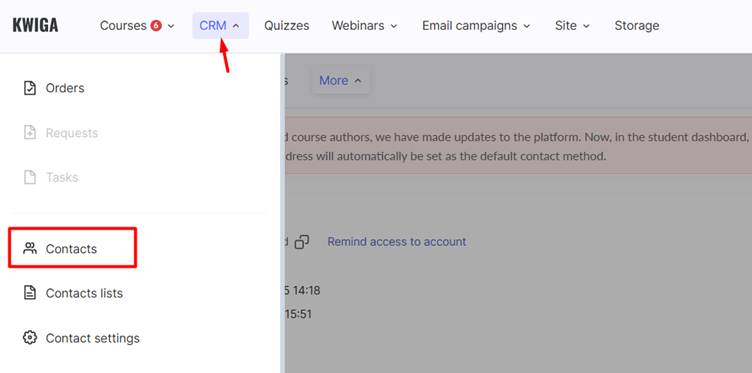
To configure fields, go to the Contacts section.
For example, you can create additional fields to:
● Collect specific information about customers, such as company, job title, or referral source;
● Customize a registration form with extra fields, e.g., for selecting a convenient consultation time or specifying special requests;
● Customize a widget form for collecting contacts by adding a question field that the client must fill in before submitting the request.
Let’s look at the default system fields and how to add a global field for all contacts.
Default (System) Contact Fields in CRM
By default, the CRM contains certain system fields that hold basic information about the contact and cannot be edited or deleted.
Here is a list of such fields:
● First Name – field for entering the contact's first name.
● Last Name – separate field for entering the last name.
● Full Name – combined field containing both first and last names.
● Email Address – used not only for storing the contact email but also for login authorization in the system.
● Phone – field for entering the contact’s phone number.
● Country – dropdown list for selecting a country.
● Time Zone – allows you to choose the contact’s time zone.
● Currency – currency selection, useful for financial operations or business analytics.
● City – field for entering the contact’s city.
● Tag – used for adding special labels to help categorize contacts.
These fields are system defaults and cannot be removed. Next, we’ll look at how to add a global field to expand CRM capabilities and store additional customer information.
How to Add a Global Field in CRM
A custom global field is a field that automatically appears in all existing and new contacts. You can use it to add custom parameters that match your business needs.
To create a new field:
-
Go to CRM → Contacts → Settings.
-
On the Add Custom Fields tab, click + Global Field.
-
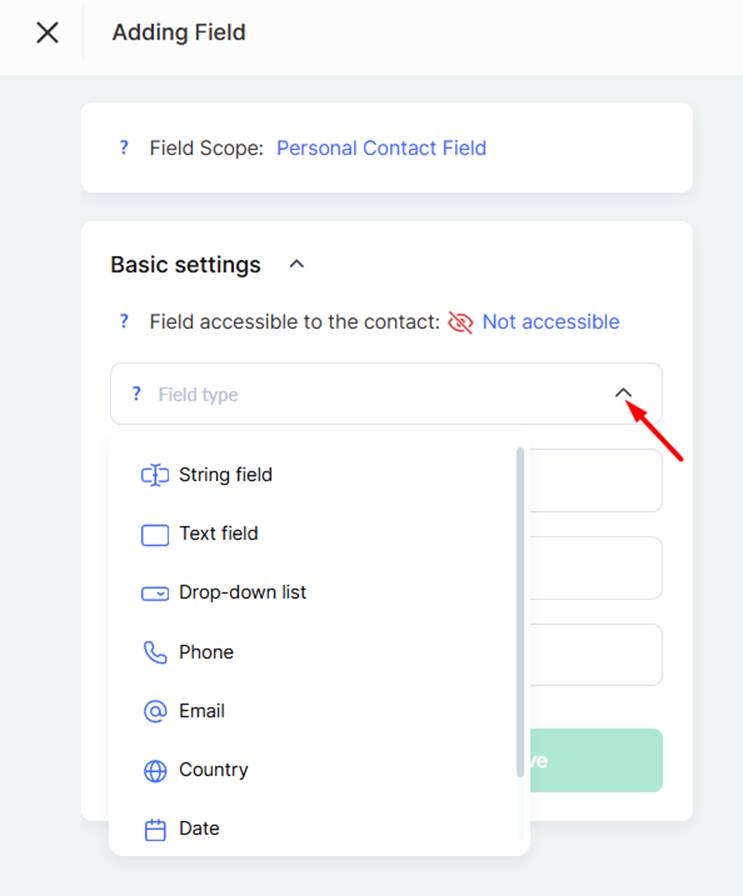
The next step is to set access permissions for this field for the user.
You can make the field completely inaccessible; in this case, it will only be visible to administrators in the CRM. You can allow the user to view the value only, for example, if it’s information about the registration source or pricing plan. Or you can grant full access; then the student will be able to edit the value themselves, for instance, to update their learning preferences.
-
Choose the field type based on the kind of information you want to store:
● String Field – for short text (e.g., social media links or unique codes), up to 255 characters.
● Text Field – for long comments or interaction history.
● Phone – for phone number input only.
● Email – for entering an email address.
● Country – dropdown list for selecting a country.
● Date – date selection field; you can define the format and default value.
● Checkbox – useful for consent agreements or confirming a specific status.
● Dropdown List – allows you to add your own values (e.g., contact source or audience segment).
Enter the field name, add a placeholder (hint), and if needed, set a default value.
Click Save – the field will automatically appear for all contacts in your CRM dashboard.
Important: If you delete the field, all data contained in it will also be deleted.
This way, custom fields enable flexible customization of your CRM to match your business processes and make working with customer data more convenient.
How to Add a Custom Field to a Contact Card
CRM allows you to create additional fields not only through the general contact structure settings but also directly from an individual user's contact card. This is particularly convenient when you need to quickly add a field and save specific information, either for a single contact or for the entire database.
-
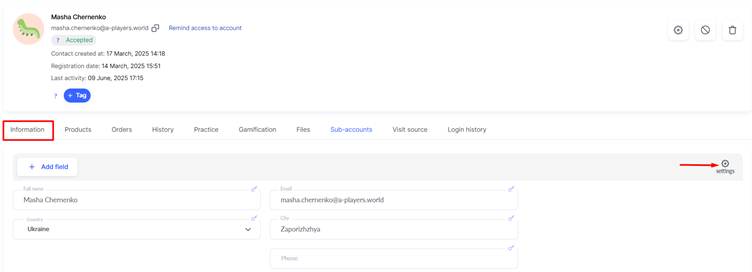
To create a new field directly for a specific contact, first navigate to the CRM > Contacts menu and open the contact card for the desired user.
-
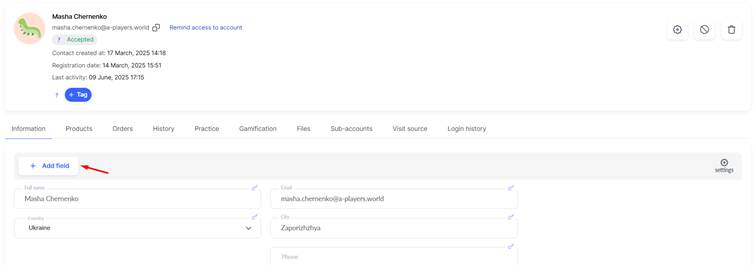
On the Information tab, click the +Add Field button. A window will then open to configure the new field’s parameters.
-
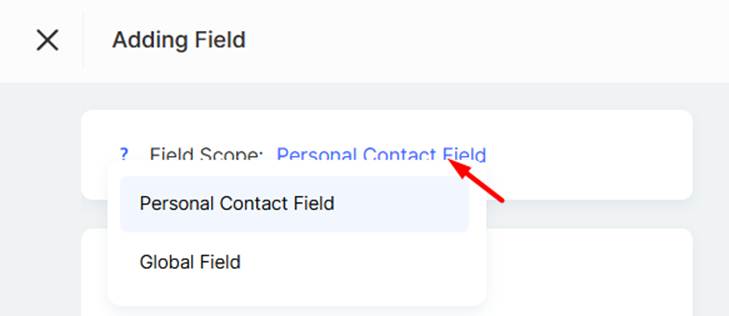
At this stage, you need to choose the field’s scope. If you select a personal contact field, it will be added only to this particular record and will not appear for others. If you choose a global field, it will become available for all contacts within the current project.
-
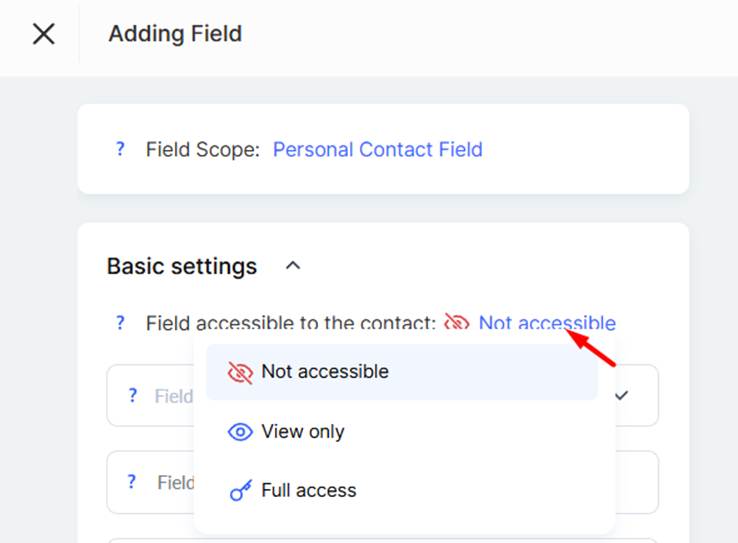
You can also configure the field’s visibility to the student — you can keep it completely hidden, allow view-only access, or grant editing rights. This is especially useful if you want the participant to update certain information in their profile themselves.
-
Choose the field type based on the kind of information you want to store:
● Text field — for short text (e.g., social media links or unique codes), up to 255 characters.
● Textarea field — for long comments or interaction history.
● Phone — for entering a phone number only.
● Email — for entering an email address.
● Country — a dropdown list to select a country.
● Date — a field with a date picker; you can set a format and default value.
● Checkbox — useful for accepting terms or confirming a status.
● Dropdown list — you can add custom values (e.g., contact source or audience segment).
-
Enter the field name, add a placeholder (hint), and set a default value if needed.
-
Click Save.
The ability to create both personal and global fields directly from the contact card enables quick data entry and facilitates adapting the structure to your workflow needs.
Organizing Fields into Sections in a Contact Card
On the platform, you can not only add fields to each contact card but also group them into thematic sections. These settings apply to all users in the account. It helps structure the data and makes the interface more intuitive, both for administrators and for curators or instructors who work with contacts on a daily basis.
A section is a separate information block within a contact card that can contain multiple fields. For example, you might create separate sections for payment information, participant personal preferences, and internal team notes. Fields in a section can be either global or individual, depending on your needs.
Here’s how to organize fields into sections:
-
Go to CRM — Contacts and open a contact card.

-
On the Information tab, go to Settings.
-
In the Fields in the “Information” Section block, under the Field Layout tab, configure how the fields will be displayed.
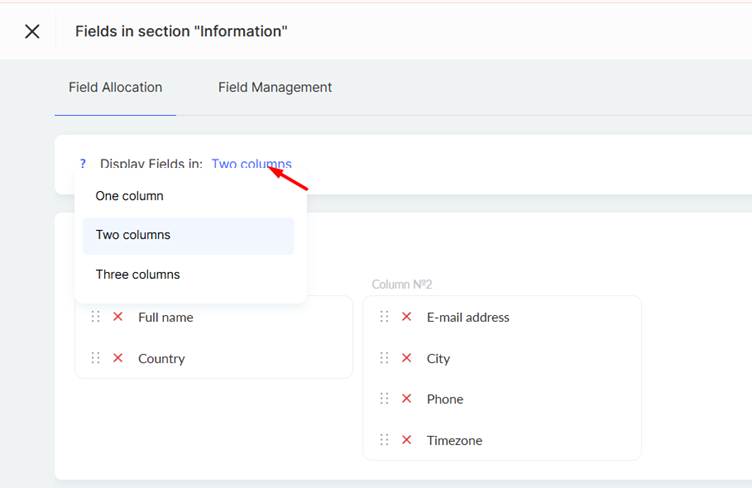
You can choose the number of columns to display fields in. Please note that the layout is dependent on the screen width. For instance, if you choose three columns, on narrower screens (such as tablets or phones), it will automatically adjust to two or even one column. -
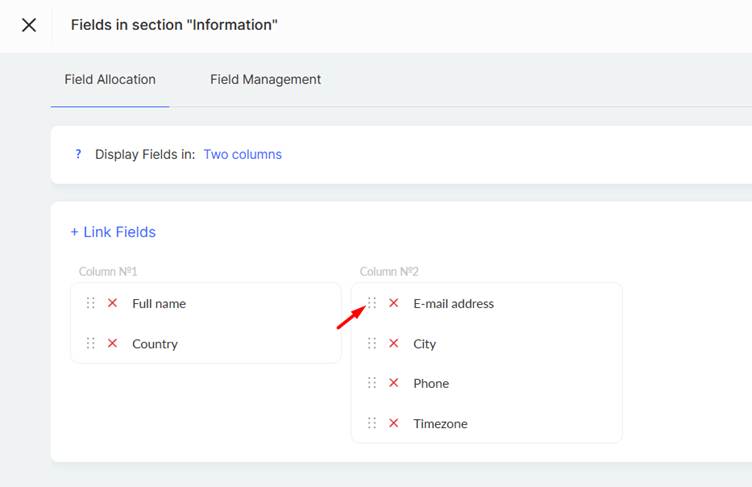
Use drag-and-drop to move existing fields into another section.
-
If there are pre-created fields that haven’t yet been linked to contact cards, you can click +Link Fields and assign them to a specific section:
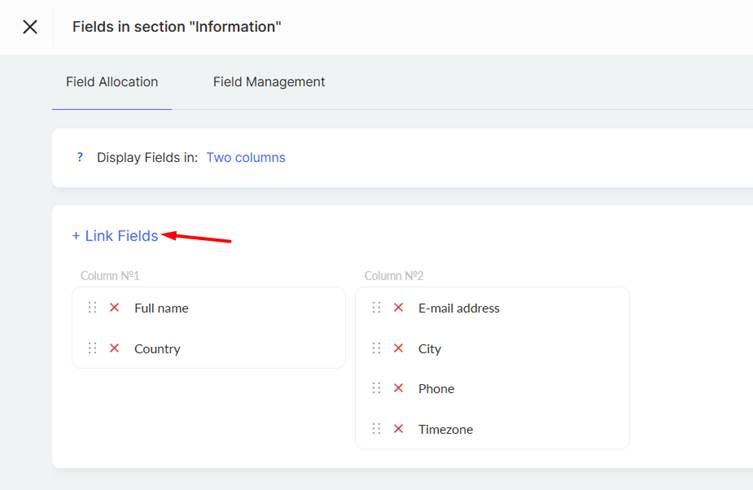
Check the boxes next to the fields you want to display in contact cards, and drag them into the appropriate section. -
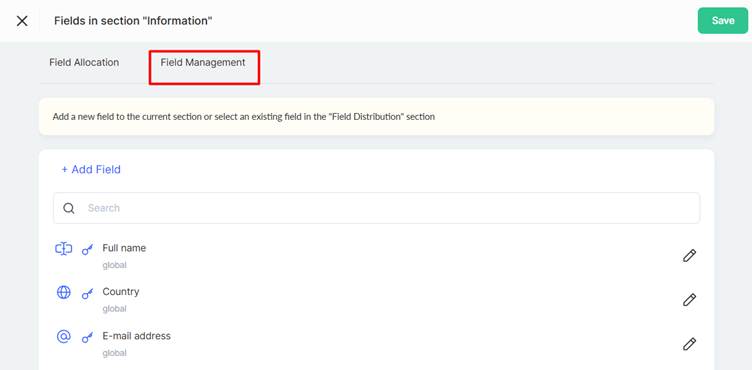
On the Field Management tab, you can add a new field to the current section or select an existing one in the Field Layout section and, for example, edit its settings.
This type of field organization into sections allows you to build a logical structure for contact information, which greatly simplifies working with the database and improves the user experience.
Configuring Display Settings for the Full Name Field
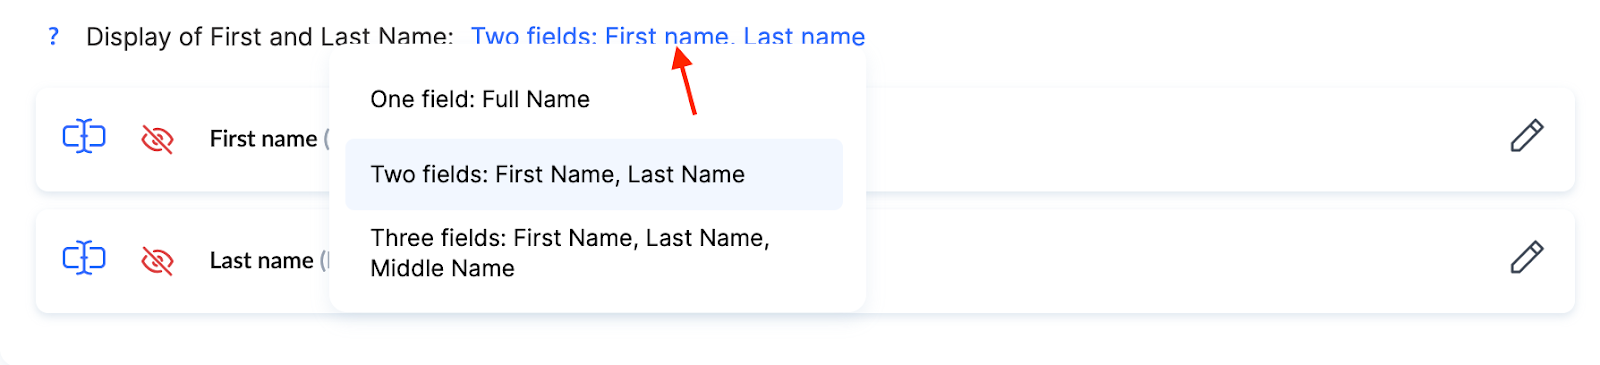
By default, the platform uses a single Full Name field, but if needed, it can be split into 2 or 3 separate fields in CRM → Contacts → Settings. Choose the format for displaying the user's first and last name. These settings determine how names appear in both the student's profile and the contact card on the admin side.
-
Single field: Full Name – the first and last names are entered in one field. The system automatically splits them into first and last names based on the configuration set in the “Full Name” field.
-
Two fields: First Name, Last Name – the first and last names are entered separately, each in its own field.
-
Three fields: First Name, Last Name, Patronymic – in addition to the first and last name fields, a third field for the patronymic is added.
The Full Name field holds special significance on the platform, as it is a global field available to all users by default. Participants can edit this field themselves, for example, in their profile settings.
It’s important to understand that Kwiga does not have separate system fields for first name and last name. Users enter their data into a single Full Name field, and the platform automatically splits this information into individual components based on the configured format. This enables the use of separate variables for first name and last name in emails, templates, and automations.
Full Name Format and Automatic Parsing
The Full Name field has a formatting option that defines how the platform will parse the input into components. When a user enters their full name into one field, Kwiga automatically separates the input according to the selected format and creates individual variables for each element.
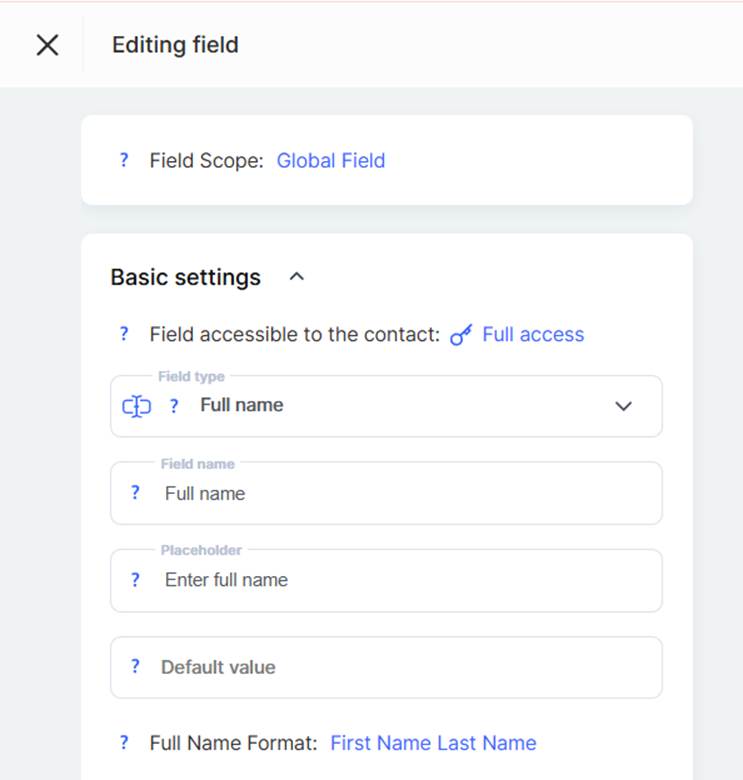
For example, if the format is First Name Last Name and the user enters “Alexey Petrenko,” the system will divide this into two parts. Likewise, if the format is Last Name First Name Patronymic and the input is “Petrenko Alexey Mikhailovich,” it will split the name into three respective components.
Note: Kwiga handles cases where the number of entered words doesn’t match the expected format. If a user enters more words than the format anticipates, all extra words are added to the last component. For instance, if the format is First Name Last Name and the user enters “Alexey Mikhailovich Petrenko Jr.,” then “Alexey” will be parsed as the first name, and everything else will be included in the last name.
Available Formats
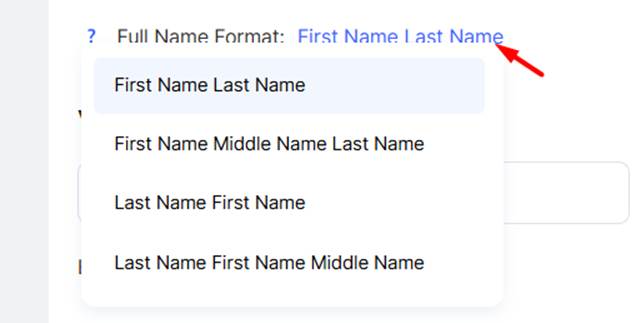
● First Name Last Name — The most common international format, suitable for most European and American users. It’s ideal for simple use cases without a patronymic.
● First Name Patronymic Last Name — Useful for specific cultural traditions or when an alternative component order is required.
● Last Name First Name — Applicable in contexts where the last name is listed first, or for formal documentation in some organizations.
● Last Name First Name Patronymic — Aligns with the traditional Ukrainian structure and official documentation standards. Ideal for formal communication and respecting cultural norms.
Once the format is set, you can use separate variables in various contexts. For example, in email campaigns, you might refer to users by first name for an informal tone or by last name for a more formal one. In certificates or documents, you can choose different combinations — from fully official to shortened versions, depending on the context.
This feature is especially valuable for platforms with an international audience, where users are accustomed to different name order traditions. Correctly configuring the format ensures accurate display and usage of participant names across all platform sections.
By using all the field system capabilities, you can build a structured database that not only stores all necessary information but also supports efficient segmentation, personalization, and automation in your client workflows.
Didn't find the answer? Contact the support service via online chat or Telegram