
Articles:
- Data export to Google Sheets
- Connecting the FB Pixel to a project on Kwiga
- Sending a webhook to transfer data to another service
- Zoom integration and usage essentials
- Generating payment links with pre-filled data
- Handling a button click in the widget
- Sending a webhook to KeyCRM with separation of the application and payment.
- Connecting chat services to a Kwiga project
Add an external chat to your Kwiga project to quickly answer visitors' questions, improve communication, and enhance customer support.
In this article:
After integration, the chat will automatically appear on your project pages according to the selected settings. This allows students and visitors to quickly contact your support team or managers directly from the page they are on.
You can configure where exactly the chat will be displayed:
-
Student profile
-
Public school page (main page only)
-
Courses
-
Bootcamps
-
Private groups
-
Webinars
-
Offers
-
Mini landing pages
The chat can be displayed on all pages or only on selected ones, by selecting the required project sections.
You can also determine who will have access to the chat:
-
All visitors - the chat will be visible to both logged-in users and site guests.
-
Only logged-in students - the chat will be available only to users who have signed in to their account.
Kwiga supports integration with several popular chat platforms, each with its own features:
-
LiveChat - a professional customer support platform with request distribution among agents, analytics, and integrations with CRM systems and other services.
-
Tawk.to - a free live chat service that lets you communicate with website visitors, track their activity, and use mobile apps for agents.
-
Elfsight - a website widget builder that lets you add an omnichannel chat combining WhatsApp, Telegram, Facebook Messenger, and other messengers in a single widget.
-
Chatwoot - an open-source support platform that combines requests from chat, email, and social media in a single interface and can be deployed on your own server.
-
HelpCrunch - a customer support service that combines live chat, email campaigns, communication automation, and a knowledge base.
-
SmartSender - a messenger marketing platform that lets you connect a chat widget to Telegram, Viber, and other channels, automate communication through bots, and build marketing funnels.
In this article, we will look at how to connect any of the supported chat services to your project on Kwiga and configure its display on the website.
Step 1: Go to chat integrations
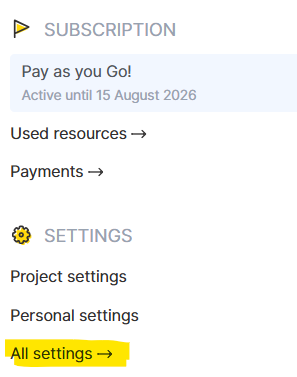
Click the avatar, then select All settings in the menu that opens:
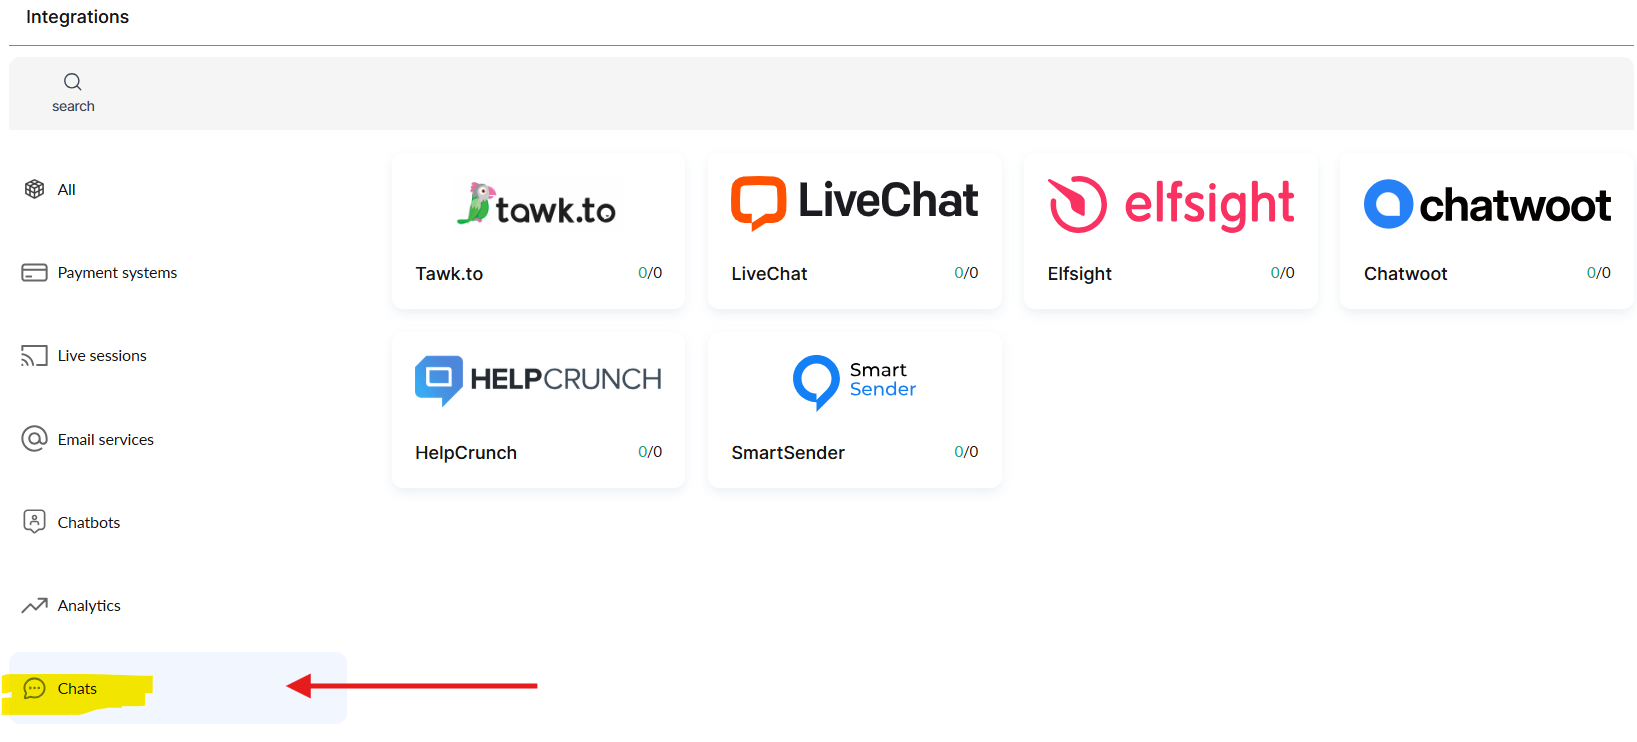
In the services menu on the left side of the screen, select Chats. You will then see the chat services available for integration. Select the one you need.
On the page that opens, click + Add account.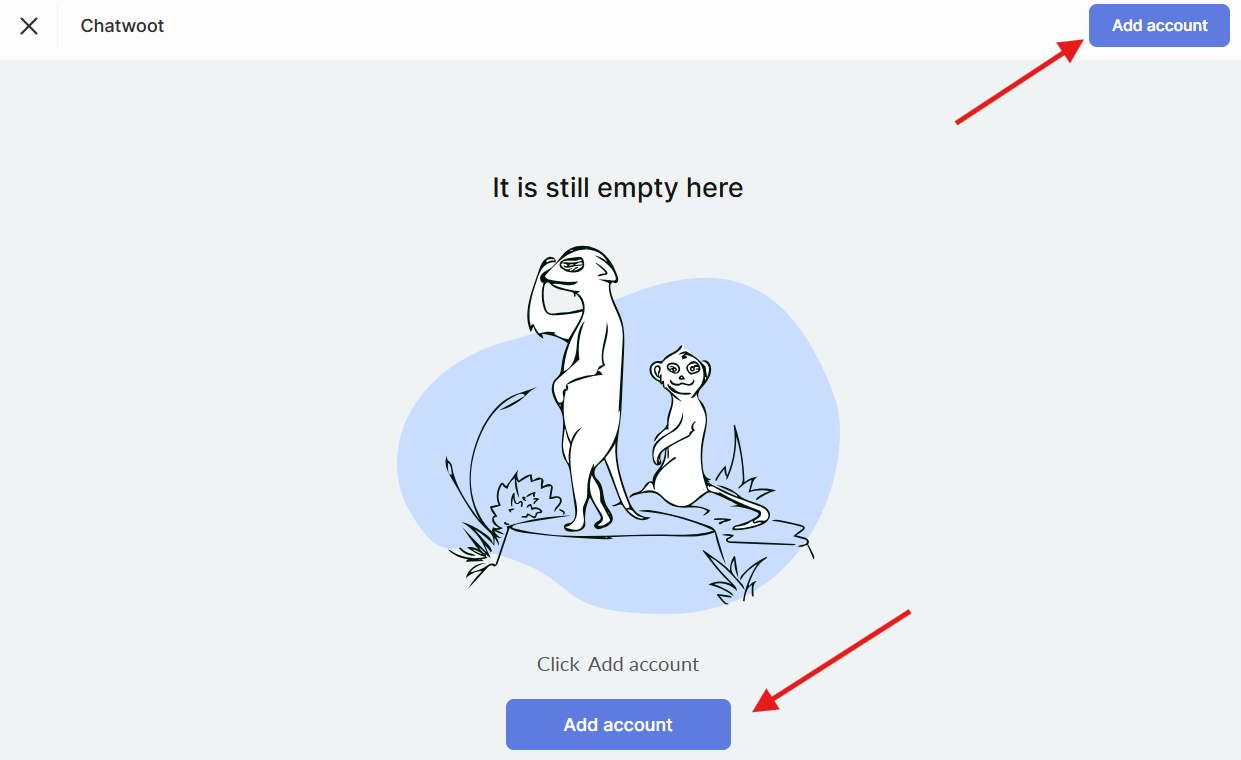
Step 2: Fill in the integration details
Enter the required details, which can be found in your account for the corresponding service.
LiveChat
Account alias - a custom name for the integration (visible only to you).
License number - the License Number from your LiveChat dashboard. Log in to your LiveChat account and open:
Settings → Channels → Chat Page
In this section, you will see the License ID (License Number). Copy it and paste it into the “License number” field when setting up the integration in Kwiga.
Tawk.to
Account alias - a custom name for the integration (visible only to you).
Property ID - the unique identifier of your website (Property).
API Key (Secure Mode) - the API key used for Secure Mode.
Where to find the details
Property ID
-
Log in to your Tawk.to account.
-
Select the required Property.
-
Go to Administration → Overview.
-
Copy the Property ID value.
API Key (Secure Mode)
-
Open Administration → Secure Mode.
-
Enable Secure Mode (if it is not already enabled).
-
Copy the API Key (Secure Mode) for use in Kwiga.
Elfsight
Account alias - a custom name for the integration (visible only to you).
App ID - the unique widget identifier.
Where to find the details:
-
Log in to your Elfsight account.
-
Open the required widget.
-
Click Install or Add to website.
-
The App ID is specified in the installation code or widget settings. It is usually the string after app/ or the parameter
Chatwoot
Account alias - any name for the integration (visible only to you).
Instance address (Base URL) - the address of your Chatwoot server (for example, https://app.chatwoot.com or the URL of your own server).
Website Token - the Website channel token.
Where to find the details
Base URL Use the address where your Chatwoot is accessible.
Website Token
-
Go to Settings → Inboxes.
-
Open the required Website Inbox.
-
In the Configuration / Widget section, find Website Token and copy it.
HelpCrunch
Account alias - any name for the integration (visible only to you).
Organization - the name (ID) of your organization in HelpCrunch.
App ID - application identifier.
Where to find the details
-
Log in to your HelpCrunch account.
-
Go to Settings → Chat Widget or Settings → Developers (API).
-
Copy the Organization (organization name or ID) and App ID.
SmartSender
Account alias - any name for the integration (visible only to you).
Target - the identifier of the target widget or project.
Domain - the domain for which the widget was created.
Where to find the details
-
Log in to SmartSender.
-
Go to Website widgets.
-
Open the desired widget.
-
Copy the value: Target and Domain.
Didn't find the answer? Contact the support service via online chat or Telegram