Articles:
We will explain how to use the StreamYard service to host a webinar through YouTube Live, adding multiple hosts, presentations, video files, and other media.
In this article:
Hosting webinars through the Youtube Live service usually meant using OBS – a fairly complex program to set up and use. An alternative solution may be StreamYard, an online service that allows you to run presentations, display various files, and also connect multiple speakers without installing additional software.
General scheme
-
Running a stream on StreamYard (not a webinar!)
-
Broadcasting the stream to Youtube Live (happens automatically!)
-
Launching a webinar on Kwiga
Despite the apparent complexity of the process, planning and synchronization are minimal and do not require deep knowledge or experience.
Please note:
Running a stream on StreamYard is free and limited to 20 hours per month. The StreamYard logo will be shown on your broadcast. If you want to hide the StreamYard logo, you need to purchase the Basic plan.
To start a broadcast on Youtube Live, you need to complete verification on your Youtube channel and confirm your phone number. After confirmation, you need to wait 24 hours for the broadcasting feature to become active.
|
Hosting a webinar on Kwiga allows you to get statistics about webinar participants, track how long they attended, whether they clicked on your promotional offers and banners, and build your further marketing strategy. If you are hosting a paid webinar, on Kwiga you will also be able to receive payments and restrict access for those who have not paid. |
Preliminary step: Youtube verification
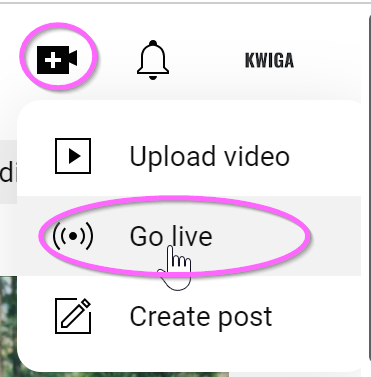
Go to https://www.youtube.com/ and sign in to your account. If you do not have one yet, you need to create it. Click "Create"
Go live.
If you are going to go live for the first time, you first need to enable this feature. To do this, you will need a verified Youtube account. To verify your account, go to the page http://youtube.com/verify and enter your phone number – after that you will receive a verification code via SMS or a free phone call from Google.
Access to the live streaming feature appears within 24 hours after account verification. After that, you will be able to go live at any time.
Registering and starting a stream on StreamYard
Follow the link https://streamyard.com/ and click Get Started. You need to enter your email address and then confirm it by entering the code received in the email.
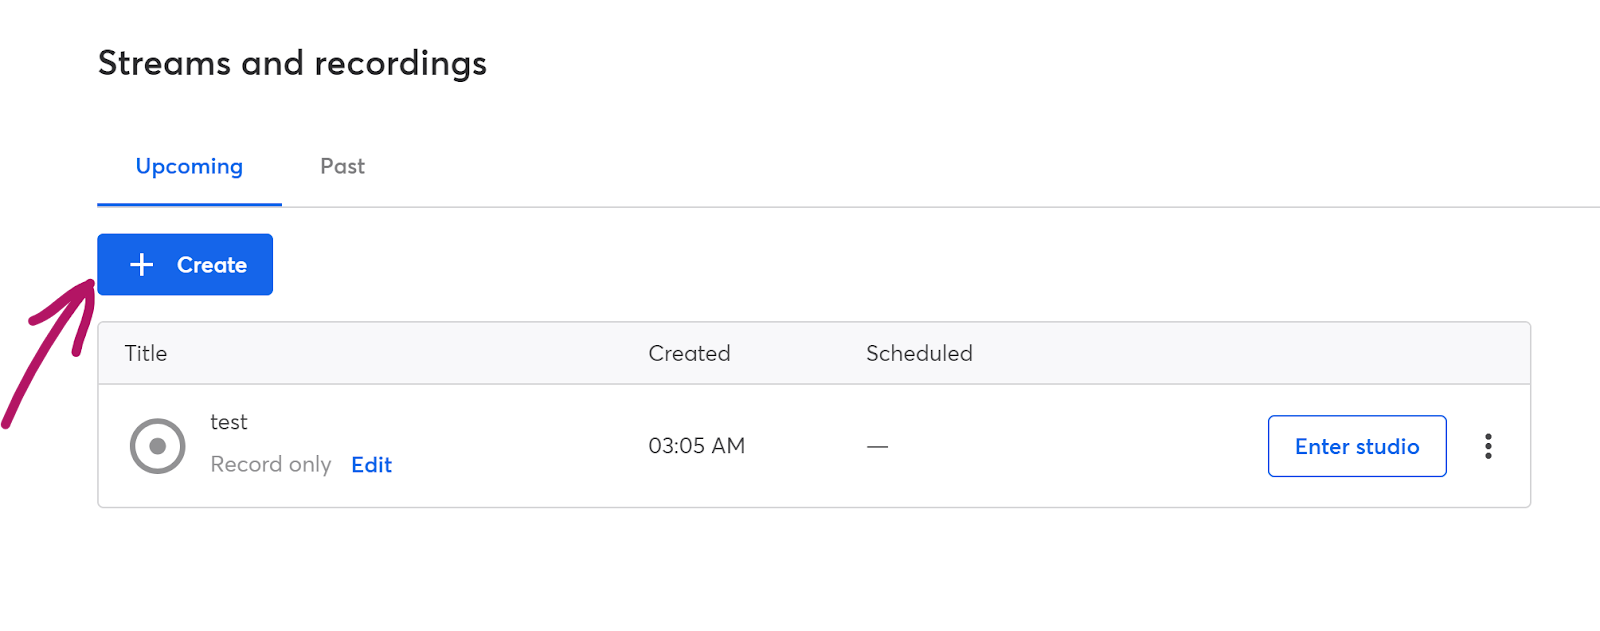
After that, you will be taken to your account. If something went wrong, open the link https://streamyard.com/broadcasts. Click +Create
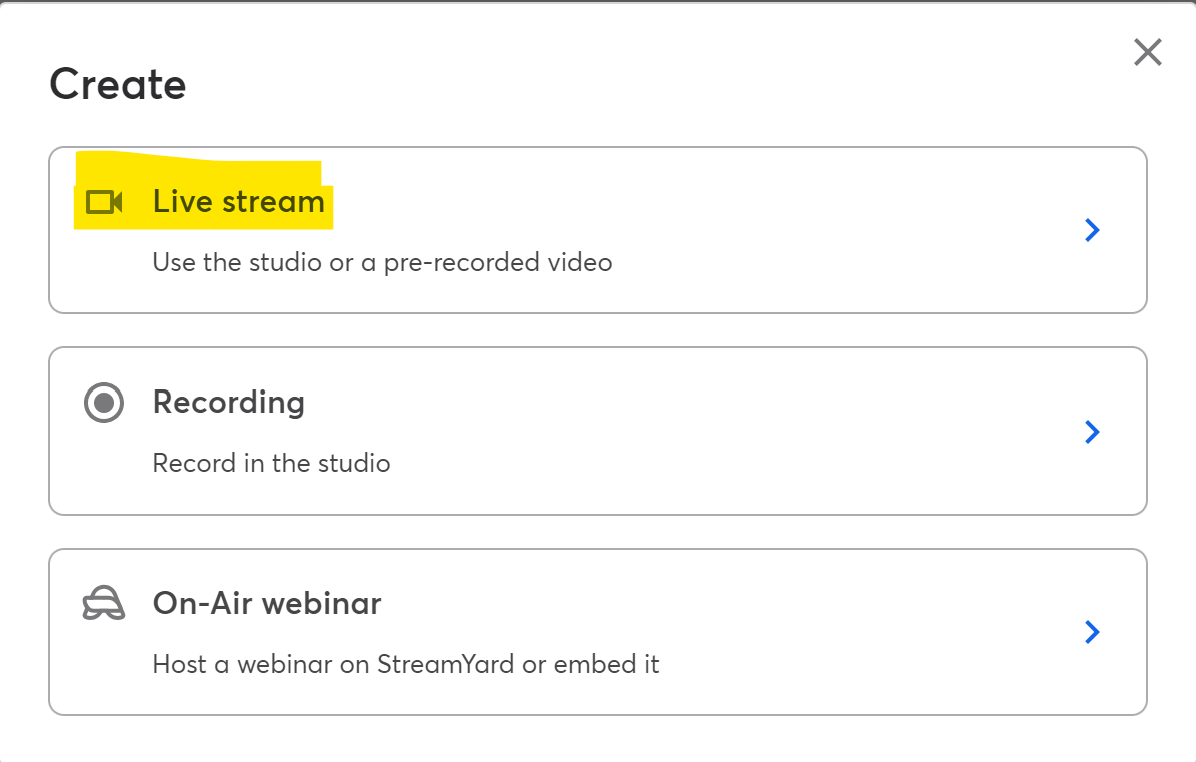
In the window that appears, select Live stream. Do not select On-Air webinar – this service will require purchasing a paid Pro plan; the webinar itself will be hosted on the Kwiga platform.
Make sure the Studio toggle is selected, and specify where the broadcast will be streamed by selecting Youtube Channel from the list.

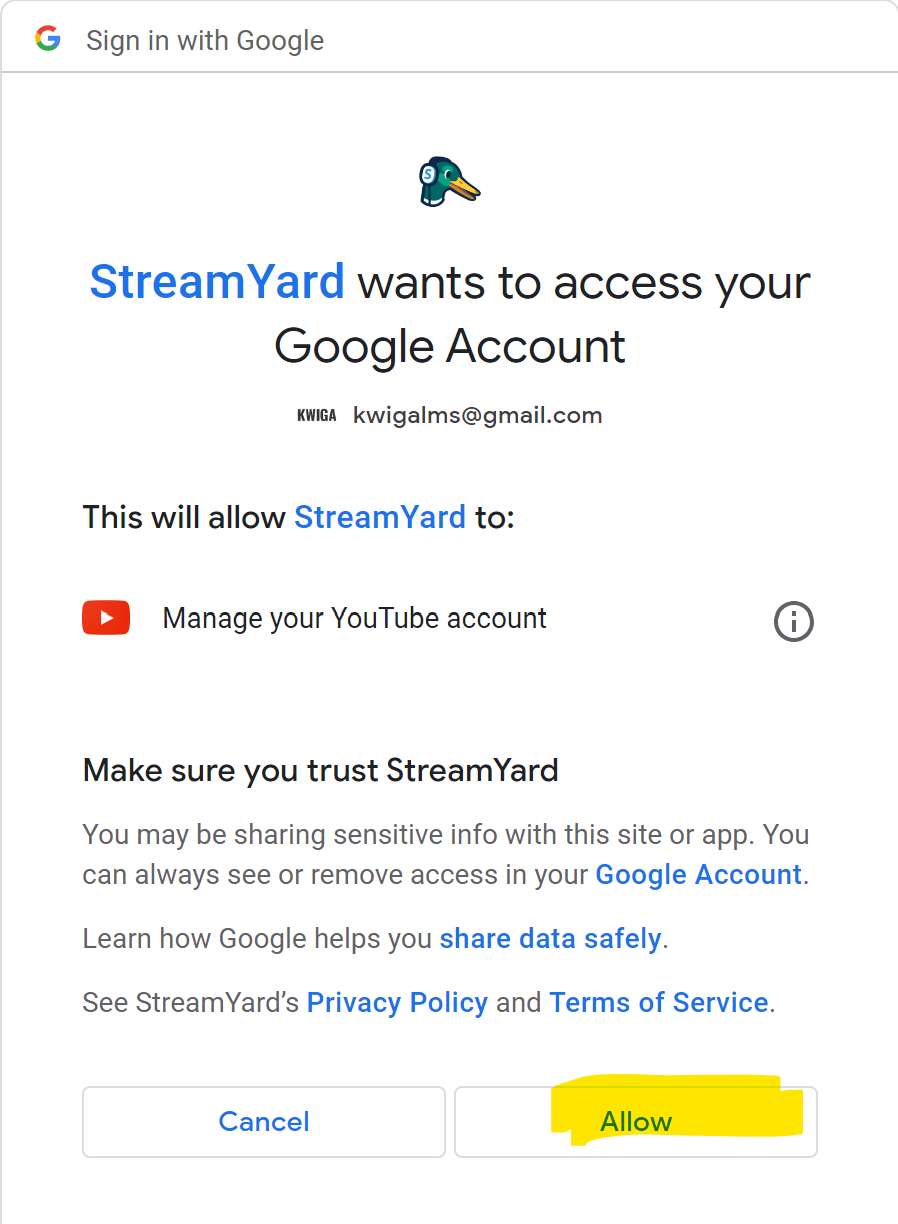
After that, an authorization window with a list of different Google Accounts will open. You need to select the one on which the broadcast will be hosted and confirm it.
In the next window, you will be prompted to add a webinar title. This is a required field and must be filled in. Your students will not see this title, since the broadcast itself will take place on Kwiga. The webinar recording will have this title.
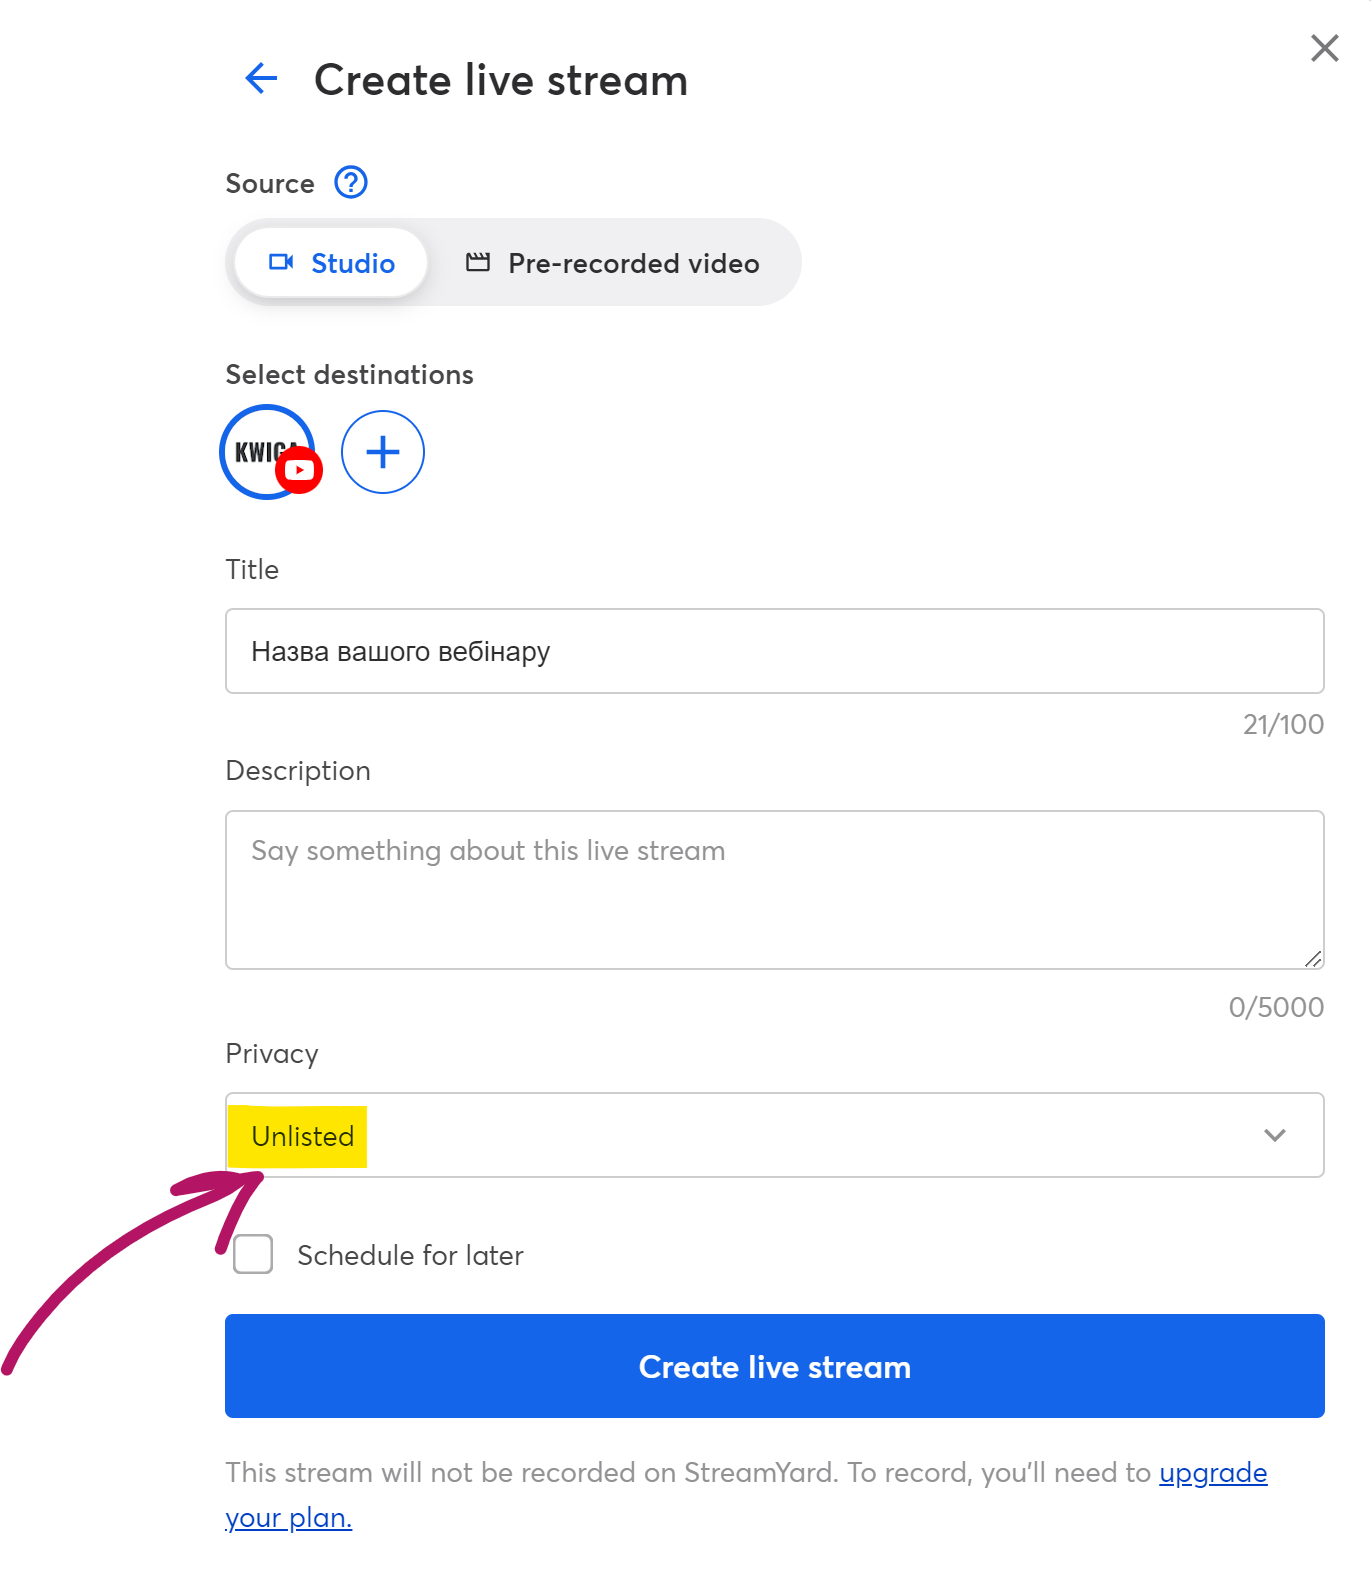
In the Privacy settings, select Unlisted. If you plan to run the broadcast later, check the Schedule for later checkbox and specify the date and time. After that, you are ready to click the Create live stream button. After clicking it, you will not be live; you will enter the studio, where you can choose the screen layout, add a presentation, and other files needed for the stream.
Configuring what the webinar participant will see
The video showed how to work with and set up the stream itself.
Scheduling on Kwiga
When you have prepared the stream on StreamYard, exit the studio and in the three-dot menu of the corresponding stream click View on Youtube. You will be redirected to the Youtube page where the stream will take place.
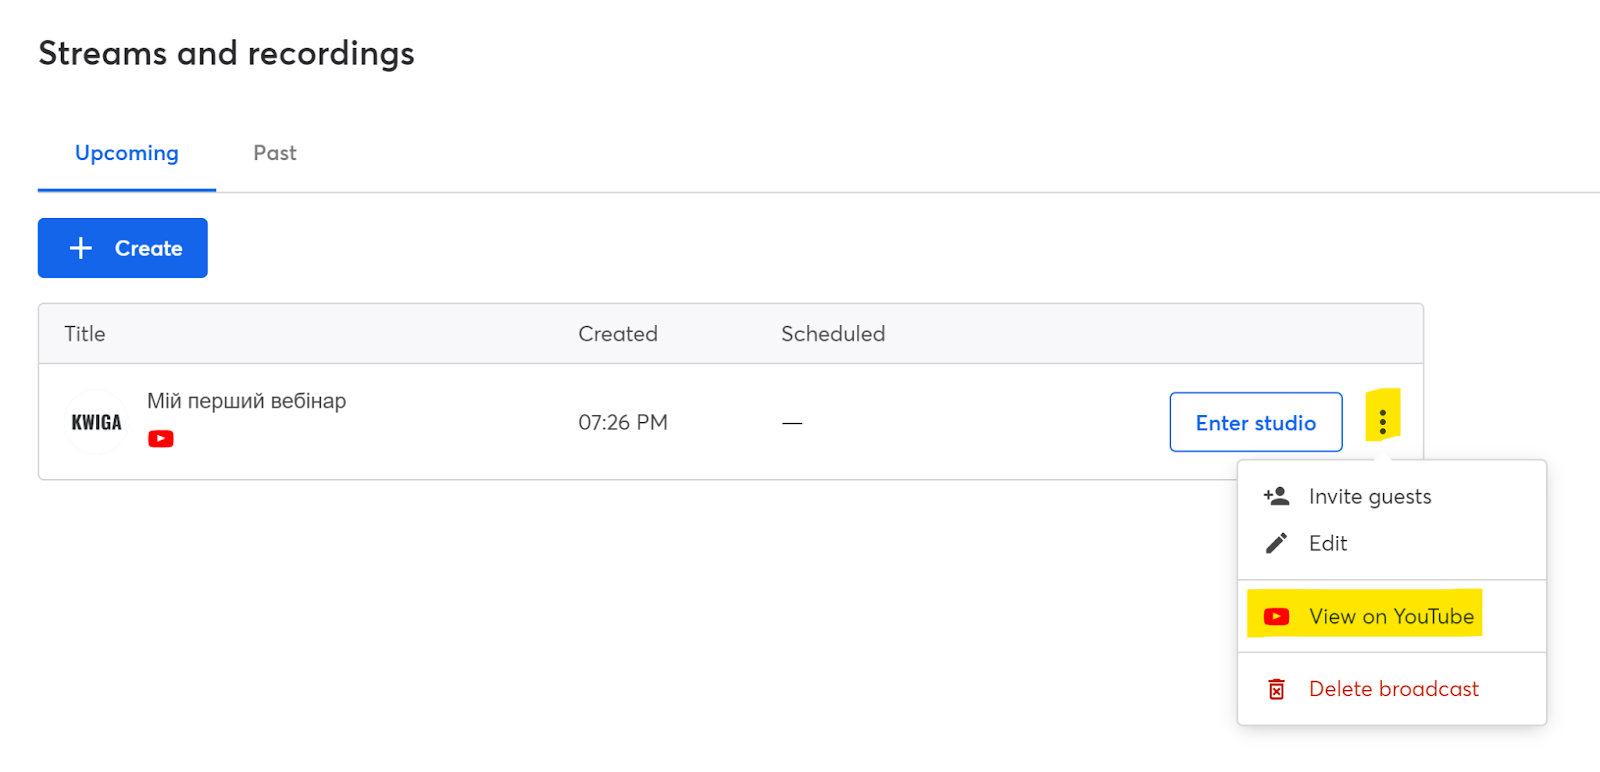
There will be a link to the stream in the browser address bar; you need to copy it and add it to the Kwiga platform.

After that, go to the Kwiga.com platform and sign in. Open All solutions - Webinars, and you will see a page with a calendar showing scheduled webinars and automated webinars. You can schedule a new webinar by clicking the +Event button or by hovering over any cell in the calendar and clicking the + sign. In the window that opens, select Webinar.


At the top, you can specify the webinar title – this title will be visible to students on the webinar page, in webinar notifications and reminders, as well as in their account.

Specify the webinar date and time – this information will be displayed to participants on the webinar page, and event reminders will also be sent.
In the broadcast source section, select Youtube and specify the broadcast link you copied in the previous step.
In the section below, Access and registration you can create a webinar link if the option suggested by the system does not suit you, and you can also specify whether participation will be paid, free, or password-protected (in development):
Registration only – means that anyone interested will be able to register and attend the webinar. You will be able to configure later what data will be required for registration; it may be just entering a name or filling in full information: name, phone number, email, etc. If the webinar is part of a course (an open lesson, a live session, Q&A, and more) – use this option.
Paid participation - use this option if participants need to pay an amount to access the webinar. Below, you will be able to specify the amount and currency. If you are planning paid participation, but participants paid not on Kwiga, we still recommend specifying Paid.
Password access - still in development.
After that, click the Save button at the top of the page - the webinar will then be scheduled, and you will be able to edit additional settings. You will be able to change the settings filled in during the first step later. Already at this step, immediately after saving, you can go to the webinar room and hold the webinar. The login address for the host, moderators, and participants is the same - this is the address specified in the access section or by clicking the blue button at the top of the page - Webinar room. If you are logged into your account, the host room will open for you; if you are not logged in, you will be able to log in to Kwiga, sign in, and enter the host room (similarly for the moderator), or register as a participant.
When you are ready and want to start the webinar, all you need to do is open StreamYard, go to the studio, and click the button at the top Go Live.

Didn't find the answer? Contact the support service via online chat or Telegram