Articles:
A step-by-step guide on how to create and add a button or banner to a webinar.
In this article:
We recommend creating the button or banner in advance, before the webinar starts, and then displaying it on students' screens during the live broadcast.
How to create a button
In the top menu, select Settings - Widget, mini-landing page - in this section you can create not only mini-landing pages, but also widgets, banners consisting of text + button, or just text or just a button.

Click the +CTA button to open the banner creation builder.

See the video for how to work in the builder and create the banner you need:
How to add a button to a webinar
Displaying a banner during the broadcast
To add a button during the broadcast, you need to schedule the broadcast itself and open the webinar room from the owner or moderator account. At the bottom of the screen, you will see the +CTA button, by clicking which you can choose which CTA to show and display (click the refresh button to see the full list).
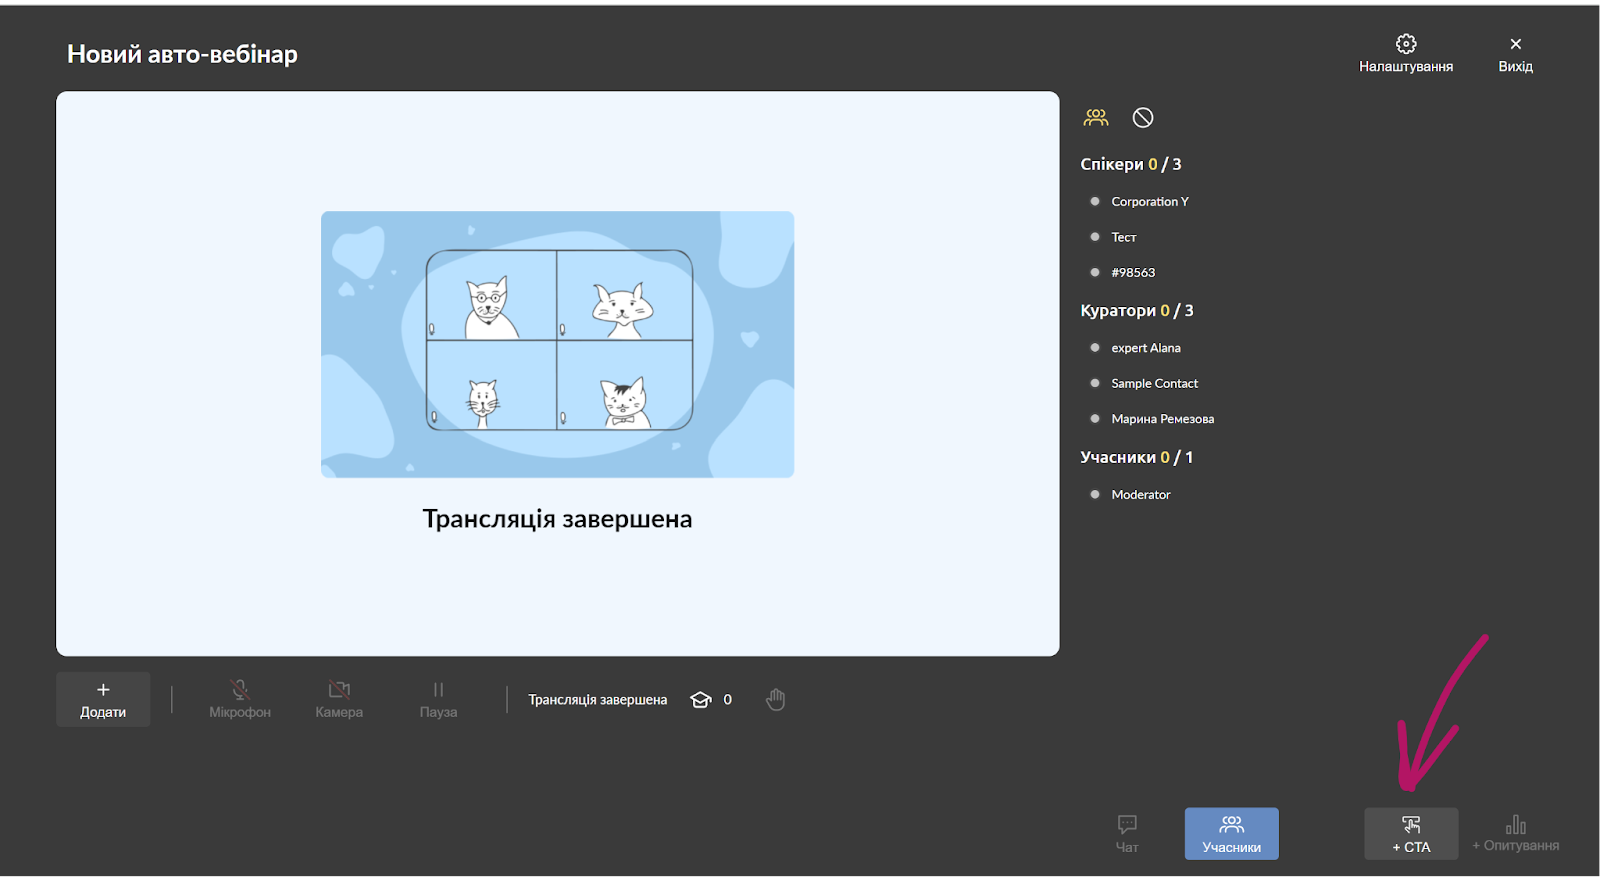
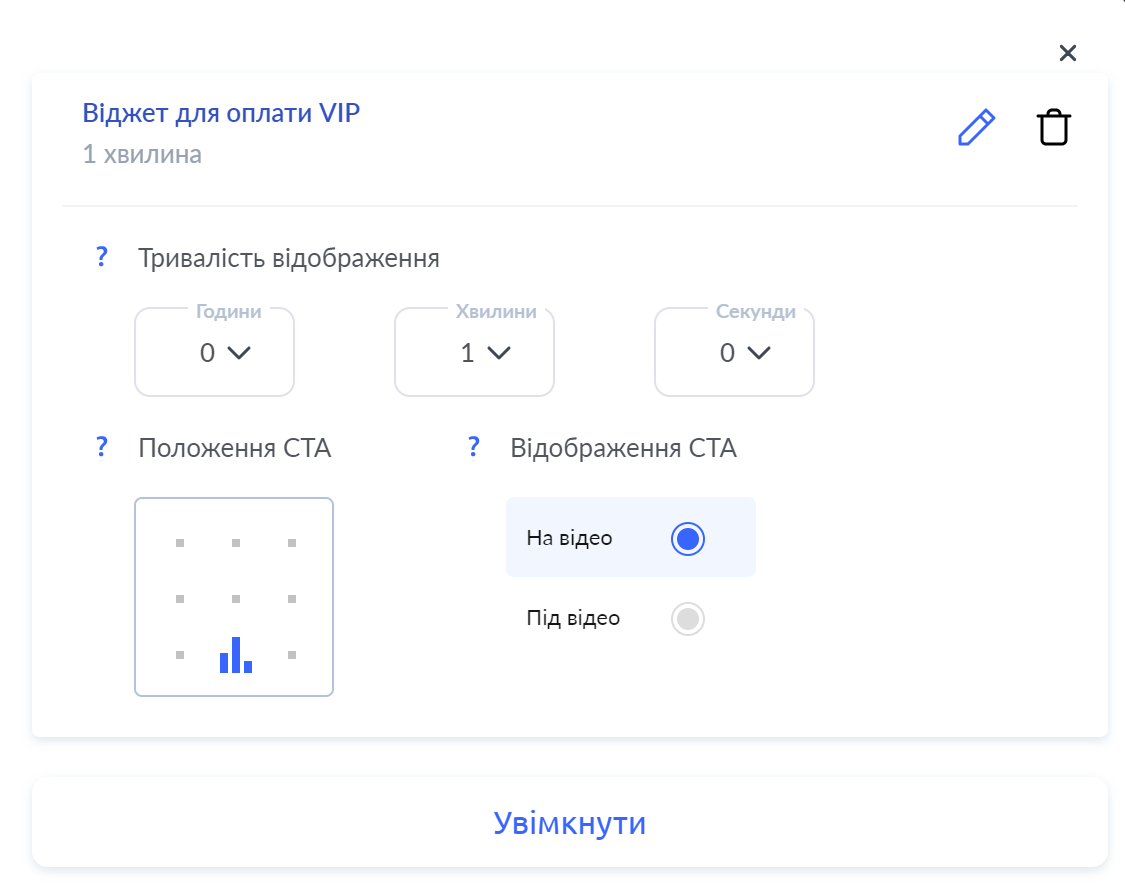
You can set the Display time and position, and when you click the Enable button, the banner will be shown to all participants.
Adding a banner to the webinar scenario
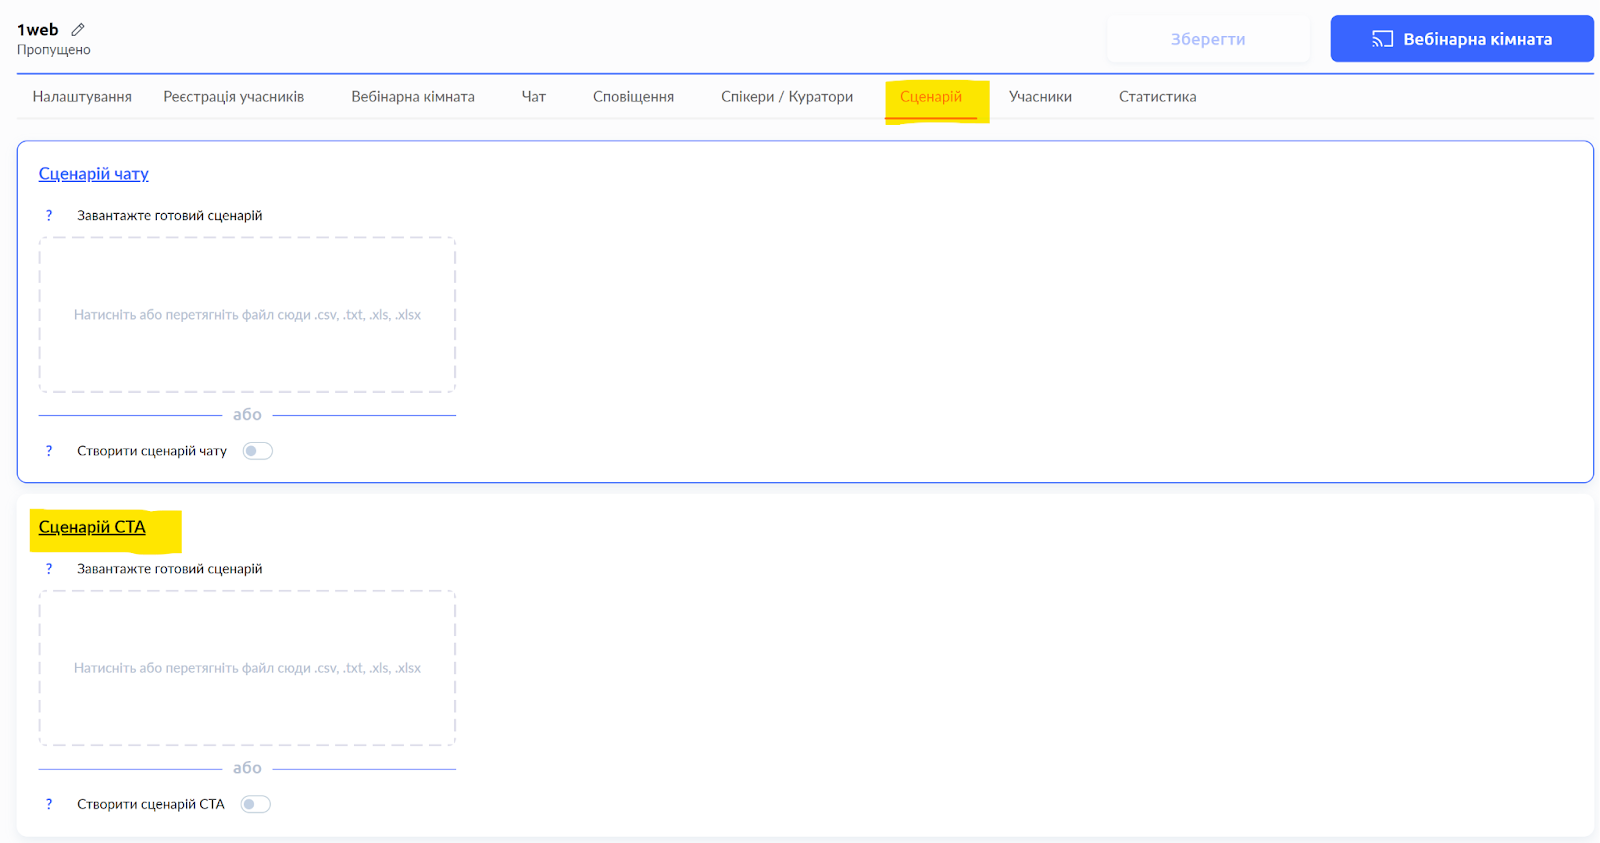
Open the settings of an already scheduled webinar (or autowebinar), go to the Scenario section, scroll down to the CTA Scenario section, where you can upload a scenario from a file, or switch on the “create CTA scenario” toggle.
If you are editing the autowebinar settings, this setting will not be available until you add a video or a link to a video.
On the page on the right, you will see the option to select a CTA, as well as the display settings for the banner. Do not forget to specify at what moment this banner should be shown, and save:
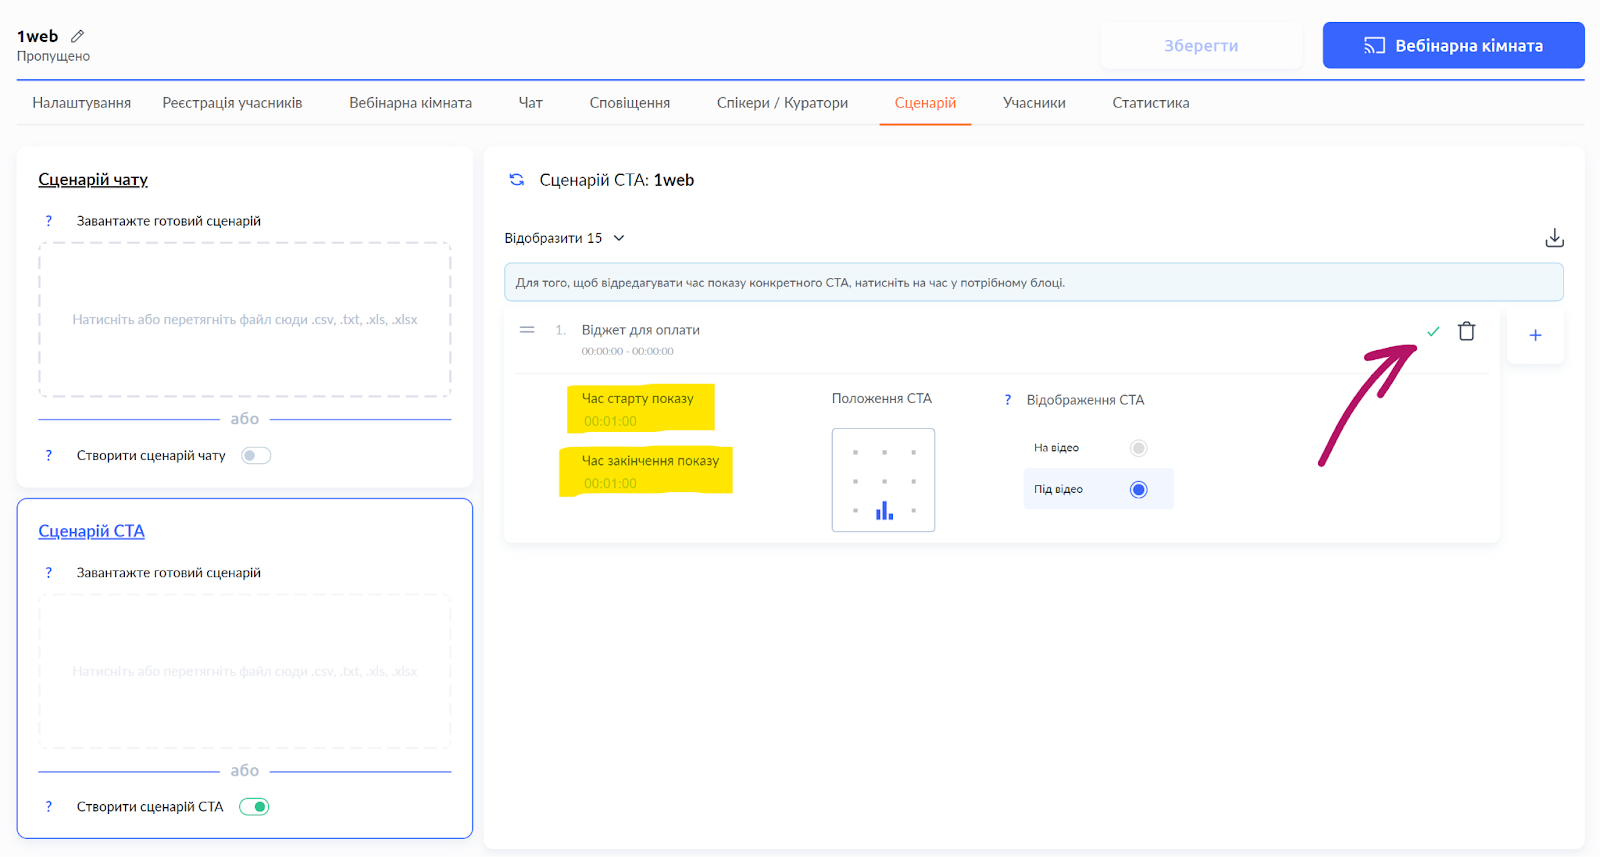
In a similar way, you can also schedule the display of other banners.
Didn't find the answer? Contact the support service via online chat or Telegram