Articles:
How to create a broadcast on Youtube Live, validate your Google account, limit video access, and hold a webinar on Kwiga.
To host a webinar on Kwiga, you need to have a verified YouTube account. You can stream using your laptop's webcam, or by using OBS or the online service StreamYard if you want to show multiple speakers, a presentation, your screen, or other documents during the stream.
Advantages of hosting a webinar on Kwiga
Advantages of hosting a webinar on Kwiga compared to streaming directly on YouTube:
- You can set up participant registration, collect contact details and other information. You can also host a paid webinar
- Participants can watch the webinar and write in the chat from any device; they do not need to have a Google account
- You can use banners, call-to-action buttons during the stream, run polls, and track click and conversion statistics.
- On Kwiga, all webinar activity is recorded in the webinar script, which can be used for future webinars and for building automated webinars.
- All statistics, reports, and visitor reactions are entered into the CRM on Kwiga and saved in the contact card.
- Additional tools for working with your audience, the ability to connect moderators, and enable a script for a live webinar.
Scheduling a stream on YouTube
Go to https://www.youtube.com/ and sign in to your account. If you do not have one yet, you need to create one. Click "Create" Go live.

If you are going to stream for the first time, you first need to enable this feature. To do this, you will need a verified YouTube account. To verify your account, go to the page http://youtube.com/verify and enter your phone number – after that, you will receive a verification code by SMS or a free phone call from Google.
Access to the live streaming feature appears within 24 hours after account verification. After that, you will be able to stream at any time.
Important - to stream on KWIGA using YouTube Live, you do not need to have a certain number of subscribers on your YouTube channel.
On YouTube, you can stream from a PC or laptop with a webcam, as well as using a video encoder (for example, OBS). Read how to use a video encoder in a separate article.
2. If verification was completed earlier, then after clicking Go live, a window will open where you can specify the stream title and source. Students will not see this title.

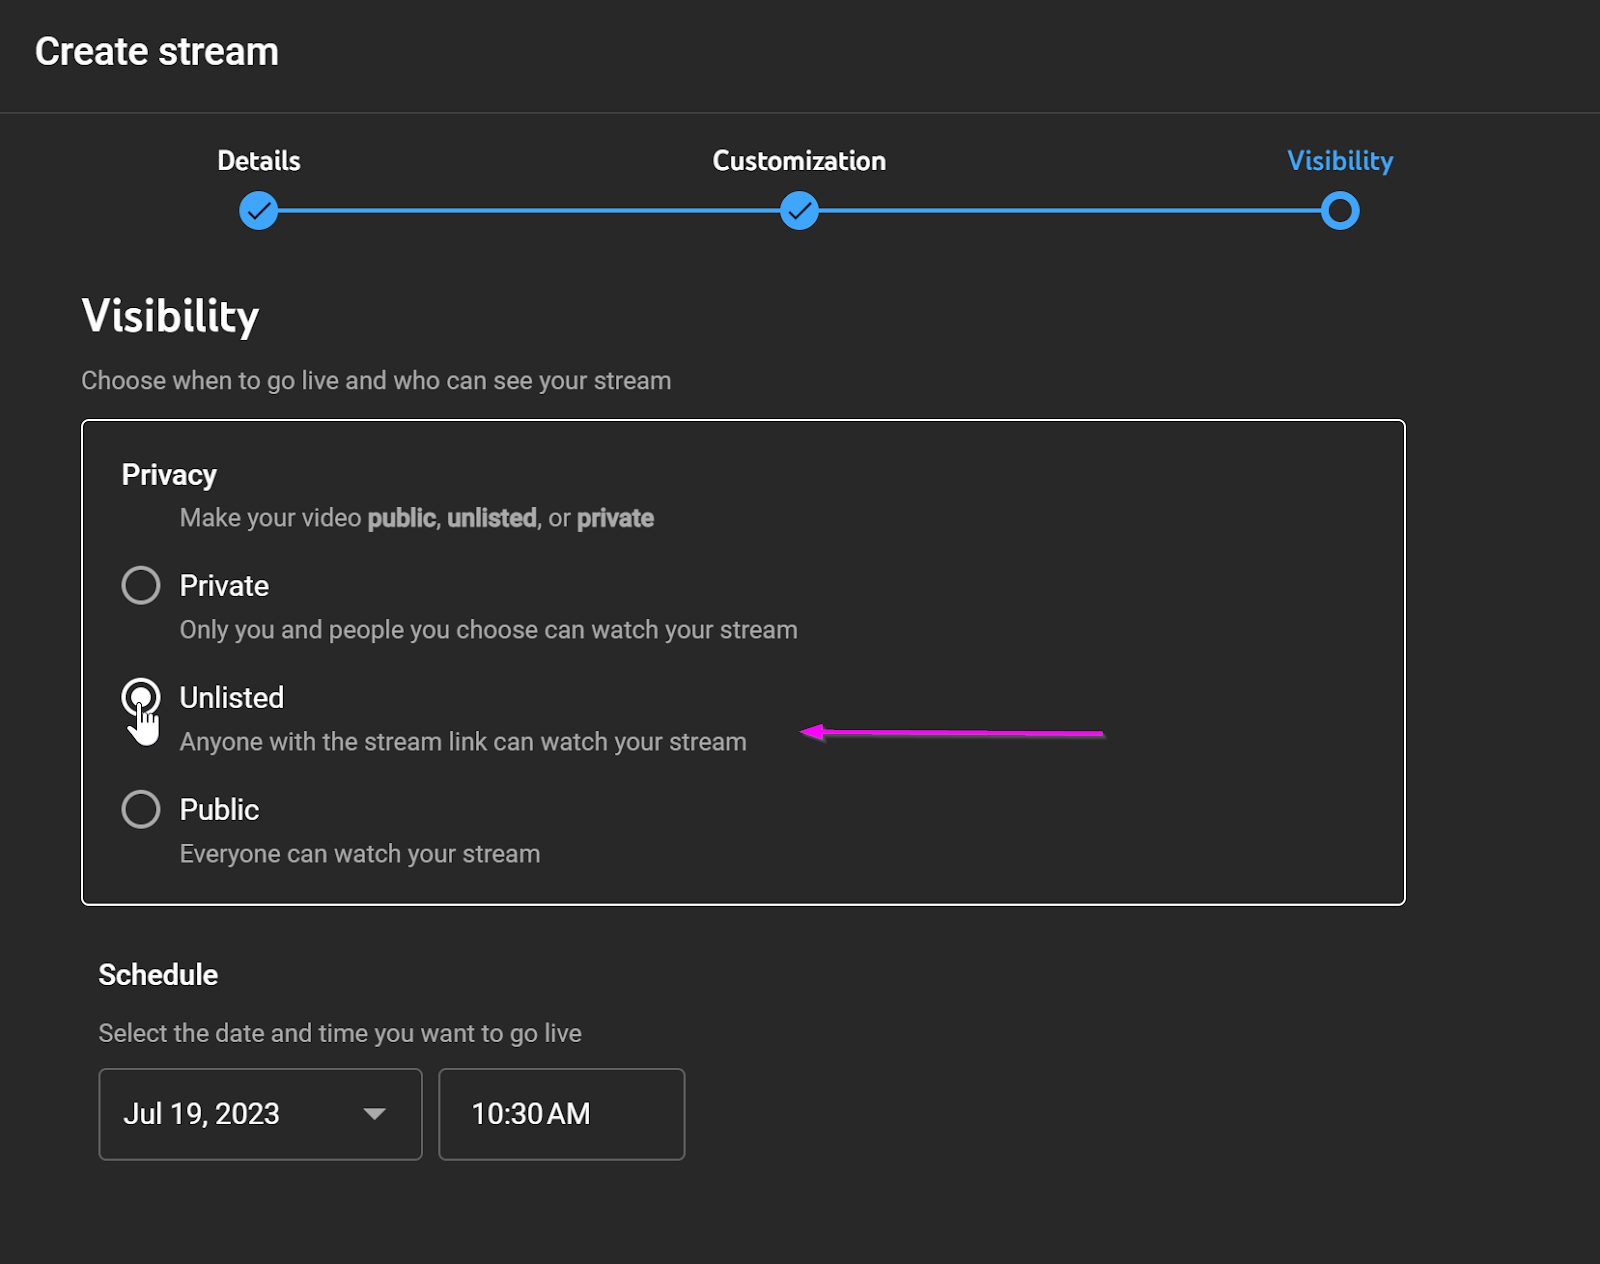
You can set the remaining settings according to your topic; you can turn off the YouTube chat. The key settings will be at the last step -Visibility: Unlisted
You can specify any stream time, since the stream is started with a special button. After that, click Schedule, and you will see brief information about the stream and two buttons at the bottom: Share and Launch. Click Share and copy the stream link - you will need it when creating the webinar on Kwiga.


Also make sure that the settings do not prohibit video embedding:
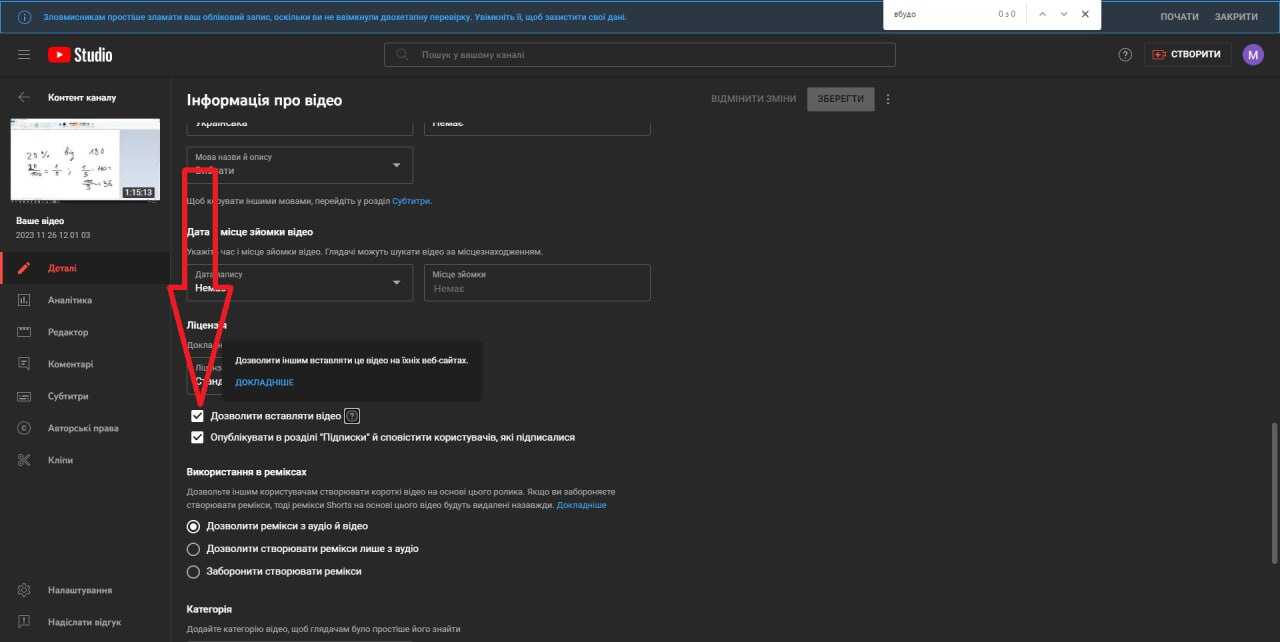
Also, the stream settings allow video embedding:
Settings -> Details -> The checkbox "Allow embedding" must be selected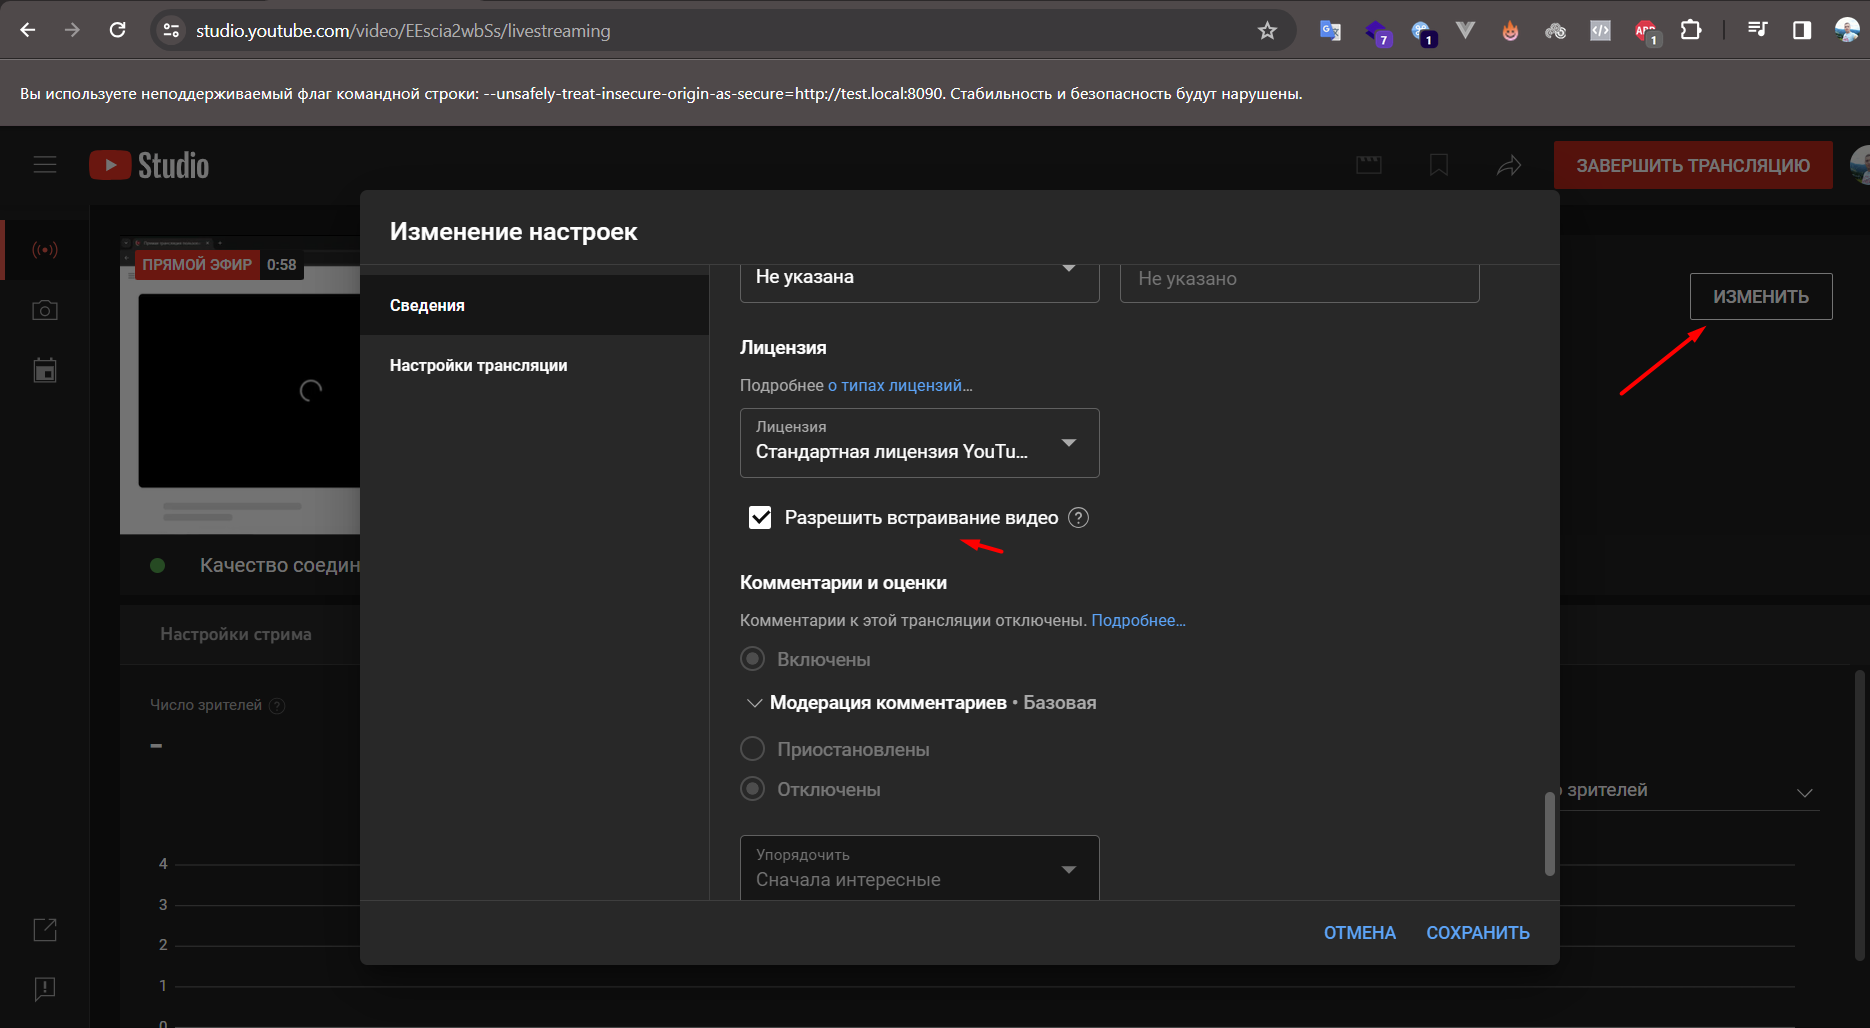
Scheduling a webinar on Kwiga
Open All solutions - Webinars, and you will see a page with a calendar displaying scheduled webinars and automated webinars. You can schedule a new webinar by clicking the +Event button or by hovering over any cell in the calendar and clicking the + sign. In the window that opens, select Webinar.

The webinar settings will open: this page will allow you to both schedule and configure the webinar room, and later download the event report.

At the top, you can specify the webinar title - this title will be visible to students on the webinar page, in webinar notifications and reminders, as well as in their account.

Specify the webinar date and time - this information will be displayed to participants on the webinar page, and event reminders will also be sent.
In the stream source section, select YouTube and provide the stream link that you copied in the previous step.
In the section below, Access and registration you can create a webinar link if the option suggested by the system does not suit you, and you can also specify whether participation will be paid, free, or password-protected (in development):
Registration only - means that anyone interested will be able to register and attend the webinar. You will be able to configure what data is required for registration later; it may be just entering a name or filling in full information: name, phone number, email address, etc. If the webinar is part of a course (an open lesson, a live session, Q&A, and so on), use this option.
Paid participation - use this option if participants need to pay a certain amount to access the webinar. Below, you will be able to specify the amount and currency. If you are planning paid participation, but participants paid outside Kwiga, we still recommend specifying Paid.
Password access - still in development.
After that, click the Save button at the top of the page - the webinar will then be scheduled, and you will be able to edit additional settings. You will be able to change the settings filled in at the first step later. Already at this step, immediately after saving, you can go to the webinar room and host the webinar. The entry address for the host, moderators, and participants is the same - this is the address specified in the access section or available by clicking the blue button at the top of the page -Webinar room. If you are authorized in your account, the host room will open for you; if you are not authorized, you will be able to sign in to Kwiga, authorize, and enter the host room (similarly for a moderator), or register as a participant.
Didn't find the answer? Contact the support service via online chat or Telegram