Articles:
- How to Add an Assistant to a Course
- How to remove a course assistant (but not from the project!)
- How to remove an assistant from the platform
- Assistants on the Project: Team Structure and Access Settings
- How to Assign a Senior Assistant and Configure Their Access
- How to Add a Team Member
- How to Remove a Team Member
- How to Set Assistant Visibility for Students
- Automatic Assignment of Assistants and Students to Groups
- How to Create a Participant Group and Assign it to an Assistant
- How to Add or Change a Public Figure on a Course
Learn how to add or change a public figure on your course to make it more personalized and highlight the identity of the author or experts involved.
In this article:
Adding a public figure to your course makes it more personalized for learners. This is a simple tool for online schools to emphasize the author's identity or for projects involving multiple experts.
What is a Public Figure and Why Add One?
A course's public figure is displayed as the course author on the school’s public pages, the course presentation page, and within the student dashboard. By default, the course author is the owner of the Kwiga account. However, it's easy to configure if you want someone else to appear as the author.

How to Add a Public Figure
Adding a User to the Team
First, you need to add the user to your dashboard if they haven’t been added yet.
Go to Settings via the profile icon in the top right corner.
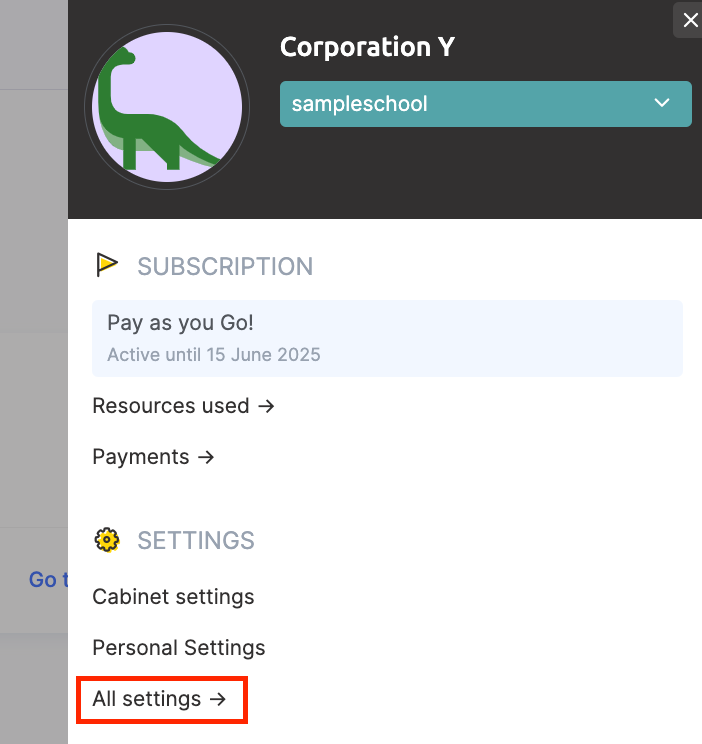
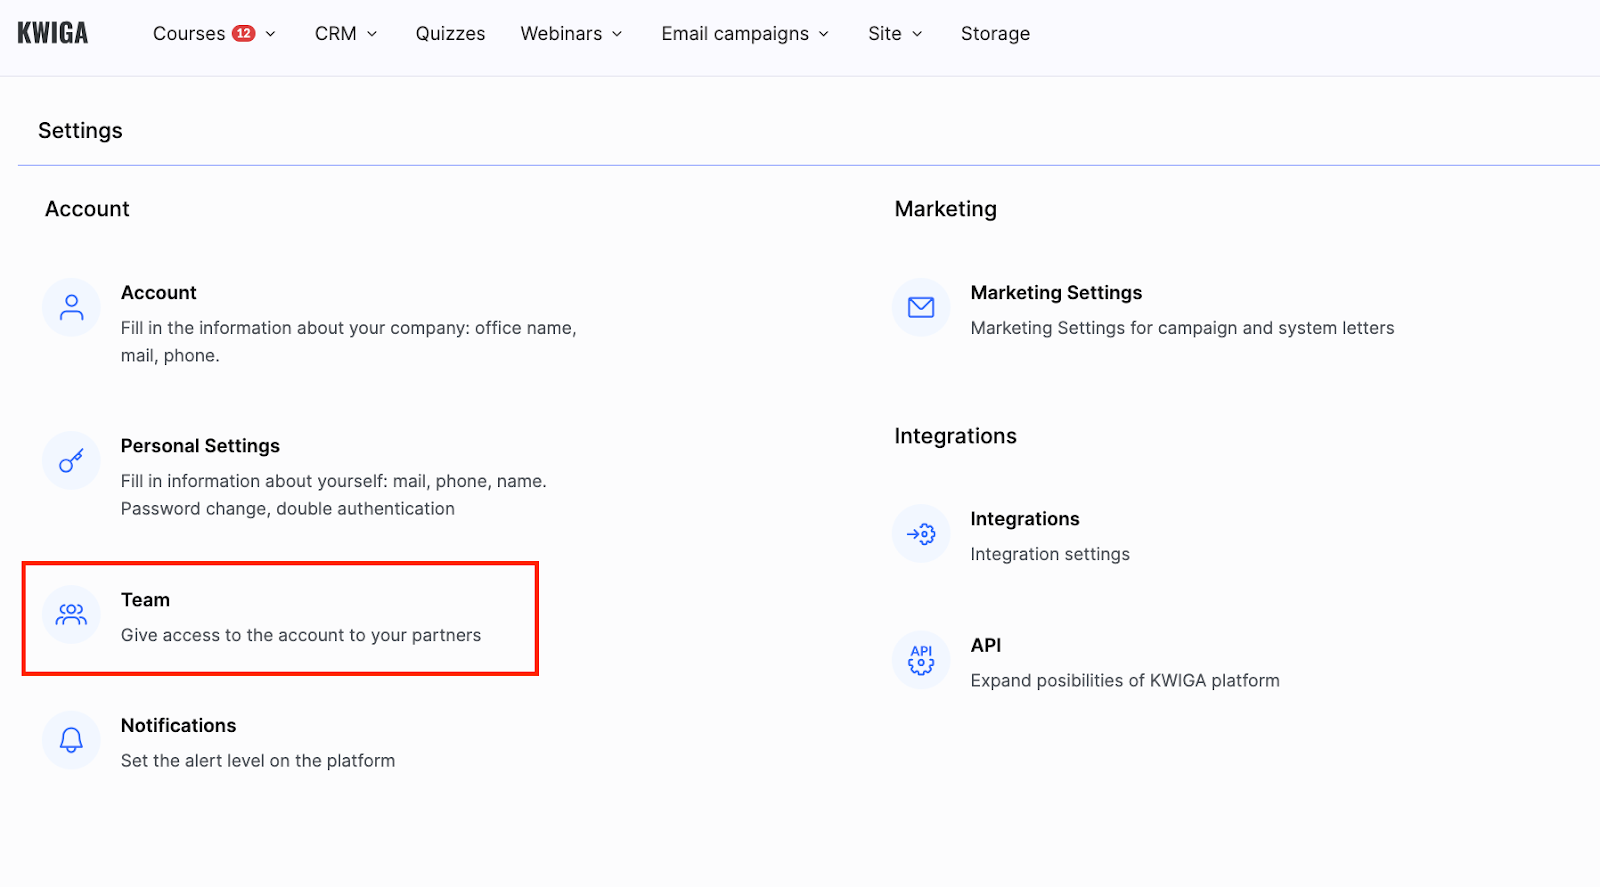
Select All Settings, then open the Team tab.
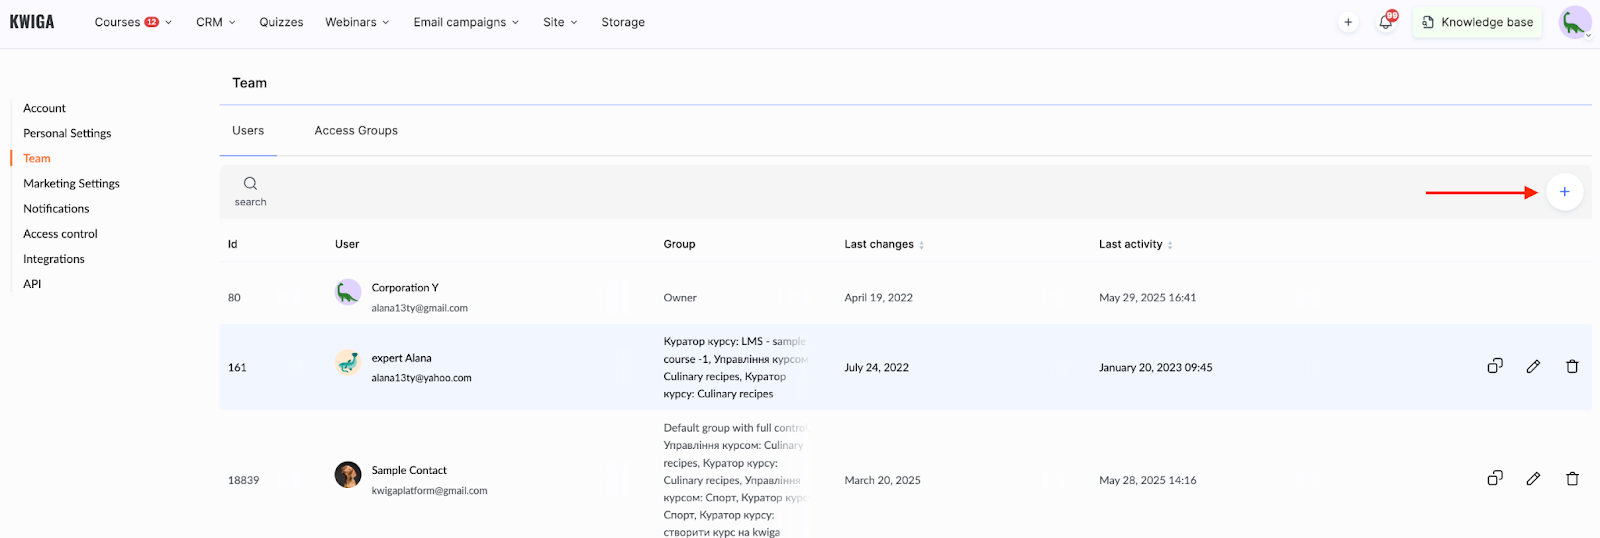
Click the + (Add User) button, send an invitation to the new user, and assign them access rights to the course.
More details on how to add a team member are available in a separate article.
Setting a Public Figure
To assign a senior assistant, follow a few simple steps:
-
Add a public figure to the product
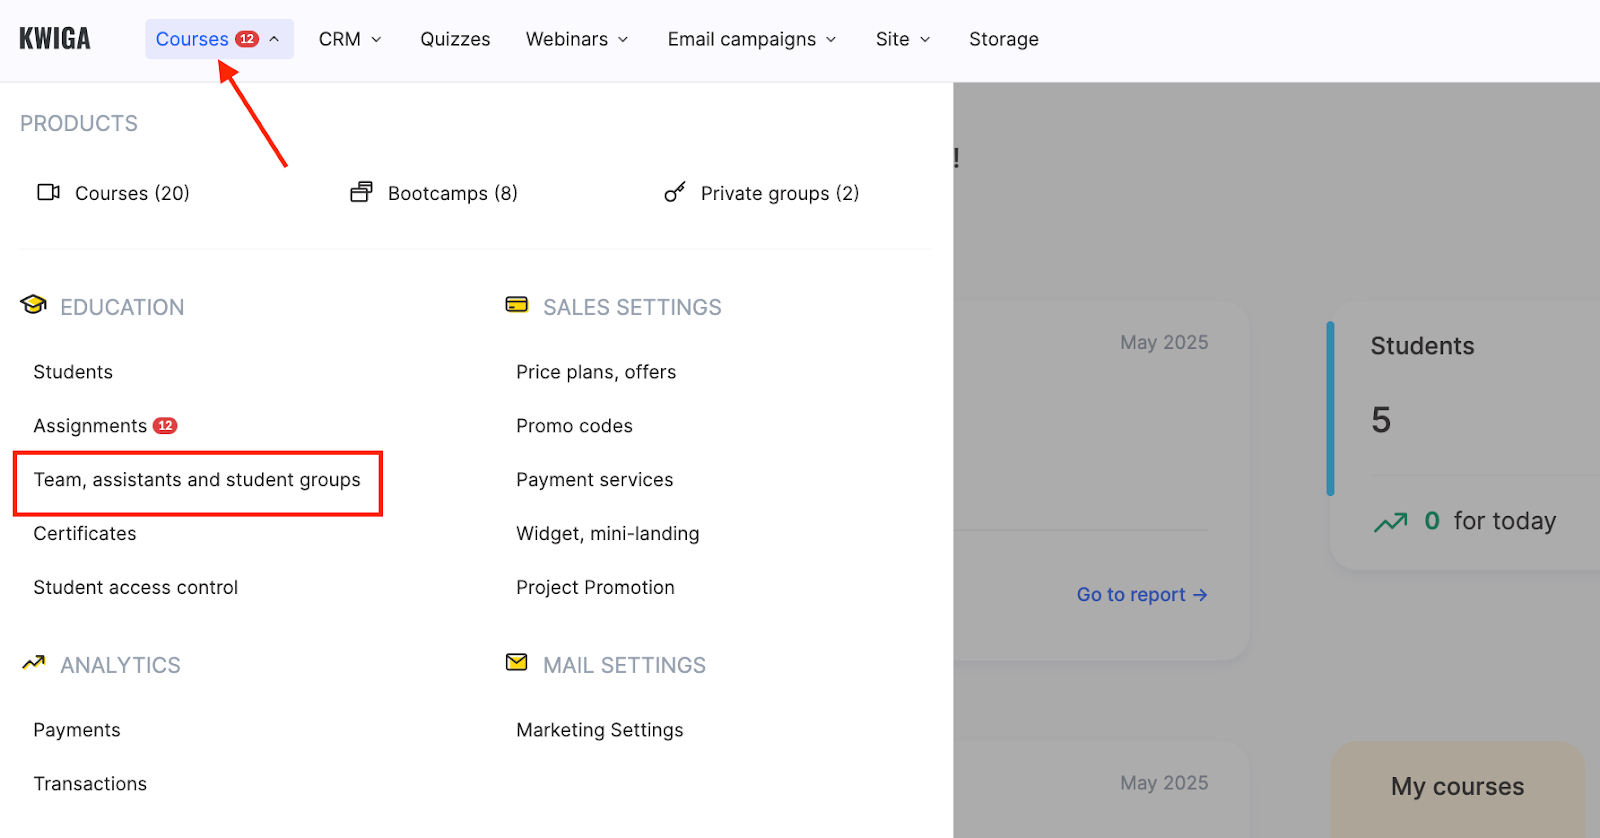
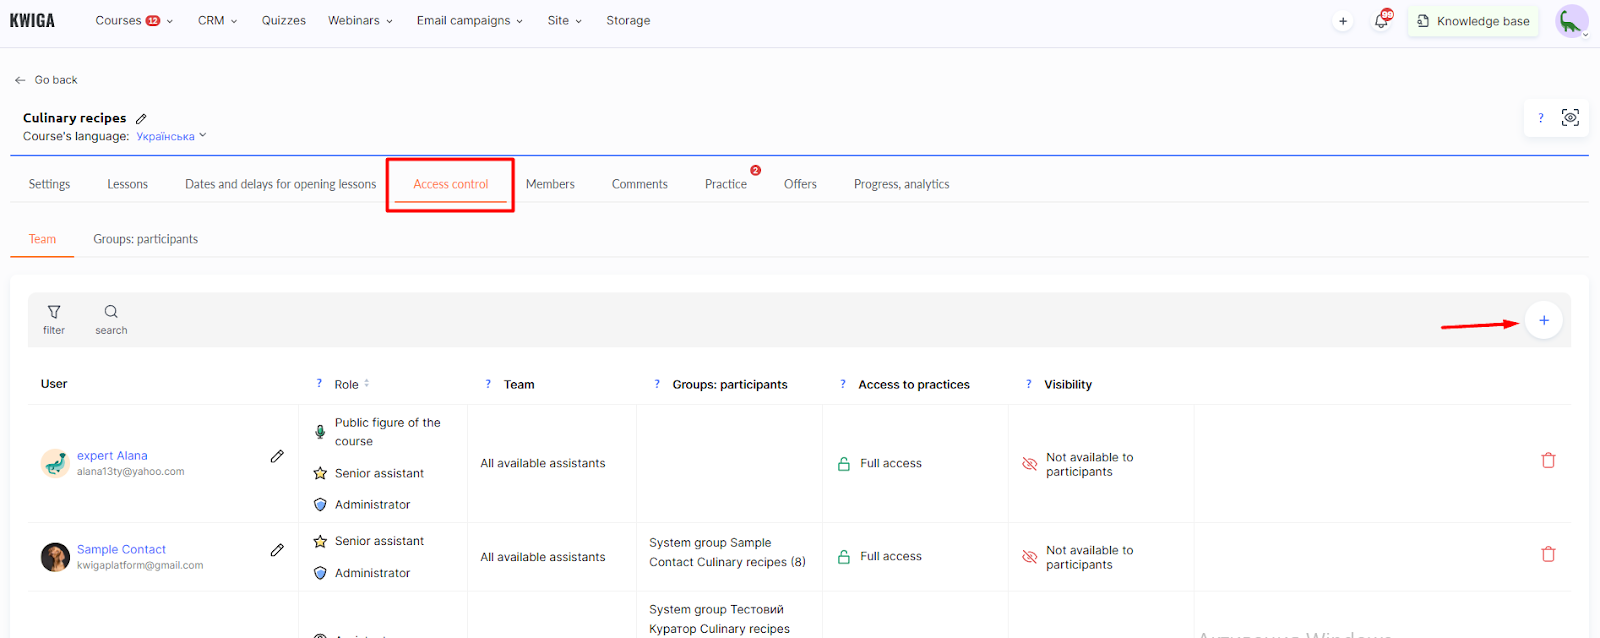
Go to the Courses menu → Team, Assistants, and Student Groups
Or in the Courses menu, directly on the course page under the Access → Access Control tab
-
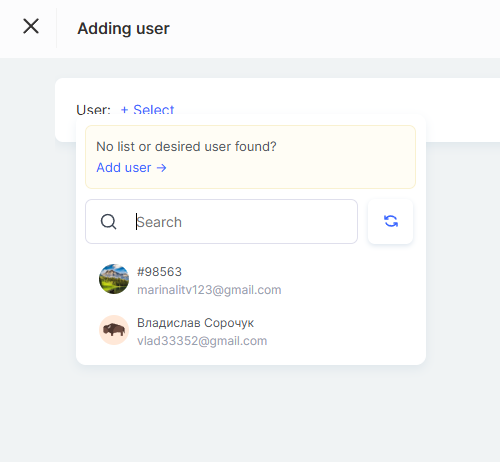
Click the + button to add a user.
-
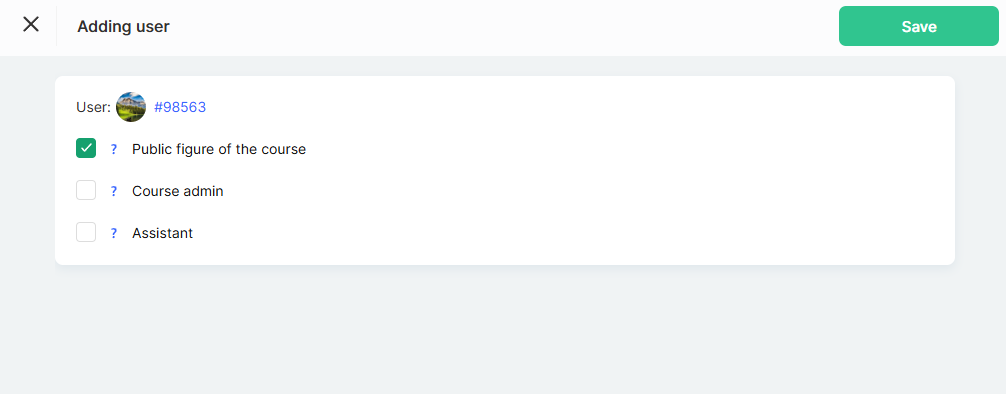
Select the appropriate name from the list and assign it as the Public Figure of the course.
-
After finishing the setup, don’t forget to click Save.
The public figure information will be displayed on the course under the Access Control tab.
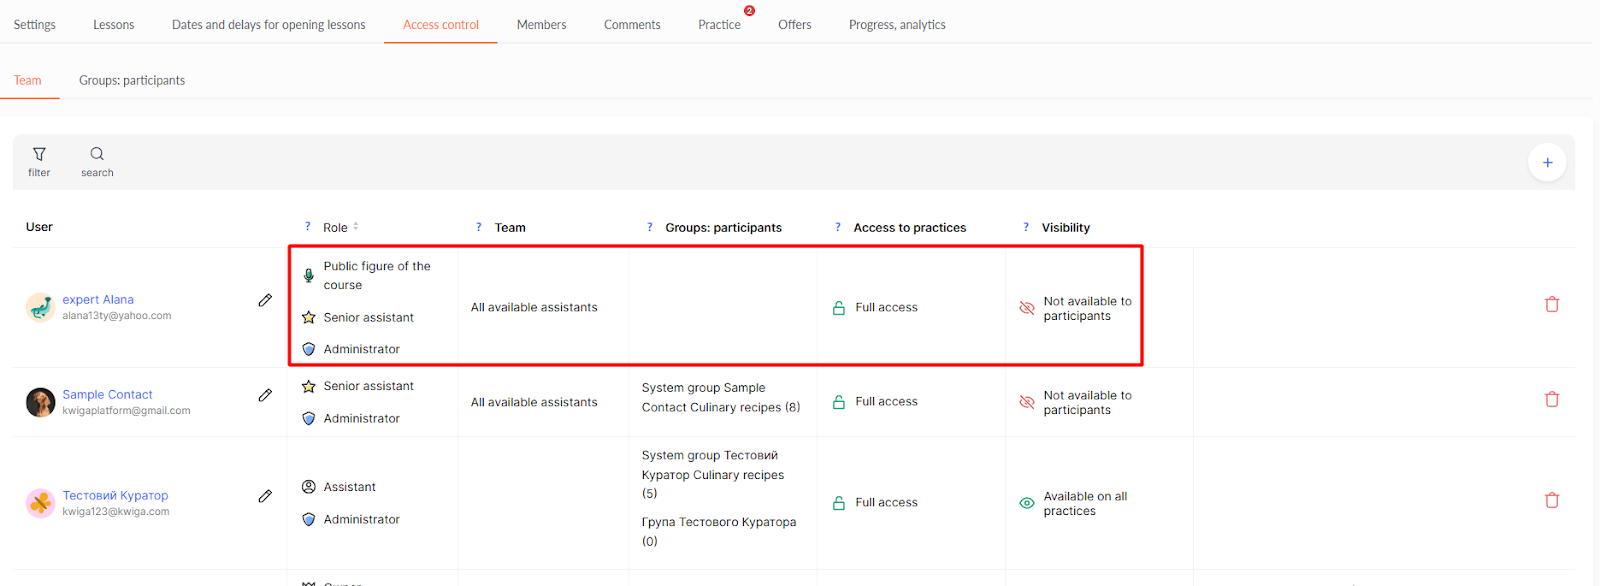
A course can have multiple public figures. If you need to add another one, you can do so using the same steps.
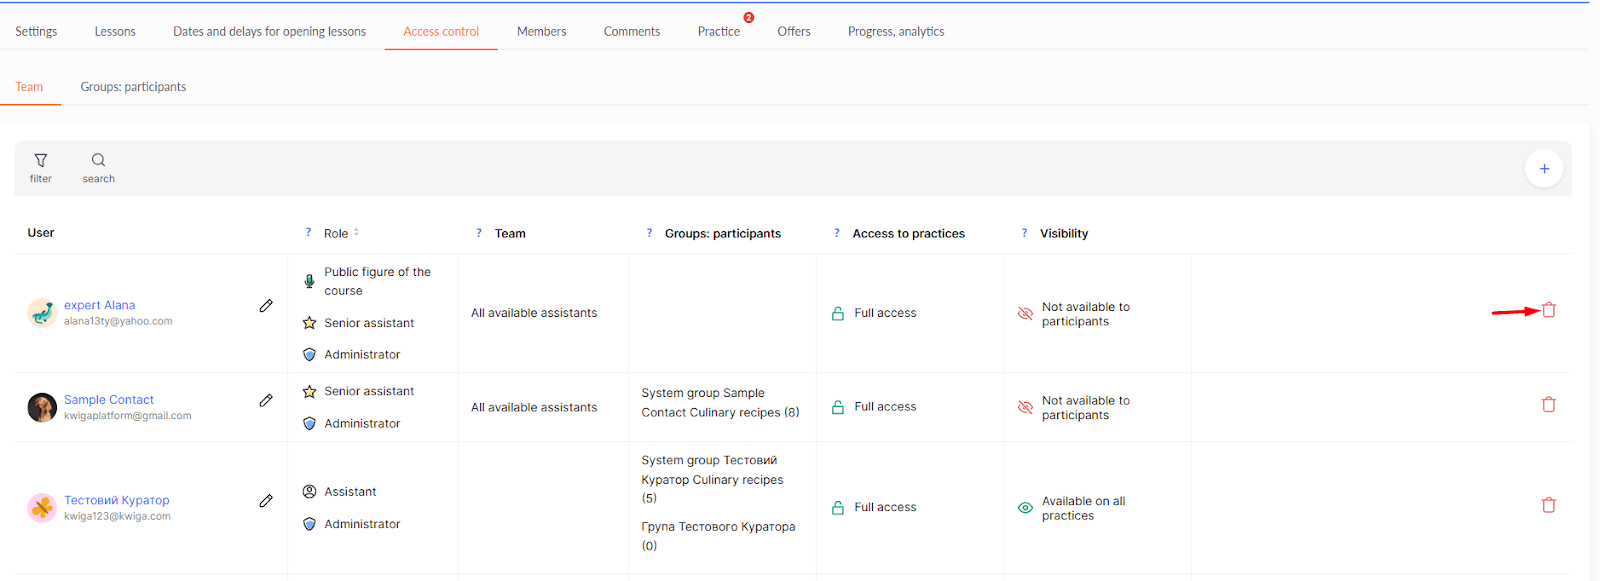
How to Remove a Public Figure
If you want the course not to display an author, remove all users listed as Public Figures under the Access Control tab.
An alternative option is to change the public figure's profile name—for example, set a generic school name. This is suitable for team-based courses where there’s no need to highlight a specific author.
Why Is This Useful?
When learners see who created the course, it builds trust in the material. A public figure makes the course more personal and helps it stand out—an author’s personality can be a competitive advantage. Use this feature to highlight the uniqueness of your courses and create a stronger connection with your audience.
Didn't find the answer? Contact the support service via online chat or Telegram