Articles:
- Contact capture form
- How to add a widget code to your website
- Tracking visits from the landing page through the widget
- Mini landing pages
- Adding a request form (widget) to a Weblium page
- Adding a request form (widget) to the Sendpulse page
- Adding a request form (widget) to a Wix page
- Displaying the Course Program on Your Website
- Adding an Online Chat for Students to the Kwiga Platform
- How to Create a Contact Collection Widget
- Widget Statistics: How to Track Effectiveness
A step-by-step guide on how to add the widget code to a page in the Sendpulse builder.
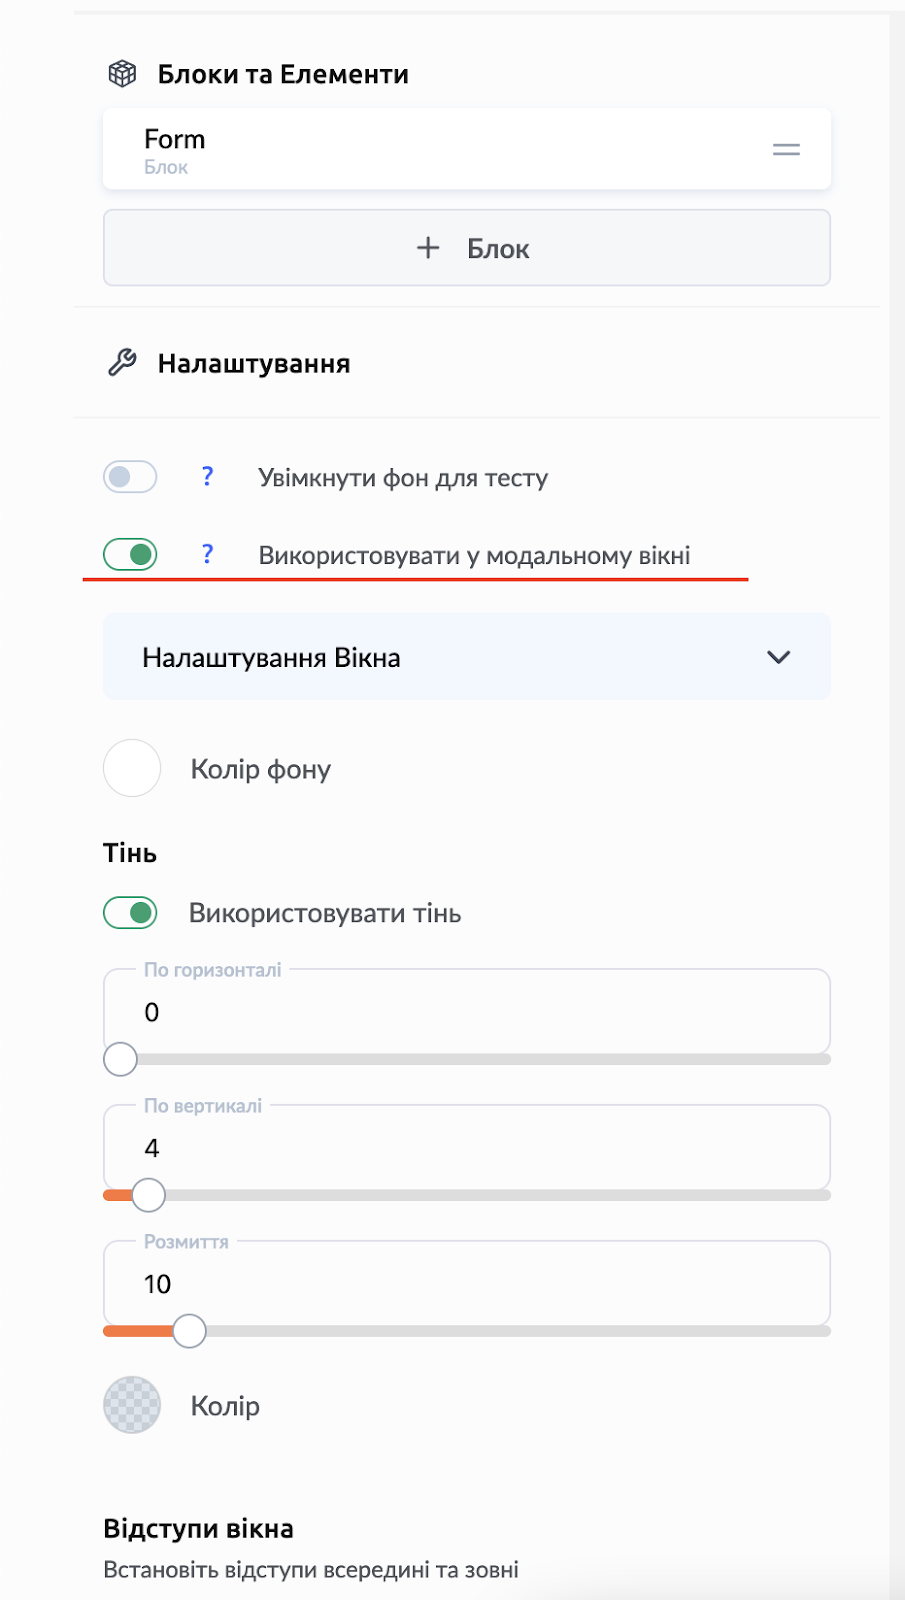
1. In Kwiga, in the widget settings, enable the option “Use in modal window”:
2. Go to the website editing mode in Sendpulse, click on the settings of the button that should open the widget when clicked.
There are two methods for adding a widget to a website in Sendpulse, you can choose any (one of the suggested) that is convenient for you.
2A - Adding an ID
Go to the button settings, and at the very bottom you will see the ID field - it can be any combination of characters, including one that is meaningful to you. Write down this ID, you will need it later.
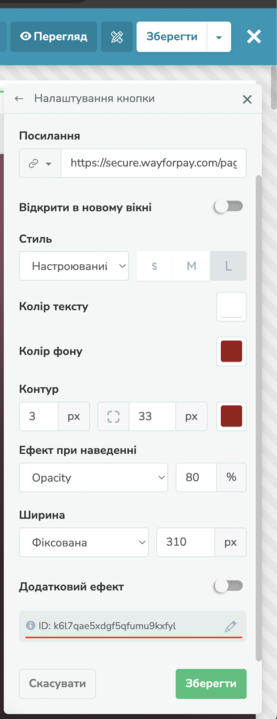
For all buttons that should open the widget when clicked, the same ID must be entered. To do this, copy it from the first button to ALL buttons that open the widget.
After making the changes, click the green Save button, then the White save button (at the top of the page).
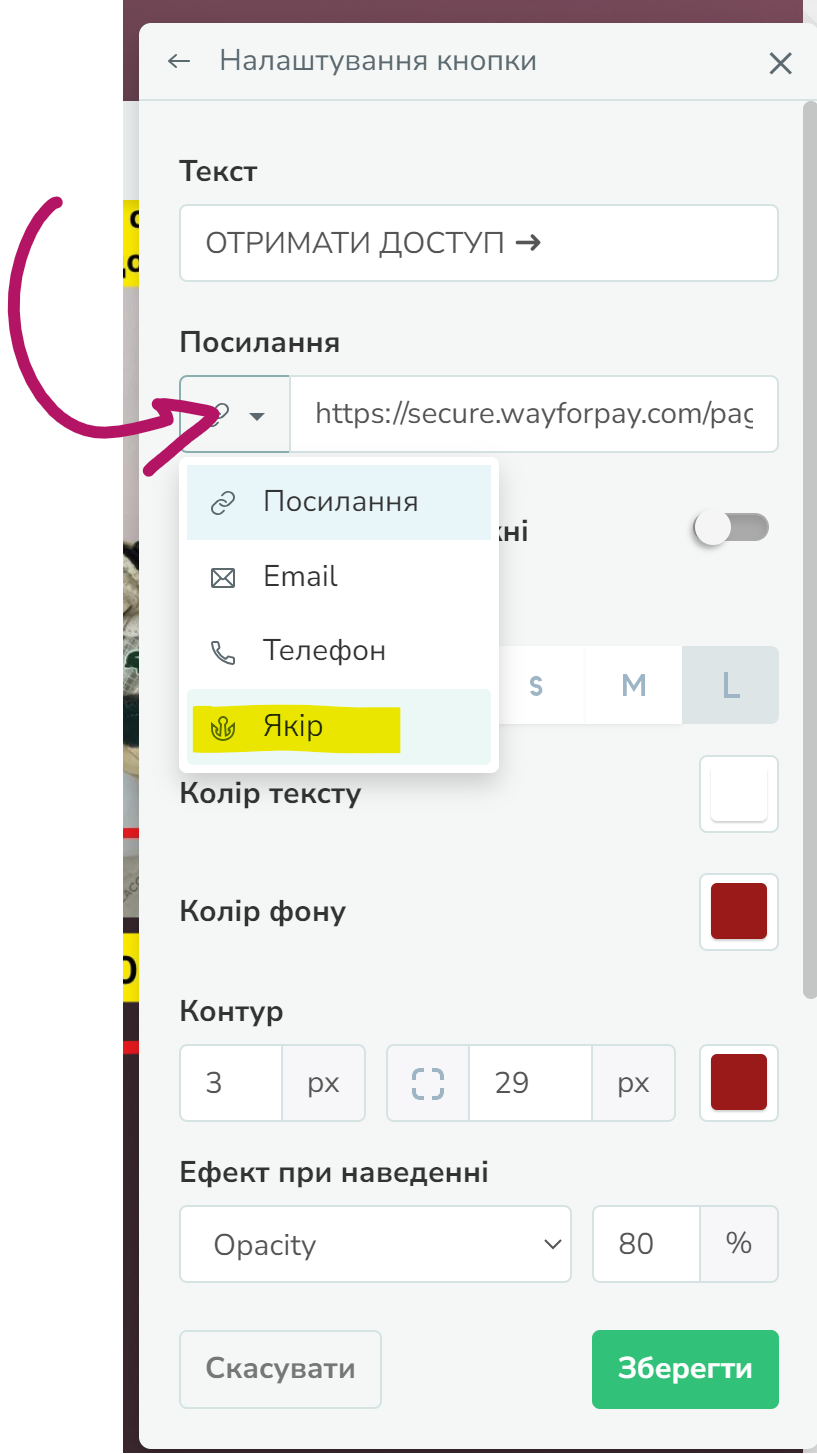
2B - Adding an anchor
In the button settings, instead of a link, select Anchor and specify a value. It can be any name (combination of characters). Write down this value - you will need it later.

After making the changes, click the green Save button, then the White save button.
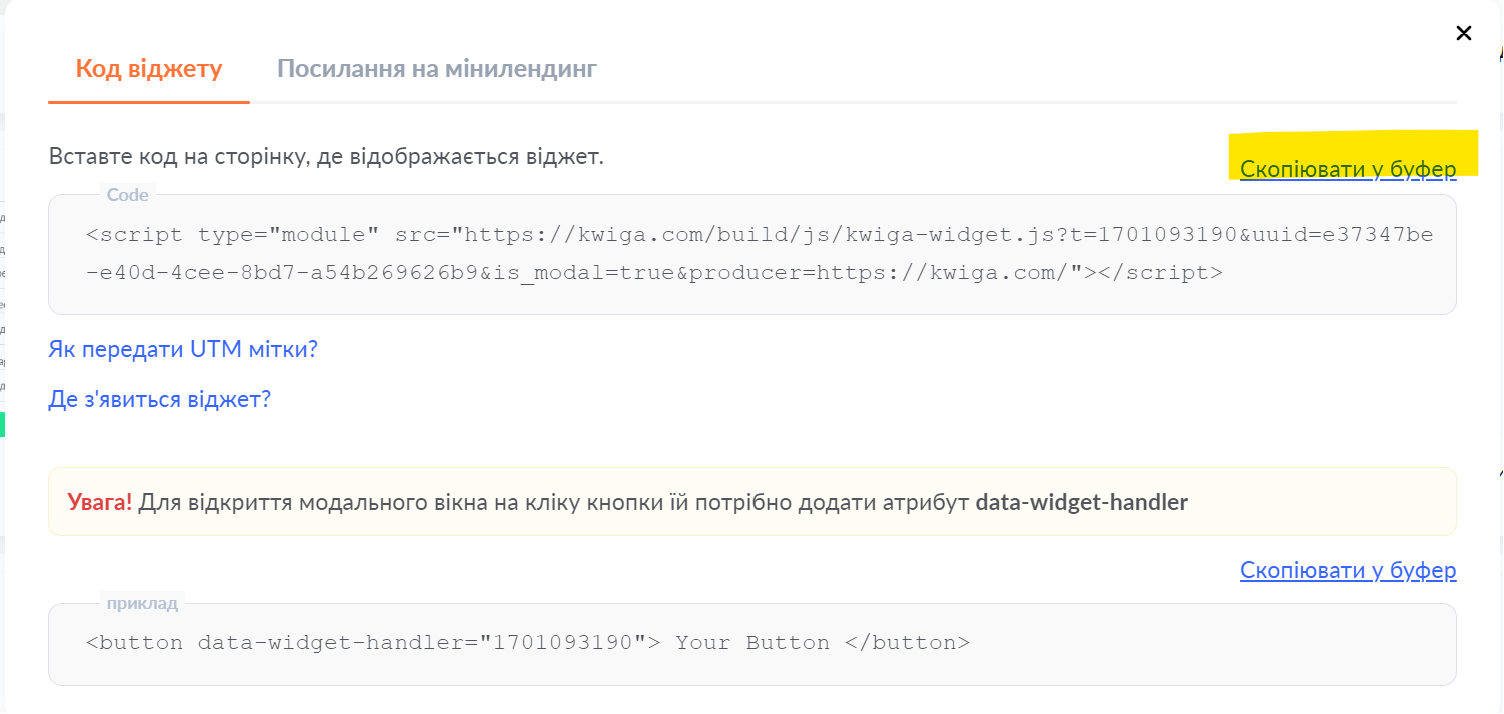
3) Copy the widget code:
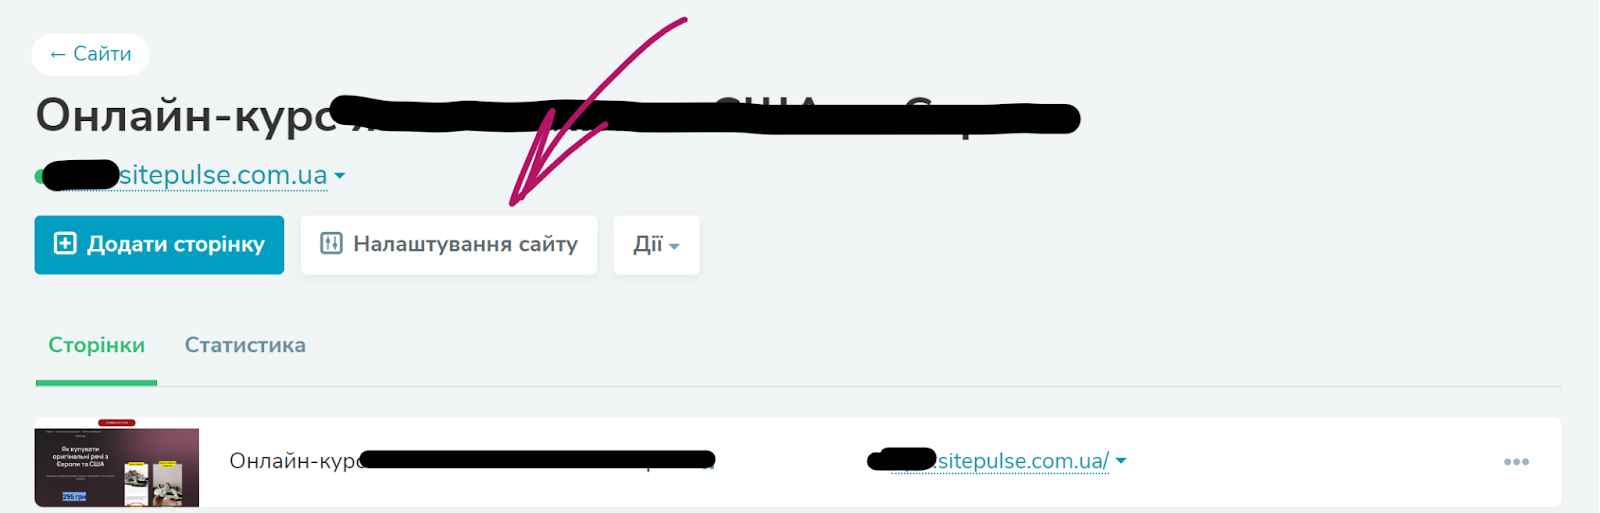
Open your website in Sendpulse and select Website settings
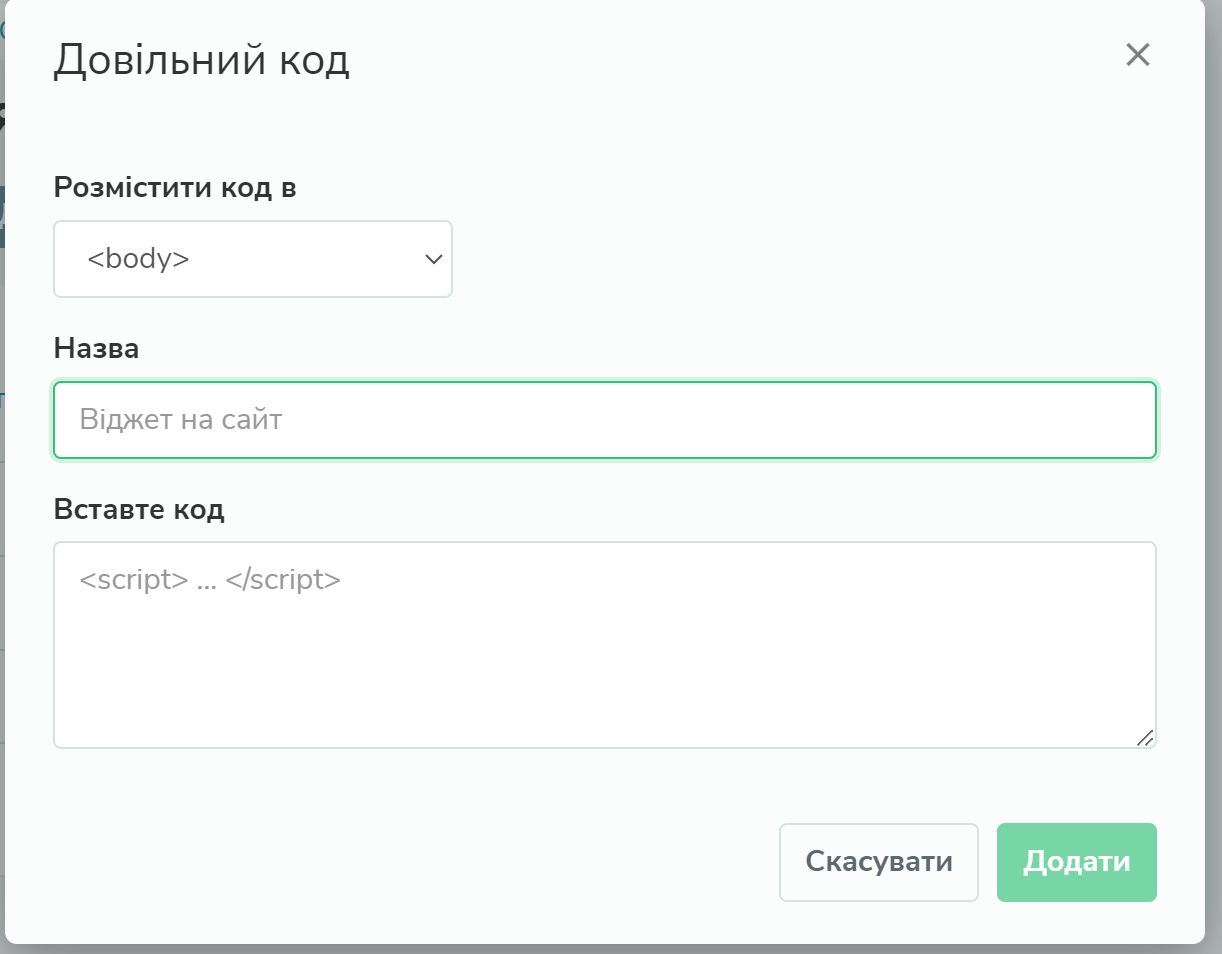
Select the Custom code tab and click Add code

In the window that appears, select Place code in , specify any name (clear to you), paste the code copied earlier, and then also add one more script based on the method selected in step 2.
3A - Adding an ID
Additionally, add the code that you wrote down in the previous step.
WIDGET ID - add the widget ID here, it can be found in the code in Kwiga (highlighted in pink in the screenshot)
