
Articles:
- Contact capture form
- How to add a widget code to your website
- Tracking visits from the landing page through the widget
- Mini landing pages
- Adding a request form (widget) to a Weblium page
- Adding a request form (widget) to the Sendpulse page
- Adding a request form (widget) to a Wix page
- Displaying the Course Program on Your Website
- Adding an Online Chat for Students to the Kwiga Platform
- How to Create a Contact Collection Widget
- Widget Statistics: How to Track Effectiveness
- How to add one or more plans in the widget or contact collection form
Learn how to set up the selection of one or more plans in a contact collection form so that visitors can immediately choose the access option they need.
A widget is a quick way to collect contacts and immediately offer visitors a convenient choice of plan without creating a separate sales page. This is especially useful when you have several course access options—for example, basic and advanced—and want to let users choose on their own before submitting the form. And if the selected plans already have a price and payment system configured, visitors will be redirected to payment immediately after completing the form—there is no need to create a separate sales page.
The widget can be placed on a mini-landing page directly on the platform or embedded on a third-party website—read more about both options in the articles Selling through a mini-landing page on the platform and Selling through a widget added to a third-party website.
Creating a contact collection form
To create a widget, go to the menu Website → Widget, mini-landing page, click the button + and enter a name for the widget.
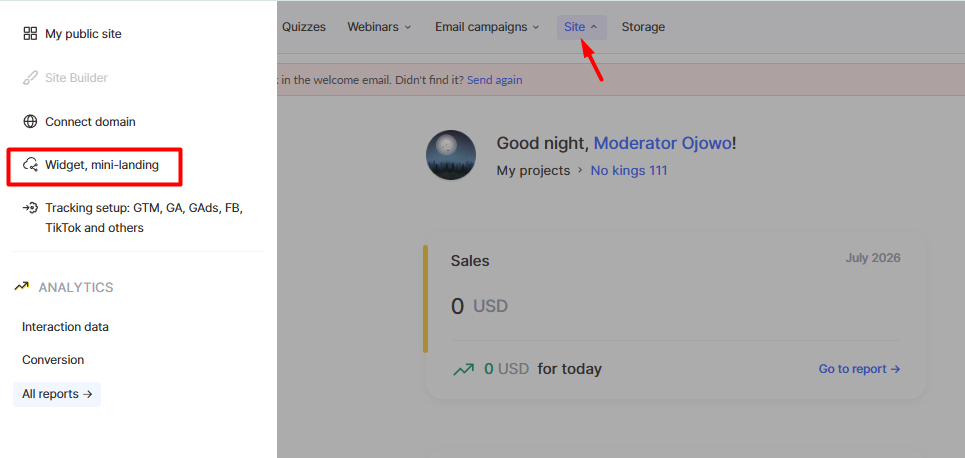
The platform will automatically create a basic form with an email field. To learn how to configure fields, form steps, and other elements, read the article How to create a contact collection form.
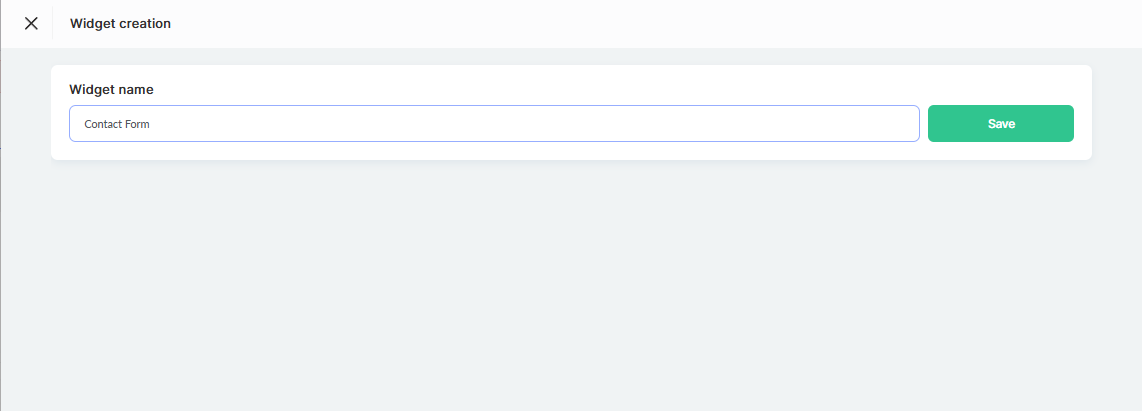
In the Logic block, by selecting the action Grant access to the product, you can link one or several plans to the form. If the required plan does not exist yet, create and configure it first—see the article for details How to configure a plan.
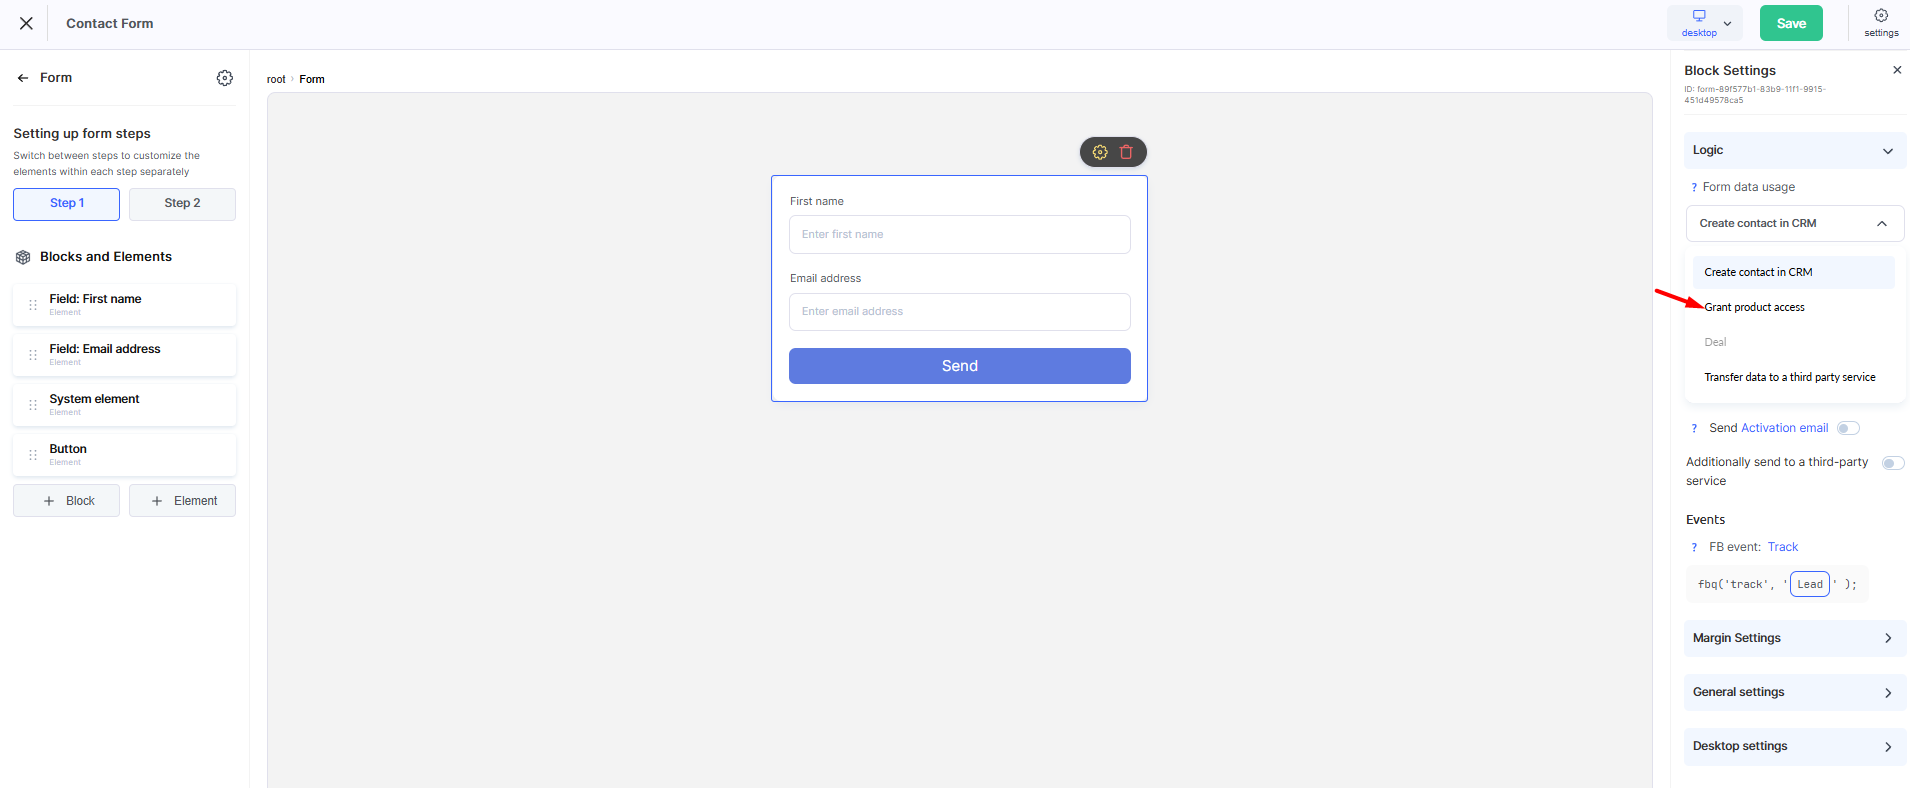
Linking multiple plans
In the Logic block of the form settings, if Grant access to the product with the access format Specific planis selected for the contact action, you can link not just one but several plans to the form.
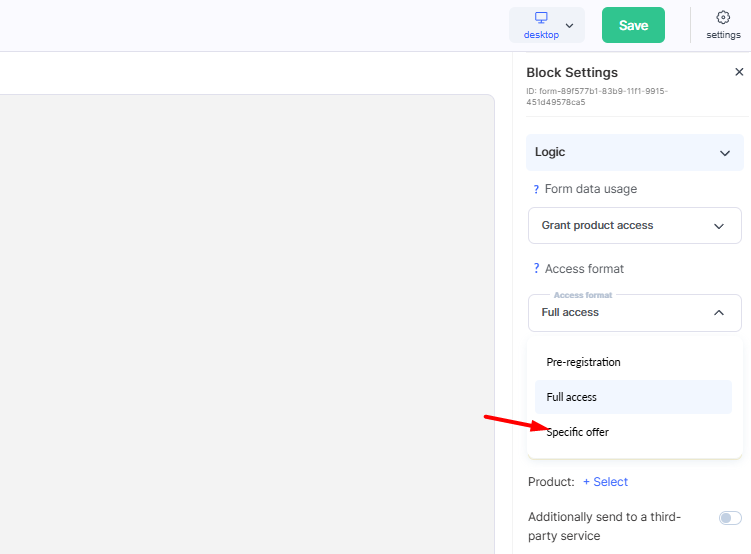
To add plans, click + Select next to the Plan.
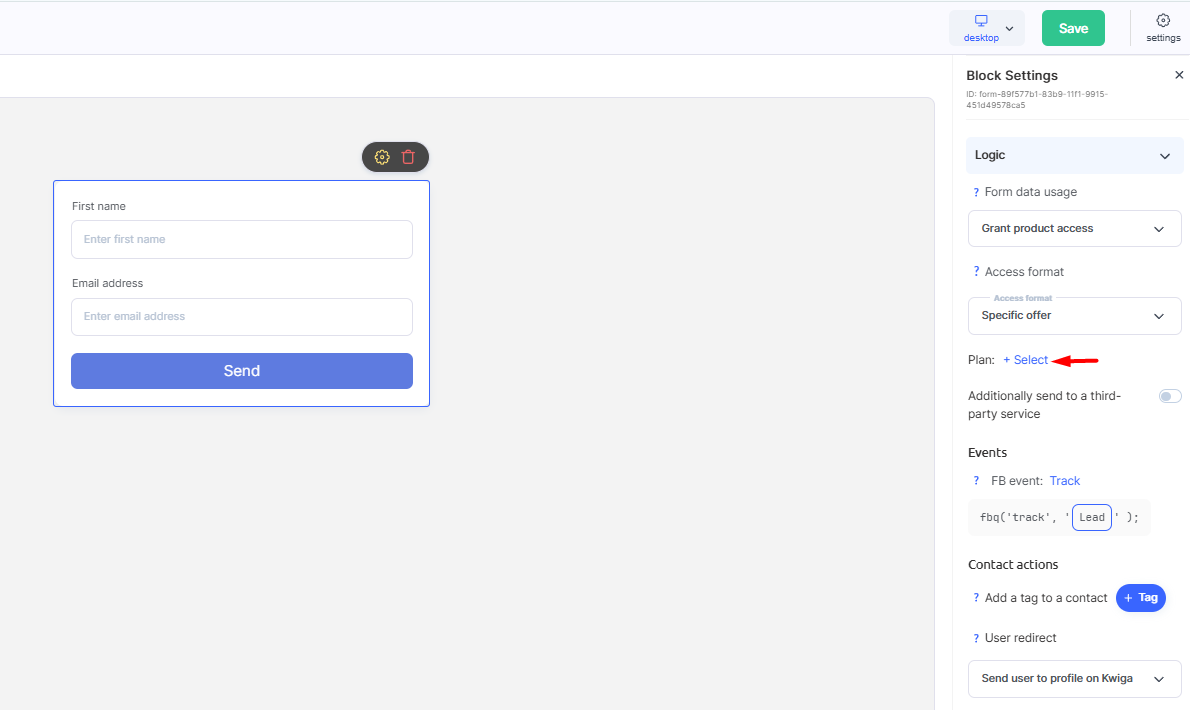
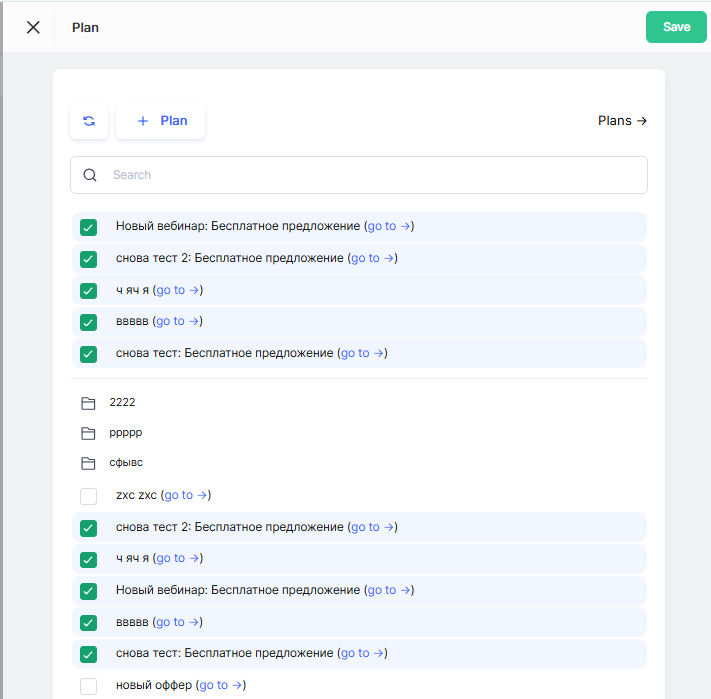
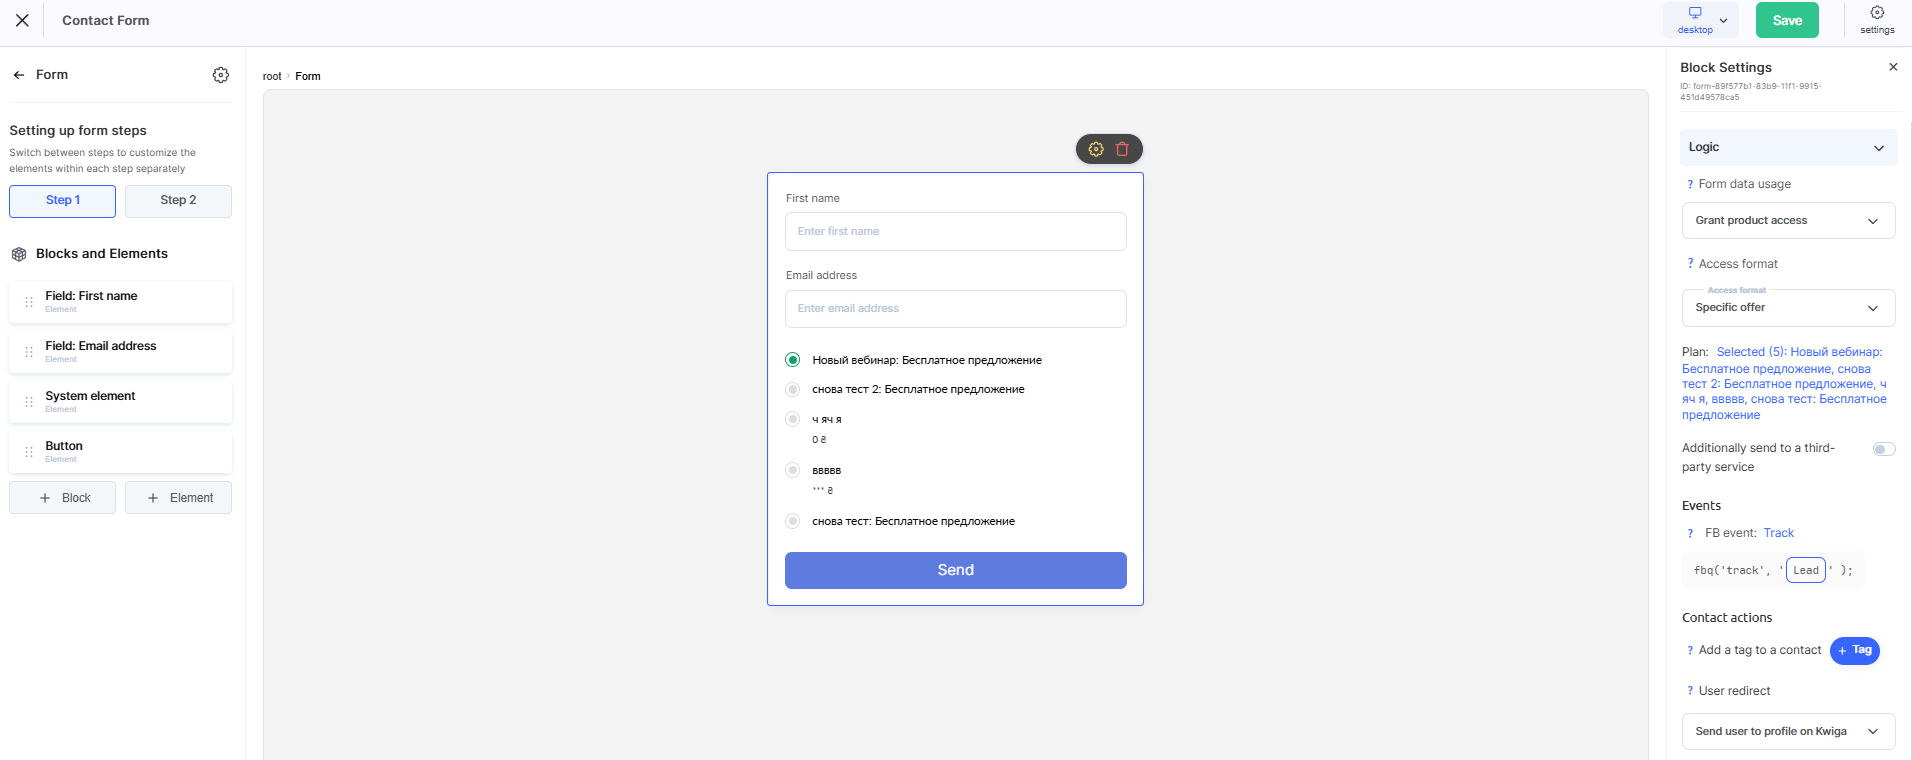
field. The Planwindow will open, where you need to select all options that should be available in the form using the checkboxes and confirm your selection with the Savebutton. After that, the Plan will display the number and list of selected options.
If multiple plans are selected for the form, the widget displayed to the visitor automatically shows a list of these plans as selectable options—each with a name and price. The visitor chooses the required plan before submitting the form, and access is granted specifically to that plan.
Linking a single plan
To link a single plan, also click + Select next to the field Plan and in the Plan window, select the required option, then confirm your selection with the Save.
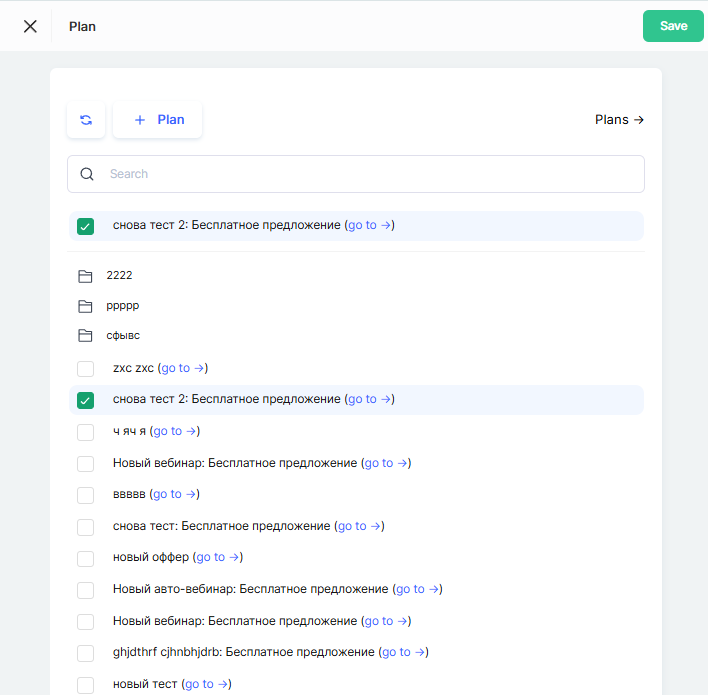
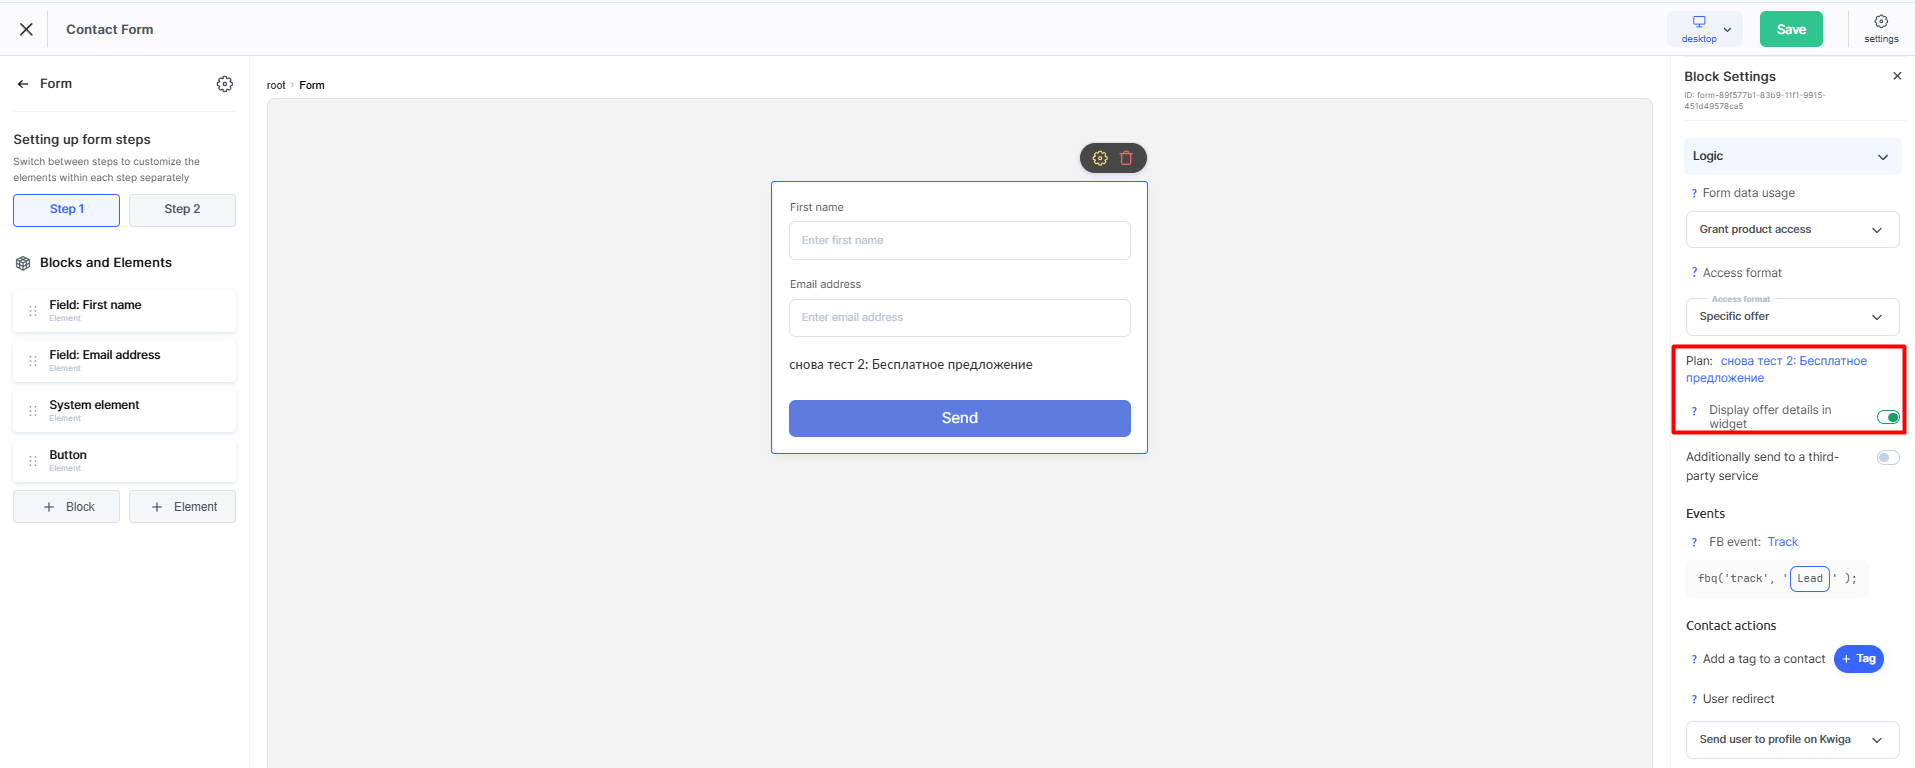
If only one plan is selected for the form, you can also enable the Display plan details in the widget.
When this option is enabled, the selected plan's name and price are displayed directly in the form, so the visitor can see the terms before providing their contact details.
The ability to add multiple plans to the widget turns a simple contact collection form into a mini sales tool: visitors immediately see the options and prices and choose the right one. If prices and a payment system are configured for the plans, the form works even more effectively—visitors proceed directly to payment, without additional steps or unnecessary pages.
Didn't find the answer? Contact the support service via online chat or Telegram