Articole:
- Cum să ștergi un curs
- Protecția drepturilor de autor pentru conținutul dvs. pe Kwiga
- Lecție publică sau de probă
- Cum să schimbi starea unei lecții în ciornă și să o ascunzi de elevi
- Utilizarea punctelor de control
- Cum să adăugați o temă la o lecție
- Cum să creați o sarcină cu verificare obligatorie de către un asistent
- Cum să creezi o sarcină pentru oferte diferite
- Cum să creezi un test cu punctaj și aprobare automată
- Cum să creezi și să realizezi un sondaj printre studenții cursului
- Conținutul lecției, toate tipurile de activități din lecție
- Descărcarea fișierelor video
- Cum să adăugați coduri de timp în videoclip
- Cum să adăugați un buton la lecție
- Inserarea codului iframe
- Adăugarea fracțiilor, funcțiilor matematice și formularelor
- Cum să adaugi text cu spoiler la lecție
- Cum să creezi un curs pe platforma Kwiga
- Cum să creezi un maraton
- Cum să adăugați o copertă unui curs
- Opțiuni de afișare a programului cursului
- How to add a public face to a course
- Cum să adaugi o echipă la un curs
- Previzualizarea cursului cu diferite niveluri de acces
- Bloc deasupra lecțiilor (banner superior)
- Setarea întârzierilor, program pentru deschiderea și închiderea lecțiilor (distribuirea treptată a conținutului)
- Raport privind progresul studenților în cadrul cursului
- Analiza finalizării temelor în cadrul cursului
- Raport de vânzări ale cursurilor
- Cum să creezi o copie a cursului
- Cum să copiați conținutul unei lecții
- Accesul asistentului la sarcinile practice
- Studentul nu poate vedea cursul (Maraton, Grup închis)
- Cum să configurezi un test astfel încât studenții să vadă comentariile după finalizare
- Livrarea mesajelor: de ce emailurile nu ajung și cum să rezolvi problema
- Cum să personalizezi aspectul unui curs
- Gestionează vizibilitatea activității
How to add a public face to a course other than the owner of the account on Kwiga. The functionality is useful both for online schools to personalize courses and for smaller projects that bring together multiple experts.
În acest articol:
Adăugarea unei persoane publice la un curs îl ajută să fie mai personalizat pentru cursanți. Este un instrument simplu pe care școlile online îl pot folosi pentru a evidenția personalitatea autorului sau pentru proiecte care implică mai mulți experți.
Ce este o persoană publică și de ce să adăugați una
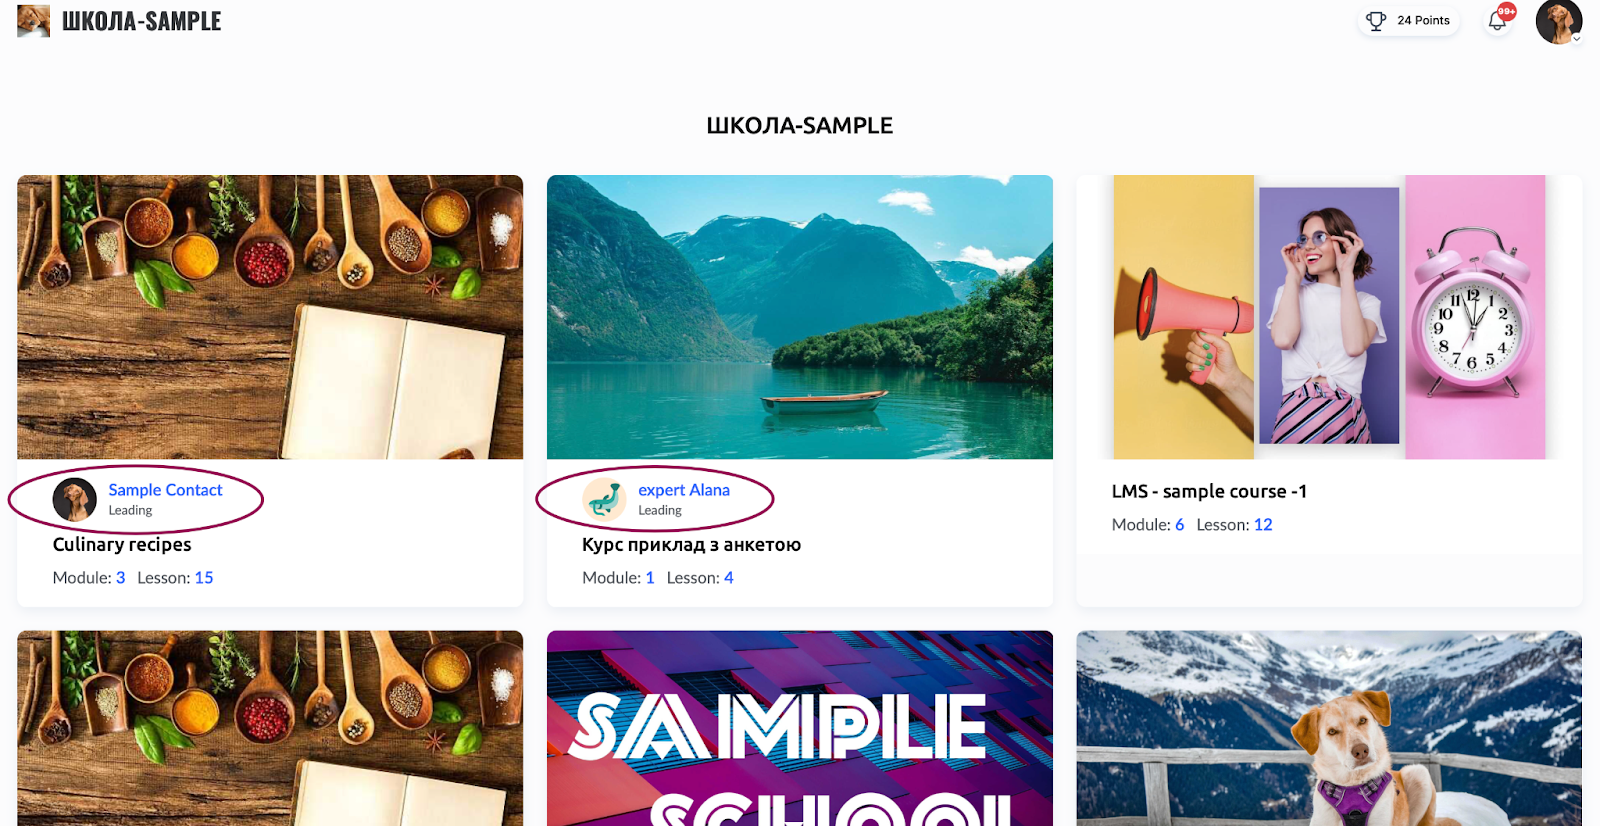
Persoana publică este persoana afișată ca autor al cursului pe paginile publice ale școlii, pe pagina de prezentare a cursului și în panourile cursanților. În mod implicit, autorul cursului este proprietarul contului Kwiga. Totuși, dacă preferați să evidențiați un alt autor, puteți ajusta ușor setările.
Cum să adăugați o persoană publică
Pasul 1: Adăugați un utilizator
-
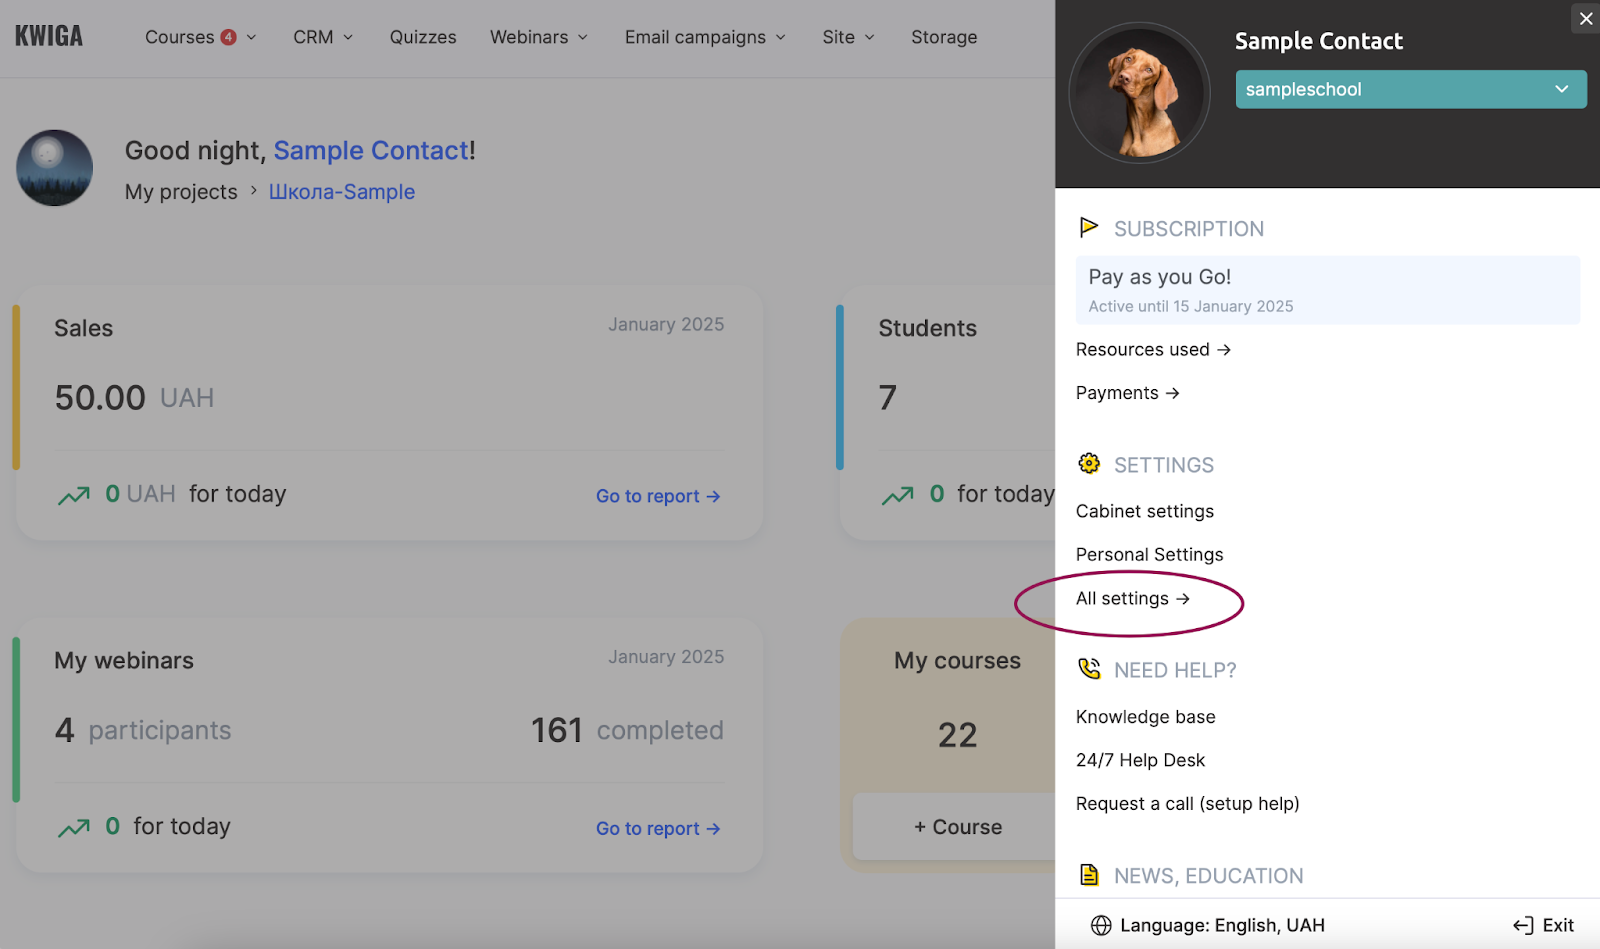
Faceți clic pe pictograma de profil din colțul din dreapta sus și accesați Setări.
-
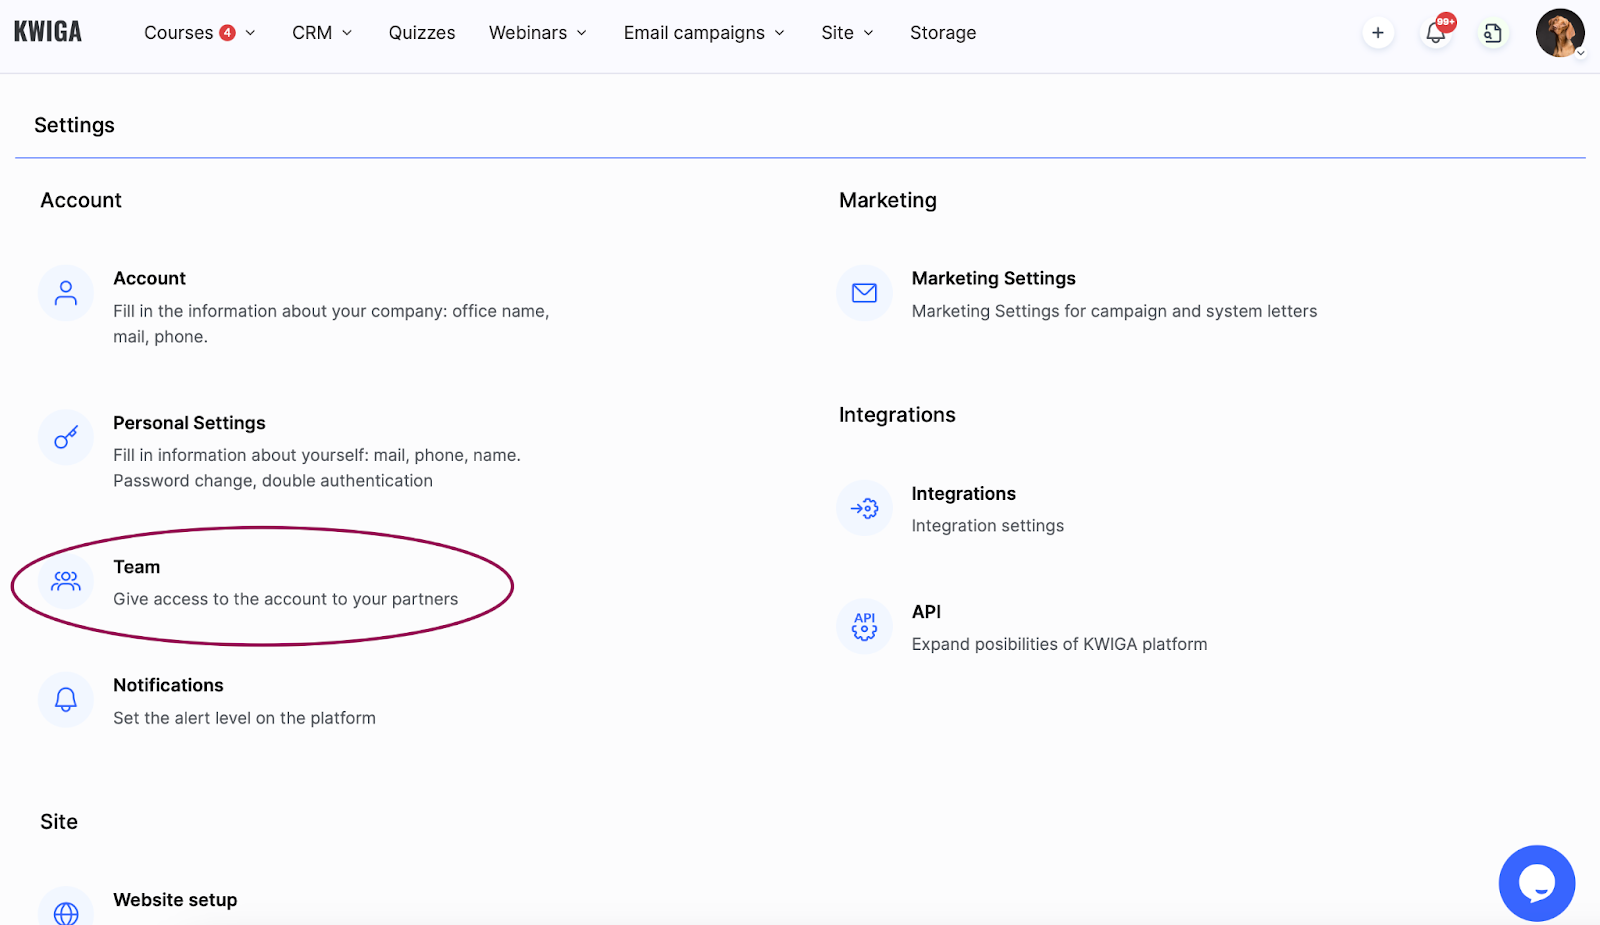
Selectați Toate setările și apoi mergeți la Echipă.
-
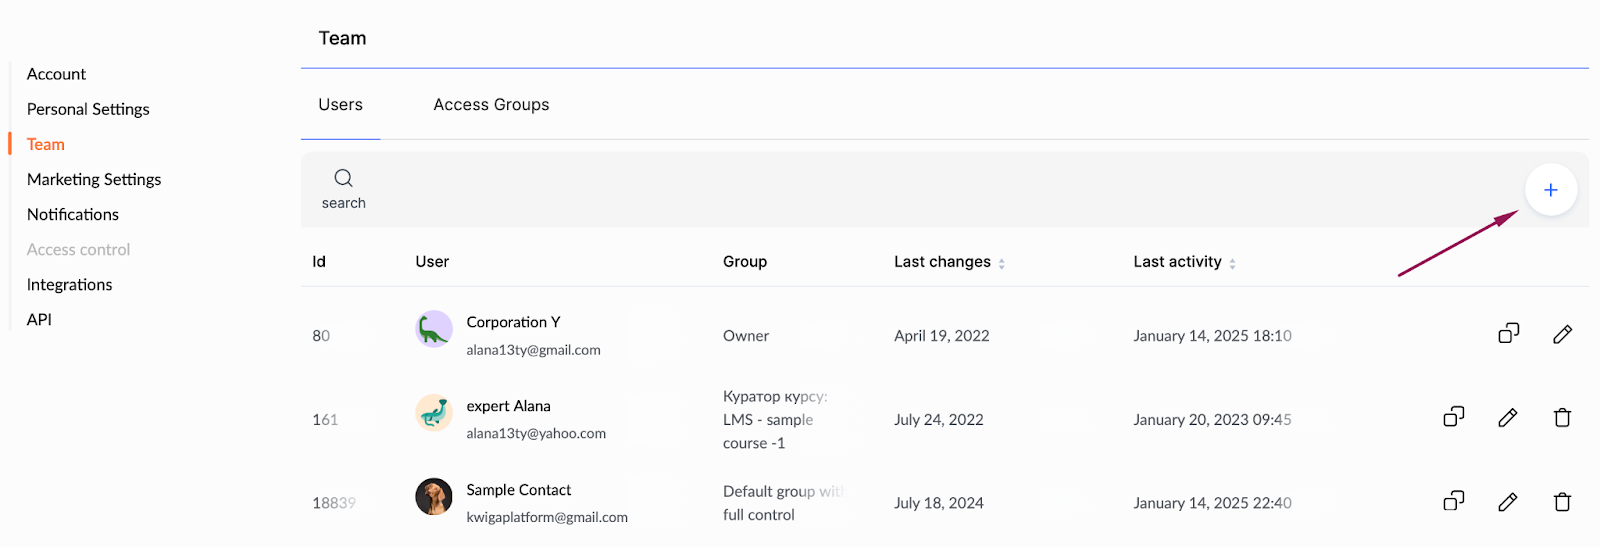
Faceți clic pe + (Adăugați utilizator).
-
Trimiteți o invitație noului utilizator și atribuiți-i drepturi de acces pentru curs.
Pentru pașii detaliați, consultați articolul despre adăugarea unui membru al echipei.
Pasul 2: Atribuiți persoana publică
-
Deschideți meniul Cursuri.
-
Selectați cursul dorit și mergeți la fila Control acces.
-
În secțiunea Persoană publică, atribuiți utilizatorul pe care doriți să îl evidențiați ca persoană publică a cursului.
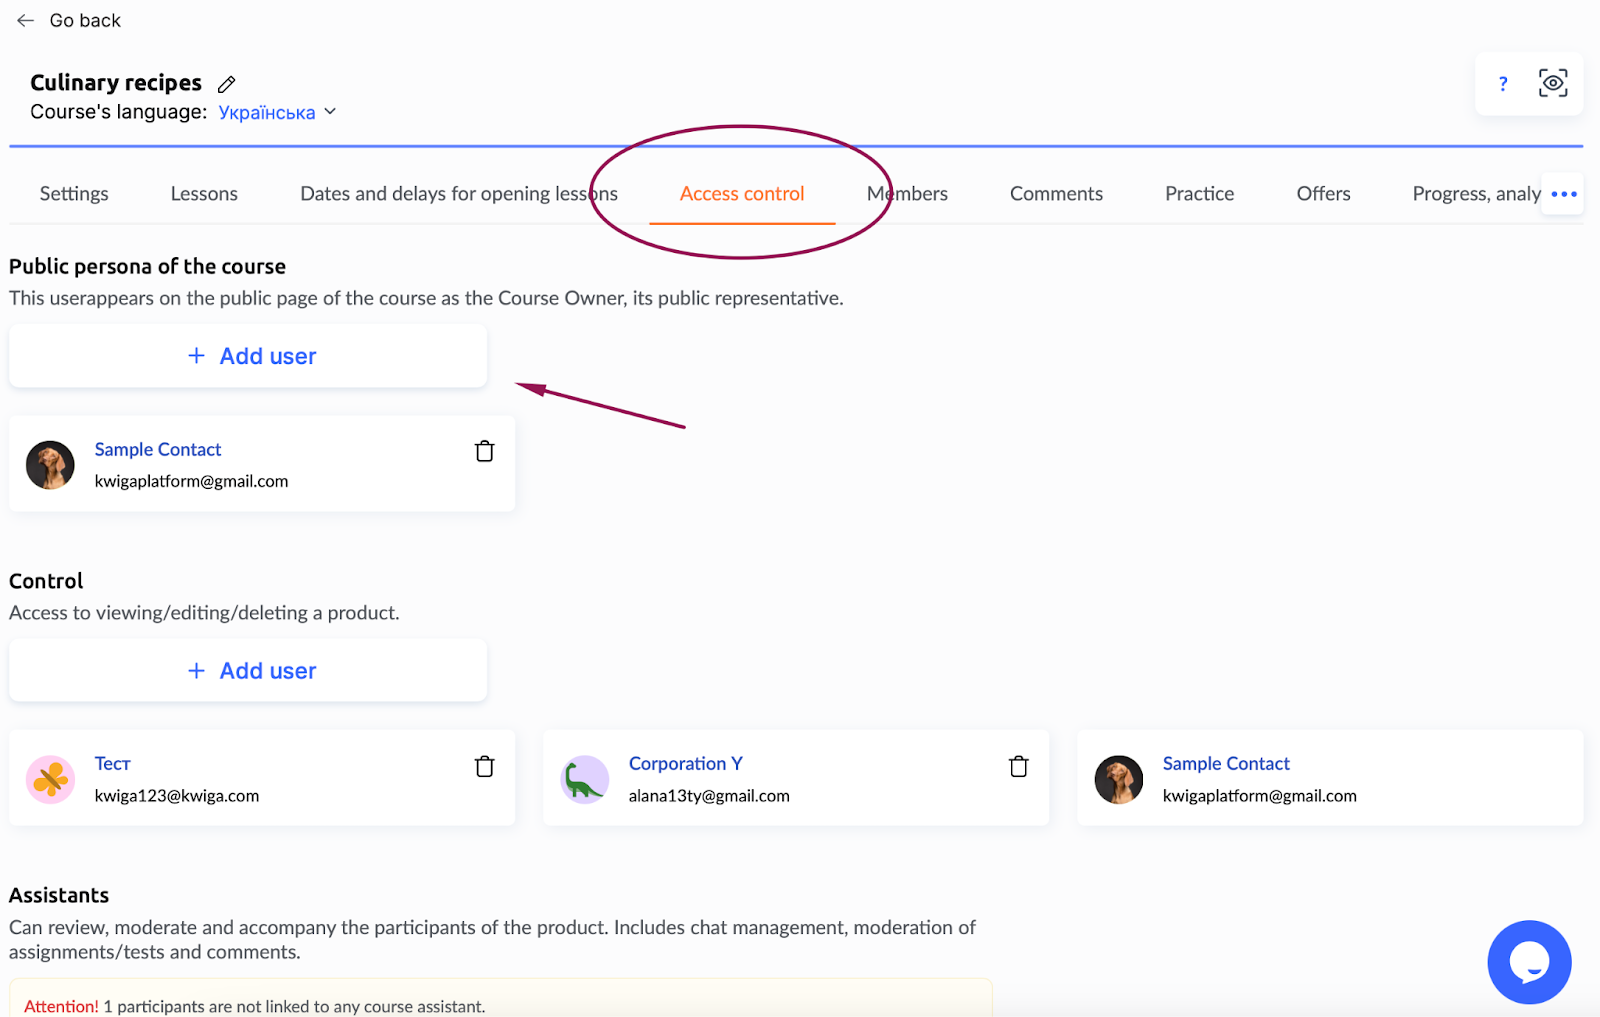
Notă: Dacă utilizatorul nu este vizibil, reîmprospătați lista folosind butonul de actualizare. Dacă acest lucru nu funcționează, reveniți la Pasul 1 și asigurați-vă că utilizatorul a fost adăugat.
Cum să eliminați o persoană publică
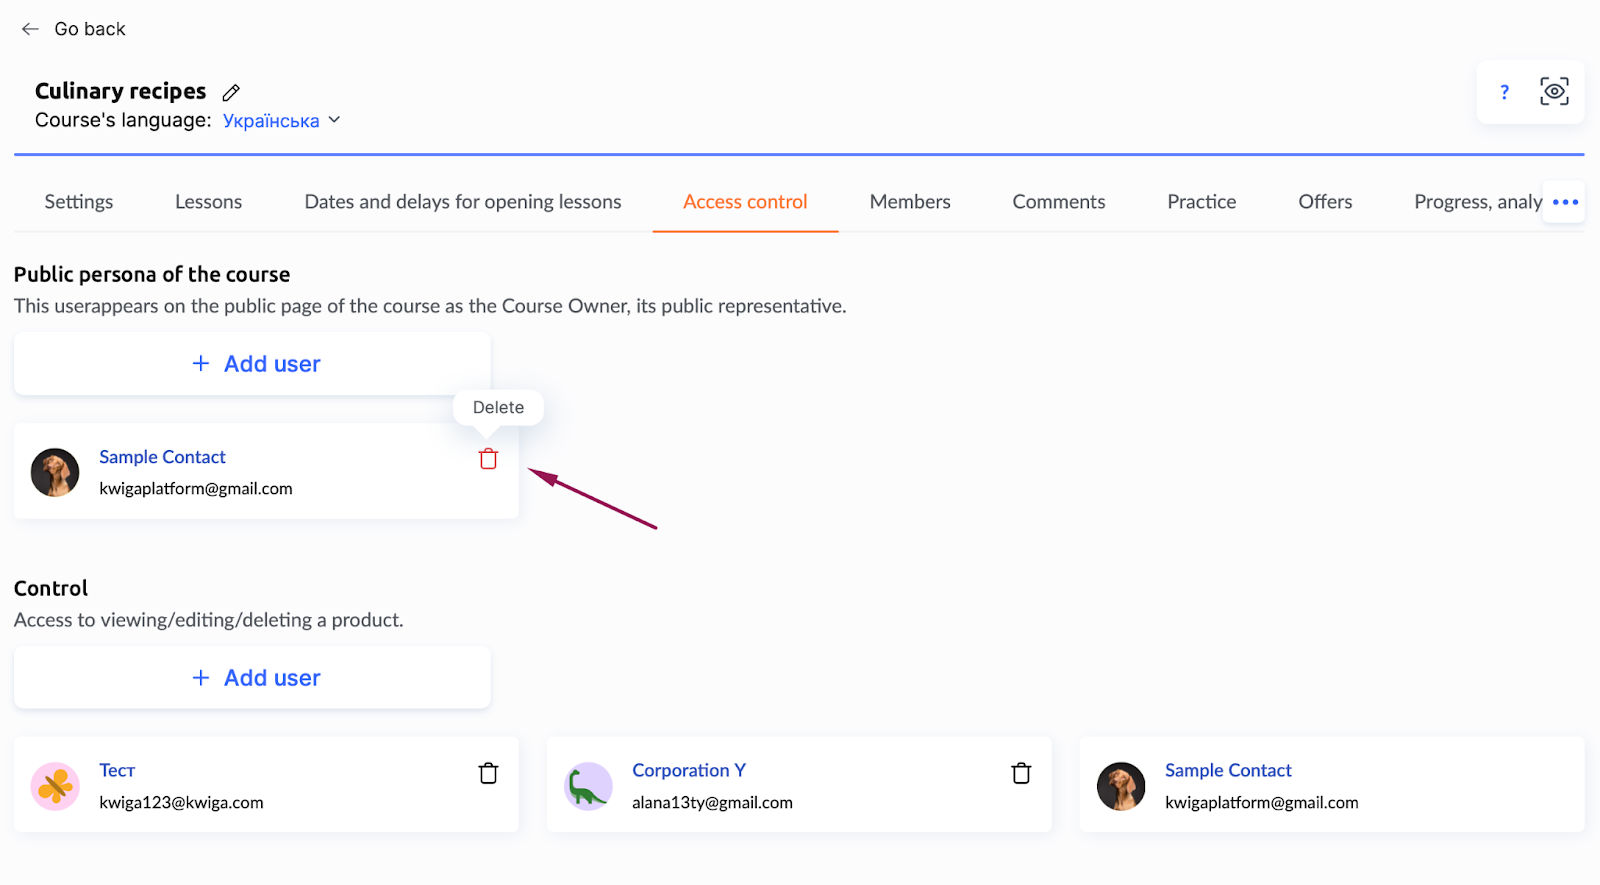
Dacă nu doriți ca cursul să afișeze un autor, eliminați toți utilizatorii din secțiunea Persoană publică din fila Control acces.
Alternativ, puteți edita profilul proprietarului contului și seta în schimb un nume general al școlii. Această abordare funcționează bine pentru cursurile bazate pe echipă, unde nu este necesară evidențierea unui autor anume.
De ce este utilă
Când cursanții văd cine a creat cursul, încrederea în material crește. Evidențierea unei persoane publice face ca cursul să pară mai apropiat și îl ajută să iasă în evidență față de altele. Identitatea autorului poate servi ca un avantaj suplimentar, ajutându-vă să evidențiați unicitatea cursurilor dvs. și să construiți o legătură mai puternică cu publicul dvs.