Articles:
- Orders: creating and editing orders.
- How do I add an individual payment link to a student
- Transactions
- How to set up sending your own email after purchase
- Integration with the Sendpulse chatbot
- How to integrate a payment system on Kwiga
- How to set a specific language for an offer page
- Important Project Settings
- How to grant access to students if the sales were not made on Kwiga
- Payment without authorization
- How to create a new stream with your own schedule
- How to give access to one student
- How to change access for one student
- How to set up demo access to a course, open house day at the school
- Setting up subscriptions (recurring payments)
- Automation: Follow-up email sequences (unpaid orders and applications)
- Credits and installments, payment in parts
- Promotional offer
- Discount coupons and possible settings
- How to launch course registration with prepayment
- How to create cross-sell offers in Kwiga
- How to start selling on Kwiga: creating a price plan
- Creating multiple pricing plans
- Selling consultations and one-on-one sessions
- How to Change a Student's Plan (Additional Payment on Kwiga)
- How to sell (give access to) parts of the course
- How to implement access renewal sales
- Selling through a registration form on a third-party site
- Selling through a mini-landing page created on Kwiga
- How to add a video to a page (mini-landing, course page)
- How to create a link with an applied coupon
- Offers and Payments on Kwiga: How It Works
- Repeat Sales: Setting Conditions and Sending a Coupon Based on Purchase Count
- Setting up notifications in a Telegram channel
- Sending Emails with Promo Codes (Unpaid Orders)
- Course Store: Settings and Capabilities
- Setting Up the Public Offer Page
- Organization of CPD on Kwiga: step-by-step guide
- How to set up a thank-you page after payment
- Set up access to lessons, sections, and modules
This guide will explain how to start selling on Kwiga, set up pricing plans for your course, and configure sales directly on the platform. In this article, we will tell you how to do it quickly, easily, and with maximum customization possibilities.
In this article:
General information about selling on Kwiga
Kwiga offers flexible options for selling your courses:
-
Price Plans and Offers: Create unlimited pricing plans. You can sell courses in parts, offer subscription-based access, or create custom conditions for specific plans.
-
Custom Orders: Offer personalized conditions and access tailored to individual students.
This article focuses on creating a pricing plan with limited-time access.
Note: Before setting up an offer, ensure your course is created on Kwiga. The course can be a basic structure without materials—adding its outline is sufficient.
Steps to create an offer:
-
Open the Courses menu and select Price Plans, offers from the sales settings section.

-
Press the button + Offer.

-
On the new page, provide the offer name and configure its parameters (access, pricing, payment, etc.).
Offer Name

The offer name should be clear to both you and your students. It will appear in access emails, contact cards, and course reports. Typically, it matches the course or plan name.
Set up the offer status
Draft: The offer is not visible to students but can be manually assigned to them.
Public: Students can purchase the course via a link or course page.
You can choose to display the offer publicly or make it available only via a direct link.

Configuring the offer
Default Funnel: Assign a default funnel for orders generated from this offer or leave it unchanged.
Offer Description: Optional field to outline what students receive upon purchase (e.g., access duration, materials).
Offer validity: Defines the sales period, not the course access duration. Often set as unlimited.
Number of sales limit: Set a maximum number of sales for the plan. Students will see the remaining spots.

Sending notifications
Kwiga allows you to configure automated messages for participants. You can adapt templates or disable notifications.
Letter about opening access to the product: Sent upon course access activation.
Letter upon successful payment: Confirms payment and access.
Letter upon unsuccessful payment: Informs students of payment issues.

Pages after payment
By default, students land on a thank-you page. You can specify any other page to redirect them to after payment in this section. You can always change this setting later.

Product
Main section - Product - click +Product and select the course or event associated with the offer.
You will see additional options related to the course that you can configure in the offer.

Access to content – Configure when the course becomes available (immediately after payment, on a specific date, or a set delay).
Immediately after payment: The course becomes available as soon as the platform receives payment confirmation. The purchase date is considered the joining date.
From a certain date : Choose any date, past or future. If the date is in the past and a student makes a purchase, they will get immediate access. Important: The date you set will apply to all students on this price and will be considered their joining date.
In __ days/months after payment: Use this option to set a delayed start for students. Access begins on the payment date plus the specified delay.

Lessons access - unlimited - means that participants will have access to all lessons in the course. To limit lessons for this price plan (offer), click Unlimited and select specific lessons in the window.

Lessons access – by default, the Without limits mode is enabled, allowing participants to access all lessons in the course. To restrict access for this pricing plan, click Delays and, in the window that opens, select the required modules, lessons, or sections.
More information about configuring lesson access is available in a separate article.

If you have added checkpoints to the course (such as completing an assignment or test to progress), ensure this setting remains enabled for the offer.

If the price plan requires assigning a Teaching assistant or Advisor, you can set this up directly in the offer to enable automatic student distribution.
If you handle the course personally — checking homework and comments without involving assistants — leave this field unchanged. Similarly, if all team members need access to all participants without group division, do not assign assistant and leave the field as is. Learn more about assistant in a separate article.
Practice Pass - This feature allows you to configure automatic checking for all tasks or send them to the assistant for review. The third option, "As per quiz settings," lets you define the evaluation format for each task.
Note: If your price plan does not involve review of the assignments or tests by you or your team, but the course includes open-ended questions and tasks, you can enable "Auto check." This will automatically mark answers as “reviewed” as soon as students submit them.

You can also configure access to comments and set up certificate issuance for the course.
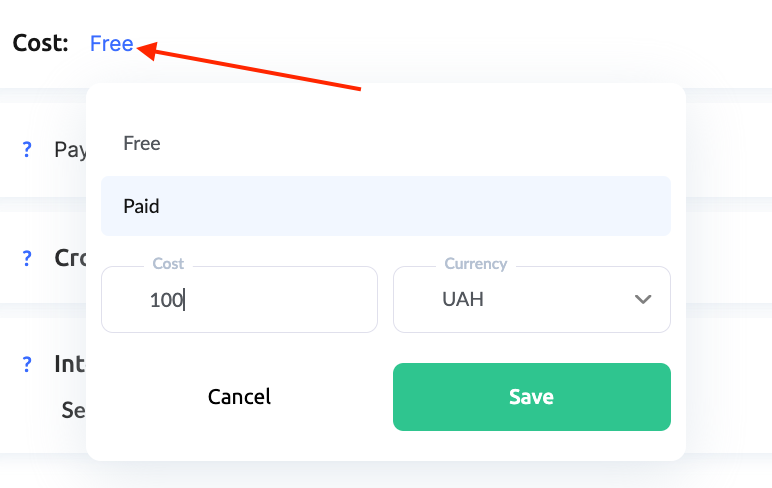
Cost
Select “Paid,” and you will immediately see additional settings where you can specify prices and currencies. Enter the maximum course price here — you’ll be able to add discounts or promotions afterward.

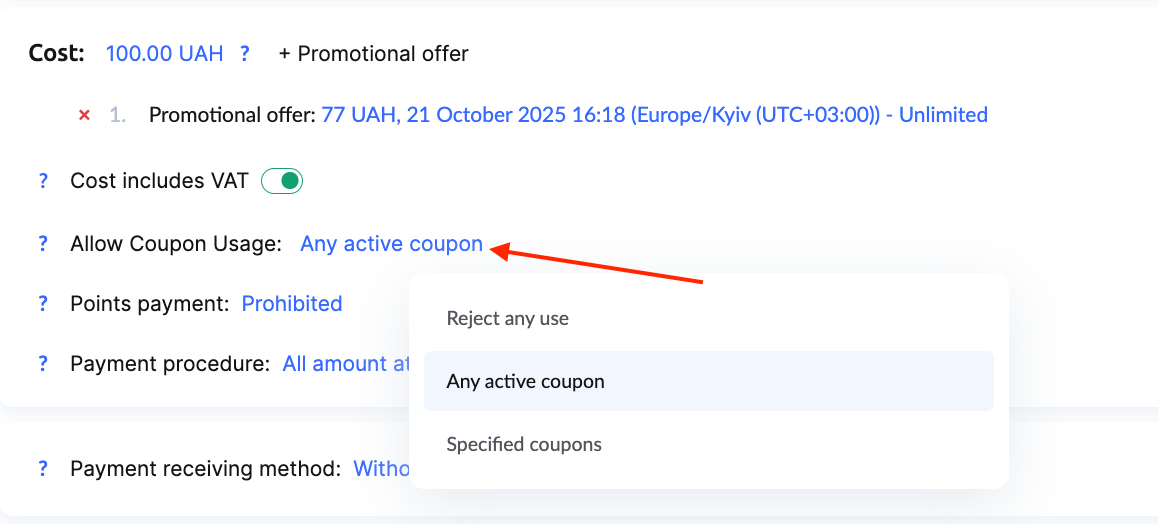
You can also restrict the use of discount coupons: either forbid all coupons, allow any active coupon, or limit usage to specific ones created for this offer. More details about coupons are available in a separate article.
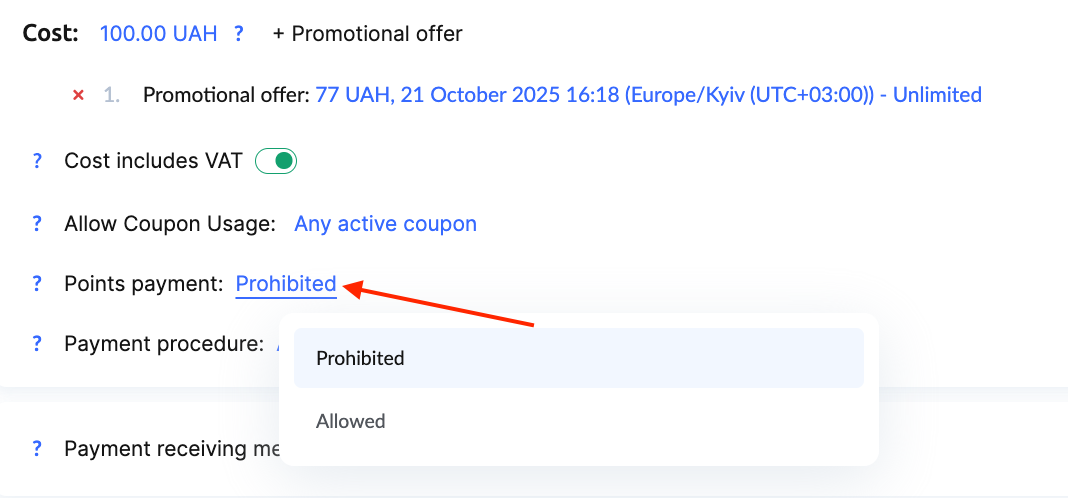
Payment with Points: If your school has a bonus program enabled, turn on this option to allow students to use their accumulated points to pay for the course.
The platform offers three payment options:
-
Full payment upfront — the standard option where the student pays the total amount in one transaction.
-
Installments — split the total cost into several payments, with customizable number of parts, intervals between them, and the amount of each payment.
-
Subscription — set up regular automatic or manual payments, allowing the participant to cancel their subscription anytime in their personal account.
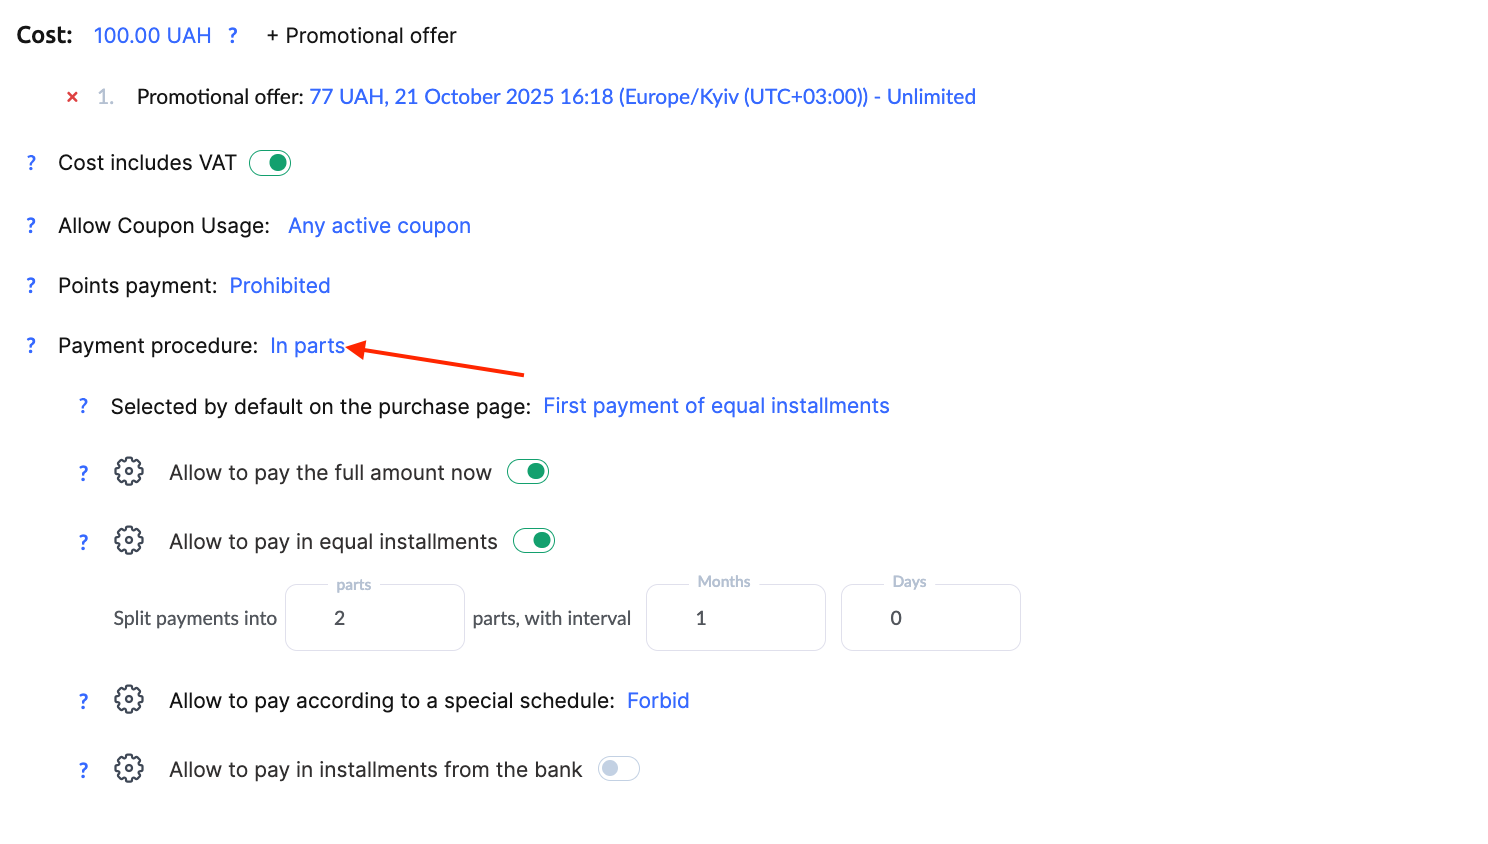
When configuring installment payments, you can specify the price the client will see for the first payment on the purchase page. A lower initial price can help improve conversion, as it appears more appealing to potential students.
Payment receiving method
To configure a payment method, set the price first. If the price is not set and left as free you won’t be able to save the payment system.
Choose the payment system you want to use for this offer. Note: Kwiga itself is not a payment system. To enable automatic course access after payment, you need to connect a payment system. See the guide here: How to integrate the payment system on Kwiga?
If you have several payment systems connected (or multiple accounts in the same system), you can set up automatic processing and define how payments are distributed between them. Alternatively, you can let your customers choose their preferred payment method.
You can leave the choice of payment system to your customers:


Cross-sell
Cross-sell offers can highlight additional products or services to students exploring your current offer. With cross-selling, you can promote other prices, consultations, or related products. If this is your first offer or you only have one product, you can skip this section.
Learn more: How to create cross-sell offers?
Integration
Currently, Kwiga supports sending student contact data to the SendPulse chatbot. After payment, student information is automatically added to a specified SendPulse address book. More about it in the article.
Didn't find the answer? Contact the support service via online chat or Telegram