
Articles:
- How to Add an Assistant to a Course
- How to remove a course assistant (but not from the project!)
- How to remove an assistant from the platform
- Assistants on the Project: Team Structure and Access Settings
- How to Assign a Senior Assistant and Configure Their Access
- How to Add a Team Member
- How to Remove a Team Member
- How to Set Assistant Visibility for Students
- Automatic Assignment of Assistants and Students to Groups
- How to Create a Participant Group and Assign it to an Assistant
- How to Add or Change a Public Figure on a Course
- Team members' access to storage folders
- Team members' access to specific quizzes
Learn how to give team members access to specific storage folders instead of all stored content.
If the Kwiga storage contains materials for different courses or areas of study, you may not want to give the entire team access to everything at once. For example, an assistant for one course may only need files for their cohort, while a course designer preparing a new course may only need a folder of courses on a specific topic.
You can set up storage folder access separately for each group by choosing specific folders and the actions the group can perform on them.
Where to set up an access group
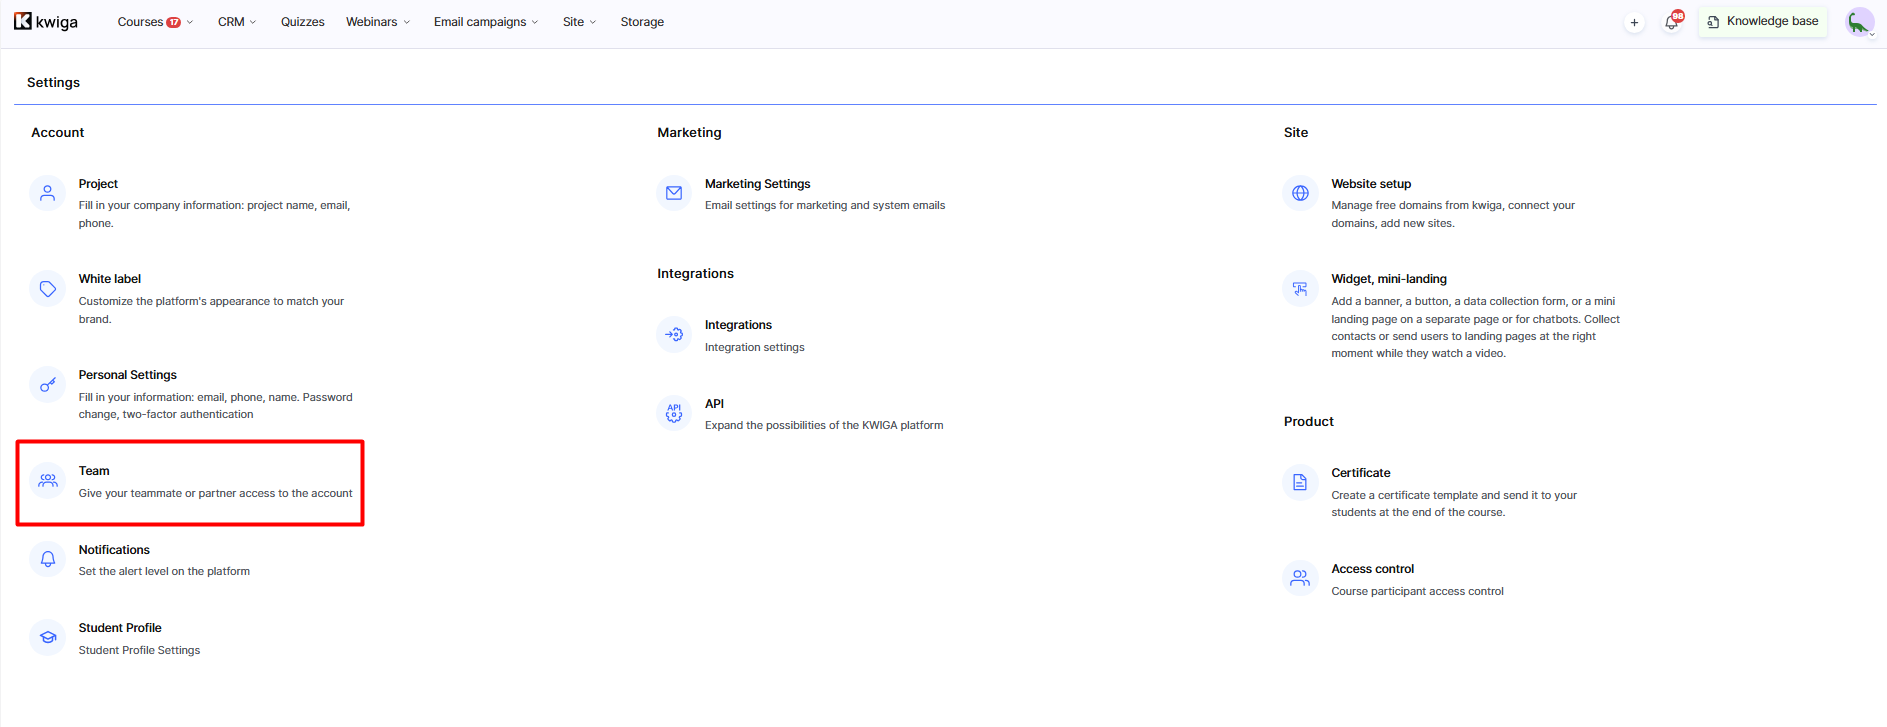
Go to Settings → All settings → Team.
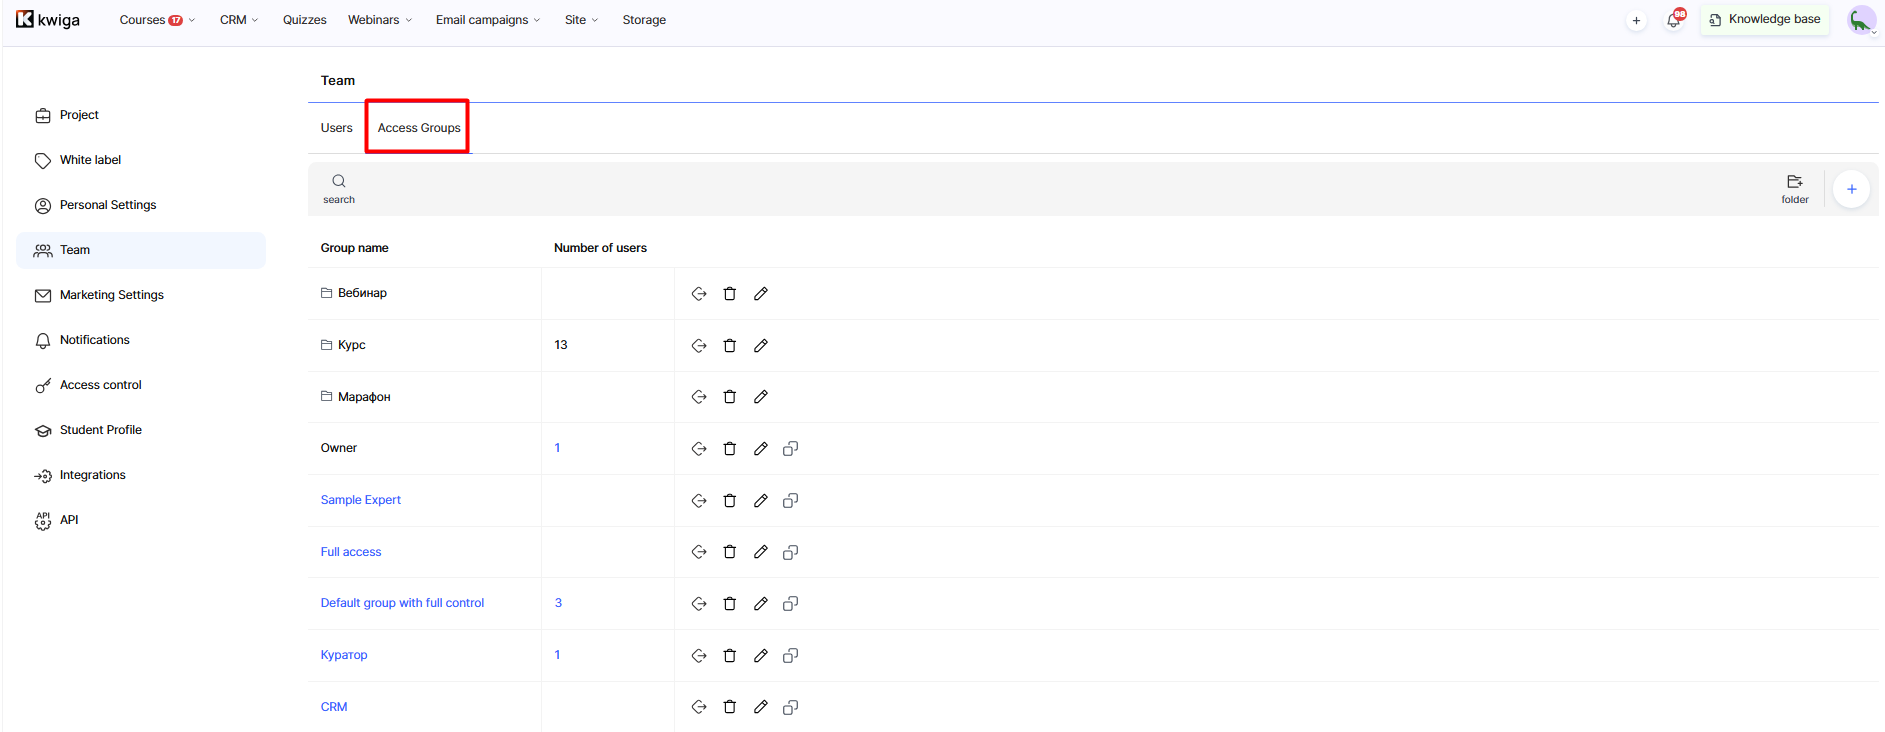
Open the Access groups tab.
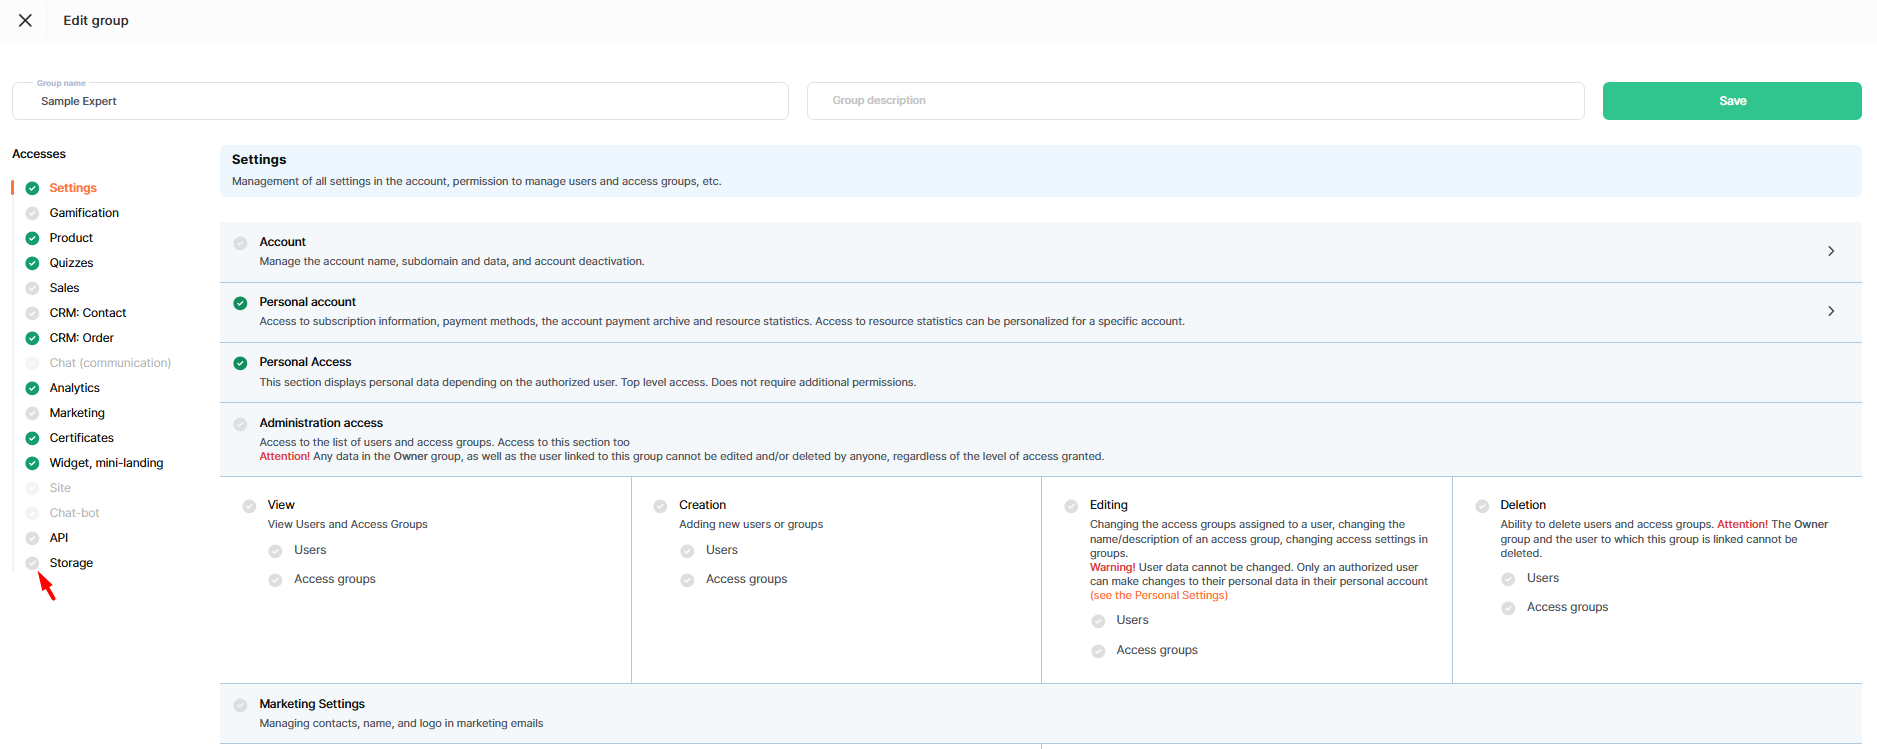
Select the group you need (or create a new one) and open Storage in the access list on the left.
Next to the section name, there's a switch between General access and Custom access.
With General access, the role can access all files and folders in storage according to its selected permissions (view, edit, delete). This works well for roles that need access to all storage, such as a school administrator responsible for materials across all courses.
With Custom access, the role can access only the folders you select, not all storage. Once you enable this mode, a searchable list of all storage folders appears below the permissions, with a checkbox next to each folder.
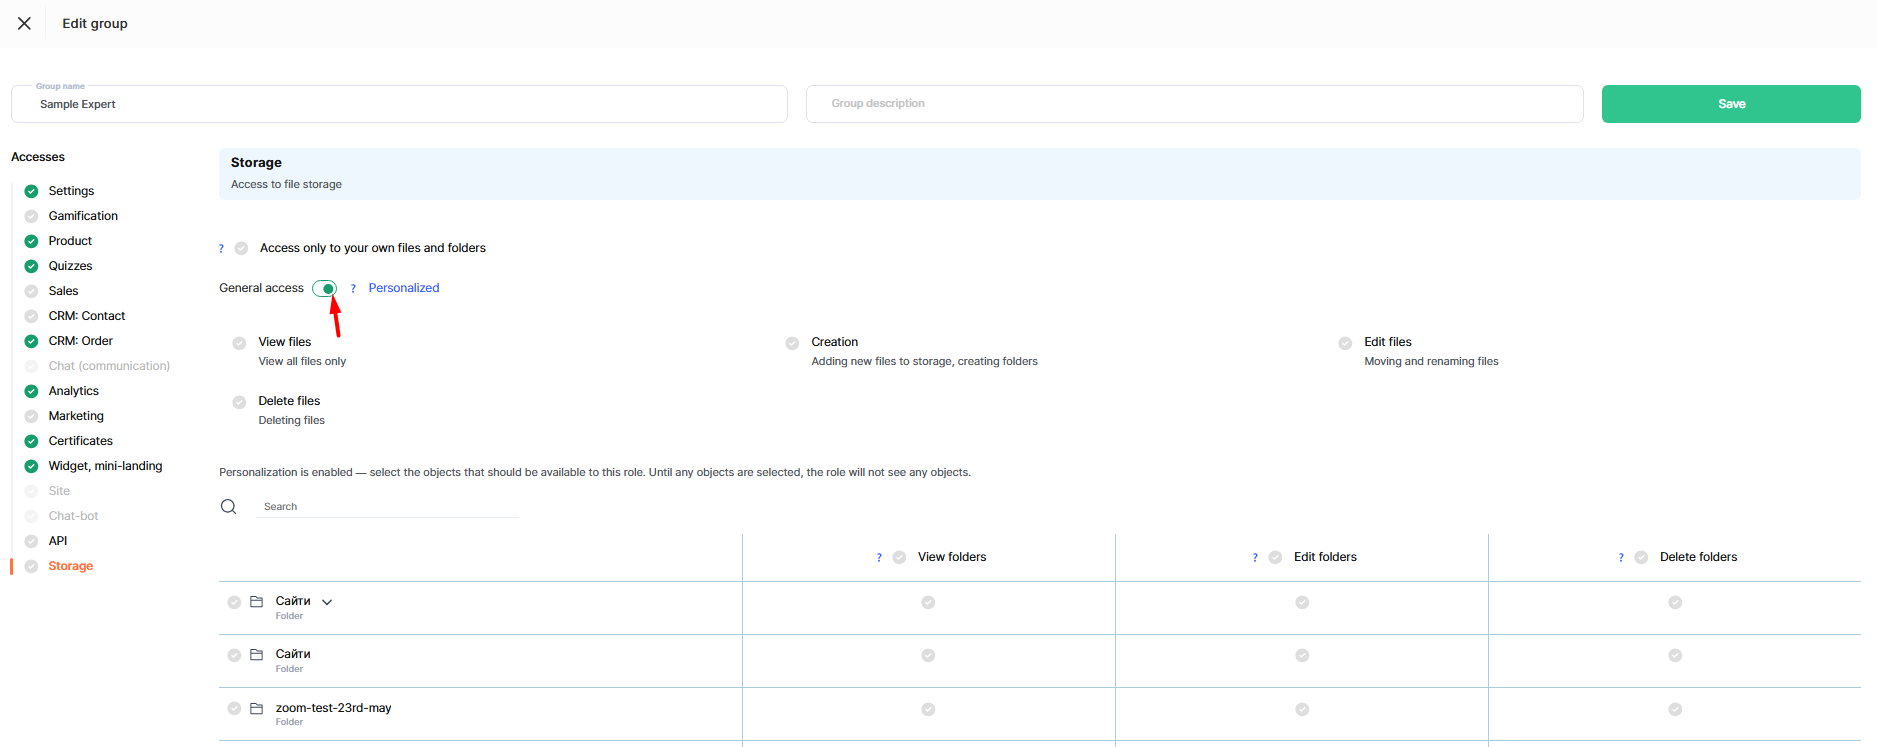
Keep in mind: once you enable custom access, the role cannot see any folders until you select them. Select the folders the team needs right away, such as a course materials folder for that course's assistant.
For files, you can enable View files (view all files only), Edit files (move and rename files), Create (add new files to storage and create folders), and Delete files.
For folders, you can enable View folders, Edit folders and Deleting folders. In Personalized mode, these three permissions are set separately for each folder in the list: you can allow viewing but prevent deletion, or allow editing only in certain folders.
Note: If a team member can see a folder but cannot rename or delete it, this is expected: viewing, editing, and deleting a folder are three separate permissions, and each must be enabled individually.
Access to your own files and folders only
Above the General — Personalized switch, there is another setting: Access to your own files and folders only.
If enabled, users will see only what they uploaded themselves in storage. Files added by other team members will be completely inaccessible to them — even if no individual restrictions have been set for those files.
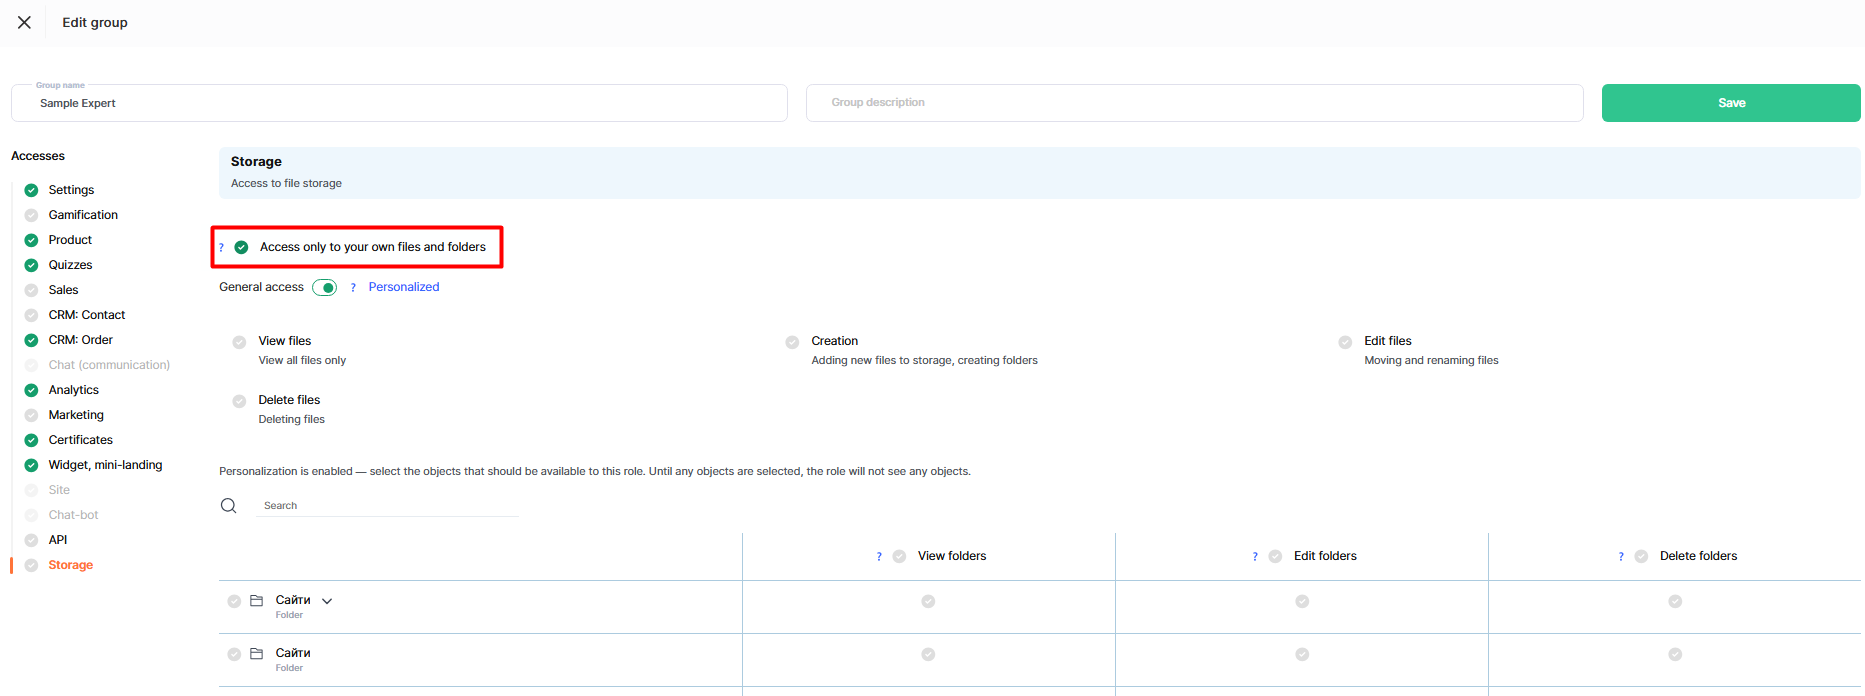
The same applies to folders. In the folder tree, users see only their own folders and the path to their own files; other people's folders are not shown. But seeing a folder and being allowed to manage it are different things: users can rename, move, or delete a folder only if all its contents belong to them. If it contains even one file owned by someone else, these actions are unavailable.
Note: If the platform cannot identify a folder's owner (for example, an old folder with no author specified), the folder is treated as shared: everyone can see it in storage, but no one can rename or delete it.
Important: New folders created after personalized access is configured are not included automatically. If the team needs access to them too, select them separately in the folder list.
Didn't find the answer? Contact the support service via online chat or Telegram