Articles:
- Access control
- How to disable login through social media
- How to set your project logo (preview) for messengers
- Changing the project (cabinet) name and other public settings
- Adding your offer to the Kwiga platform
- How to connect an additional project
- How to set a specific language for a page on Kwiga
- Notifications received by students
- Changing the password and login settings
- Changing personal information
- Sender settings and reply address
- Important settings
- How to delete a user account
- Project (School) Presentation Page
- How to Bind Your Own Domain/Subdomain
- Using variables on the project, list of available variables
- Connecting a Custom Domain (Subdomain) for Sending Emails
- How to Add Public Project Information and Contact Channels
- Student Profile Settings
A detailed guide to creating your own school or project in the shared workspace — from clicking the button to your first login in the new dashboard.
An additional workspace may be needed if you want to isolate a group of products (team / contacts / statistics) or for producers who need to evaluate the effectiveness of launching experts.
Please note: the number of active projects affects pricing. Before creating a new project, check the terms of your pricing plan.
To create a new project:
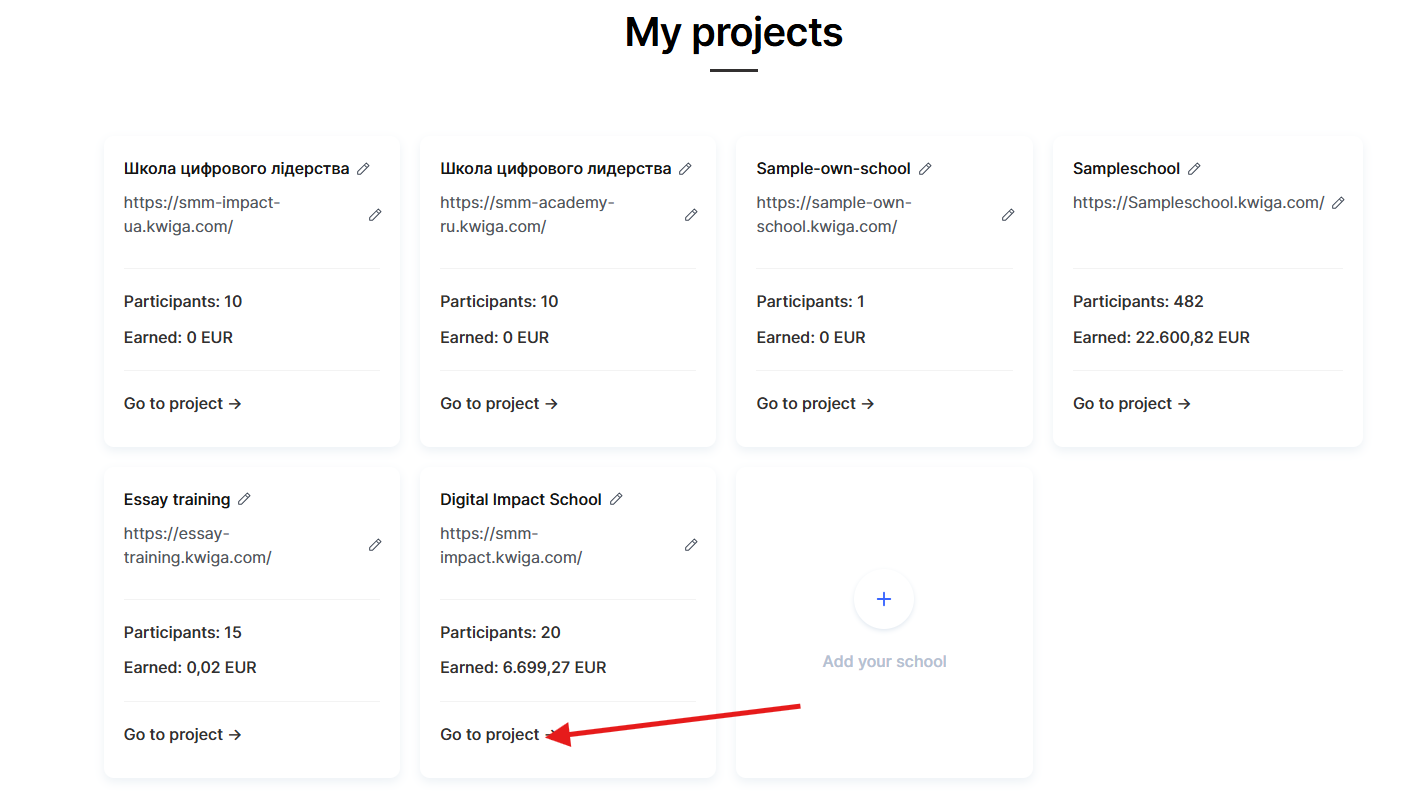
1. Click on the profile avatar in the top-right corner.
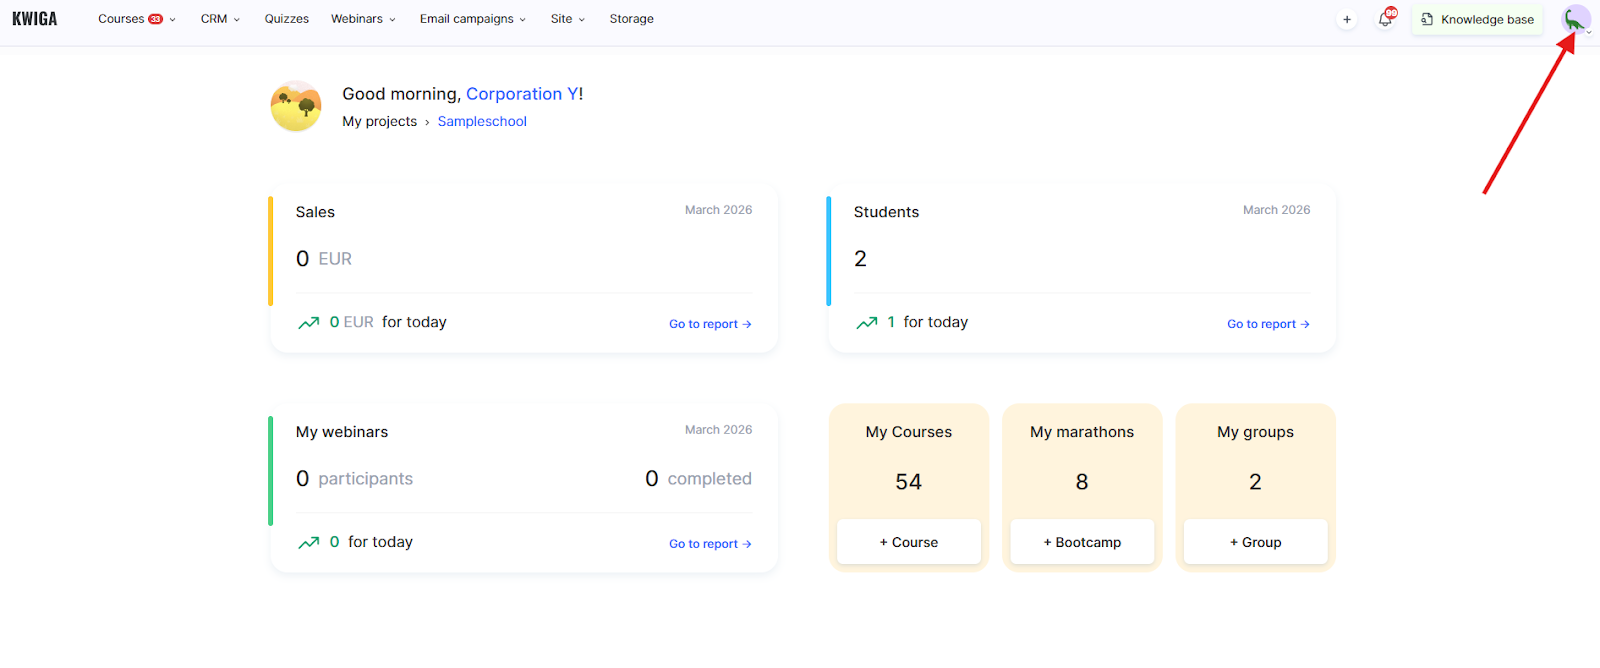
2. Go to Project Management.
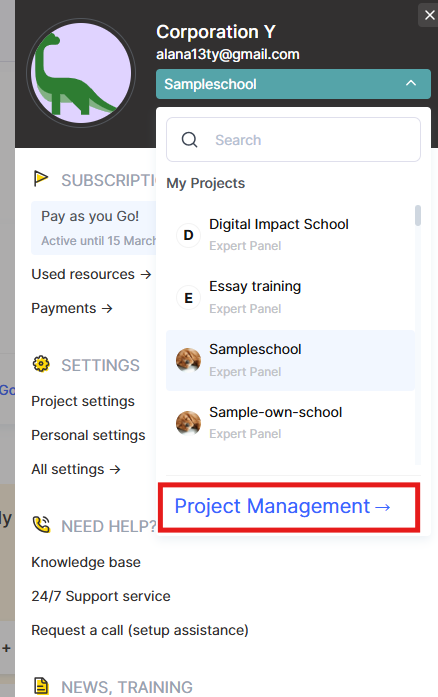
There are two options:
● Create your own school — a new project where you are the owner.

● Add a project to the shared workspace — if you have administrator rights in another user’s workspace, you can create a project there.
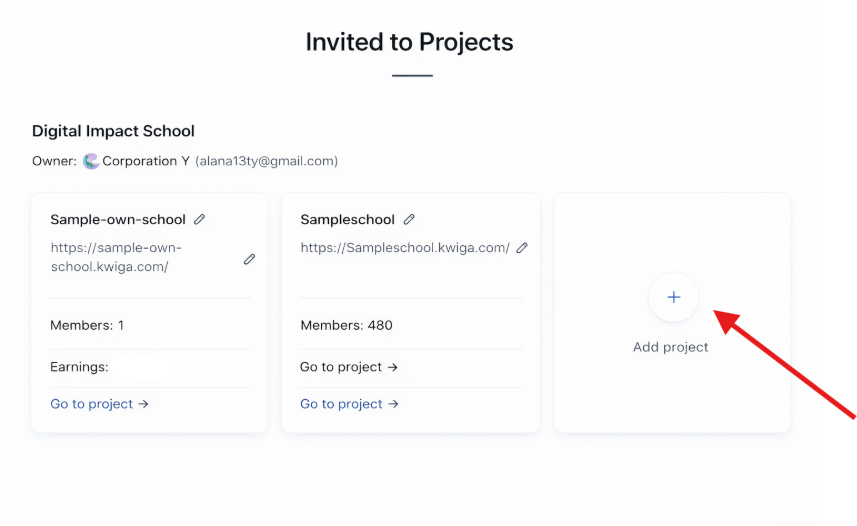
The creation form will open. Depending on the situation, it will appear in one of two formats:
Option 1 — Your own school. Fill in the fields:
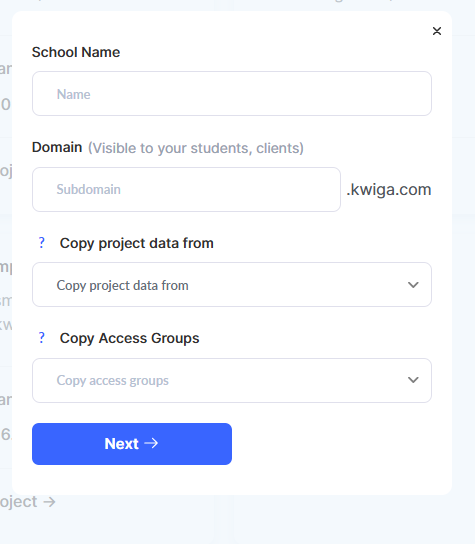
● School name — the internal name of the project.
● Domain — a subdomain in the format name.kwiga.com (this is what your students and clients will see). We recommend thinking about the subdomain in advance. If you change it later, the previous link will stop working. It’s better to set it immediately or at least before adding students.
● Copy project data from (optional) — transfer settings from an existing project.
● Copy access groups (optional) — copy access groups from another project.
Option 2 — Project in a shared workspace. If you have administrator rights in another user’s workspace, the form will contain a warning:
“The project will be created in the shared project workspace owned by: [owner’s name].”
The fields to fill in are the same.
After filling in the fields, click Next →.
After creating the project, configure it according to your needs: add your team, define access groups, and check the domain before you start working with students.
You can switch between projects through Project Management as well.
Didn't find the answer? Contact the support service via online chat or Telegram