Articles:
- Access control
- How to disable login through social media
- How to set your project logo (preview) for messengers
- Changing the project (cabinet) name and other public settings
- Adding your offer to the Kwiga platform
- How to connect an additional project
- How to set a specific language for a page on Kwiga
- Notifications received by students
- Changing the password and login settings
- Changing personal information
- Sender settings and reply address
- Important settings
- How to delete a user account
- Project (School) Presentation Page
- How to Bind Your Own Domain/Subdomain
- Using variables on the project, list of available variables
- Connecting a Custom Domain (Subdomain) for Sending Emails
- How to Add Public Project Information and Contact Channels
- Student Profile Settings
Learn how to connect a custom domain or subdomain to your Kwiga project. Understand the key steps, what to choose, and important setup considerations.
In this article:
When creating a project on the Kwiga platform, you automatically get a dedicated address for your project, in the format: some_name.kwiga.com. You can change the first part (subdomain) at any time in the settings of your dashboard. You can also bind your own domain or subdomain, which will remove "kwiga.com" from your project’s address.
Why Connect Your Own Domain or Subdomain?
Connecting your own domain or subdomain to a project on Kwiga is an important step toward building a professional online presence. Instead of using the standard address like yourproject.kwiga.com, you can use a beautiful and memorable address tied to your brand, such as myschool.com or online.myschool.com. This increases trust among visitors, improves recognition, and makes your project more solid and memorable. A custom address signals professionalism and encourages greater loyalty from clients.
What You Need to Prepare in Advance
Before you start binding the domain, make sure you have:
-
A registered domain with an external registrar (for example, https://www.ukraine.com.ua/, https://www.godaddy.com/ etc.)
-
Access to the domain management panel (personal account with the registrar)
-
An active project or school on the Kwiga platform
-
Patience — DNS record updates can take anywhere from several hours to 24/72 hours. The update time depends on the registrar and is beyond the control of both the registrar and the platform.
Choice: Domain or Subdomain?
The choice between a domain and a subdomain depends on the structure of your business and goals:
-
Domain (myschool.com) — ideal if you are launching a primary school or brand from scratch and want the entire website to open under a beautiful address.
-
Subdomain (course.myschool.com, blog.myschool.com) — useful if you already have a main website and want to launch an online school as a separate direction or project.
-
You want to clearly separate different projects or products while maintaining a unified "brand umbrella" (for example, courses.mysite.com for courses, blog.mysite.com for a blog).
-
You plan to launch different online schools or directions under one main domain, making it easier to manage them from a central point.
-
If you are using separate landing pages that are not created on the platform, it is likely better to use a subdomain for connecting to the platform.
Step-by-Step Instructions for Binding a Domain
-
Open your project in the Kwiga personal dashboard.
-
In the menu, select Website, then click Connect Domain.

Click on the Bind Domain button, in the window that opens, select your domain and enter your domain address, then click the Next button.


After that, you will see the settings that need to be applied on the registrar's website. The interface of each registrar differs, and you can check with the support of your chosen registrar for how to input the necessary data. After you enter the specified records, click the Confirm button.
Note! The settings shown in the screenshot below are for a test account. Do not copy them from the screenshot in this article!
Once you have configured everything, it may take some time for the DNS to update — about 24 hours, and for some registrars, up to 72 hours. You can check with the support of your chosen registrar for the exact time required in your case.

Binding a Subdomain
Open your project in the Kwiga personal dashboard. In the menu, select Website, then click Connect Domain.
Click the Bind Domain button, in the window that opens, select your domain and enter your domain address, then click the Next button.
Fill in the domain and subdomain. Please note, in the Subdomain Name field, you should only enter the subdomain name, not the full address. The screenshot below shows an example for the case when the subdomain courses.smartclass.com.ua is being bound.


After that, you will see the settings that need to be applied on the registrar's website. The interface of each registrar differs, and you can check with the support of your chosen registrar for how to input the necessary data. After you enter the specified records, click the Confirm button.
Note! The settings shown in the screenshot below are for a test account. Do not copy them from the screenshot in this article!
Once you have configured everything, it may take some time for the DNS to update — about 24 hours, and for some registrars, up to 72 hours. You can check with the support of your chosen registrar for the exact time required in your case.

Changing the Linked Domain Address
If you are already using your own domain (or subdomain) and decide to replace it with another one, follow these steps in the given order to maintain the functionality of all links for your students:
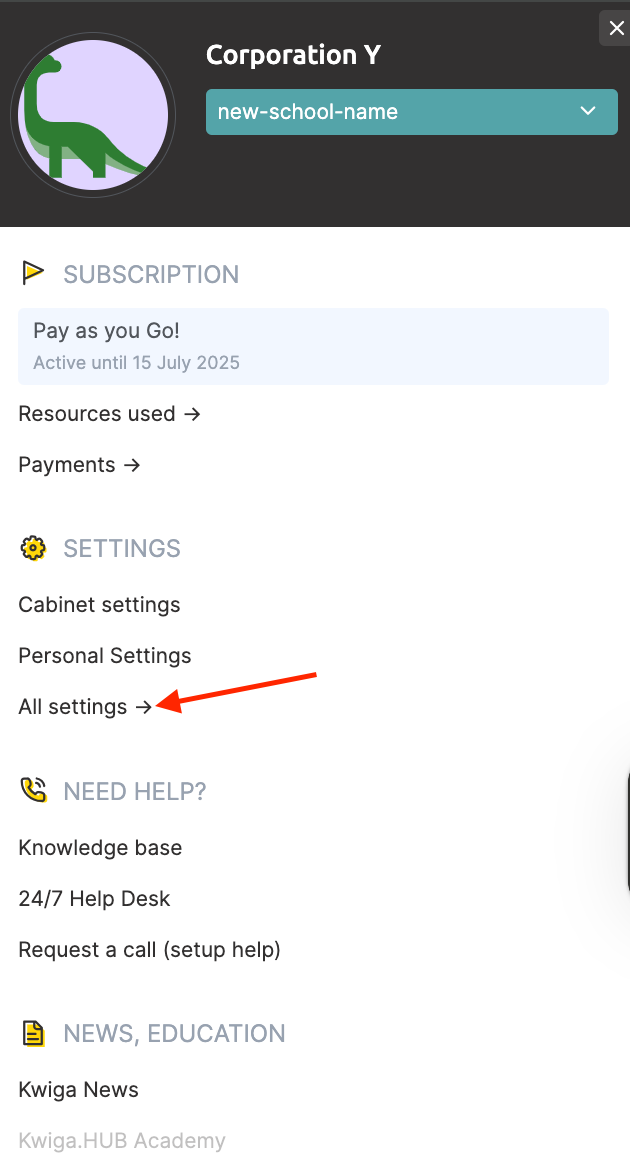
-
Open Settings → All Settings:
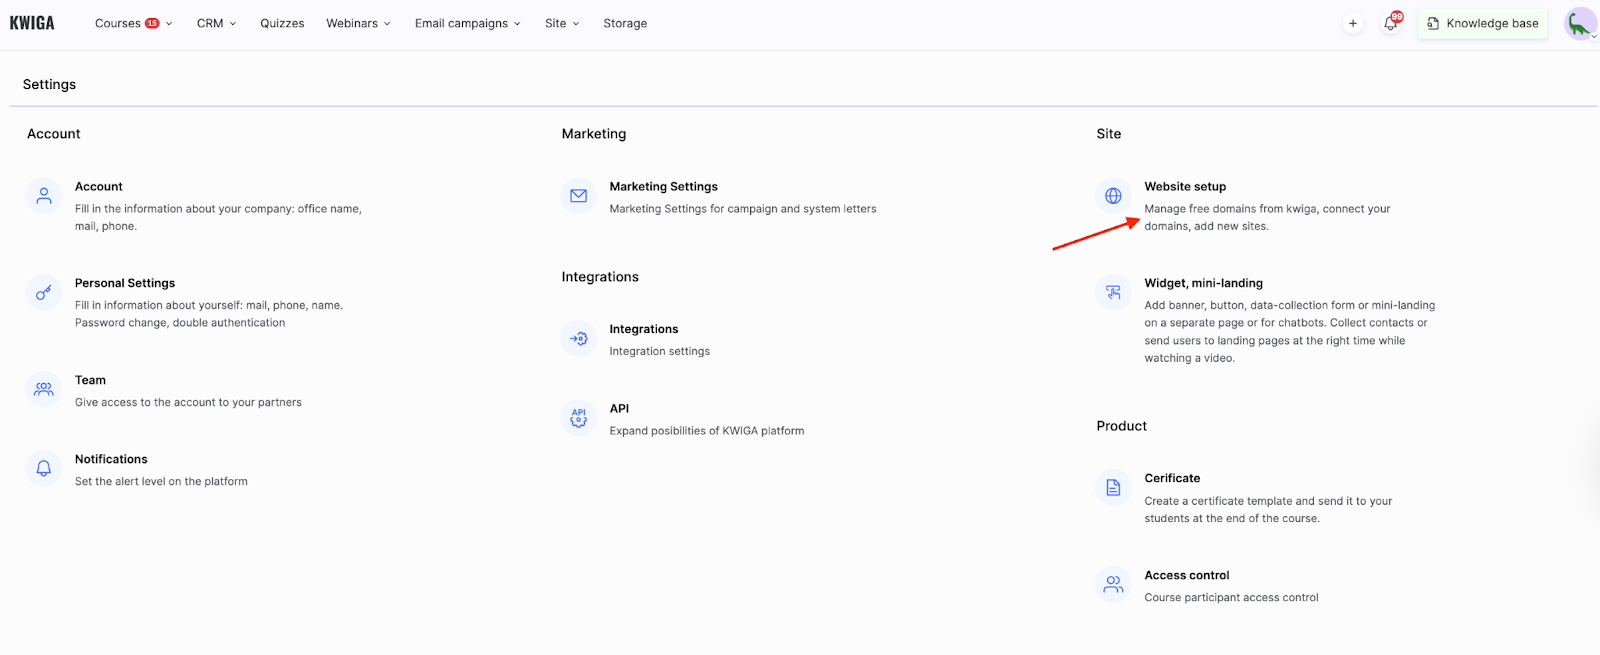
And select Site Settings:
-
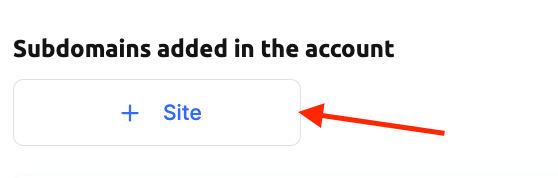
Add a new site using the +Site button:
-
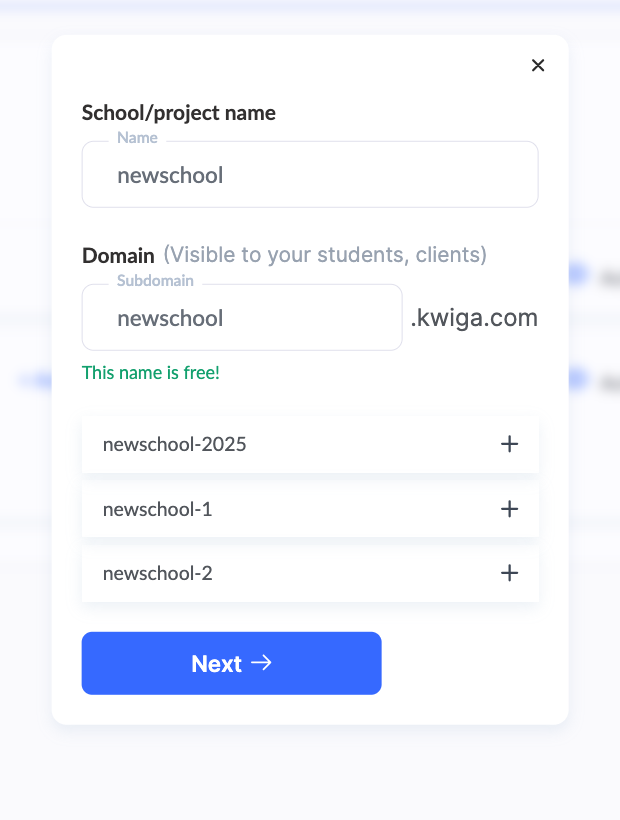
Enter the new name and specify the new domain on Kwiga. You can either use a new subdomain on Kwiga.com or connect your own domain/subdomain to the new site.
If you plan to use a new custom domain/subdomain, link the domain (steps are described above in the Step-by-Step Guide to Linking a Domain section).
-
Once the new domain is created and activated (if you linked your own domain, activation may take up to 24 hours), mark the new site as the Default Site. This automatically redirects students who open "old" links to the new address.
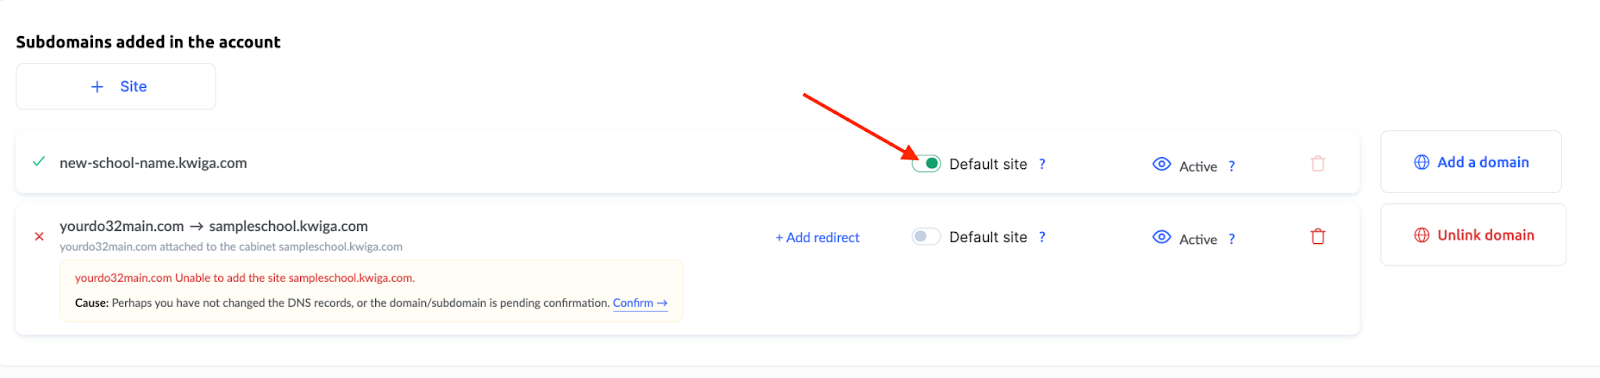
If you use a Kwiga subdomain for the new site (i.e., you did NOT connect your domain/subdomain), students will not need to log in again at the new address. However, students must log in at the new address if you connected your domain. If they access the product from their main profile on the platform, they will be logged in automatically when redirected.
Didn't find the answer? Contact the support service via online chat or Telegram