Články:
- Objednávky: vytváření a úprava objednávek
- Jak přidám individuální platební odkaz studentovi
- Transakce
- Jak nastavit odesílání vlastního e-mailu po nákupu
- Integration with the Sendpulse chatbot
- How to integrate a payment system on Kwiga
- Jak nastavit konkrétní jazyk pro stránku nabídky
- Important Project Settings
- Jak udělit přístup studentům, pokud prodej neproběhl přes Kwiga
- Platba bez autorizace
- Jak vytvořit nový stream s vlastním rozvrhem
- Jak udělit přístup jednomu studentovi
- Jak změnit přístup pro jednoho studenta
- Jak nastavit demo přístup ke kurzu, den otevřených dveří ve škole
- Nastavení předplatného (opakované platby)
- Automatizace: Následné e-mailové sekvence (nezaplacené objednávky a přihlášky)
- Kredity a splátky, platba po částech
- Propagační nabídka
- Slevové kupóny a možné nastavení
- Jak spustit registraci na kurz s předplatbou
- Jak vytvořit nabídky křížového prodeje v Kwiga
- Jak začít prodávat na Kwiga: vytvoření cenového plánu
- Vytváření více cenových plánů
- Prodej konzultací a individuálních sezení
- Jak změnit plán studenta (Dodatečná platba na Kwiga)
- Jak prodávat (poskytovat přístup k) části kurzu
- Jak implementovat prodej obnovení přístupu
- Prodej prostřednictvím registračního formuláře na webu třetí strany
- Selling through a mini-landing page created on Kwiga
- Jak přidat video na stránku (mini-landing page, stránka kurzu)
- Jak vytvořit odkaz s uplatněným kupónem
- Nabídky a platby na Kwiga: Jak to funguje
- Opakovaný prodej: nastavení podmínek a odeslání kupónu na základě počtu nákupů
- Nastavení oznámení v kanálu Telegram
- Odesílání e-mailů s promo kódy (neuhrazené objednávky)
- Obchod s kurzy: Nastavení a možnosti
- Nastavení stránky veřejné nabídky
- Organizace CPD na Kwiga: průvodce krok za krokem
- Jak nastavit děkovací stránku po platbě
- Nastavte přístup k lekcím, sekcím a modulům
The article outlines the key parameters that need to be checked and configured before launching.
V tomto článku:
Before launching a course or bootcamp and inviting your first student, we recommend verifying the following settings in your project:
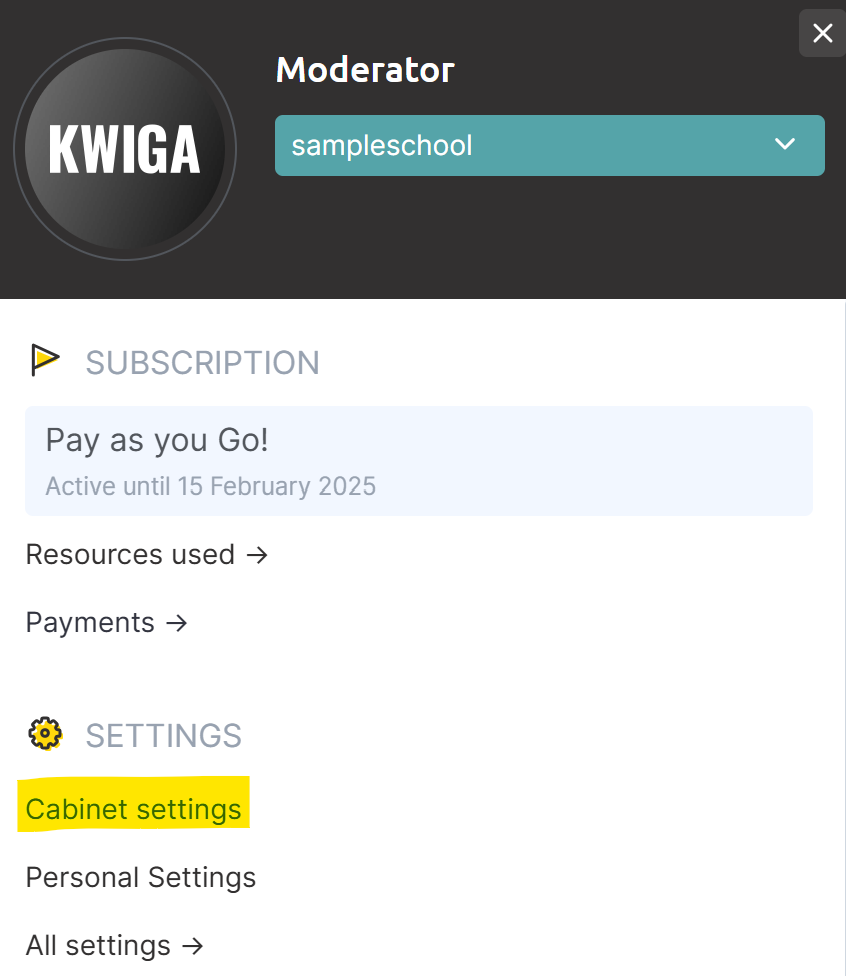
Name and Cabinet Address
Click on the avatar and select the cabinet settings option:
On the page that opens, check the account name and address:
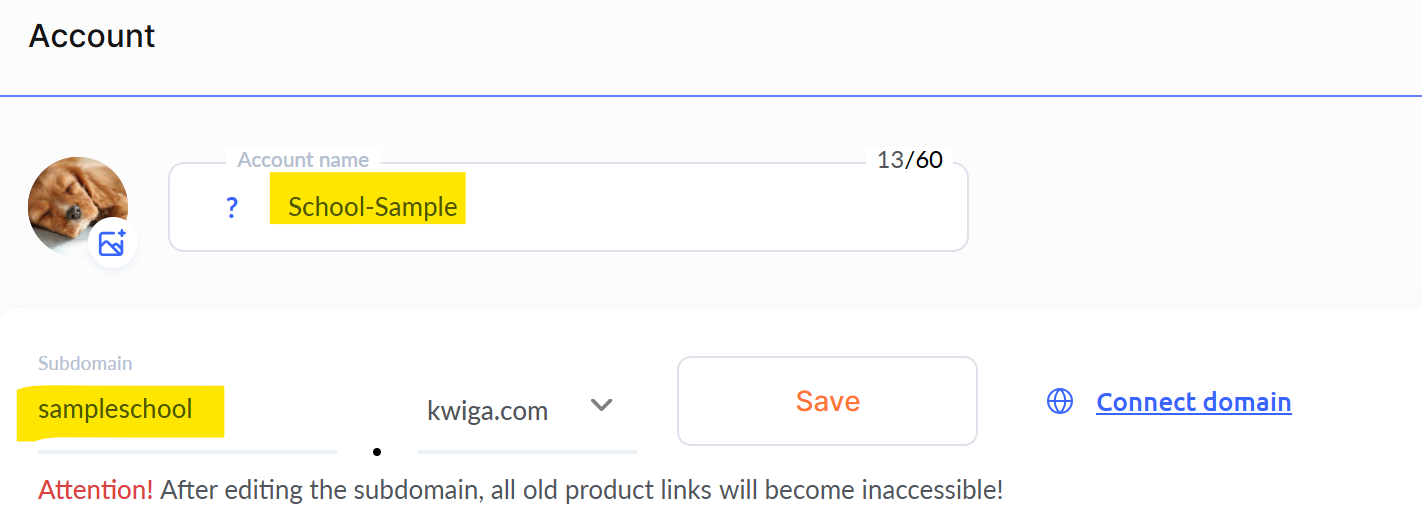
If you plan to use your own domain/subdomain, it is advisable to do so in advance, as changes may take up to 24 hours to take effect. This period is typical for major registrators and cannot be expedited. During the domain/subdomain linking process, your students will not be able to access the course, so it is essential to complete this step before launch.
Marketing Settings
Marketing settings include the logo displayed in emails, the sender's name, and footer information. It is important to ensure these fields are filled out before starting sales or granting access. Additionally, you can set the language for emails: it can be a specific language or one that matches the student's interface language.
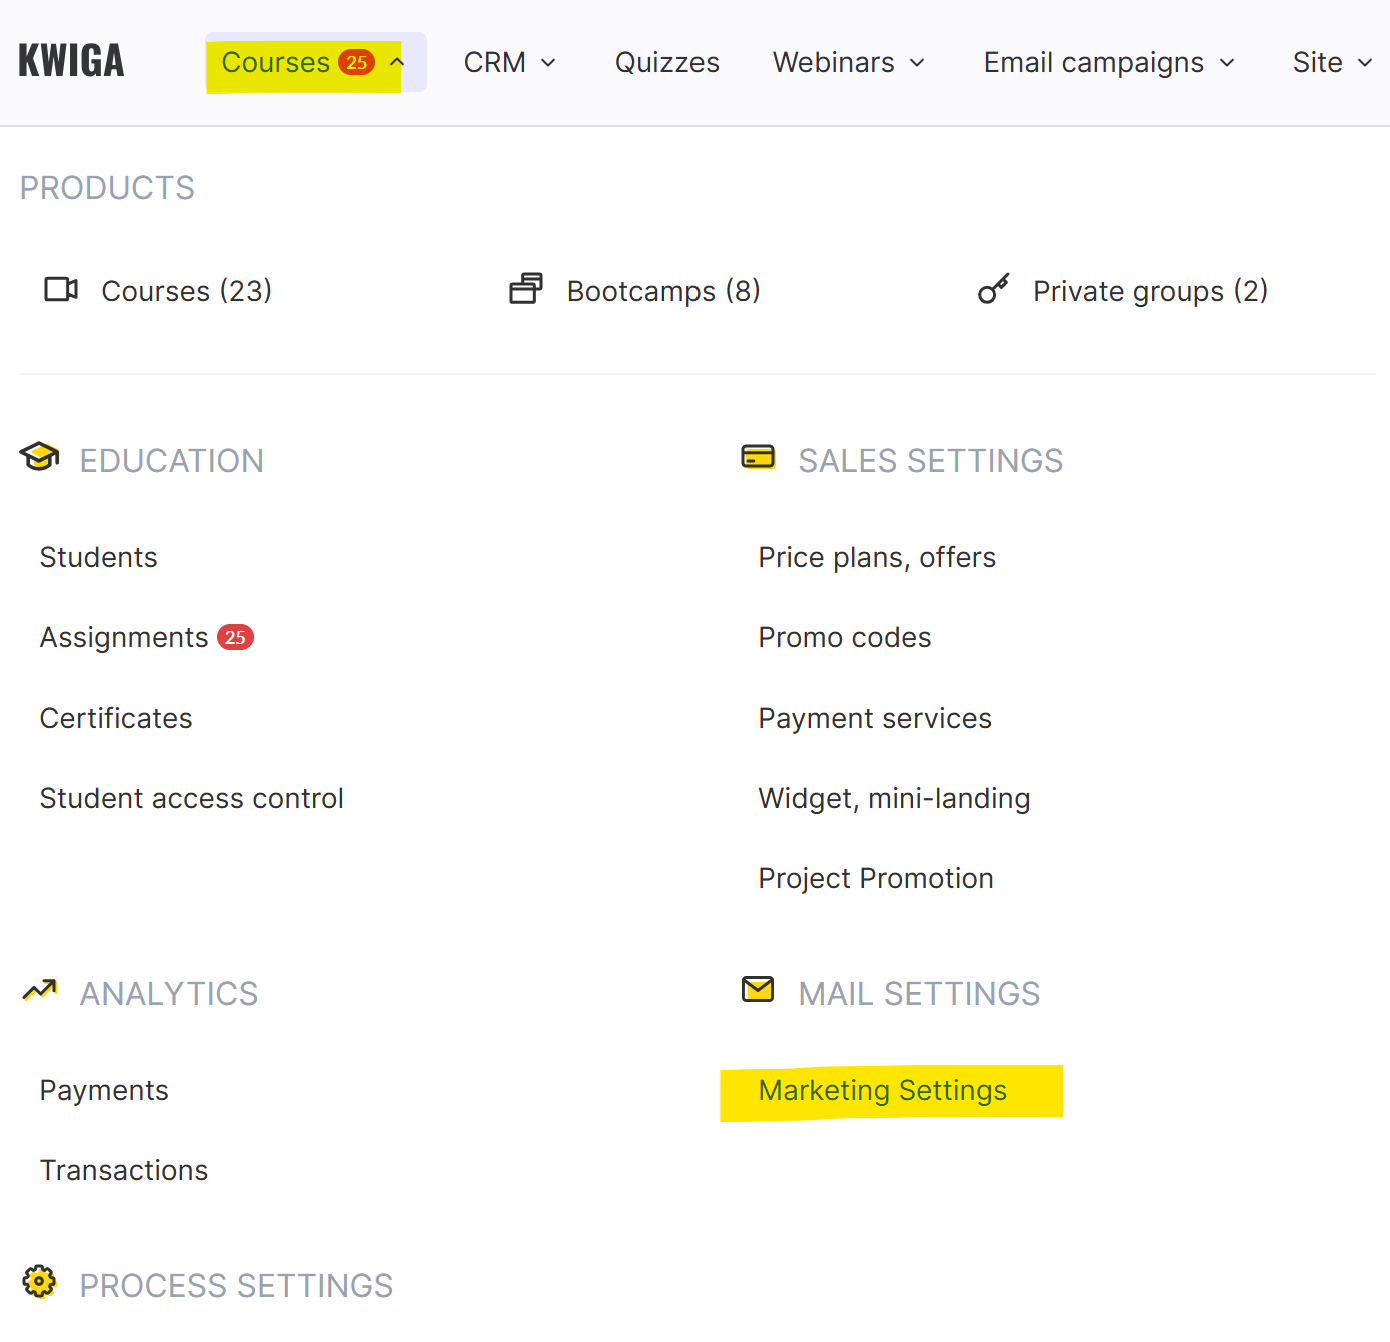
In the top menu, select Courses, then go to Marketing Settings:
In the "From Name" field, you can specify your name or the name of your school/project. This name will appear as the sender.
If you want to receive replies from students to your emails, it is recommended to enter the address where responses should be directed in the "Reply-to Address" field. The default value shown in your settings is a technical address, not monitored by support.
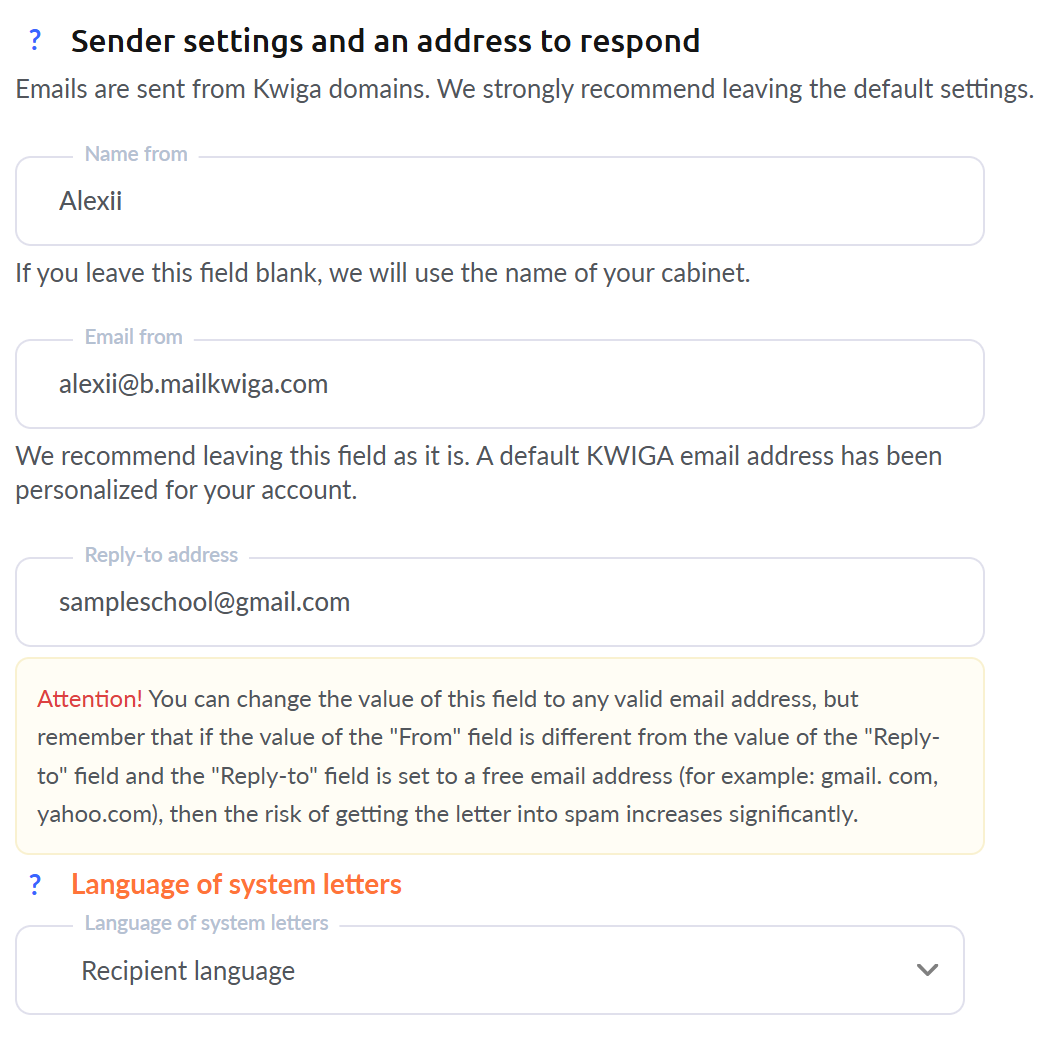
The contact information in emails includes details about the school or course author. You can fill this in multiple languages or just one, and use that language across all emails.
Full Address — this is the postal address of the school. You can enter only the country or the full legal address of a sole proprietor.
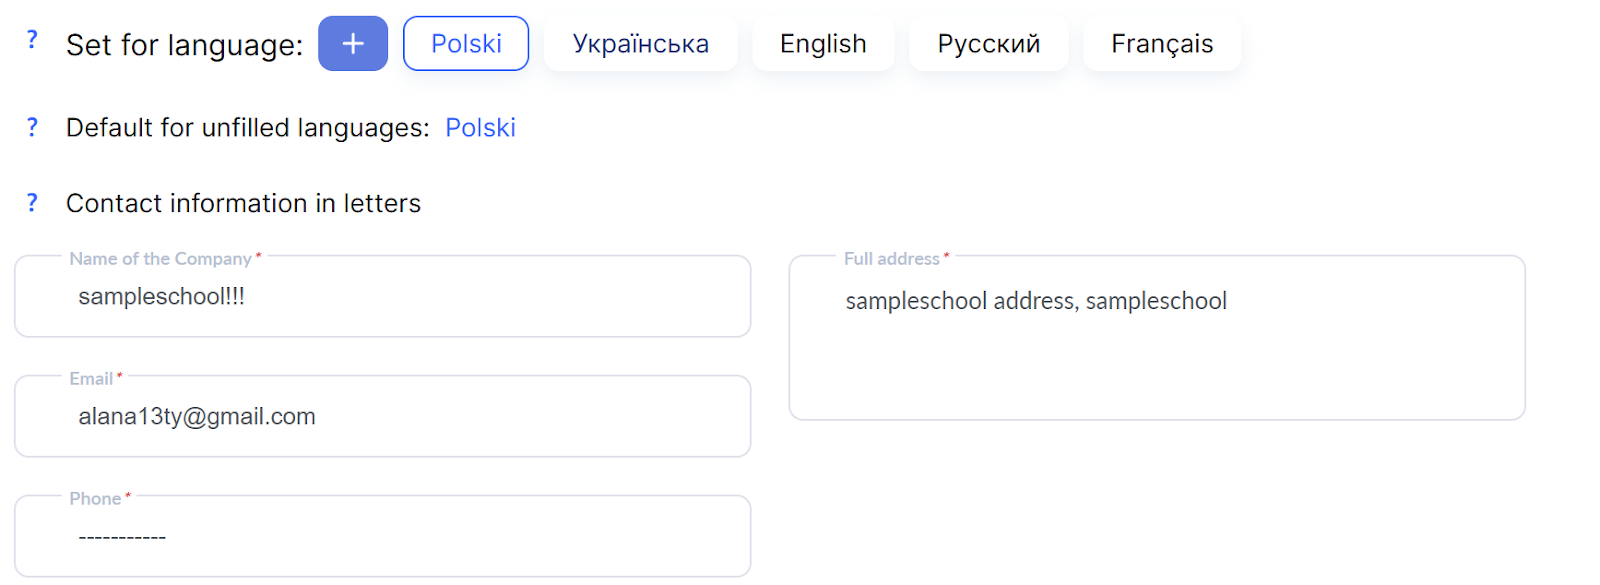
Logo — the uploaded image will be automatically added to emails.
Контроль доступов
Access Control
To enhance material protection and reduce the risk of pass-sharing (when clients share their login credentials with others), it is recommended to limit the number of devices that can access your courses. For more details about how this works and the necessary settings, read the article Access Control.
Nenašli jste odpověď? Kontaktujte podporu prostřednictvím online chatu nebo Telegram