Articles:
- Access control
- How to disable login through social media
- How to set your project logo (preview) for messengers
- Changing the project (cabinet) name and other public settings
- Adding your offer to the Kwiga platform
- How to connect an additional project
- How to set a specific language for a page on Kwiga
- Notifications received by students
- Changing the password and login settings
- Changing personal information
- Sender settings and reply address
- Important settings
- How to delete a user account
- Project (School) Presentation Page
- How to Bind Your Own Domain/Subdomain
- Using variables on the project, list of available variables
- Connecting a Custom Domain (Subdomain) for Sending Emails
- How to Add Public Project Information and Contact Channels
- Student Profile Settings
Adapt the platform to your school’s needs with flexible profile settings and interface personalization.
In this article:
Student profile settings allow you to organize the interface so that it best matches the habits and needs of a specific audience, taking into account every detail—from participant age to the specifics of educational programs.
When a student can easily find the right courses, quickly navigate tasks, and doesn’t waste time searching for certificates, they can focus on the main goal—gaining knowledge.
To access the settings, click on the avatar, select All Settings, and then Student Profile. Four main sections are available here to personalize the learning process.

1. Where to redirect participants after logging in
By default, after logging in, a participant lands on the homepage (Dashboard). However, administrators can configure the system so that they are redirected to another section.
When logging in via the school’s presentation page, three options are available: stay on the current page, go to the Dashboard, or open the Actively Learning section.

When a participant switches between different schools in the system, it is possible to set the redirect either to the Dashboard or to Actively Learning.

Important note: if a participant logs in directly from a course or lesson page, they will remain there regardless of redirect settings.
2. Settings for the Actively Learning and Completed sections
In the student’s profile, there are three types of learning products: courses (marathons), webinars, and private groups.
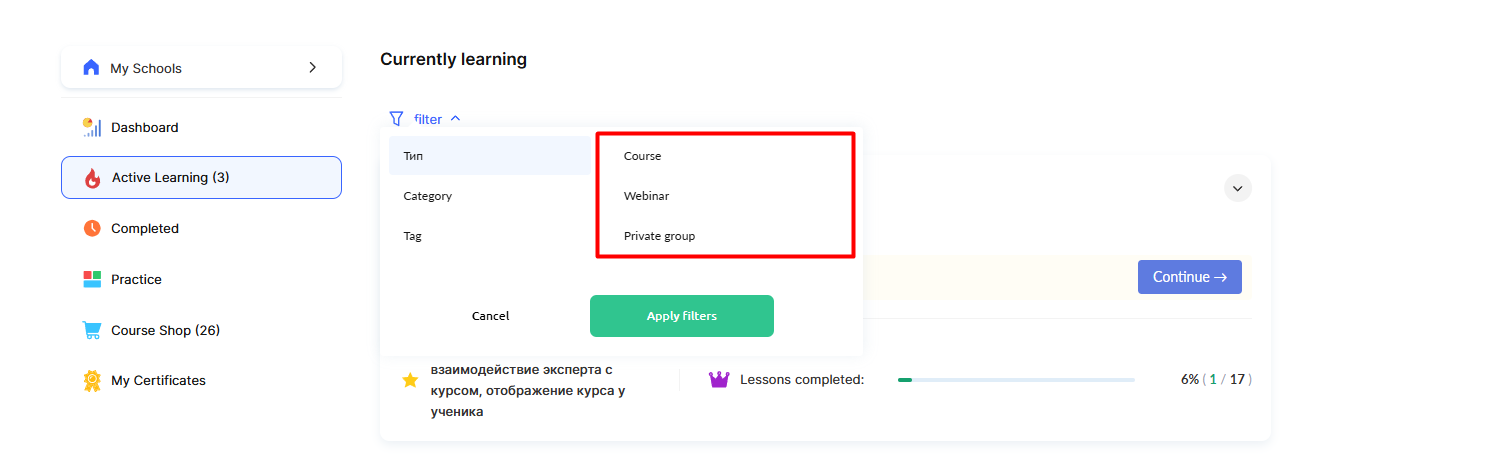
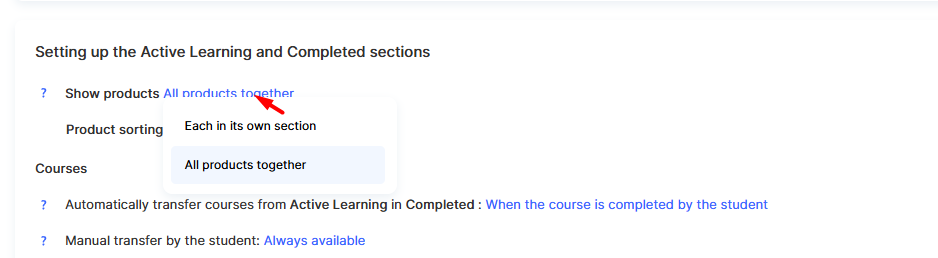
You can choose one of two display options:
Each in its own section — products of each type are shown in separate sections: courses (marathons), webinars, and private groups. This enables students to navigate various types of learning content easily.
All products together — all products are shown in a single section, regardless of their type, without separate tabs. When this option is selected, an additional sorting setting becomes available.
When the “together” display is selected, you can set the sorting order:
-
By purchase date (newest first) — products are sorted by the time of purchase, with the newest displayed first.
-
By access start date (newest first) — products are sorted by the start date of access, with the most recent ones displayed first.
Each type of product has its own logic for moving between the Actively Learning and Completed sections.
Courses
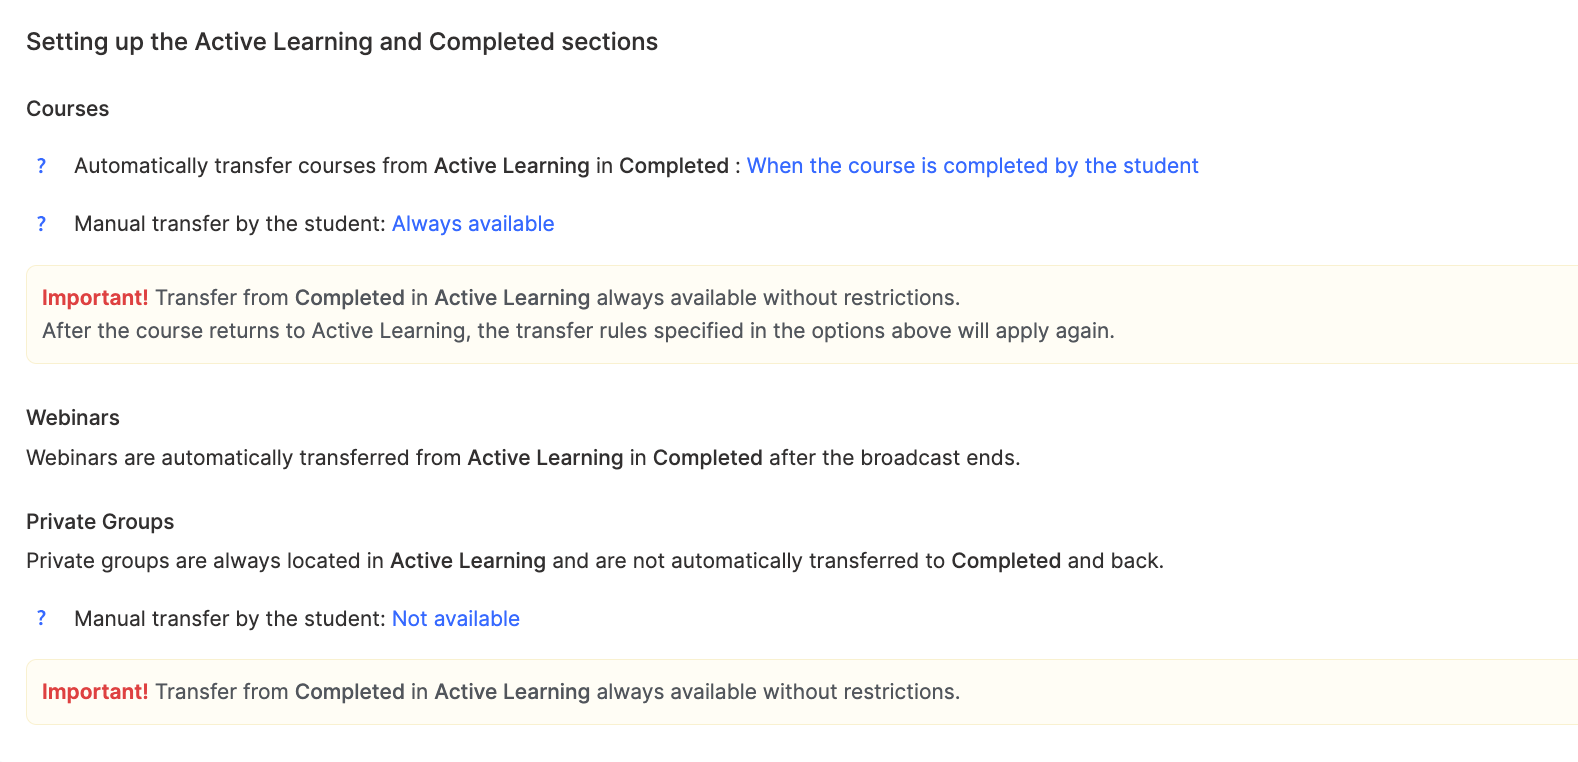
Courses can automatically move to Completed in three scenarios:
-
After the course is fully completed, when the participant has watched all videos, studied materials, and completed practical assignments.
-
When the course access expires according to the schedule.
-
All courses remain in the Actively Learning section without automatic transfer.
Additionally, a self-transfer feature can be enabled, allowing participants to decide which courses to move between sections from their profile, using the Move button.

Webinars
Webinars follow a simpler logic—they automatically move to Completed immediately after the broadcast ends. This makes it easy to distinguish between ongoing and past events.
Private Groups
By default, private groups always remain in Actively Learning. However, if the self-transfer feature is enabled, participants can manage their placement via their profile.
Useful feature: from the Completed section, any material can always be moved back to Actively Learning without restrictions.
3. Homepage (Dashboard) Settings
The Dashboard in a participant’s profile consists of information blocks that display different aspects of their learning process.

Administrators can manage the visibility of these blocks in Profile Settings → Dashboard Section Settings using the eye icon, and they can change the order by dragging and dropping blocks.

Status Block – Displays the participant’s current level or rank in the system. It appears only if gamification with statuses is enabled and can be completely disabled in the relevant section.
Actively Learning Block – Provides quick access to all courses, webinars, and groups the participant is currently studying. It’s a convenient way to continue learning from where they left off.
Completed Materials Section – Shows the participant’s learning progress, displaying all completed courses and events. It motivates learners and gives them a way to revisit previously studied content.
Rating Block – Shows the participant’s position among others, but only if they are part of at least one ranking. This block is managed through the gamification section.
Competitions Block – Displays active contests and tournaments the participant is involved in. It appears automatically when their ranking is included in competitions.
Current Quizzes – Tasks are organized in a clear order: first, those awaiting review, then unstarted tasks, tasks with errors, and finally completed ones. This helps structure practical work efficiently.
Achievements Block – Displays earned rewards and badges. It’s only active when the reward system is enabled and can be turned off entirely in gamification settings.
Certificates – Certificates are always available on the Dashboard, providing constant access to all documents received for completed courses and educational programs.
4. Student Profile Menu Settings
The navigation menu on the left side of the profile can be customized to fit the specifics of a school. The platform allows changes to both the names of menu items and their order.

To change menu item names, use the Edit Menu Item Names button. Here, you can adjust names for each language version of the site separately. For example, instead of the standard Actively Learning, you could set My Courses or Current Learning to better match the school’s communication style.

The sorting and visibility management function allows you to rearrange menu items by dragging and dropping, and control their visibility using the eye icon. Settings are split between the desktop version (screens 1050px and wider) and the mobile version (screens under 1050px). This separation optimizes navigation for different devices. For example, on mobile phones, you can keep fewer menu items for simplicity, while on computers, you can display a more detailed navigation menu.
All these settings work together to create a comfortable and personalized learning environment tailored to the needs of each school and its participants.
Folder display settings
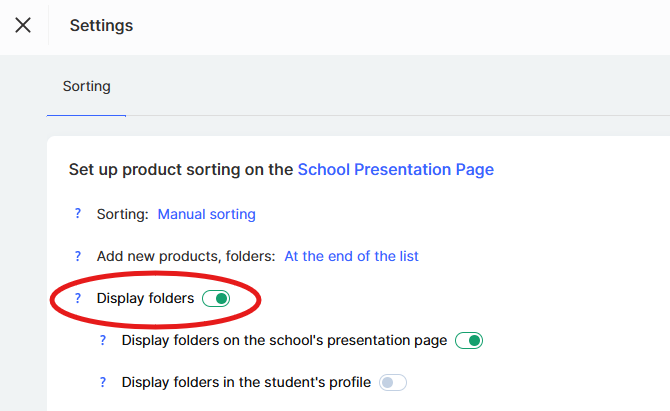
If you already have folders and want to configure how they appear on the project page or in the student’s dashboard, open the page with all courses (or marathons).
To do this, go to the Courses menu and navigate to one of the sections in the Products block — for example, Courses — then open Settings.

You’ll be able to decide whether to display the folders and whether to show them on the school’s presentation page using the corresponding toggle switches.
Below is a list of folders where you can adjust individual settings for each one.
If you’ve enabled folder display on the school’s presentation page, you’ll have the option to hide any of them.
Depending on the selected settings, the icon will change — this helps you quickly navigate, and a tooltip will appear when hovering over it to show which folders are visible to students and which are hidden.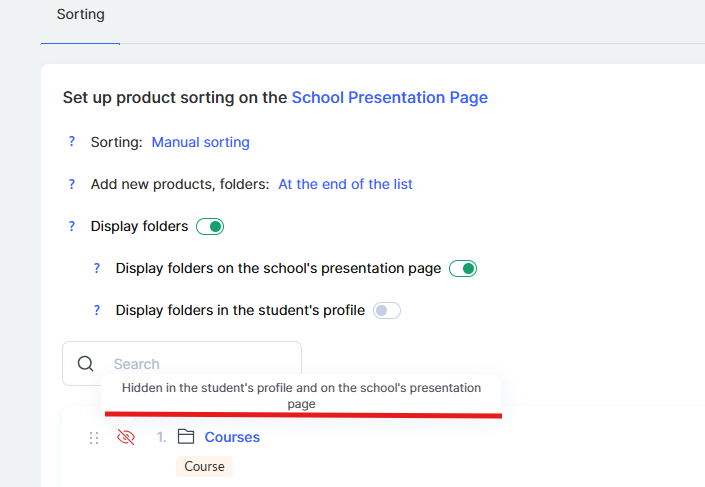
Customization of folder appearance
This feature is currently under development, so it’s not yet possible to customize the appearance of folders.
Didn't find the answer? Contact the support service via online chat or Telegram