Articles:
- How to give access to the course
- How your course is seen by your students
- How to Learn on the Kwiga Platform (Guide for Students)
- How to access a student's account
- How to see the progress of participants
- How to create a certificate
- Automation: Awarding points upon completing lessons
- Conducting surveys (reactions, ratings, NPS)
- How to view all test attempts
- How to set up a test retake
- How to update a student's rate and keep their progress
- How to change access settings for a single student
- How to change the expiration date of the course
- How to extend access to the course
- The student entered wrong email
- Automation: Setting up reminders if a student does not log into the platform
- How to unblock a user
- How to "freeze" access to a course
- How to find an email with a code needed to access Kwiga account
- Viewing the course as a student
- Pre-registration or waiting list.
- Importing and transferring the student database
On this page, you will understand how to quickly transfer existing contacts, students, and even students' current progress from another platform to KWIGA.
In this article:
Course Import
If you already have a list of students that need to be added to a specific course, you can do this using bulk import.
Uploading a File and Configuring Import
-
Open the Courses section and navigate to the desired course.
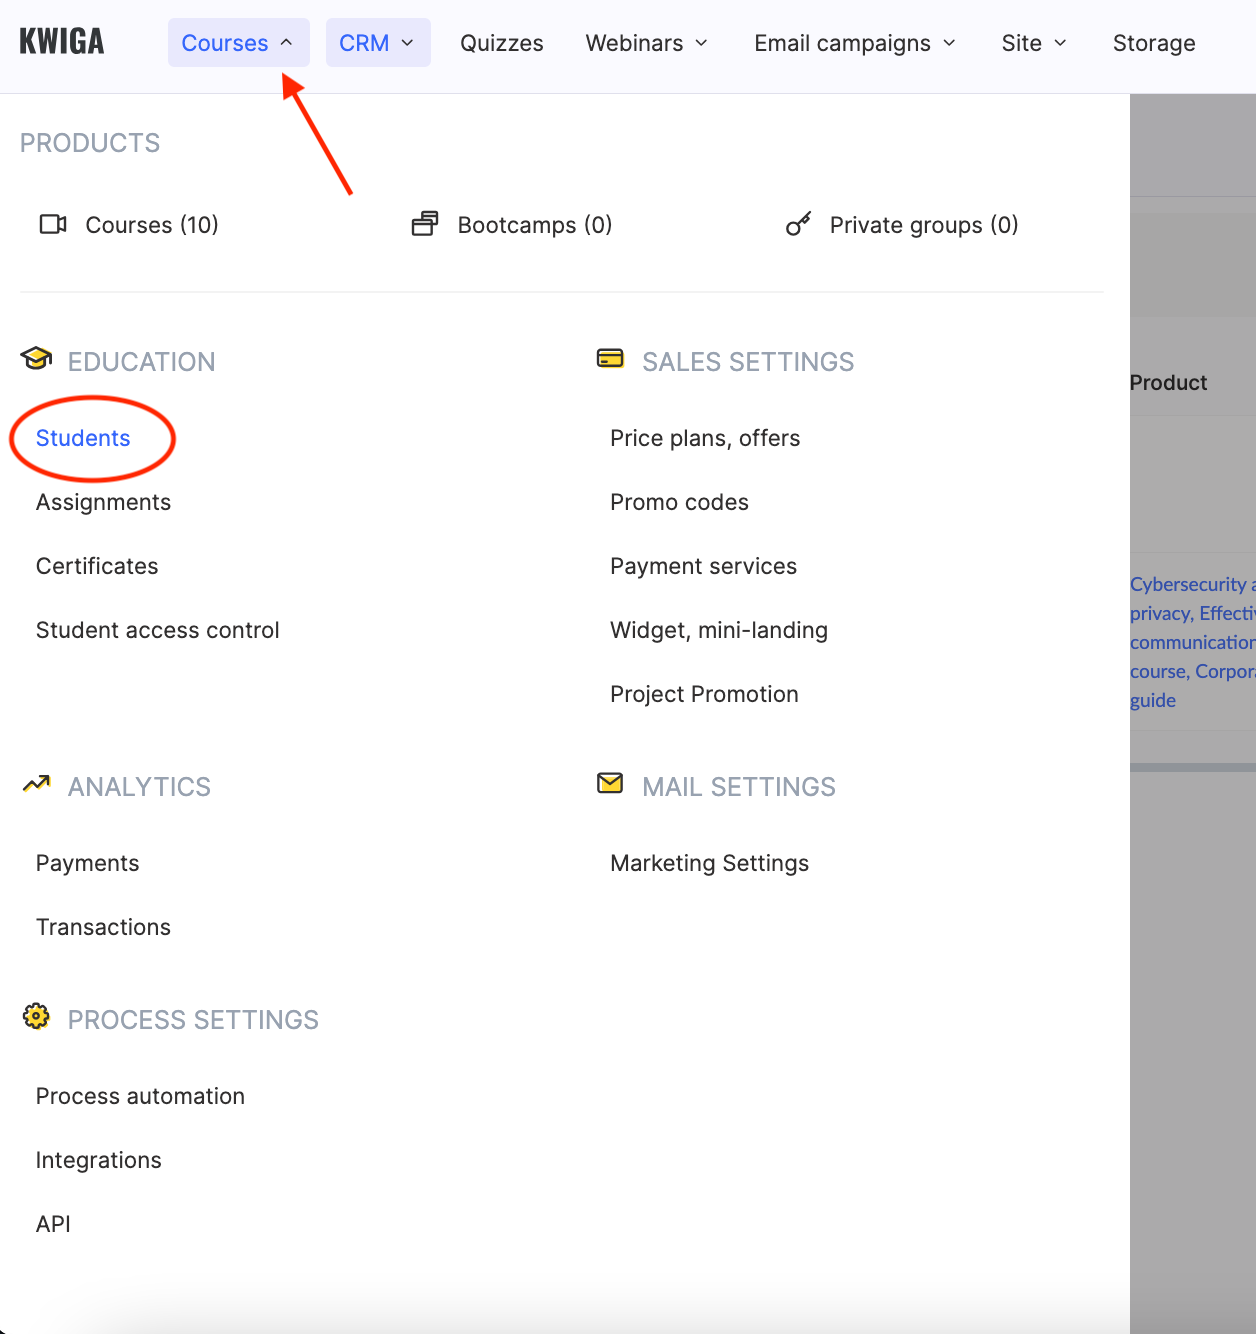
-
In the Members tab, click +, then select the Import tab.

3. Specify the import name.
Note: The import history is saved. By assigning a unique name, you can easily find the required import in case of any questions.

-
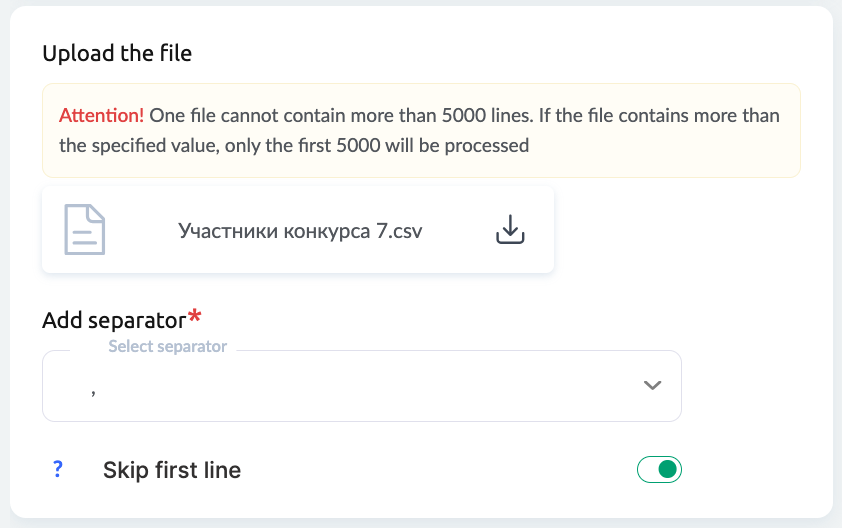
Upload a file with student data in CSV or XLSX format
You can import either a list of email addresses or a detailed table with personal data, social media links, and additional notes. If the file contains more than 5,000 rows, the system will process only the first 5,000 entries. A sample file is available for download to ensure correct formatting.
On Kwiga, you can create custom fields in the contact card to align with your business processes, allowing you to use them in automations and audience segmentation.
If uploading a CSV file, specify the delimiter (e.g., semicolon or comma). If you’re unsure about the delimiter, contact Kwiga support. For XLS/XLSX files, no delimiter needs to be specified. If the file contains column headers, enable the Skip First Row toggle.
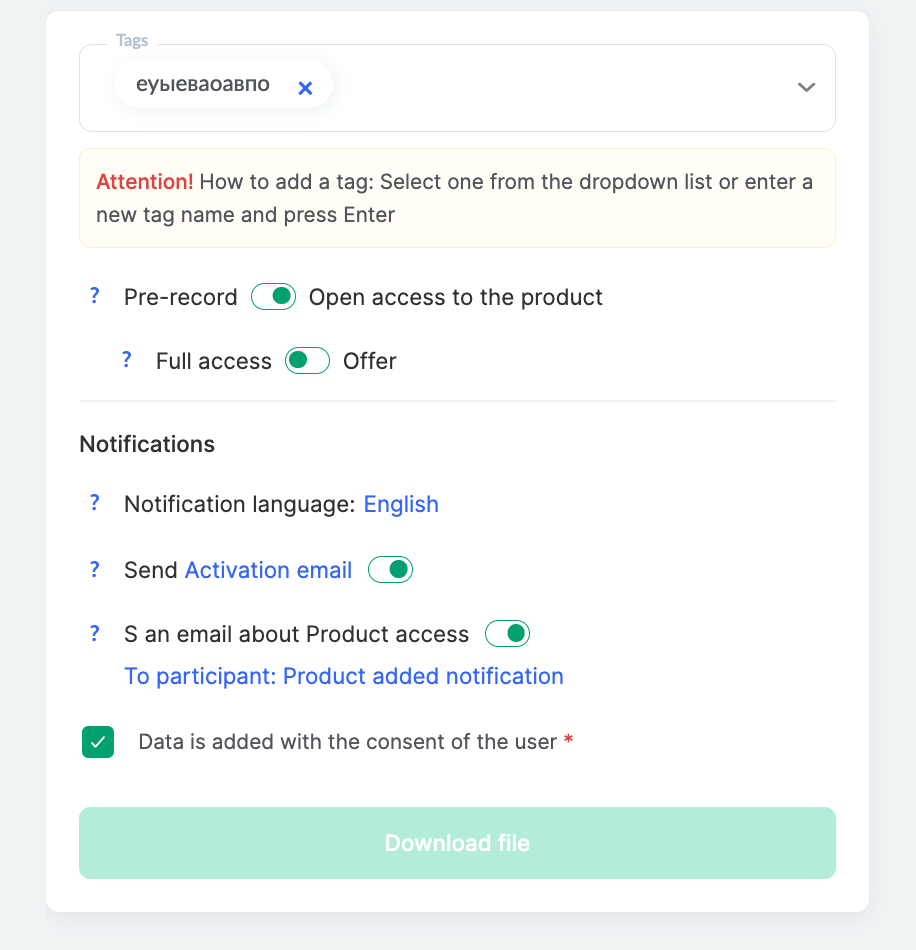
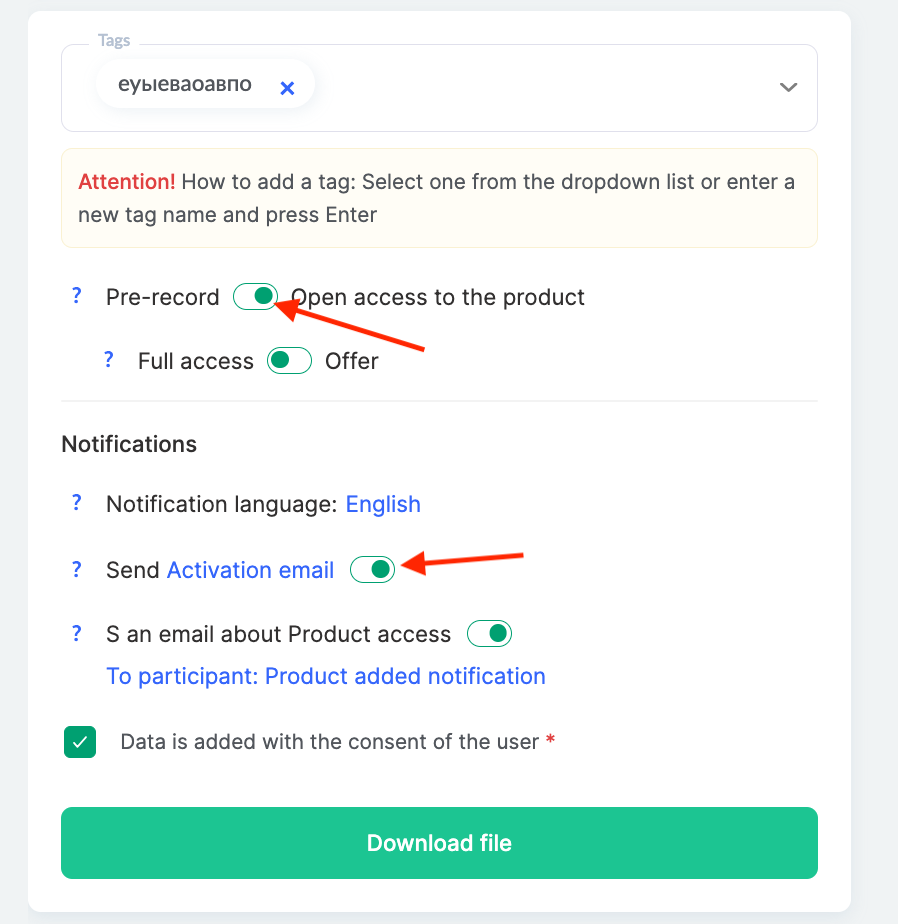
On this step, you can add tags to all contacts in the file, grant access to a product and select the relevant offer.
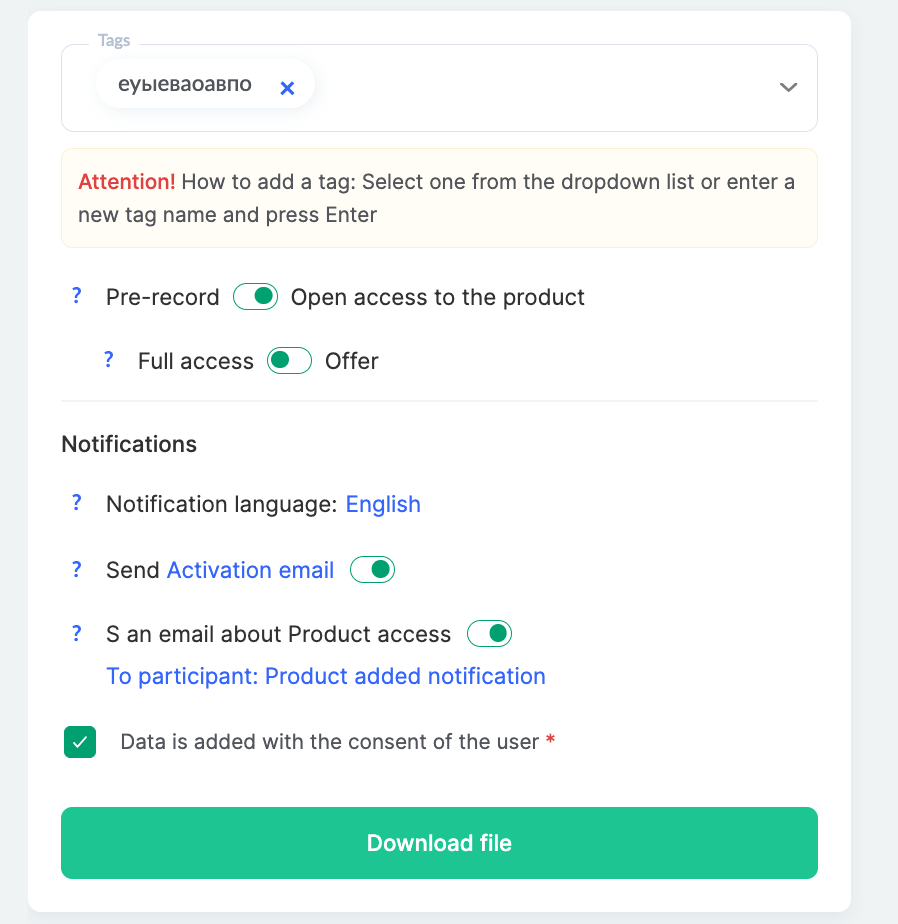
Configure email notifications by selecting a language, choosing an email template, or disabling email sending altogether. After making all adjustments, click Download File.
Data Processing and Import Completion
The system will begin processing the data, which may take a few seconds depending on the file size and number of contacts.
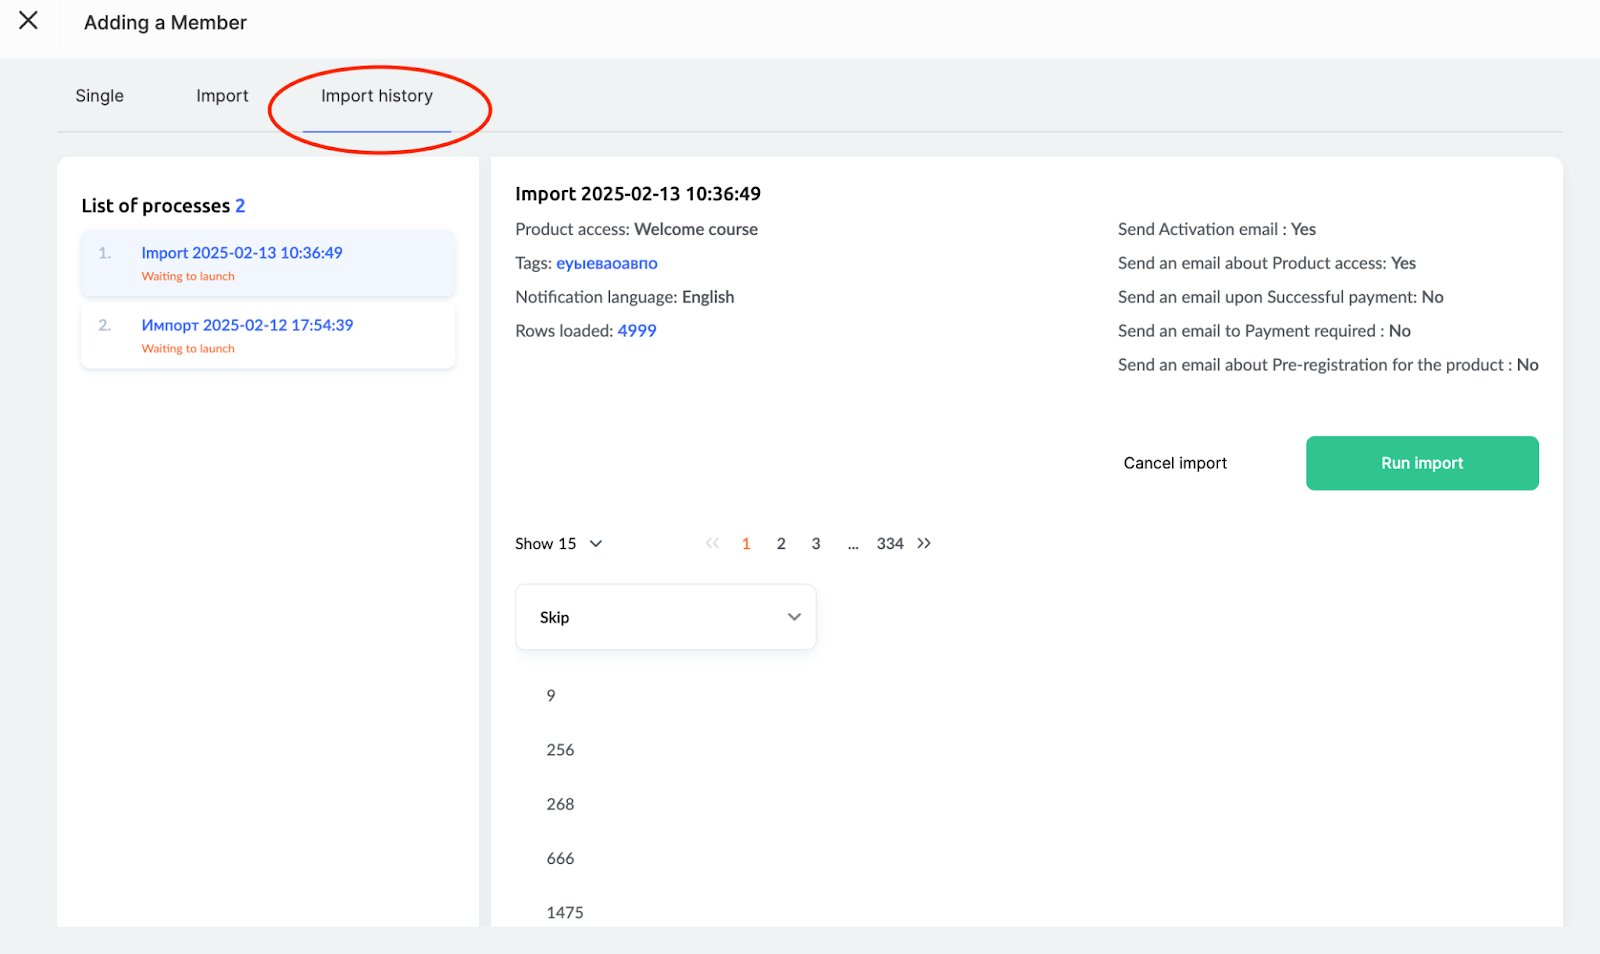
In the Import History tab, you will see the settings selected in the previous step, and a table with columns where you must specify which data to import and where to assign it.
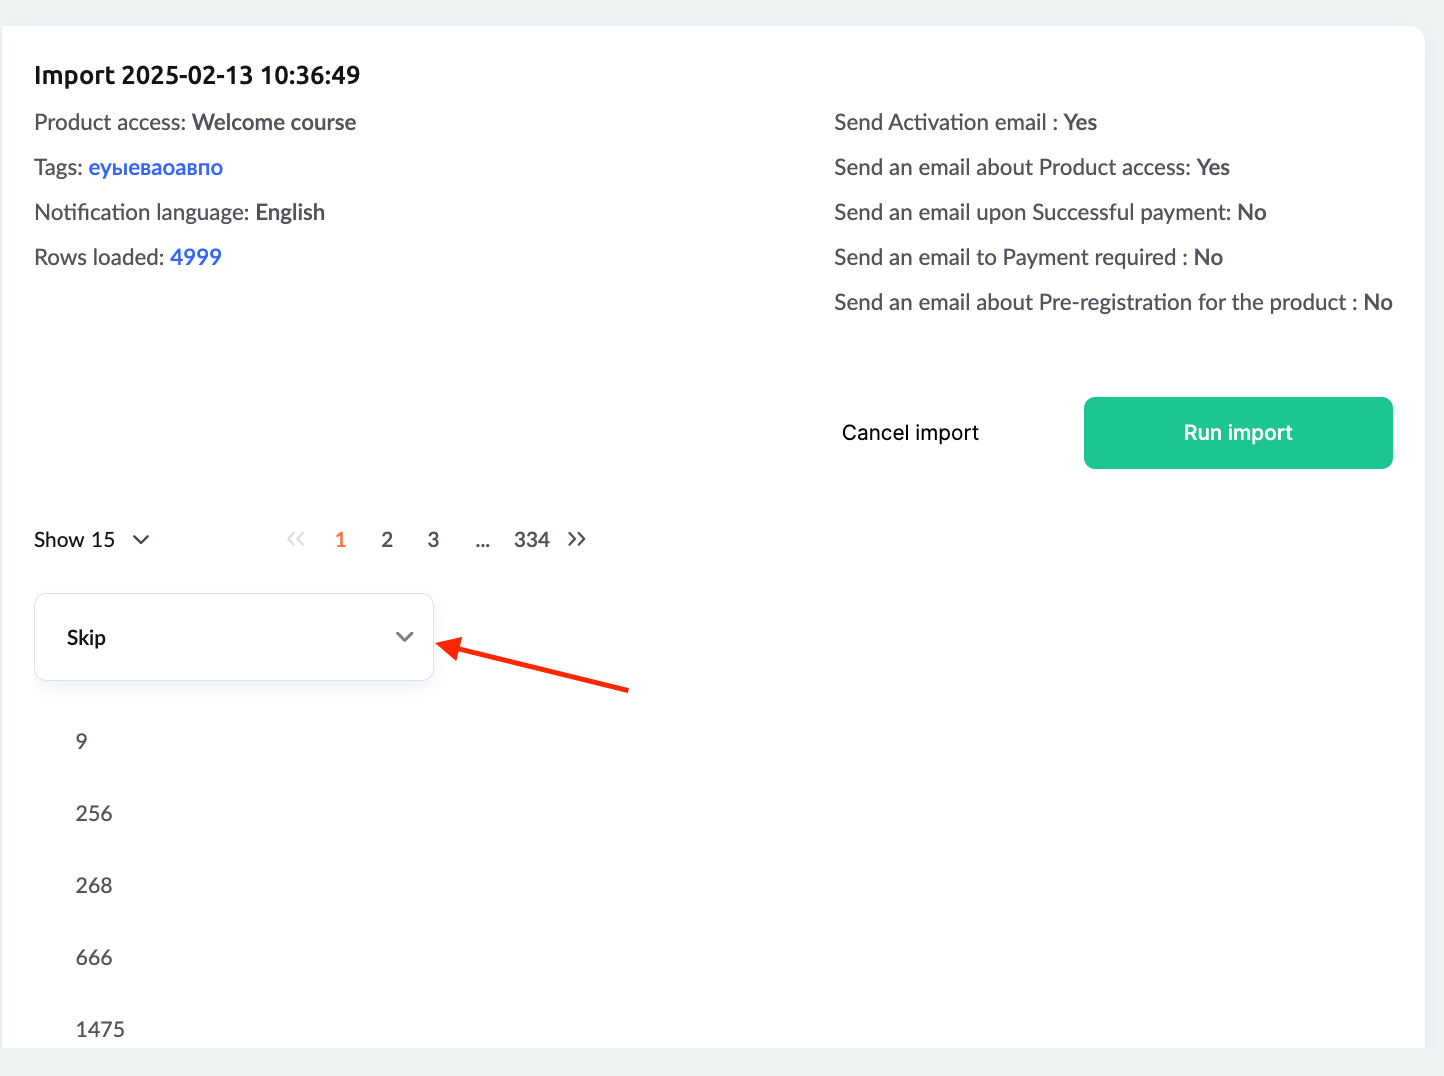
You can skip unnecessary columns or import only email addresses.
Tip: At this stage, you can assign a tag to participants by selecting a specific column and marking it with a tag. For example, if a column contains pricing plans, you can tag students accordingly, making it easier to filter participants and grant access based on their plan.
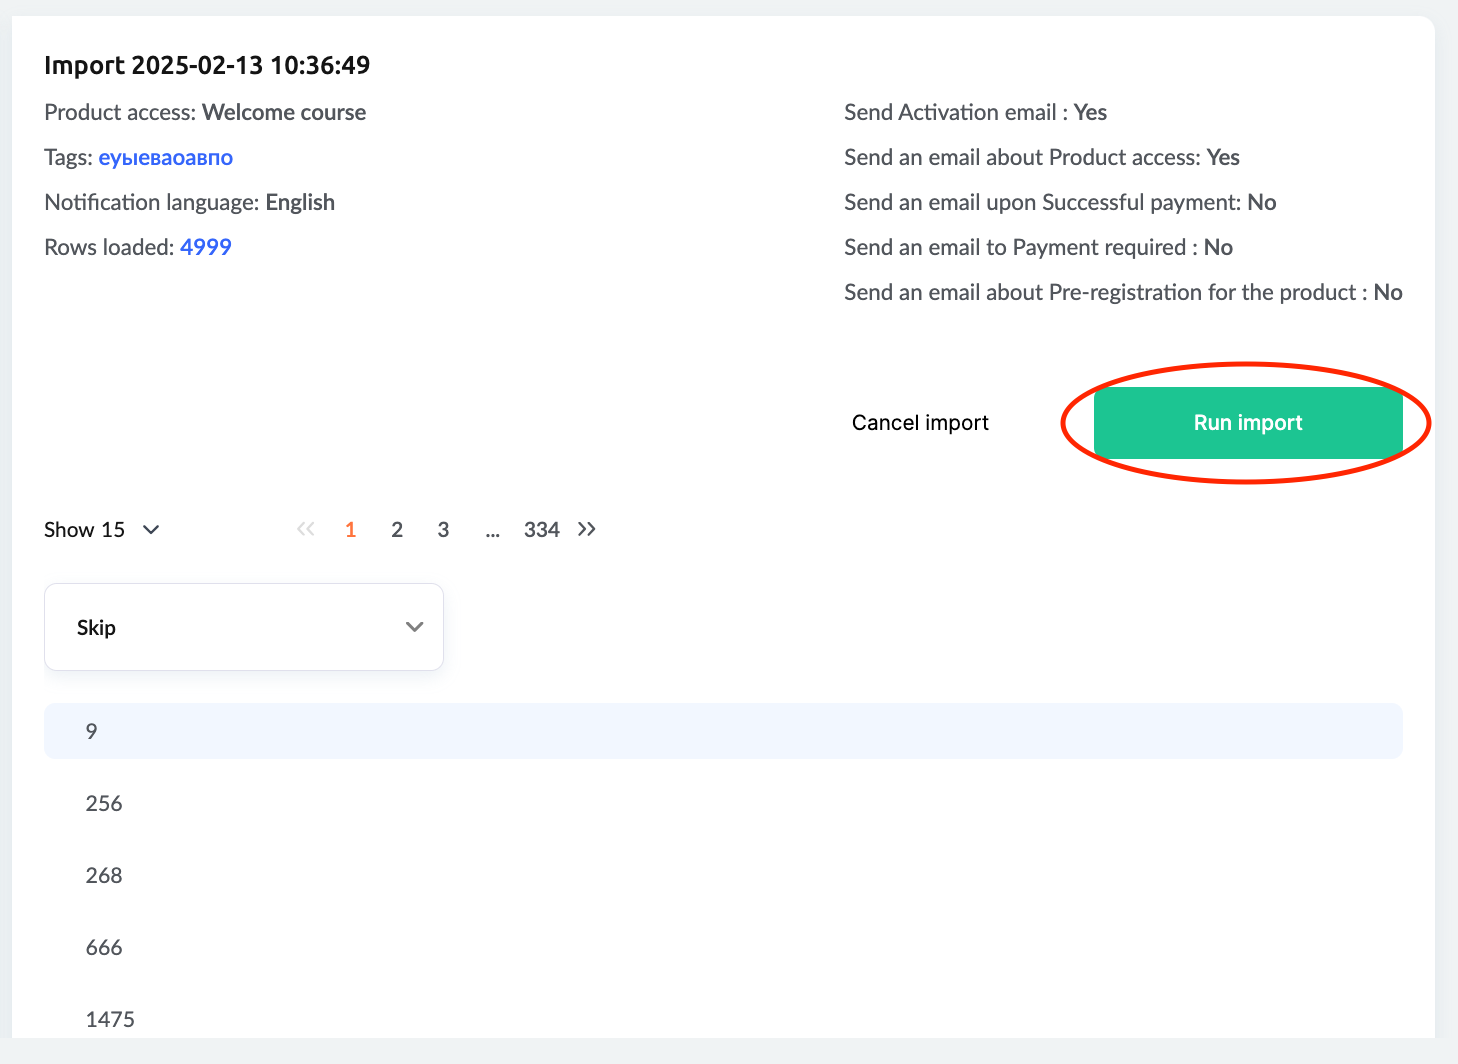
Once all settings are defined, click Start Import.
CRM Import
Another way to bulk import contacts, particularly useful for transferring a client database for email campaigns, importing contacts not linked to a specific course, or if you prefer working directly within the CRM.
How to Import Contacts into CRM
-
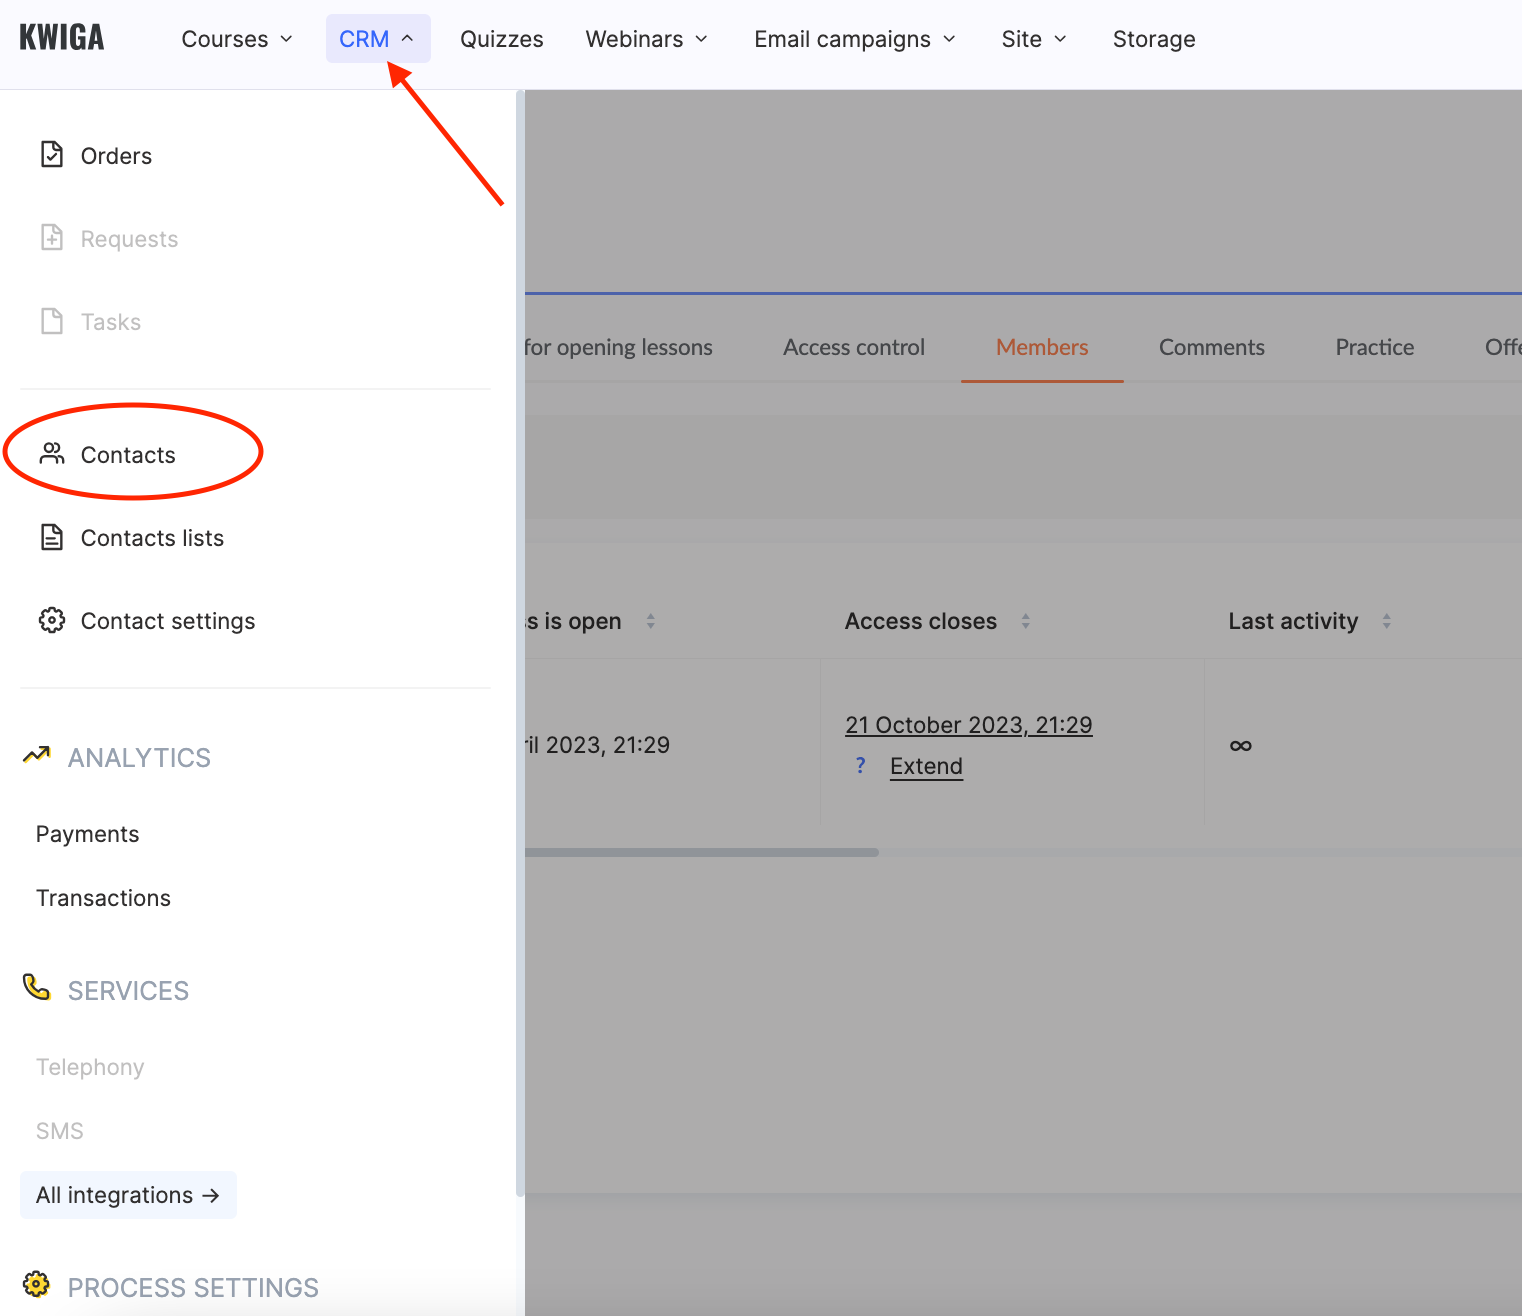
Go to the CRM menu and select Contacts.
-
Click + and open the Import tab.
-
Specify the import name and select the file containing the email addresses of the contacts.
Note: Assigning a unique name makes it easier to locate the import in case of questions.
-
Upload the file in CSV or XLSX format.
If the file has more than 5,000 rows, only the first 5,000 entries will be processed. A sample file is available for correct formatting. Import supports both email lists and detailed tables with personal data, social media links, and additional notes. Kwiga allows you to create custom fields in the contact card for automation and audience segmentation.
Import Settings
If importing a CSV file, specify the delimiter (e.g., comma). Contact Kwiga support if you are unsure about the delimiter. For XLS/XLSX files, no delimiter is needed. If the file contains column headers, enable the Skip First Row toggle.
At this stage, you can also add tags to all contacts in the file, and choose whether to grant product access or disable activation email notifications.
Click Upload File, and the system will start processing the data. This may take a few seconds, depending on the file size and number of contacts.
In the next step, you will see the settings selected earlier, and a table where you must define which data to import and where to place it. You can skip unnecessary columns or import only email addresses.
Once all parameters are set, click Start Import.
Contact Data Update
You can update the details of existing contacts in Kwiga CRM. For example, if only email addresses were initially imported, you can now add extra fields.
To avoid duplicates, do not grant product access and do not send an activation email. If an email address already exists in the CRM, the system will update the contact instead of re-adding it.
You can add tags to specific participants by including them in the file. To add multiple tags at once, enter them separated by commas in one cell. You can also create a custom user field and enter the required information.
Note: Kwiga CRM also allows bulk actions on all or selected groups of contacts.
Importing students to Kwiga is a fast and convenient way to transfer your contact database, configure access, and automate workflows. You can add students directly to a course or import contacts into CRM for email campaigns and audience segmentation.
Flexible settings, tags, and custom fields help you structure data and manage the learning process effectively. No matter your strategy, Kwiga’s import feature streamlines administration and saves time.
Didn't find the answer? Contact the support service via online chat or Telegram