Articles:
- How to delete a course
- Copyright protection of your content on Kwiga
- Public or trial lesson
- How to change the status of a lesson to draft and hide it from students
- Usage of checkpoints
- How to Add Practice to a Lesson
- How to create a task with mandatory review by an assistant
- How to create a task for different offers
- How to create a test with scores and automatic approval
- How to create and conduct a quiz among students on the course
- Contents of the lesson, all types of activities in the lesson
- Downloading video files
- How to add time codes to the video
- How to add button to the lesson
- Inserting iframe code
- Adding fractions, mathematical functions, formulas
- How to add text with spoiler to the lesson
- How to create a course on the Kwiga platform
- How to create a marathon
- How to add a cover to a course
- Course Program Display Options
- How to add a public face to a course
- How to add a team to a course
- Course preview with different access levels
- Block above lesson or module pages (top banner)
- Setting delays, schedule for opening and closing lessons (dripping content)
- Report on student progress on the course
- Analytics of assignments completion on the course
- Course sales report
- How to create a copy of the course
- How to copy lesson content
- Assistant’s Access to Practical Assignments
- Student Can't See the Course (Marathon, Closed Group)
- How to set up a test so that students see comments after completion
- Letter delivery: why letters don't arrive and how to fix it
- How to Customize the Appearance of a Course
- Manage activity visibility
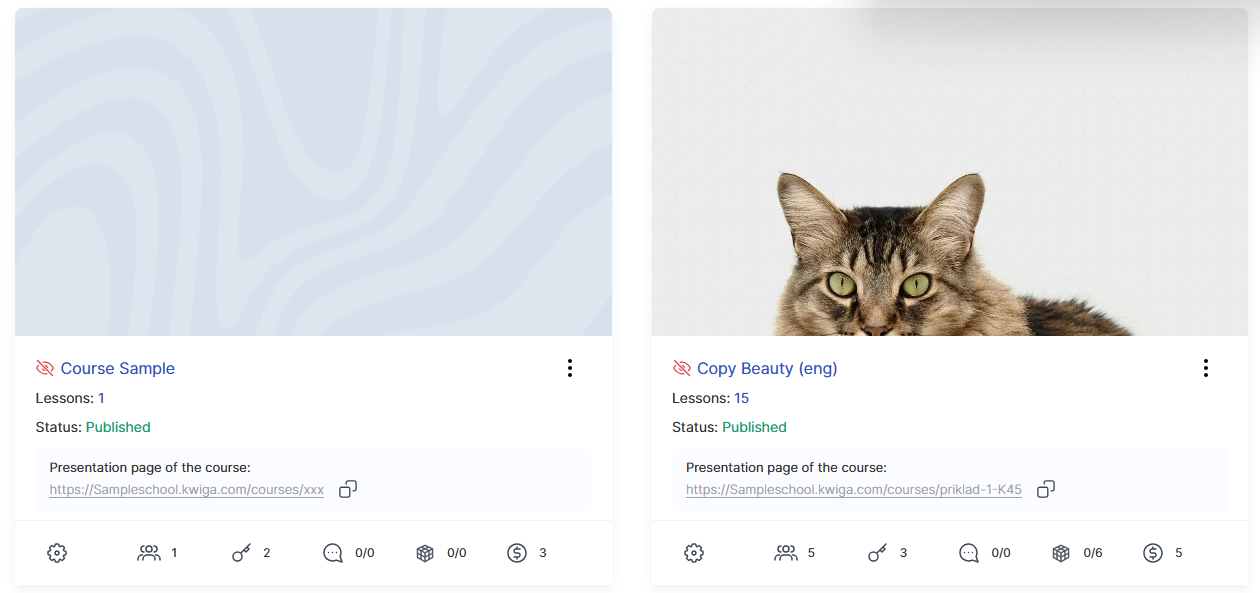
A cover on the course increases the interest in your material. Create a bright and engaging cover for your course.
A course cover image increases its recognizability and attractiveness to students. Add a preview image to make your course look professional on the school page.
A course may appear on the school page either with or without a cover. The version with a preview looks much more appealing and professional, helping your course stand out among others.
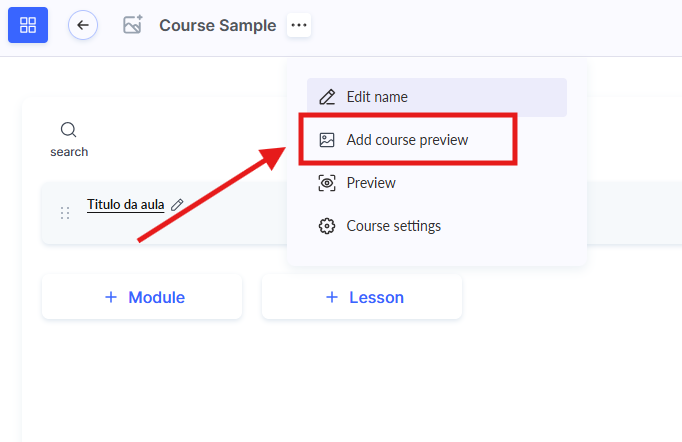
How to Add a Preview
Open the desired course in your dashboard.
Click the three-dot icon next to the course name and select Add Course Preview.
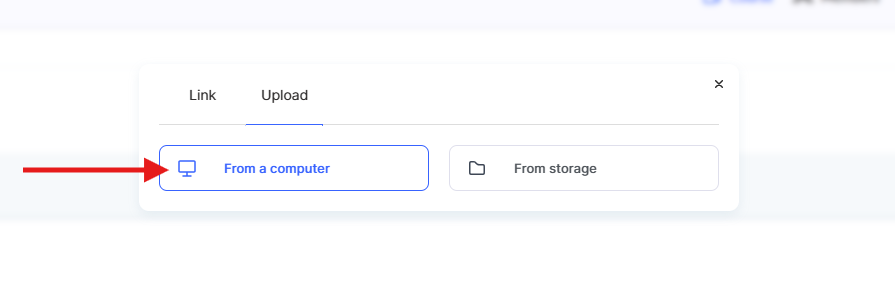
Select an image from your computer or storage.
Recommended size: Use an image with a 16:9 aspect ratio, such as 1920×1080 px or 1280×720 px, in JPG or PNG format.
Then click Upload once you’ve selected and added the image.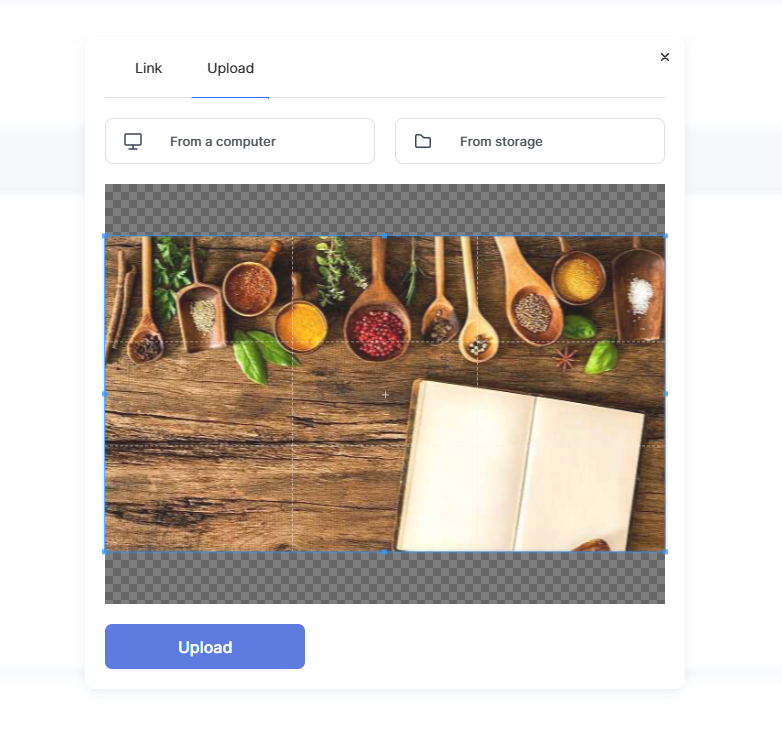
Note: If needed, adjust the display area in the cropper to select the best portion of the image before uploading.
Didn't find the answer? Contact the support service via online chat or Telegram