Articles:
- How to delete a course
- Copyright protection of your content on Kwiga
- Public or trial lesson
- How to change the status of a lesson to draft and hide it from students
- Usage of checkpoints
- How to Add Practice to a Lesson
- How to create a task with mandatory review by an assistant
- How to create a task for different offers
- How to create a test with scores and automatic approval
- How to create and conduct a quiz among students on the course
- Contents of the lesson, all types of activities in the lesson
- Downloading video files
- How to add time codes to the video
- How to add button to the lesson
- Inserting iframe code
- Adding fractions, mathematical functions, formulas
- How to add text with spoiler to the lesson
- How to create a course on the Kwiga platform
- How to create a marathon
- How to add a cover to a course
- Course Program Display Options
- How to add a public face to a course
- How to add a team to a course
- Course preview with different access levels
- Block above lesson or module pages (top banner)
- Setting delays, schedule for opening and closing lessons (dripping content)
- Report on student progress on the course
- Analytics of assignments completion on the course
- Course sales report
- How to create a copy of the course
- How to copy lesson content
- Assistant’s Access to Practical Assignments
- Student Can't See the Course (Marathon, Closed Group)
- How to set up a test so that students see comments after completion
- Letter delivery: why letters don't arrive and how to fix it
- How to Customize the Appearance of a Course
- Manage activity visibility
Learn more about how to use Kwiga tests to set up automatic knowledge testing of your students.
In this article:
Tests on the Kwiga platform are a convenient tool for automatically checking your students’ knowledge. You can configure the grading system, set conditions for successful completion, and choose what information to show students after they finish the test.
How to create a test
Tests in Kwiga are created separately from lessons and are available in the Quizzes section.
To create a new test:
1. Go to the Quizzes section
2. Click the + button

3. Select Standard Quiz
4. Enter the quiz name
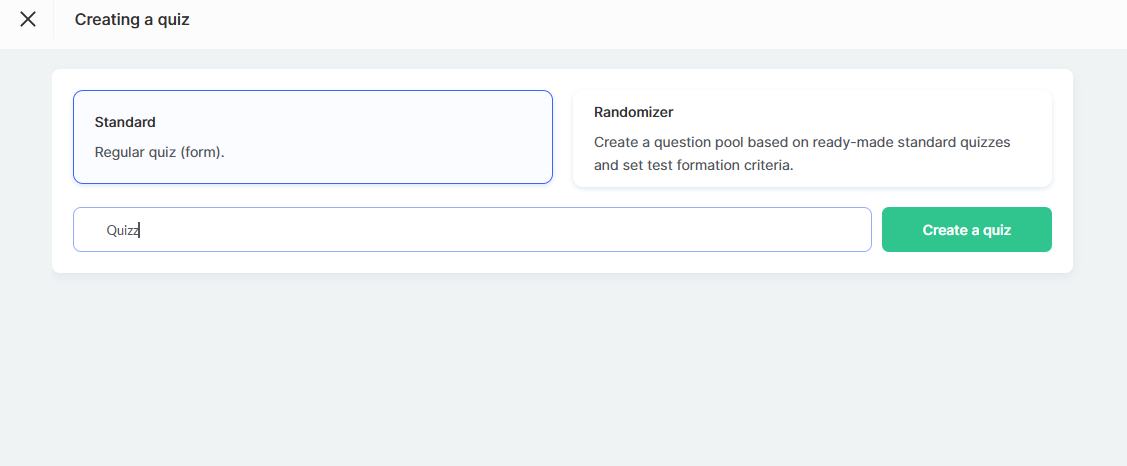
5. Click Create Quiz
After this, you will be taken to the test builder, where you can add questions by choosing the type you need — text answer, fill-in-the-blank, multiple choice, etc.
Tip: If you plan to have a large number of practical tasks in your course, add the assignment number or the lesson title directly in the name. This will make it easier to fill and edit your course later.
Read more about the Quiz Randomizer in a separate article.
Grading and Automatic Checking Settings
Kwiga allows you to set up automatic quiz checking to simplify the grading process and make it as convenient as possible for you and your students. You can choose how the evaluation will be conducted, whether students should see their scores, and what conditions must be met for successfully completing the test.
Grading
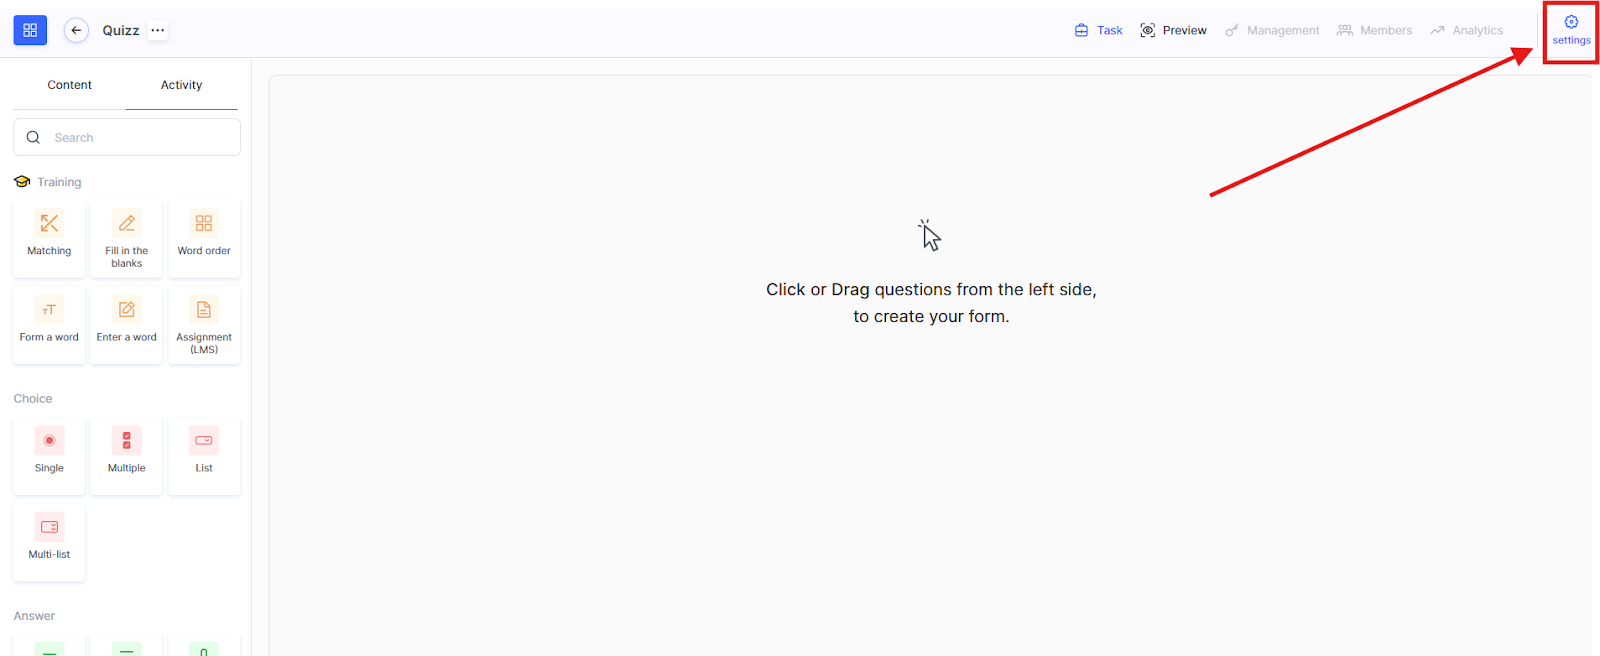
Go to Quiz Settings → Grades and Points
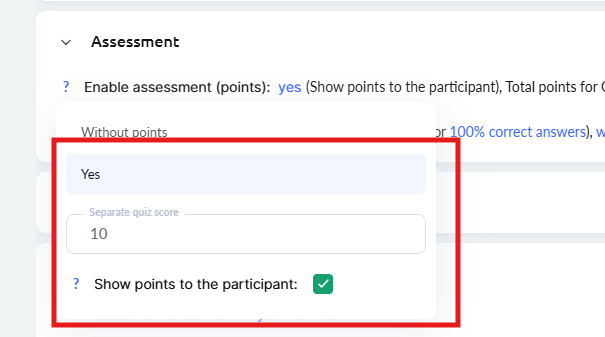
Enable grading (points): choose whether points should be awarded for answers or not. 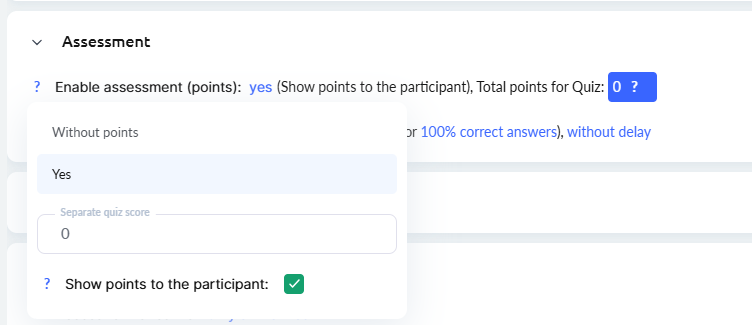
You can configure point awarding on three levels:
-
For each correct answer
This method is suitable when each correct answer is evaluated separately. In this case, you do not need to set a separate score for the entire test (you can leave it as 0). When adding questions to the quiz, you can specify the number of points for each correct answer.
For example: if the answer is correct, the participant receives 1 point. In the case of a multiple-choice question, the point value is indicated next to each correct option. This allows for more precise assessment of knowledge.
-
For each question
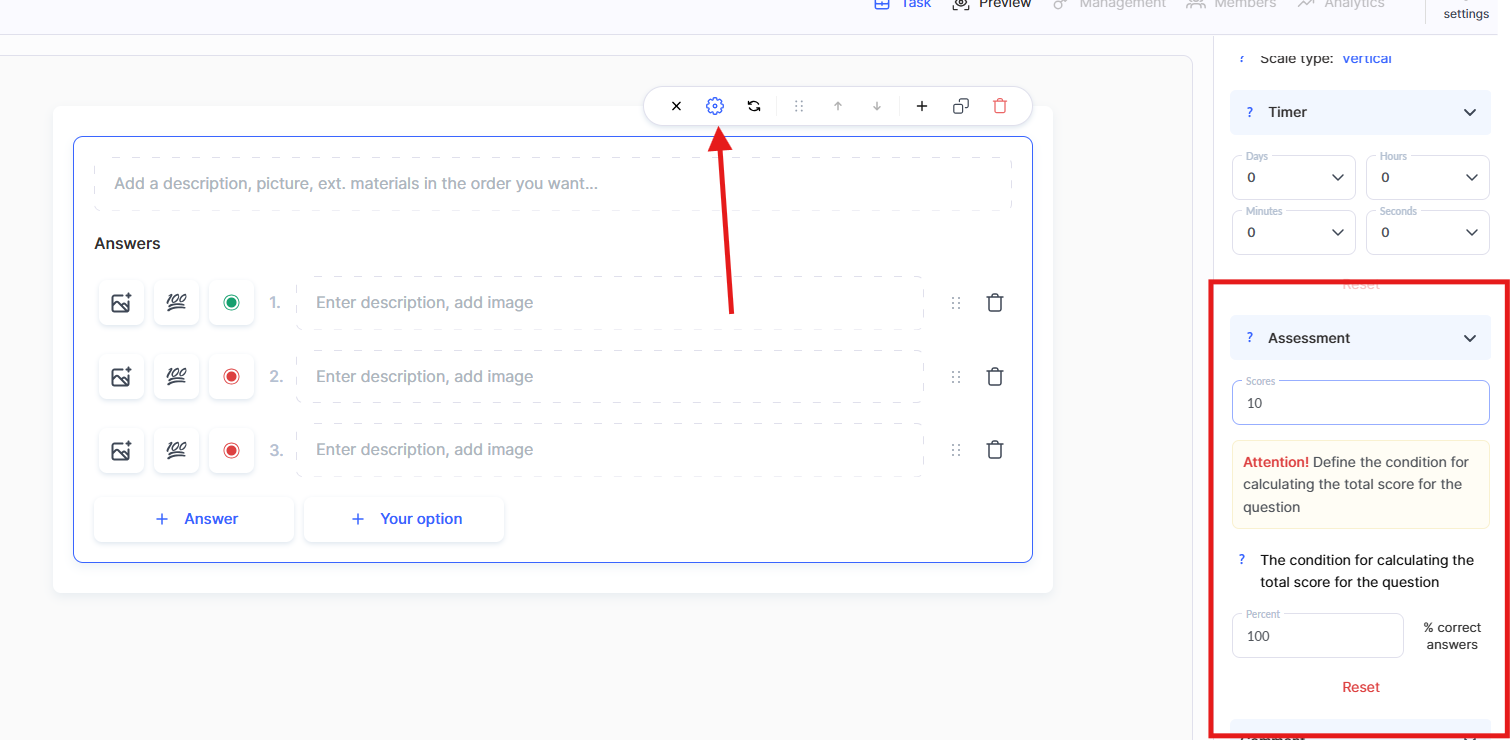
Grading per question means assigning a total score for completing the entire task correctly, rather than awarding points for each individual answer. In the test settings, above the question text, there is a field where you can specify the number of points a participant receives for answering all parts of the question correctly.
This option is ideal when there is no need to evaluate each answer separately. In such cases, it’s also important to clearly define the conditions under which points will be awarded.
-
Total score for the test
This approach allows you to set a fixed score for the entire test, provided that a certain result is achieved.
For example: if a participant answers 70% of the questions correctly, they receive the specified score — for instance, 10. And if the result is below the set threshold, the test is graded as 0 points.
Important: if you need each question to award a specific number of points and the student’s final score to depend on the number of correct answers, then you should use one of these methods: Per correct answer or Per question.
Grading can be enabled or disabled depending on your goals.
If you enable grading, students will receive points for correct answers. You can choose to show these points to students, or keep them hidden.
Quiz Approval
Test approval is usually configured automatically. To do this:
-
Go to Quiz Settings
-
Enable Quiz Approval: Automatic

-
Set the condition for successful completion of the test: specify the minimum number of points or the percentage of correct answers.
The results are approved immediately after the specified conditions are met — for example, the minimum number of points or the required percentage of correct answers. This is convenient and fast.
The settings also include an option to add a delay before automatic approval, to imitate manual checking.
Note: In the offer settings, you can also specify who checks the quiz — automatically or a curator. This setting has higher priority and allows you to change the checking method for a specific plan.
You can read more about creating an assignment with different checking methods for different plans in a separate article.
Important: changes made to the test settings are applied immediately, but previous attempts will keep the old settings.
For example, if you add points to a test after students have already completed it, their previous results will not change. Anyone who passed the test before the changes were made will not receive the new points.
More about recalculating quiz results — in a separate article.
Useful links:
Quiz settings
How to add questions and answer options
In Kwiga, you can create interactive and engaging tests by combining different types of questions in a single quiz. This allows you to adapt the test to your goals and make it more effective for learning. There is no limit to the number of questions in a test, and the question types can vary.
How to add a question to a quiz
On the left panel, you will find all available question types, organized into categories for easy searching and use.
To add a question to your quiz:
-
On the left panel, go to the Activity tab
-
Select the desired question type from the available categories
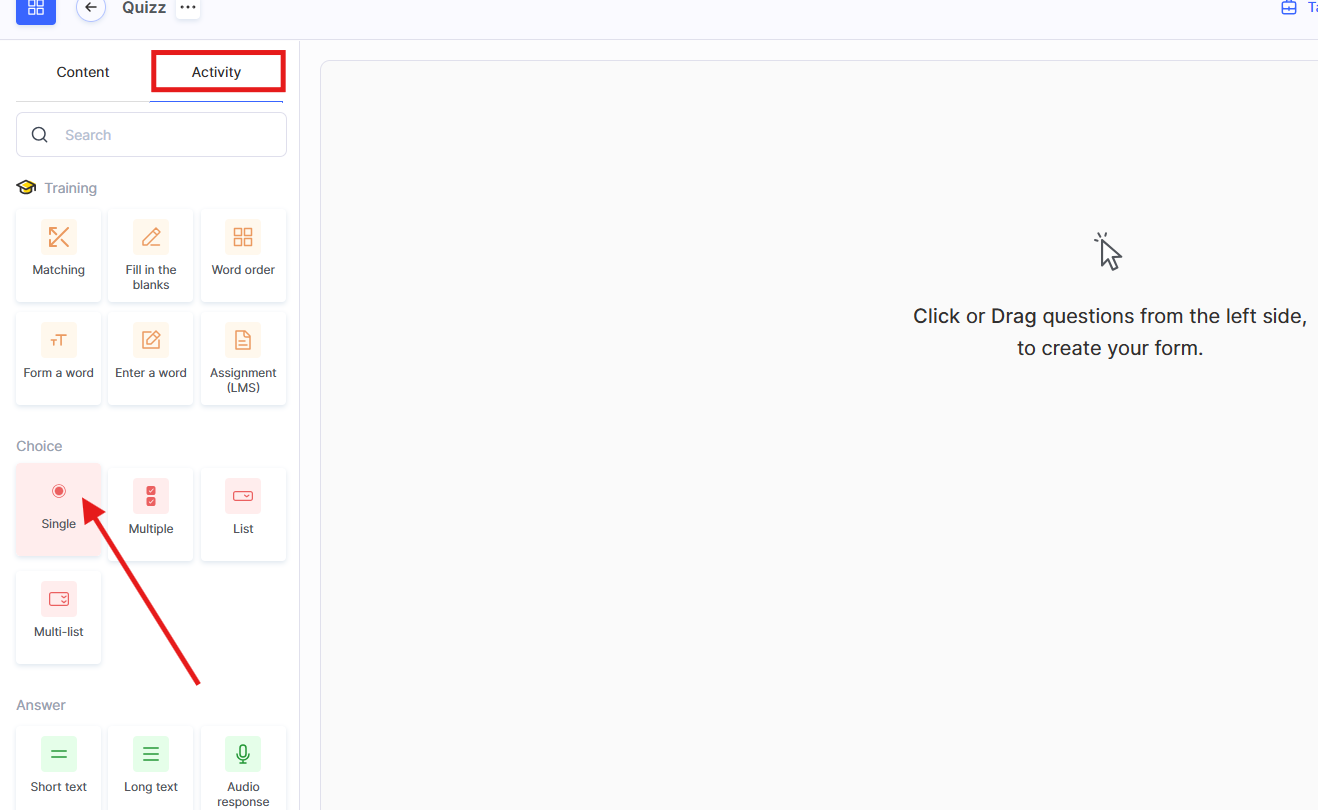
• Click on the selected type or drag it into the central part of the screen
• Fill in and configure the chosen activity — add the question and the answer options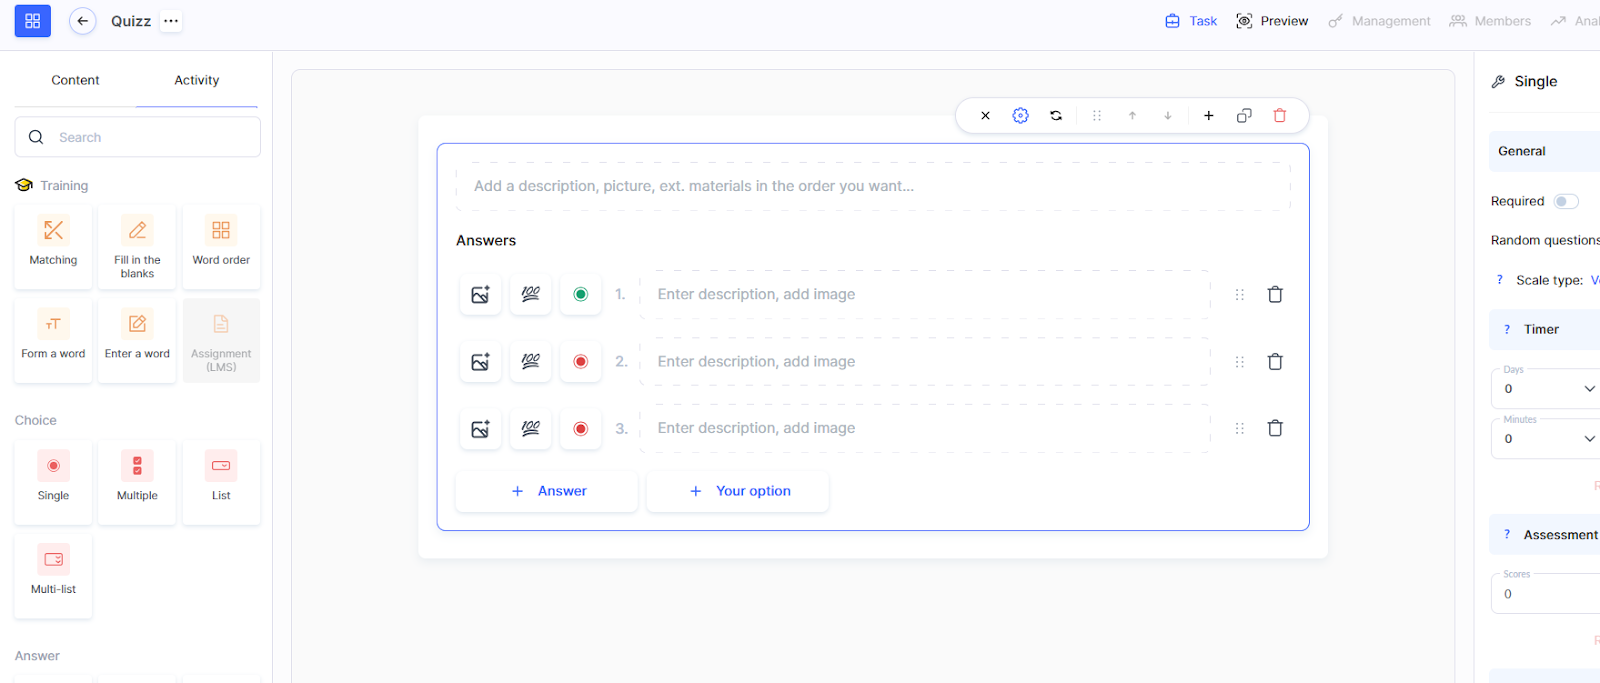
Read more about all available question types and activities in the article: Quizzes, practices: types of questions and activities.
Question settings
For each question, you can configure:

● Requirement to answer — the student cannot complete the test without answering this question
● Shuffle answers — automatically changes the order of answer options each time the test is taken
● Time limit — a time restriction for answering
● Number of points — an optional setting where you can specify how many points the student receives for the correct answer
Depending on the selected question type, you can also configure the position of the scale (for rating-scale questions), the appearance of answer options, the orientation of elements (placing options vertically or horizontally), as well as add a Comment.

How to set up a test so that students see comments after completing it
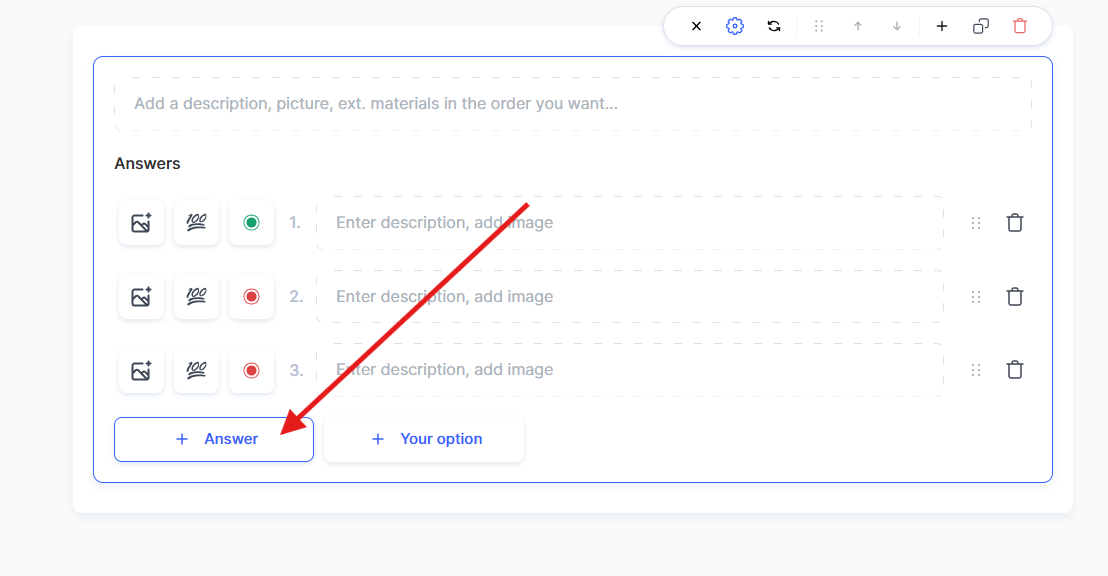
Adding answers
-
Add the question text
-
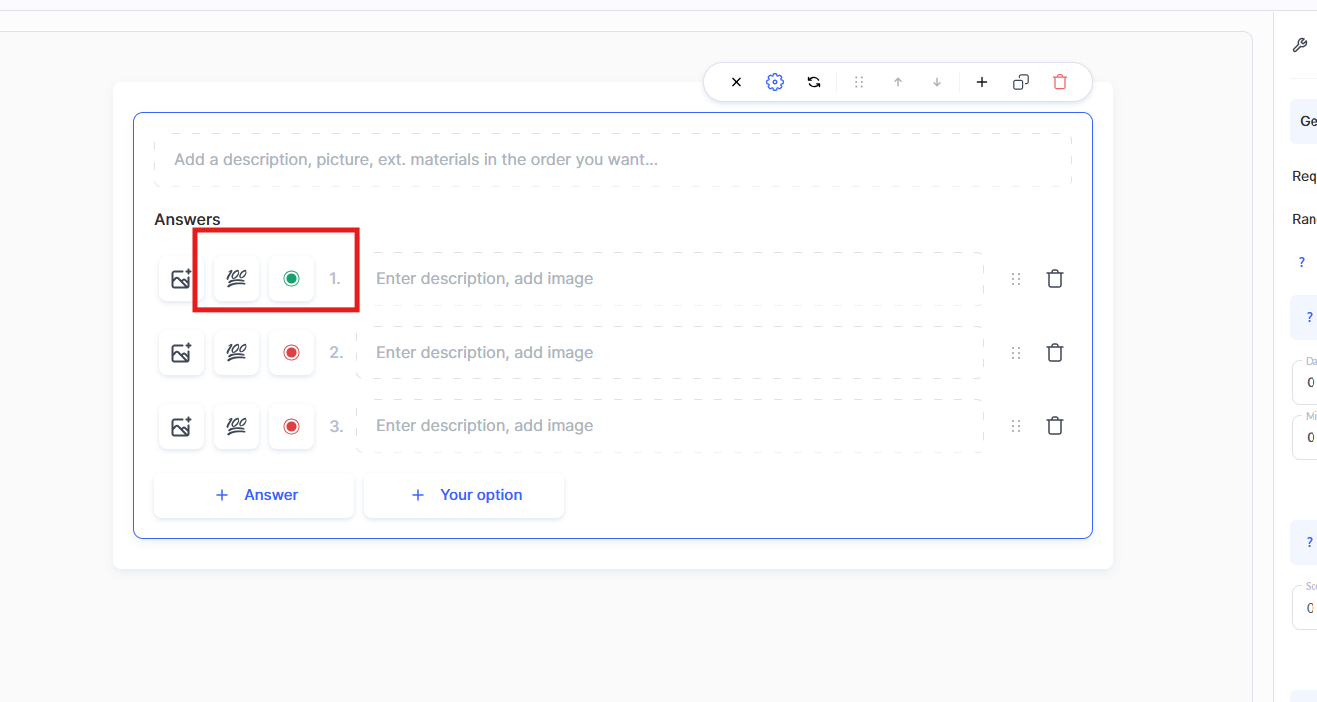
Add answer options using the +Answer button
-
For each answer, you can assign points for the correct option
-
Mark the correct choice in green
All changes are saved automatically.
Managing questions
Each new question is added using the +Add activity button or by clicking on the question type on the left side panel.
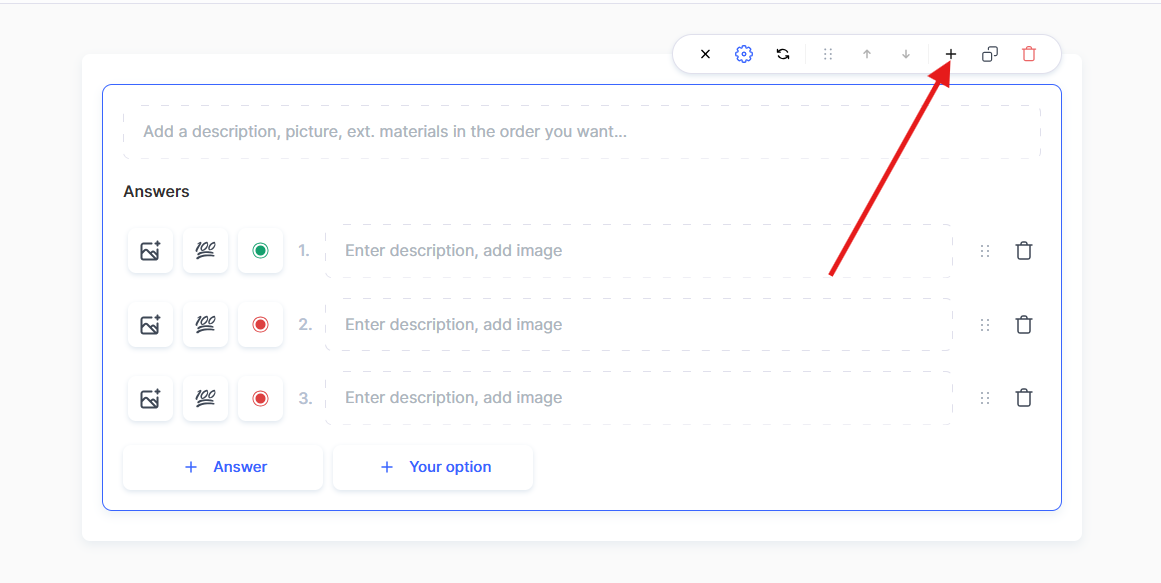
You can change the order of questions by dragging the question block up or down.
If you need to delete a question, click the trash bin icon.
By using different question types and additional settings, you can create tests of any complexity that will help effectively assess students’ knowledge.
How to add a test to a lesson
Once the test is created and all questions are added, the final step is to attach it to a lesson.
To add a test to a lesson, open the lesson and add the quiz through the corresponding block.
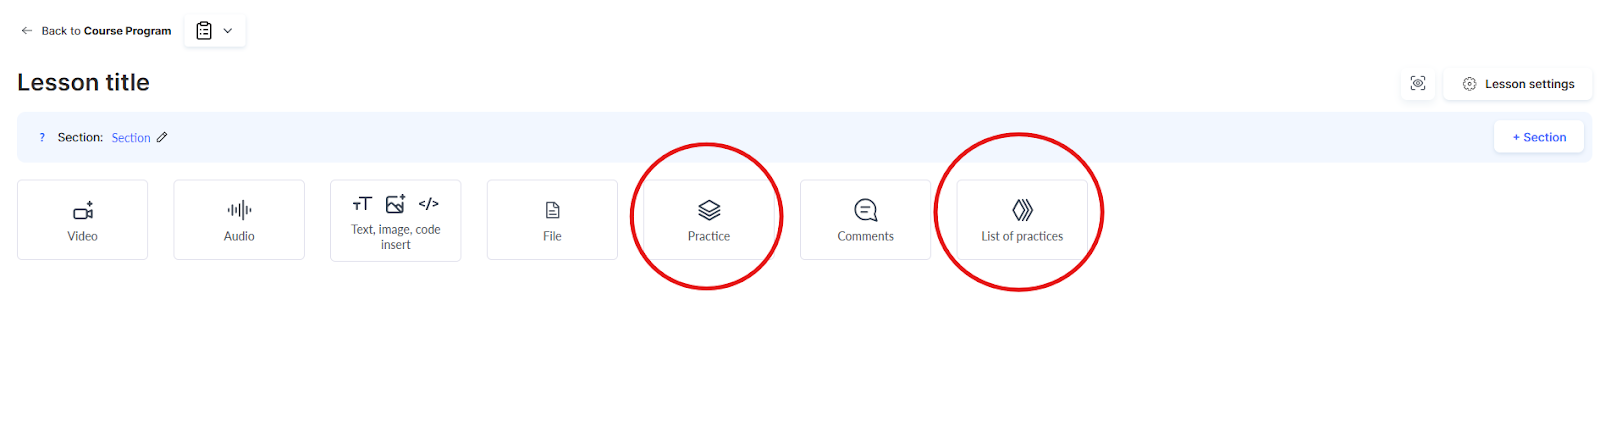
For a detailed guide, read the article: How to add a practice activity to a lesson.
How students will see the test
After the assignment is added, students will see it in the lesson content.
To make sure everything displays correctly, use the preview function.
Open the lesson builder, switch to preview mode, and check how the assignment looks from the student’s perspective.

The test will be checked automatically after completion, and the student will see the result immediately after finishing.
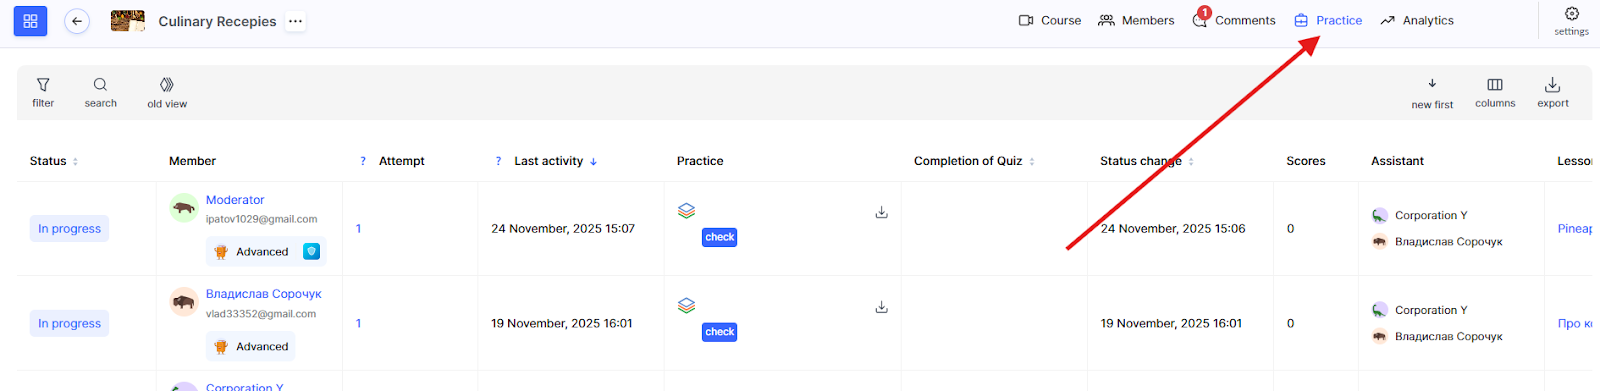
Where to view student results
After a student completes the assignment, it becomes available in the Practice menu. Since the test is configured for automatic checking, the results will already be evaluated and approved according to the specified conditions.
To view the test results:
-
Go to the Practice menu
-
Find the student’s assignment you need
-
Open it to view detailed information
In the results window, you will see:
Quiz — the name of the test and the lesson it is attached to
Completion and approval settings — the conditions required for quiz approval
Participant — information about the student
Result — completion status (Practice completed / Not completed), automatically determined by the system
Points — the number of points earned
Time — the duration of the test attempt
Number of attempts — how many times the student took the test
Questions — a detailed view of the student’s answers to each question
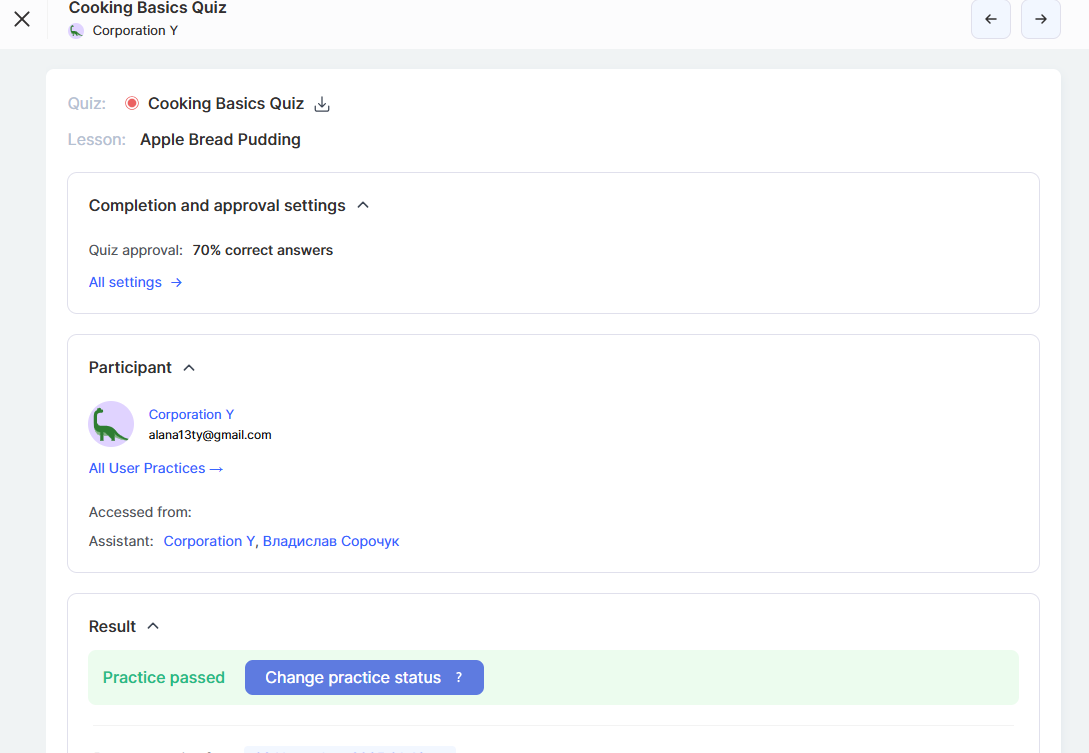
If needed, the curator can manually change the practice status or the number of points by clicking the Change practice status button and selecting Passed, Not passed, or Needs revision, as well as leave comments on the answers.
In addition, if the test includes grading, the curator can manually adjust the number of points earned.
Didn't find the answer? Contact the support service via online chat or Telegram