
Articles:
- How to delete a course
- Copyright protection of your content on Kwiga
- Public or trial lesson
- How to change the status of a lesson to draft and hide it from students
- Usage of checkpoints
- How to Add Practice to a Lesson
- How to create a task with mandatory review by an assistant
- How to create a task for different offers
- How to create a test with scores and automatic approval
- How to create and conduct a quiz among students on the course
- Contents of the lesson, all types of activities in the lesson
- Downloading video files
- How to add time codes to the video
- How to add button to the lesson
- Inserting iframe code
- Adding fractions, mathematical functions, formulas
- How to add text with spoiler to the lesson
- How to create a course on the Kwiga platform
- How to create a marathon
- How to add a cover to a course
- Course Program Display Options
- How to add a public face to a course
- How to add a team to a course
- Course preview with different access levels
- Block above lesson or module pages (top banner)
- Configure delays, the lesson opening schedule, and lesson closing
- Report on student progress on the course
- Analytics of assignments completion on the course
- Course sales report
- How to create a copy of the course
- How to copy lesson content
- Assistant’s Access to Practical Assignments
- Student Can't See the Course (Marathon, Closed Group)
- How to set up a test so that students see comments after completion
- Letter delivery: why letters don't arrive and how to fix it
- How to Customize the Appearance of a Course
- Manage activity visibility
Supplement lessons with additional materials by inserting presentations, tables, and quizzes right into the lesson!
In this article:
How to insert iframe code
When creating a course lesson, you can use iframe code to enhance your lesson with materials from third-party services, such as Google Sheets, Google Forms, Wordwall, or presentations from Canva, Genial.ly, and other services that allow you to embed code on a page. This lets students complete forms and view presentations directly in the lesson without leaving the page.

You can find an example lesson at the link.
How to insert code into a lesson
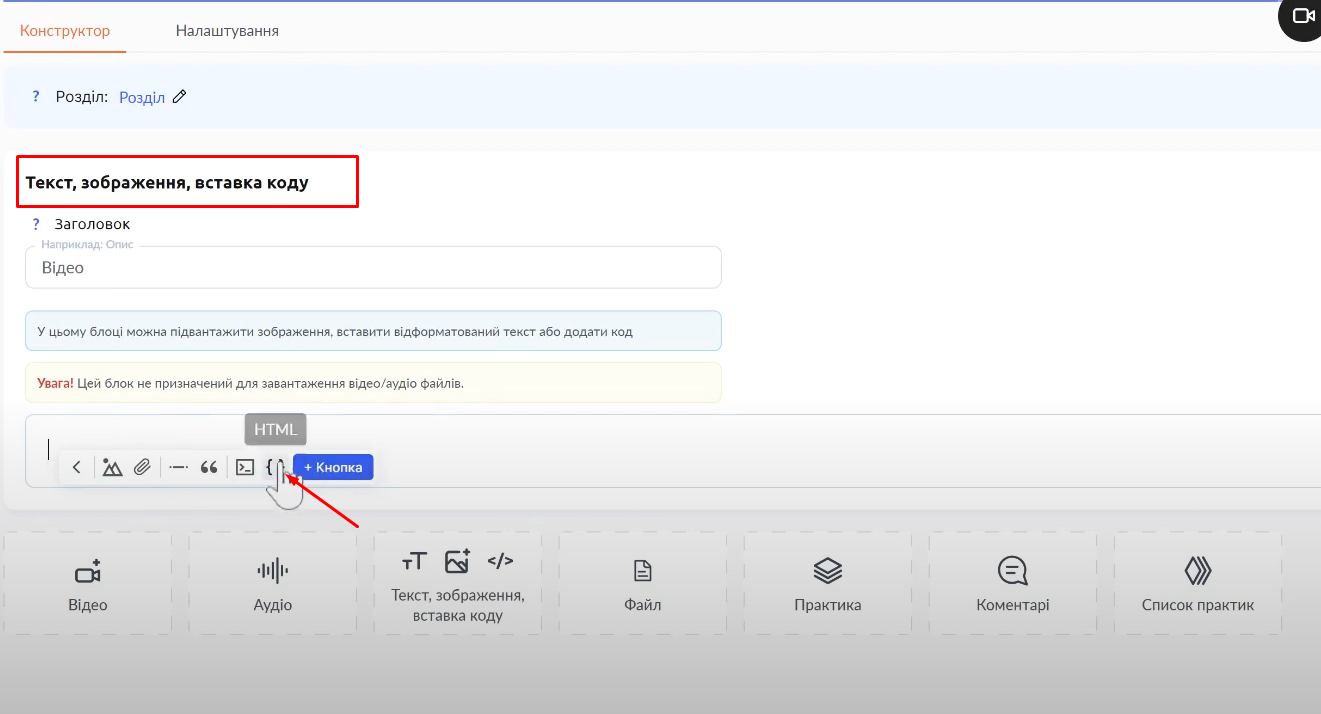
To insert code into a lesson, simply add the Text, Image, Code Embed element.

Then select the Code Embed button on the toolbar and paste the code.

To change the height or width of an embedded object (presentation, spreadsheet, game, etc.), add dimensions to the code width="640" height="1000", entering numerical values appropriate for the embedded object.
How to Find Embed Code
Google Forms
Open the form you want to embed in a lesson or assignment. Click Send, select the code icon, and copy the code. You can also adjust the form dimensions in the same window.

Google Sheets
Open the spreadsheet you want to share. Go to File – Share – Publish to web – Embed and choose whether to embed one sheet or the entire document. After confirmation, a code will be generated that you can use in a Kwiga lesson or assignment. Remember that you can adjust the dimensions using width="640" height="1000" (enter any values you prefer).

Canva
Open the Canva presentation or design you want to use in a lesson or quiz. Click Share – More – Embed, agree to make the presentation public, and publish it. Use the HTML embed code.

Genial.ly
Make sure you have published your presentation in Genial.ly. You cannot share a draft or private presentation.

Then simply click Share next to the Present button, select Embed, and copy the iframe code.
To change the dimensions of the embedded presentation, edit the height and width parameters.

WordWall
Open the material you want to add to a Kwiga lesson or assignment, click Share, select the code icon, and choose iframe (selected by default). Copy the code and use it on Kwiga.

As always, you can adjust the dimensions of the embedded material by changing the width and height values.

Quizlet
Open the quiz page on Quizlet and find the Share button and the three-dot button next to it. Click the three dots and select Embed:
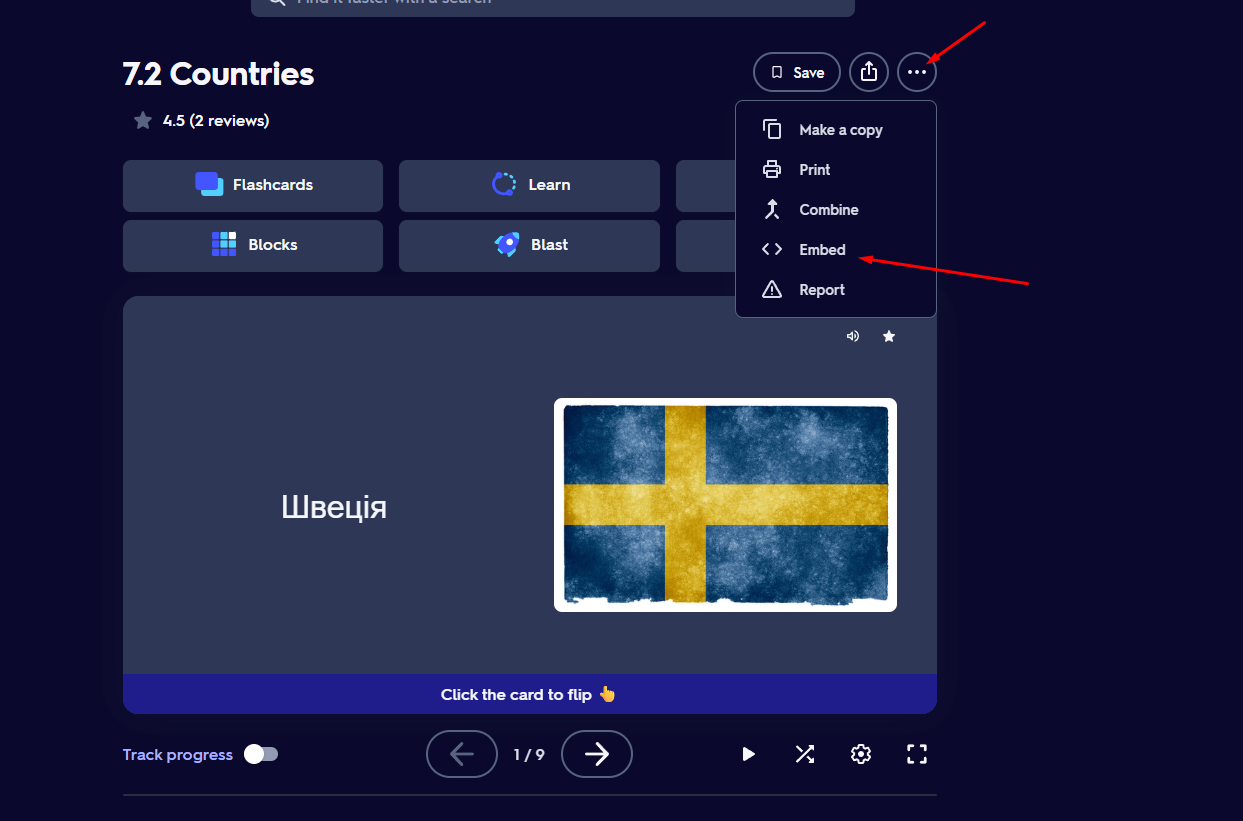
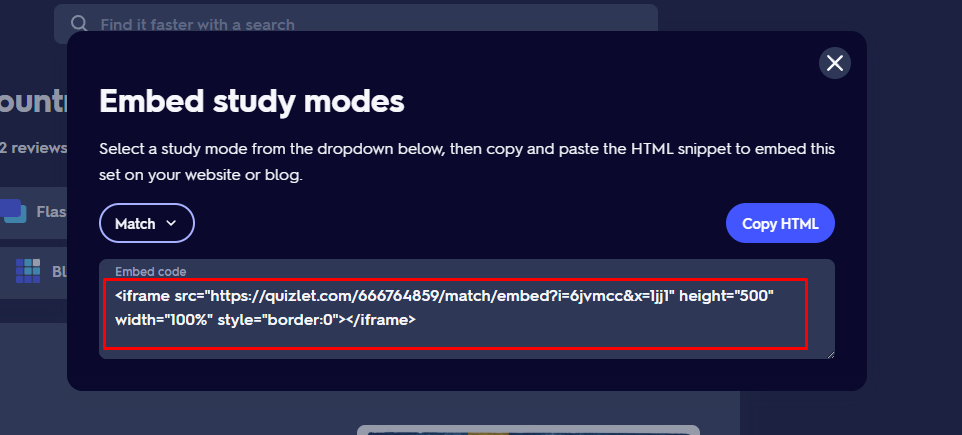
In the window that opens, you can change the study mode and copy the code at the bottom to add to your lesson page (highlighted in yellow):
Dropbox
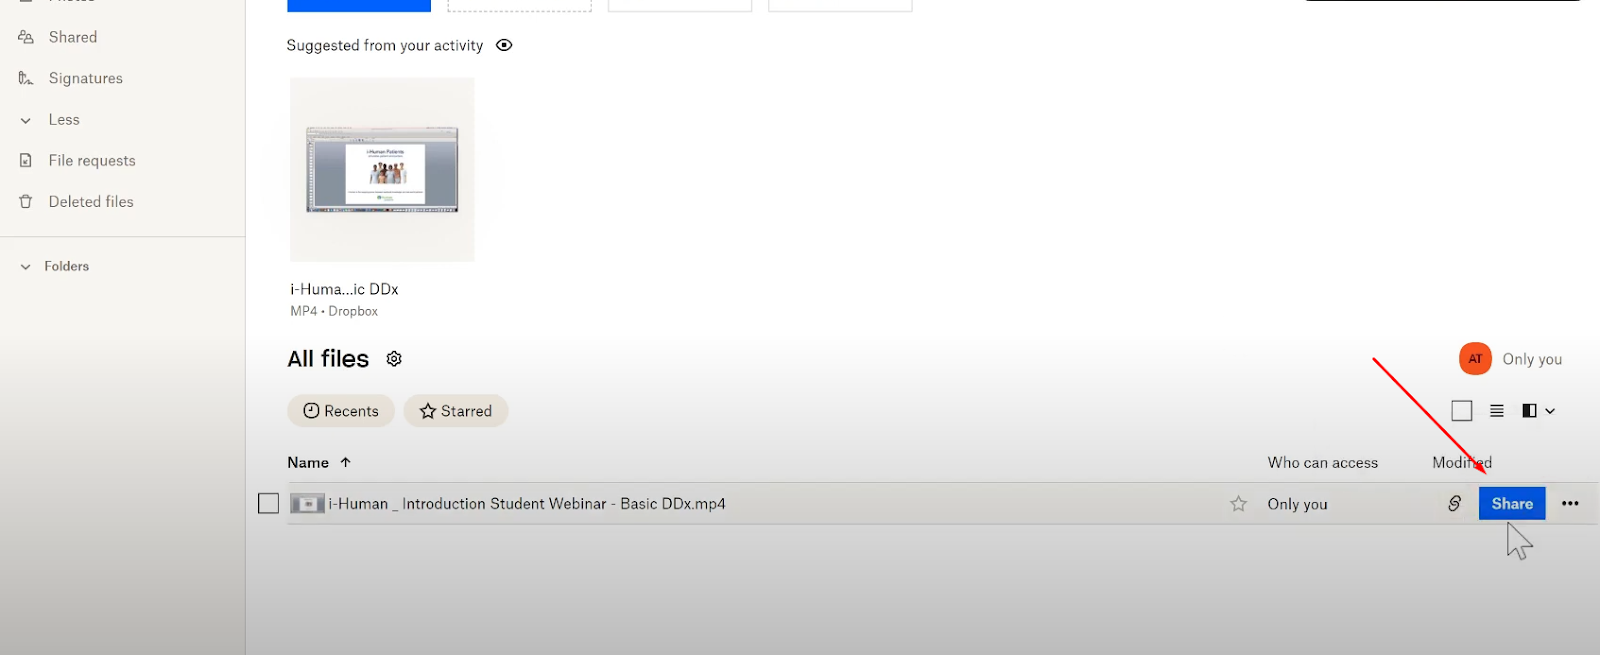
You can embed videos uploaded to Dropbox in a lesson. To do this, obtain a direct link to the video file (not the link provided by the Share button in Dropbox!) and embed it as an iframe.
The steps are shown below:
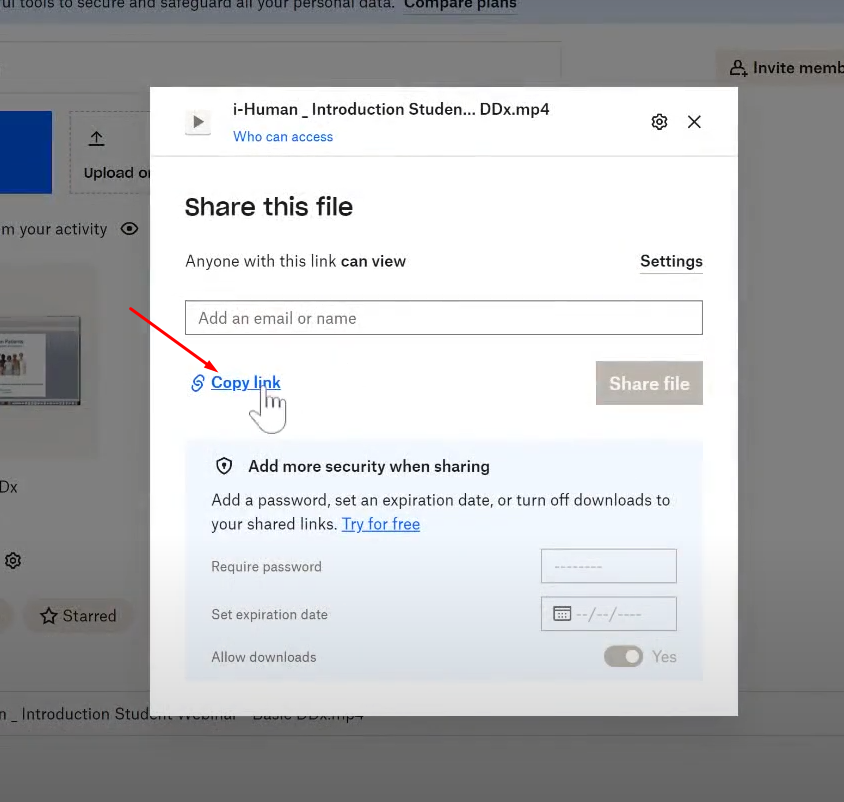
1. Open your Dropbox account, find the file, and click Share. Make sure anyone with the link can view the file, then copy the link into a text editor.
2. At the end of the link, you will find dl=0, which you need to replace with raw=1. The screenshot below shows two links: the original link copied in step 1, and the modified link below.


3. Copy the modified link (the lower one) into your browser address bar and press Enter. The address bar will then show a different URL. This is the direct link to the file that you need for the lesson.
4. Open the lesson and add a Text, Image, Code Embed block where you want to insert the video. Click +, add HTML code, select iframe, and paste the video URL (obtained in step 3) into the link field:
Please note, the video is streamed from Dropbox servers. Playback speed and quality depend entirely on Dropbox. Dropbox may also impose restrictions, described here: bandwidth limitations.
Didn't find the answer? Contact the support service via online chat or Telegram