Articles:
- How to delete a course
- Copyright protection of your content on Kwiga
- Public or trial lesson
- How to change the status of a lesson to draft and hide it from students
- Usage of checkpoints
- How to Add Practice to a Lesson
- How to create a task with mandatory review by an assistant
- How to create a task for different offers
- How to create a test with scores and automatic approval
- How to create and conduct a quiz among students on the course
- Contents of the lesson, all types of activities in the lesson
- Downloading video files
- How to add time codes to the video
- How to add button to the lesson
- Inserting iframe code
- Adding fractions, mathematical functions, formulas
- How to add text with spoiler to the lesson
- How to create a course on the Kwiga platform
- How to create a marathon
- How to add a cover to a course
- Course Program Display Options
- How to add a public face to a course
- How to add a team to a course
- Course preview with different access levels
- Block above lesson or module pages (top banner)
- Setting delays, schedule for opening and closing lessons (dripping content)
- Report on student progress on the course
- Analytics of assignments completion on the course
- Course sales report
- How to create a copy of the course
- How to copy lesson content
- Assistant’s Access to Practical Assignments
- Student Can't See the Course (Marathon, Closed Group)
- How to set up a test so that students see comments after completion
- Letter delivery: why letters don't arrive and how to fix it
- How to Customize the Appearance of a Course
- Manage activity visibility
How to add a public face to a course other than the owner of the account on Kwiga. The functionality is useful both for online schools to personalize courses and for smaller projects that bring together multiple experts.
In this article:
Adding a public persona to a course helps make it more personalized for students. It’s a straightforward tool that online schools can use to highlight the author’s personality or for projects involving multiple experts.
What is a public persona, and why add one
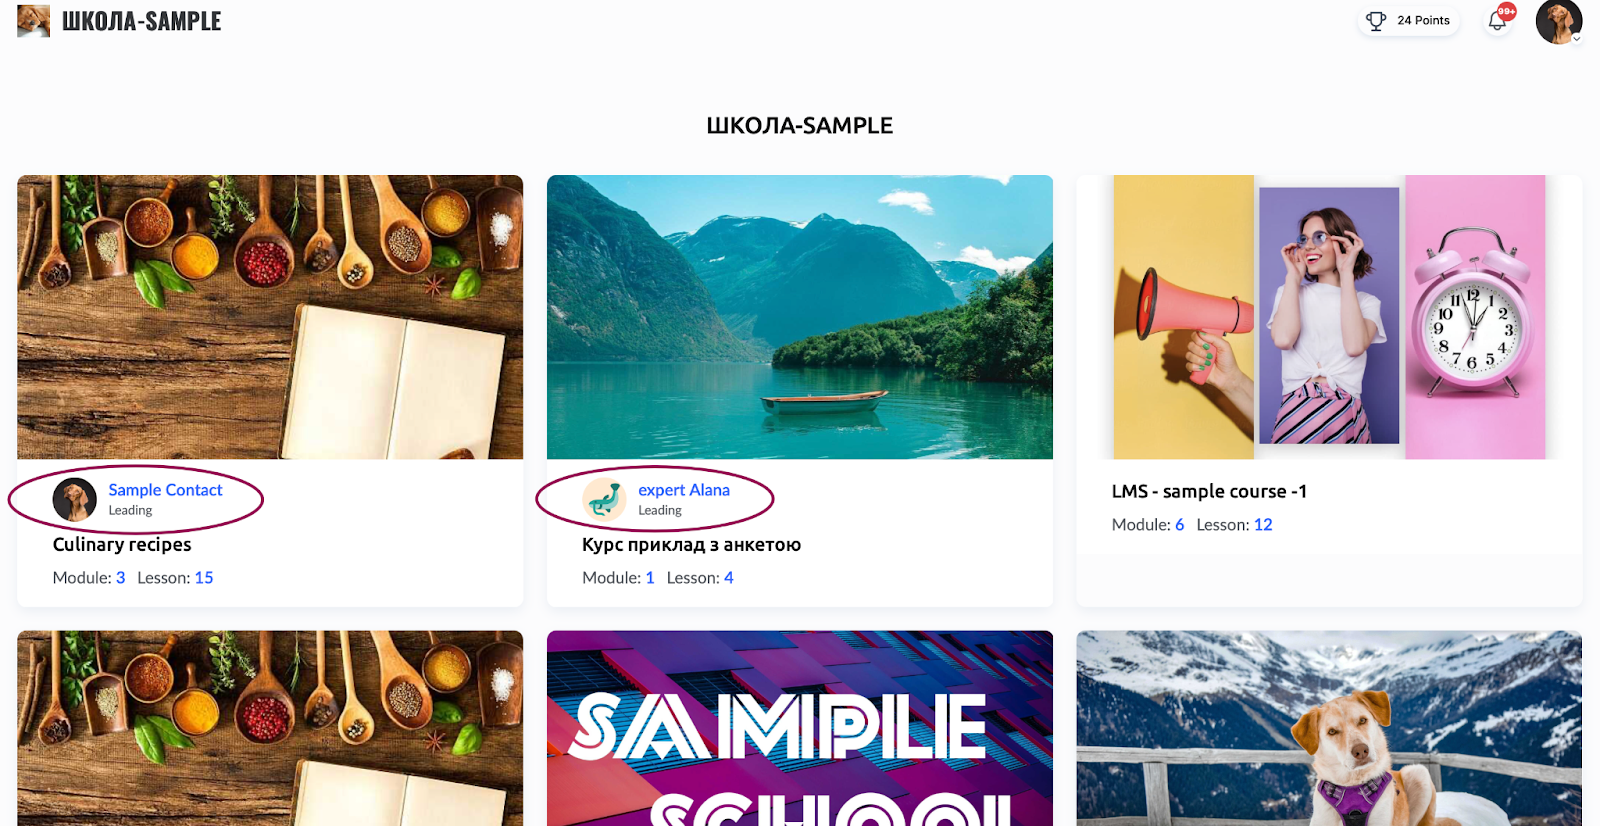
The public persona is the individual shown as the course author on the school’s public pages, the course presentation page, and within the student dashboards. By default, the course author is the owner of the Kwiga account. However, if you’d prefer to feature a different author, it’s easy to adjust the settings.
How to add a public persona
Step 1: Add a user
-
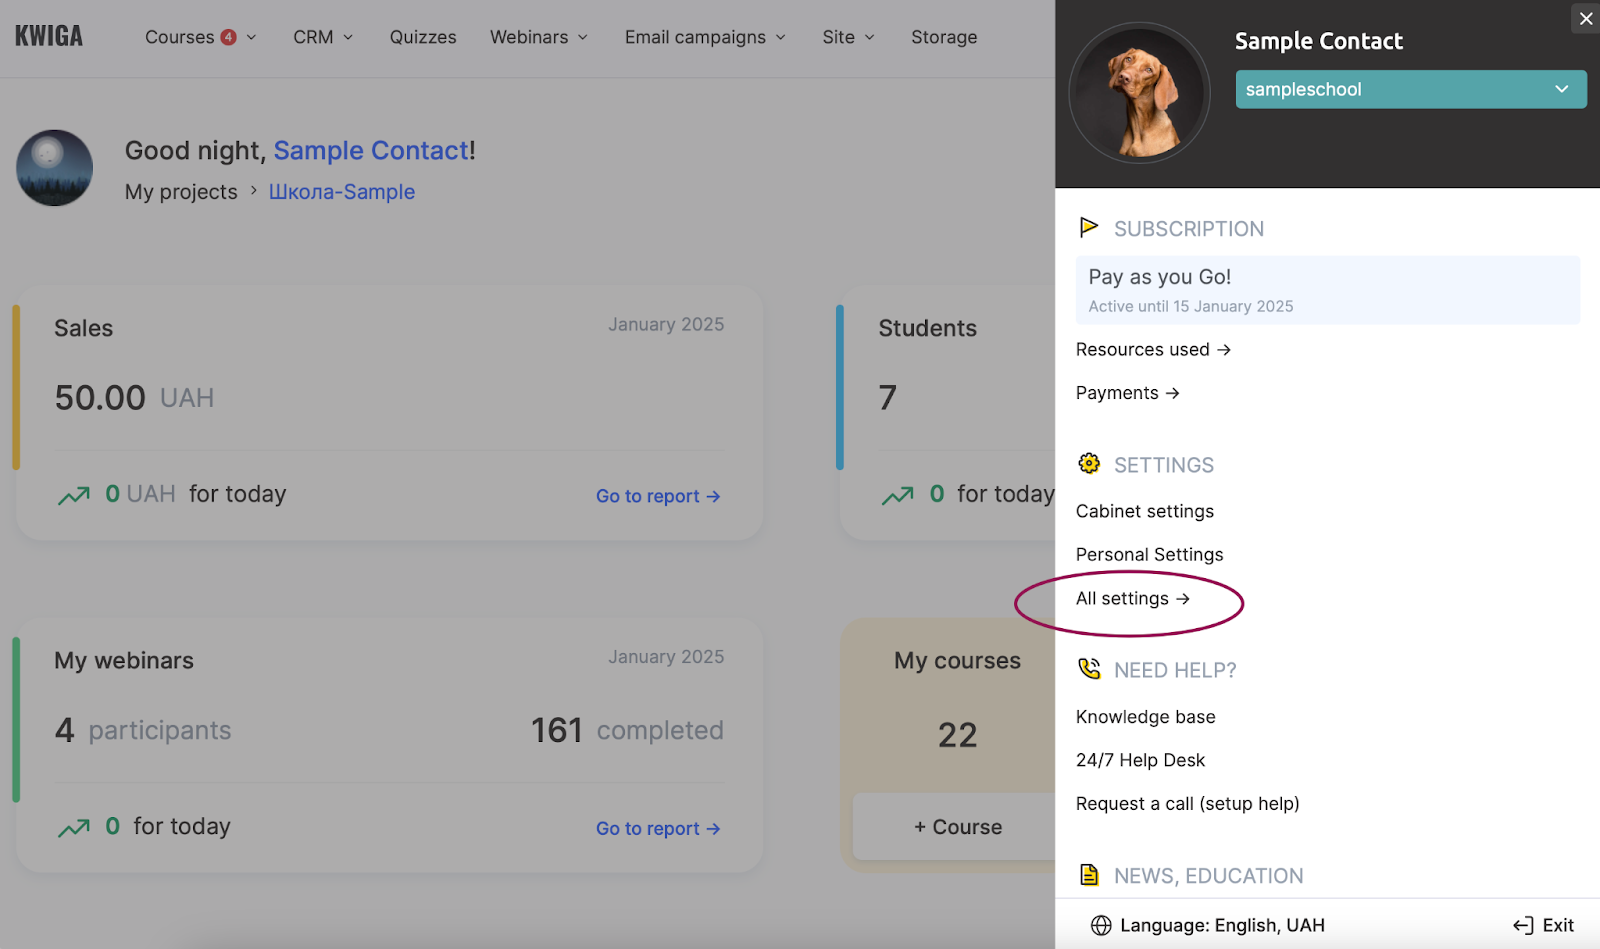
Click the profile icon in the top-right corner and navigate to Settings.
-
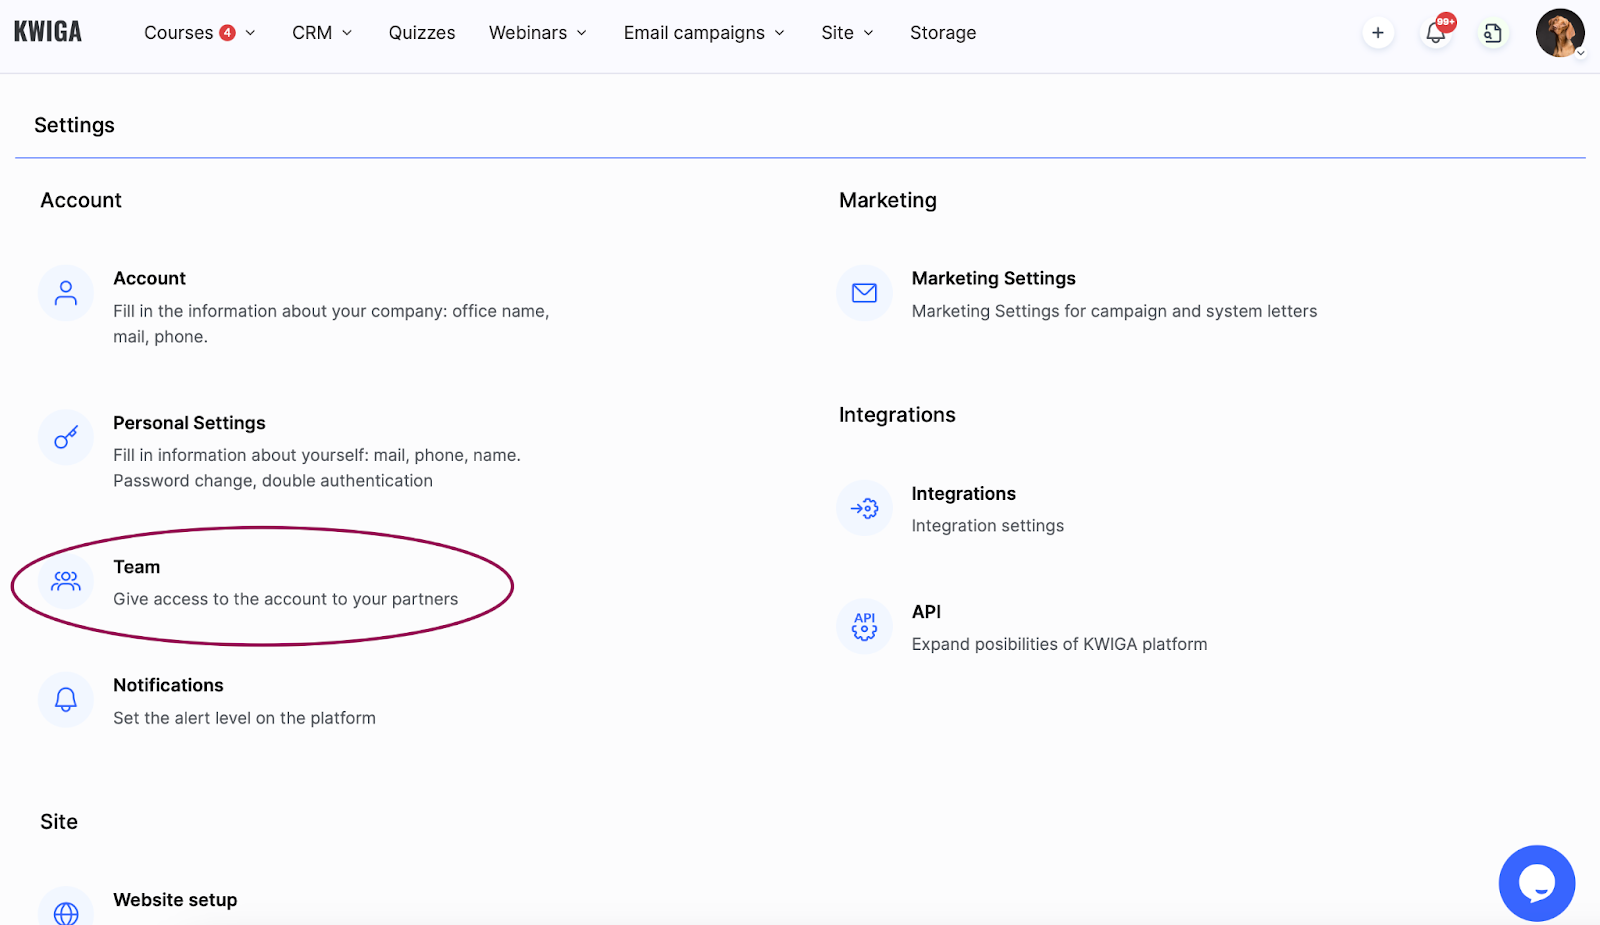
Select All Settings and then go to Team.
-
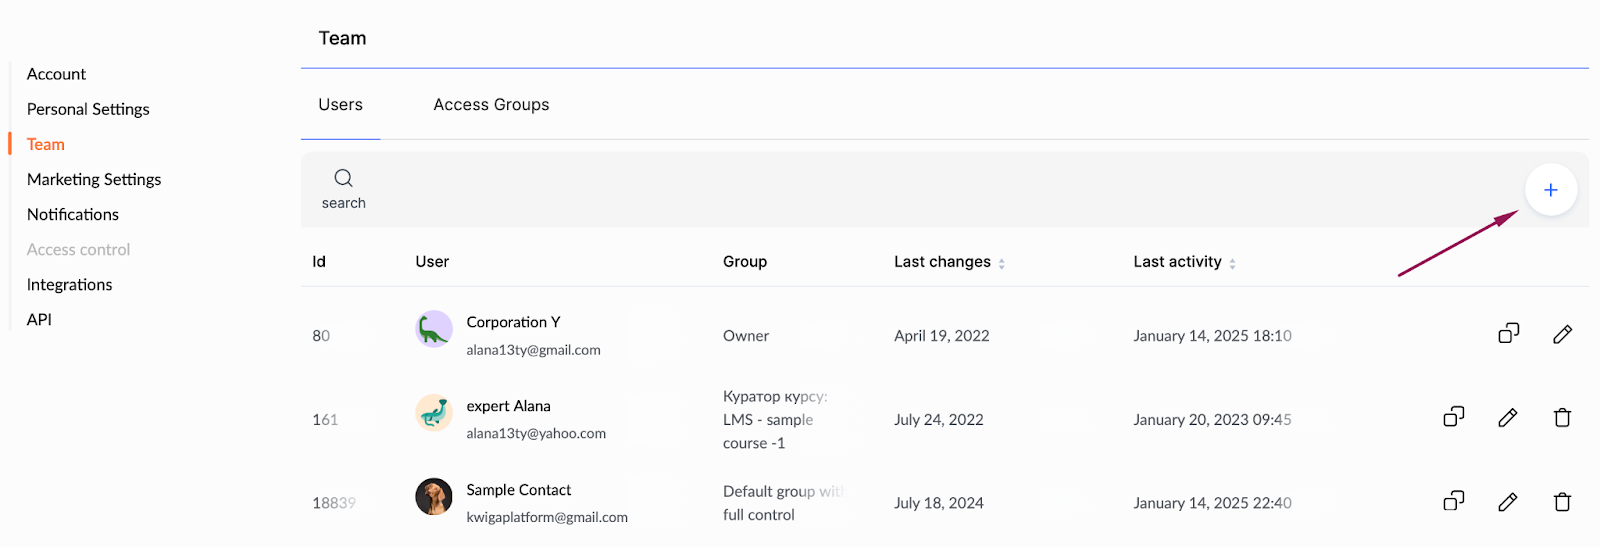
Click + (Add User).
-
Send an invitation to the new user and assign them access rights for the course.
For detailed steps, refer to the article on adding a team member.
Step 2: Assign the Public Persona
-
Open the Courses menu.
-
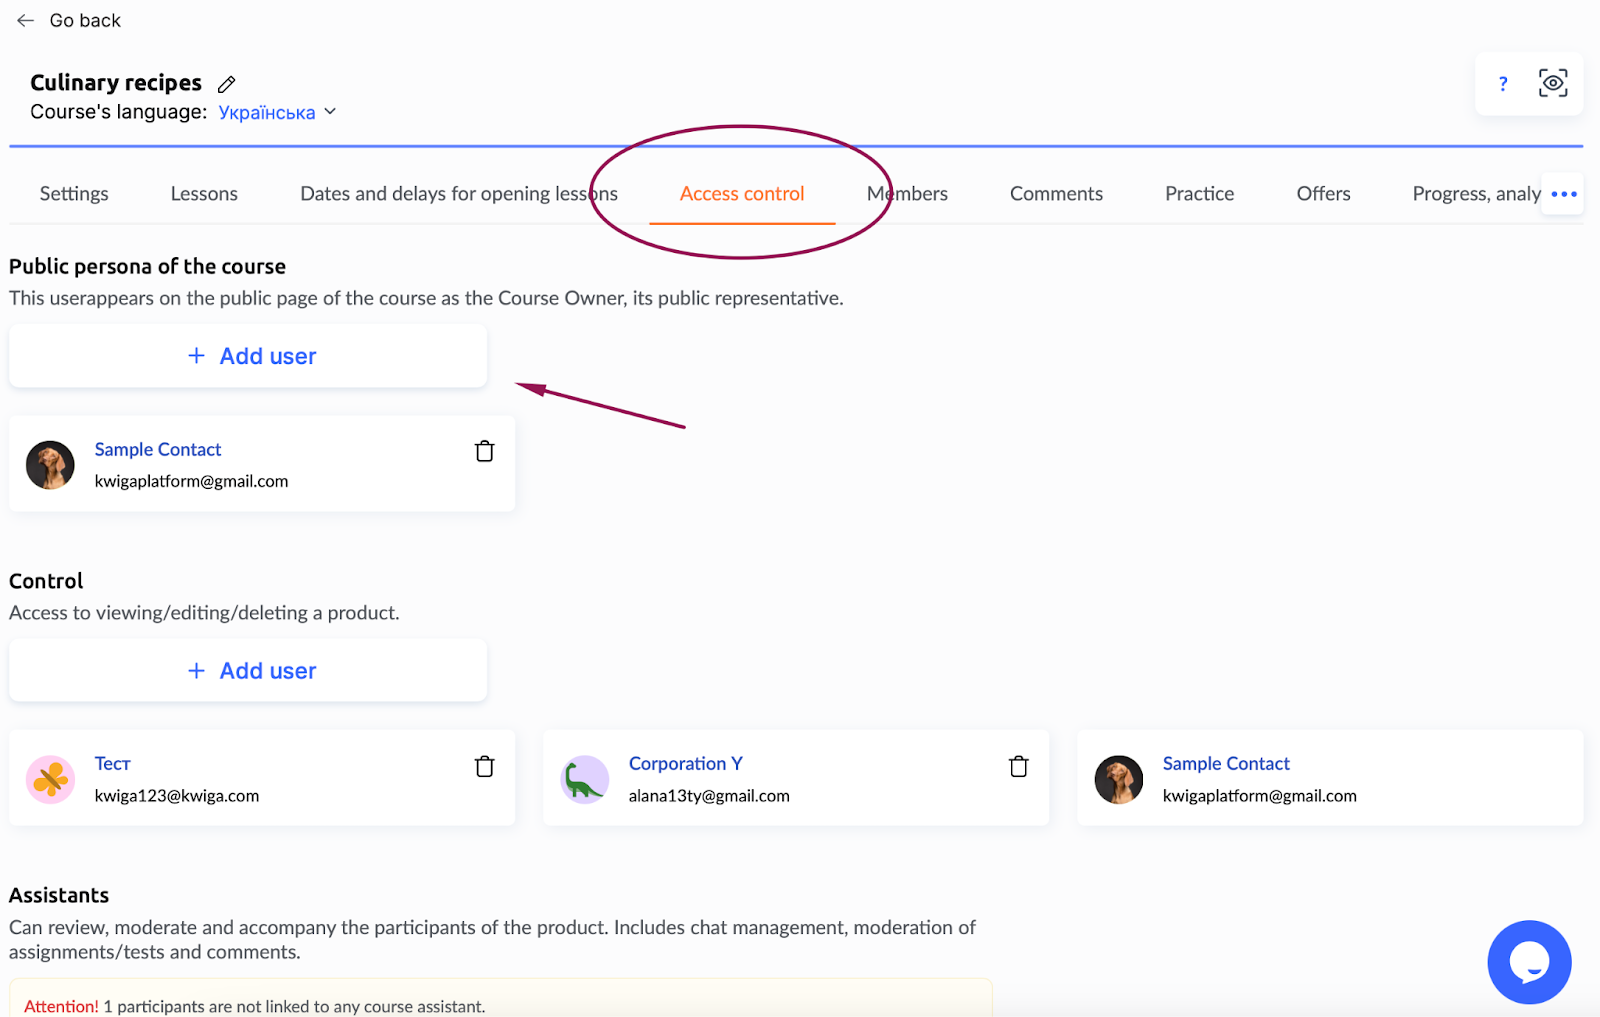
Select the desired course and go to the Access control tab.
-
In the Public Persona section, assign the user you want to feature as the course’s public persona.
Note: If the user isn’t visible, refresh the list using the update button. If this doesn’t work, return to Step 1 and ensure the user has been added.
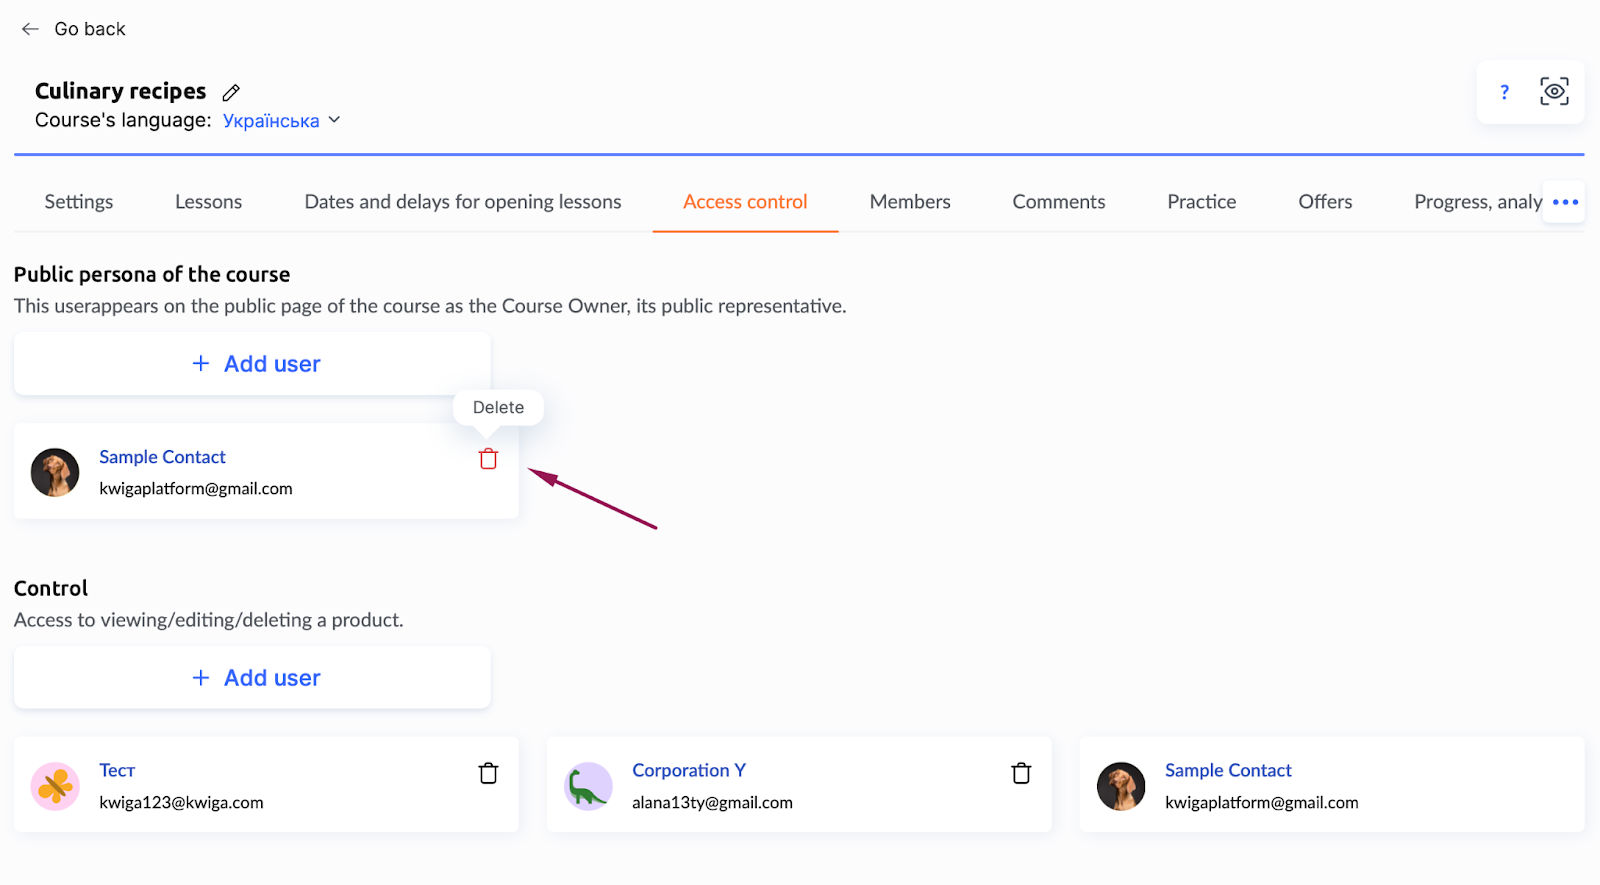
How to remove a public persona
If you don’t want the course to display an author, remove all users from the Public Persona section in the Access control tab.
Alternatively, you can edit the profile of the account owner and set a general school name instead. This approach works well for team-based courses where highlighting a specific author isn’t necessary.
Why is it useful
When students see who created the course, it increases trust in the material. Featuring a public persona makes the course feel more relatable and helps it stand out from others. The identity of the author can serve as an additional advantage, helping you highlight the uniqueness of your courses and build a stronger connection with your audience.
Didn't find the answer? Contact the support service via online chat or Telegram