
Articles:
- How to give access to the course
- How to access a student's account
- How to view member progress
- How to Create a Certificate and Add It to a Course
- Automation: Awarding points upon completing lessons
- Conducting surveys (reactions, ratings, NPS)
- How to view all test attempts
- How to set up a test retake
- How to update a student's rate and keep their progress
- How to change access settings for a single student
- How to change the expiration date of the course
- The student entered wrong email
- How to extend access to a course
- Automation: Setting up reminders if a student does not log into the platform
- How to unblock a user
- Freezing and unfreezing access to a product
- How to find an email with a code needed to access Kwiga account
- Viewing the course as a student
- Pre-registration or waiting list.
- Importing and transferring the student database
- Comments: a convenient tool for user interaction
- Certificate Issuance After Passing a Test
- How an Expert Can Access Their Student Profile
- Student Registration and Authorization
- Certificates Report
- Manual issuance and reissuance of a certificate
- Managing products in a contact card: adding, closing, changing the date, and removing access
What to do if a student did not have time to complete the course. How to extend access to a course for one or more participants.
In this article:
Sometimes participants do not have time to complete the course within the set timeframe: some get sick, some are busy with work, etc. The Kwiga platform allows you to extend access for an individual student or for all participants on an offer at once.
How to extend access for an individual participant
In the contact card:
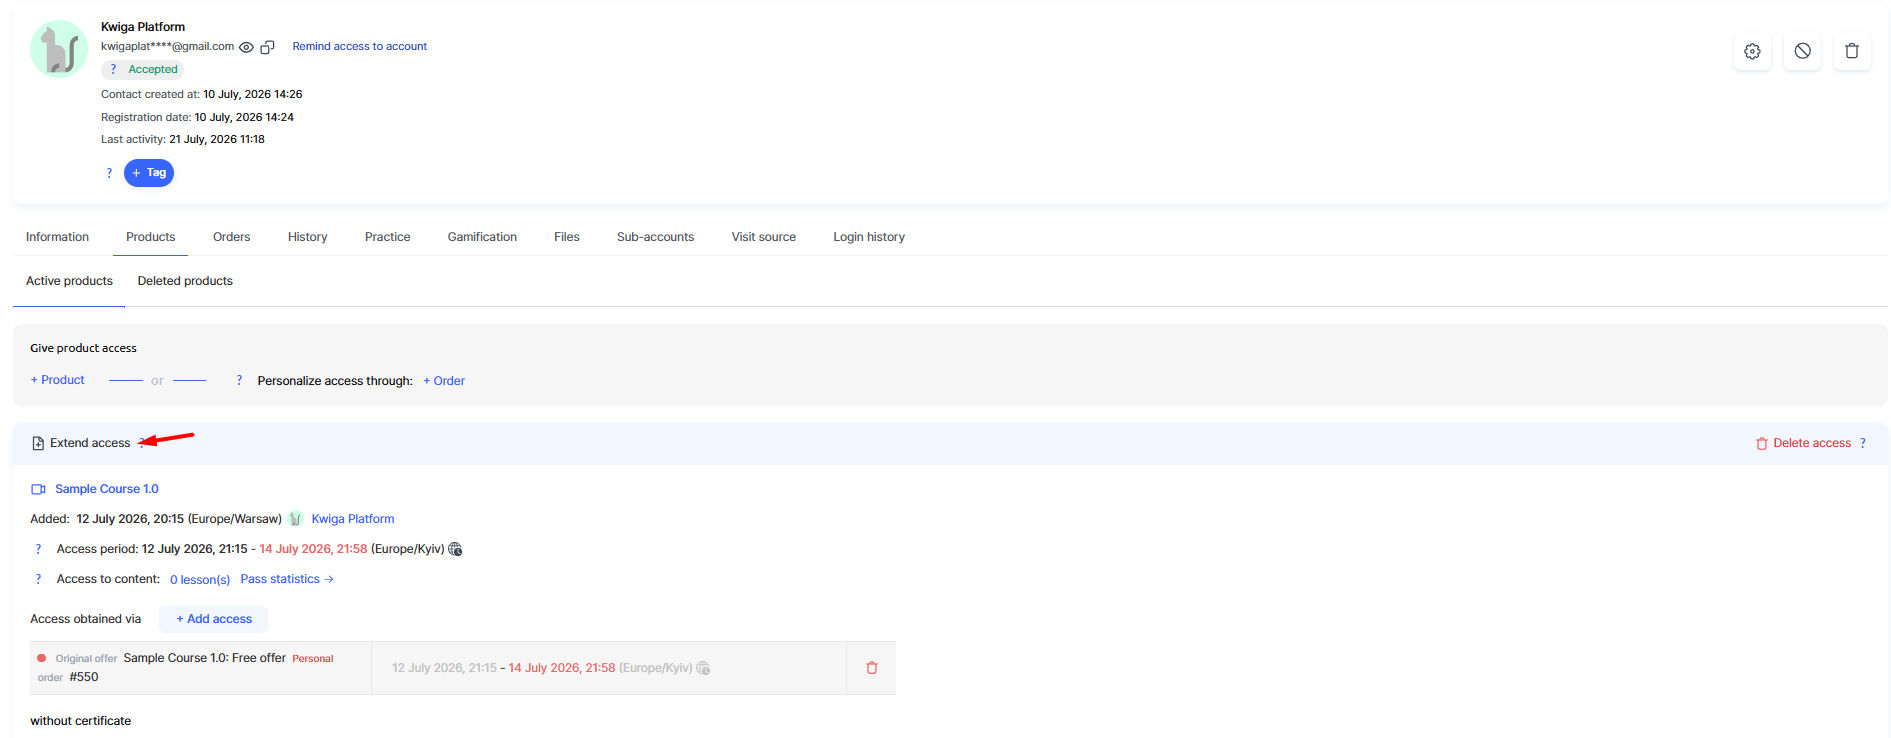
Open the required contact card, go to the Products tab and click Extend access in the action panel next to the required product.
In the Extend accesswindow that opens, specify how you want to extend access: for a period — that is, for a specific number of months and days or until a specific date — by specifying a specific access end date.
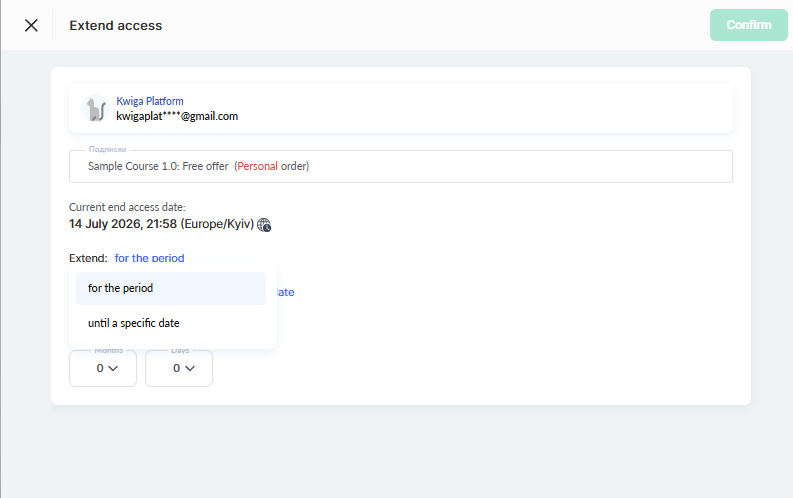
If extension for a period is selected, you also need to choose the Extension start date: from the access end date — then the specified period will be added to the previous date (for example, +1 month to July 31 will result in August 31), or from the current date — then the period is counted from the moment of extension, regardless of the date set previously.
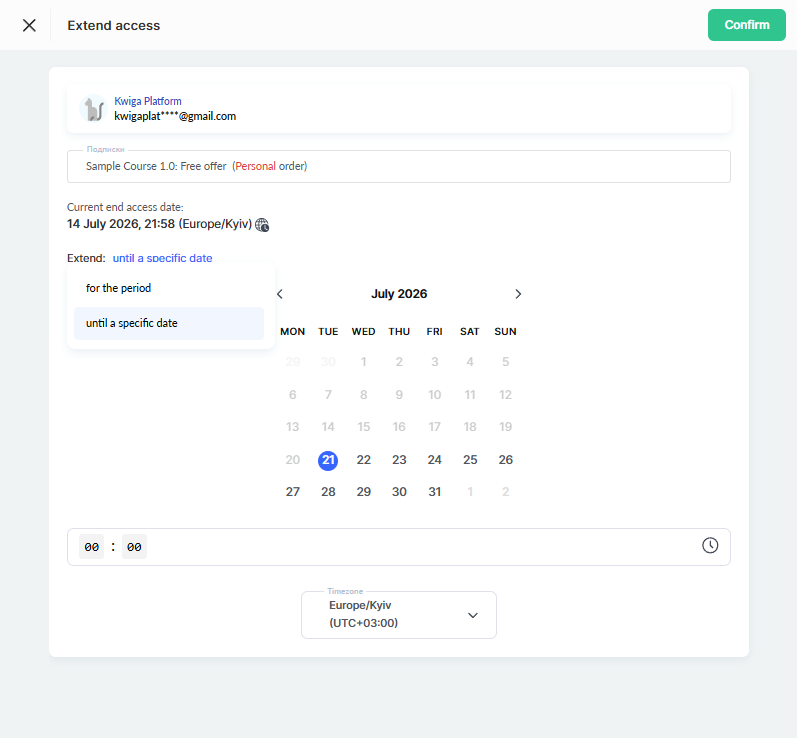
The selected value is immediately displayed in the Access will be extended untilfield, after which you only need to confirm the changes by clicking Confirm.
On the Course participants tab:
Go to the required course and open the Participantstab. Next to the required participant's name, in the Access endscolumn, click Extend and specify the new access period in the same way.
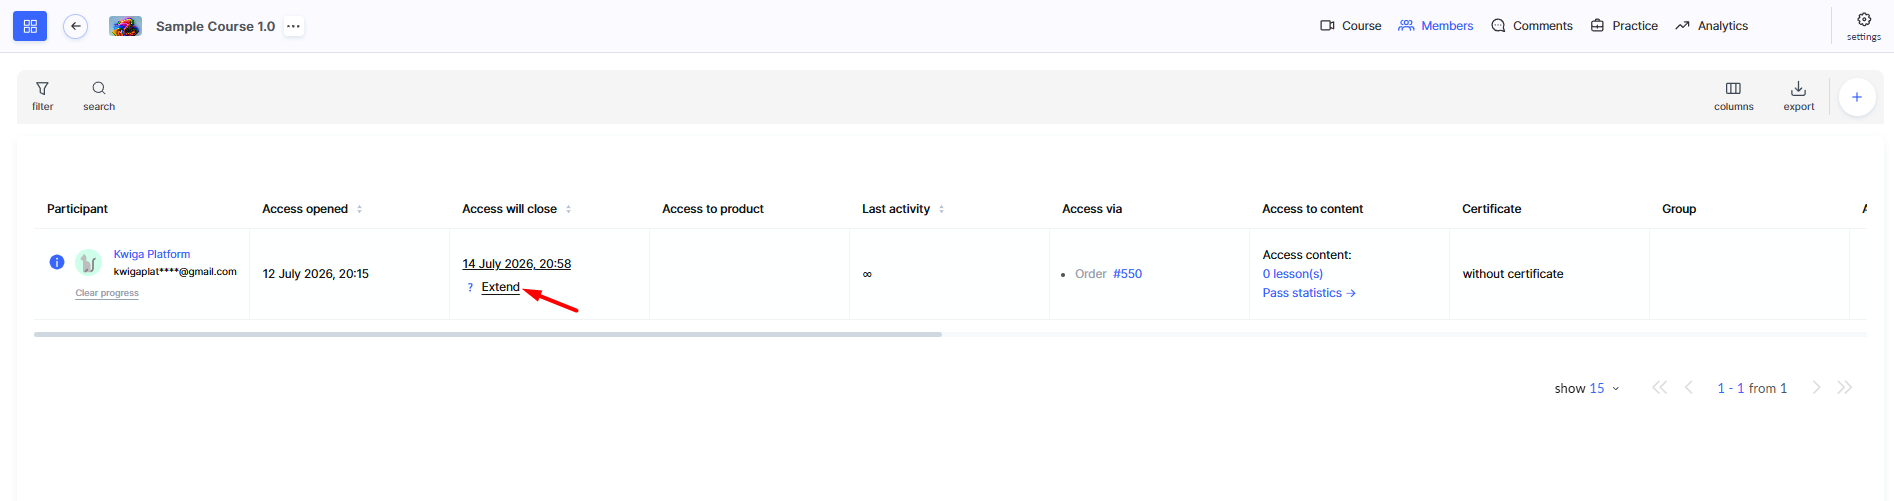
Regardless of the method, access is extended immediately after saving, the new date is displayed under the course title, and the participant receives an email notification about the change to the access date for the materials.
How to change the access end date for all participants on an offer
If you need to give additional time to all students on a specific offer at once, you should not extend access for each one individually — it is better to use the offer settings.
Open the Coursesmenu, go to the Plans, offers and select the desired offer.
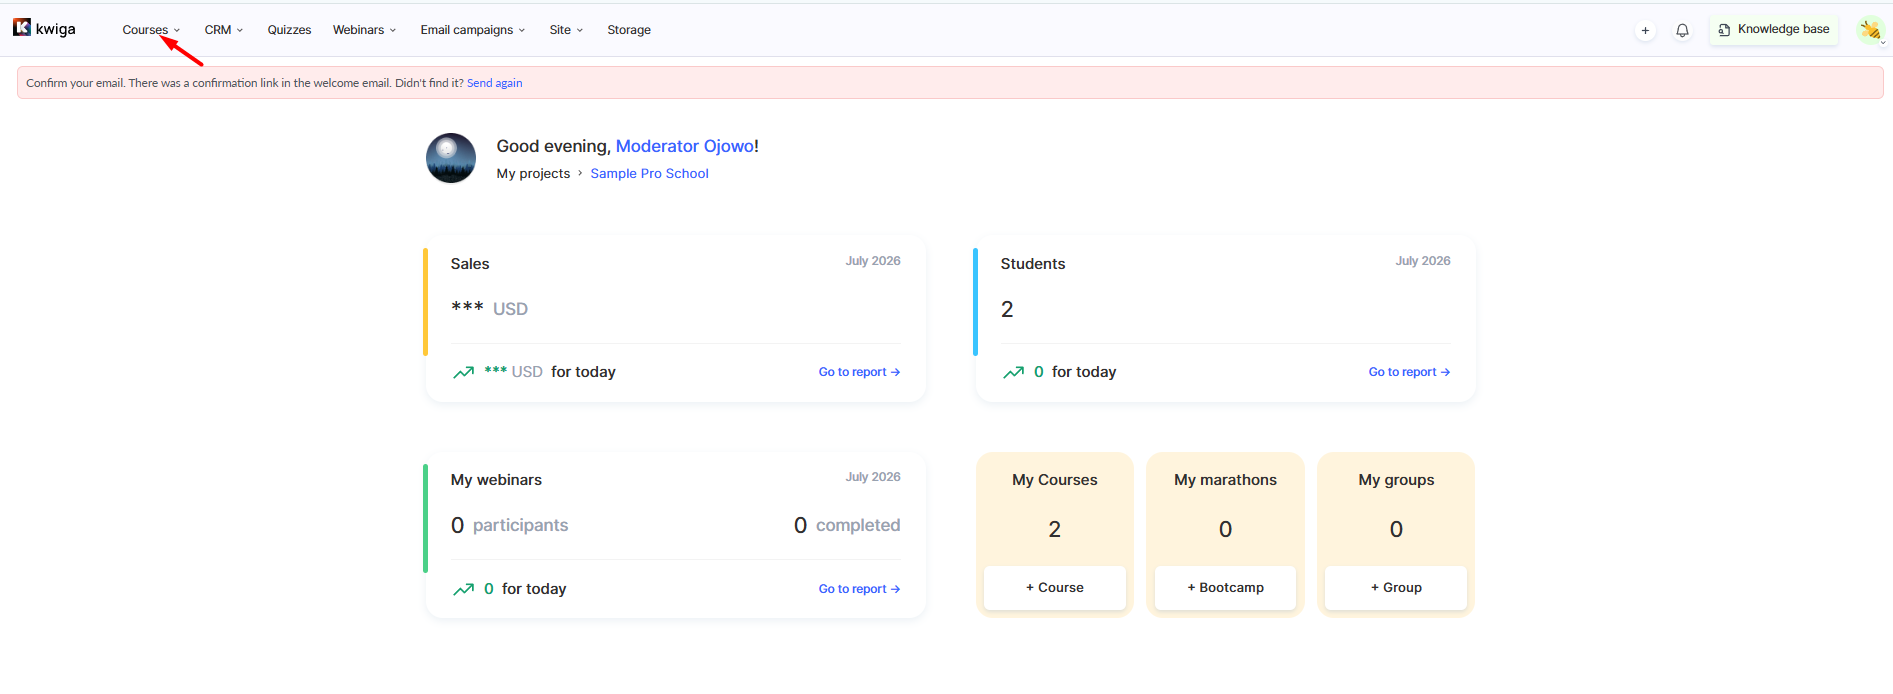
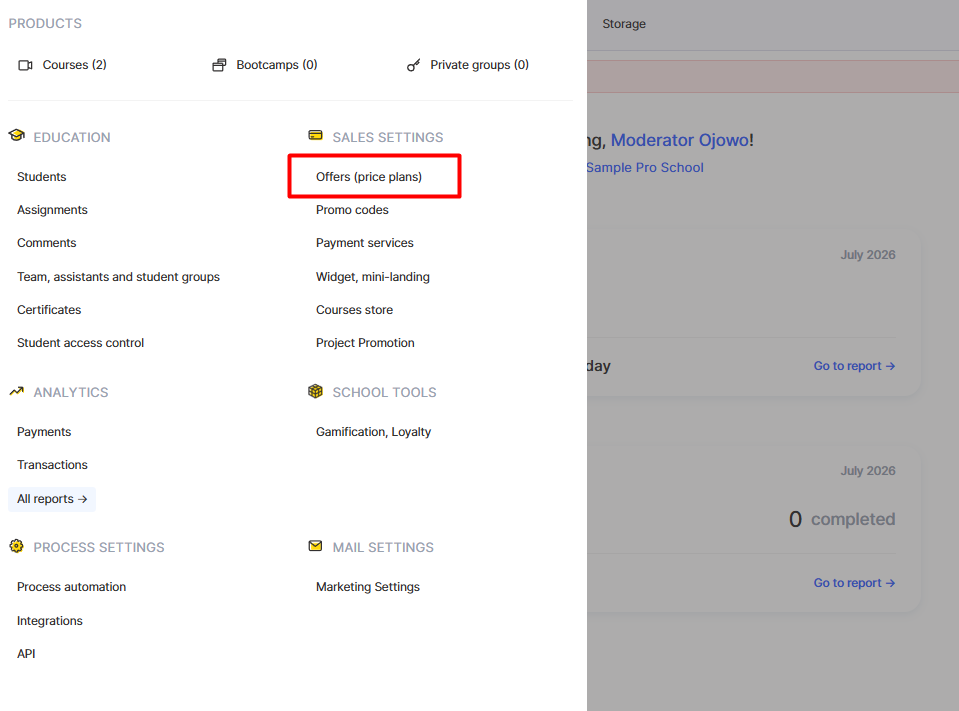
In the Product section, change the content access period: you can specify a new access end date, add a certain number of days or months, or make access unlimited.
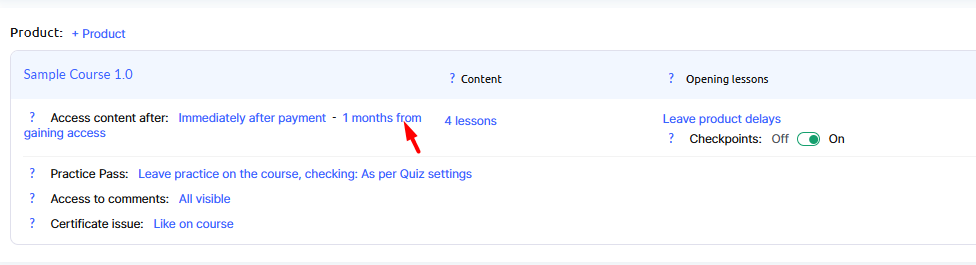
When changing the access period in an offer, the new date is displayed in each student's profile under the course title, but notification emails are not sent in this case.
Kwiga allows you to flexibly extend access to a course: individually—for a specific participant via the contact card or the Participantstab, by selecting the extension method and starting point, or in bulk—for all participants on the plan at once via the offer settings. This allows you to quickly respond to students' individual requests without losing control over the overall plan terms.
Didn't find the answer? Contact the support service via online chat or Telegram