
Articles:
- How to give access to the course
- How to access a student's account
- How to view member progress
- How to Create a Certificate and Add It to a Course
- Automation: Awarding points upon completing lessons
- Conducting surveys (reactions, ratings, NPS)
- How to view all test attempts
- How to set up a test retake
- How to update a student's rate and keep their progress
- How to change access settings for a single student
- How to change the expiration date of the course
- The student entered wrong email
- How to extend access to a course
- Automation: Setting up reminders if a student does not log into the platform
- How to unblock a user
- Freezing and unfreezing access to a product
- How to find an email with a code needed to access Kwiga account
- Viewing the course as a student
- Pre-registration or waiting list.
- Importing and transferring the student database
- Comments: a convenient tool for user interaction
- Certificate Issuance After Passing a Test
- How an Expert Can Access Their Student Profile
- Student Registration and Authorization
- Certificates Report
- Manual issuance and reissuance of a certificate
- Managing products in a contact card: adding, closing, changing the date, and removing access
How to manually grant a contact access to a product or plan, temporarily close or extend that access, and, if necessary, remove or restore it completely.
In this article:
Managers often need to grant a contact access to a course manually: when payment was made outside the platform, when access was agreed with the student personally, or when an error needs to be corrected after an unsuccessful order, etc. For this purpose, the contact card includes the tab Products, where you can see all active access grants as well as those that have already been deleted. From here, you can quickly grant a contact access to the required course or plan without creating an individual order.
Adding a product in the contact card
To grant a contact access, open their card and go to the Products tab. If the contact does not yet have any products, the Active products subtab will be empty, and this is where you should use the Grant access to product section by clicking + Product.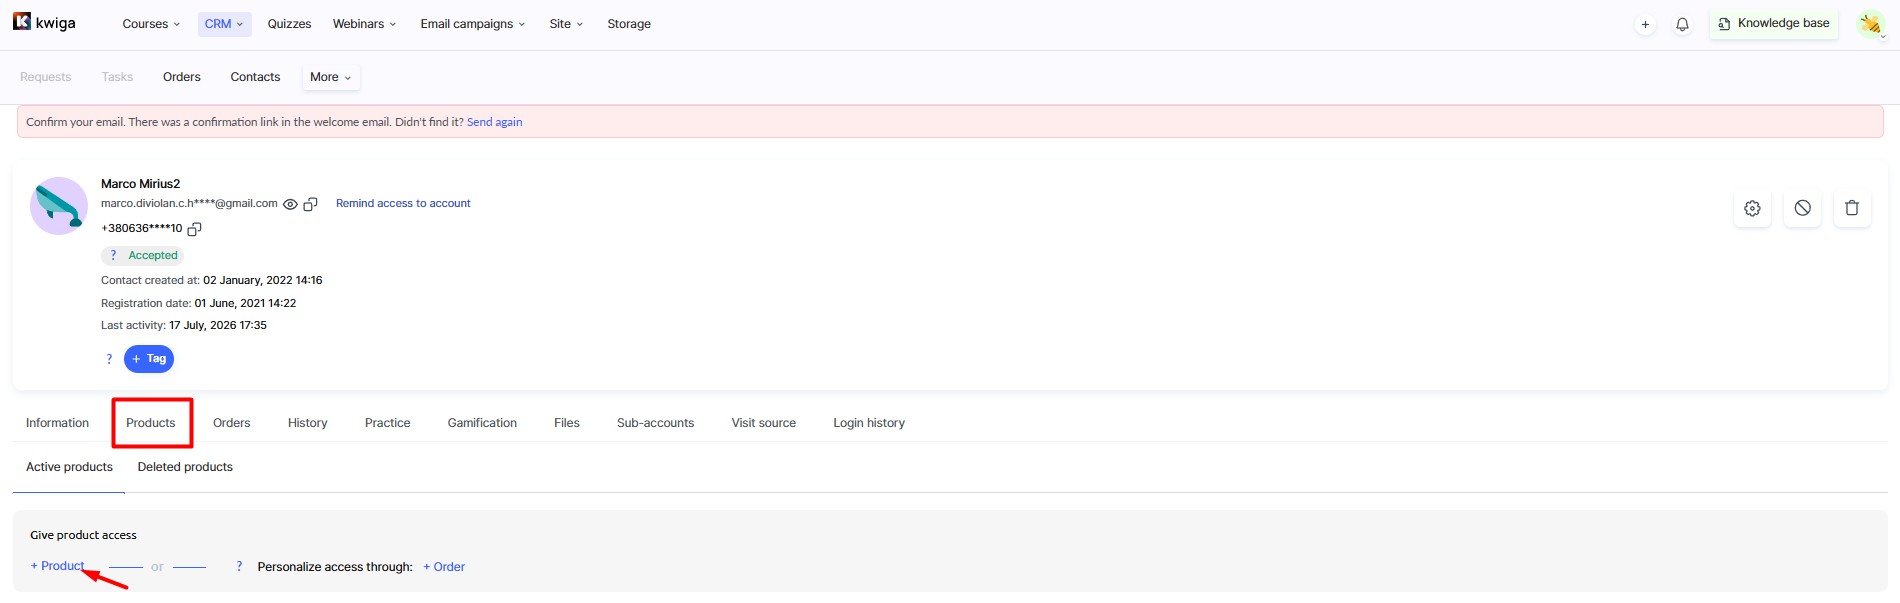
In the modal window that opens, first select what exactly access is being granted to: a specific product or a specific plan.
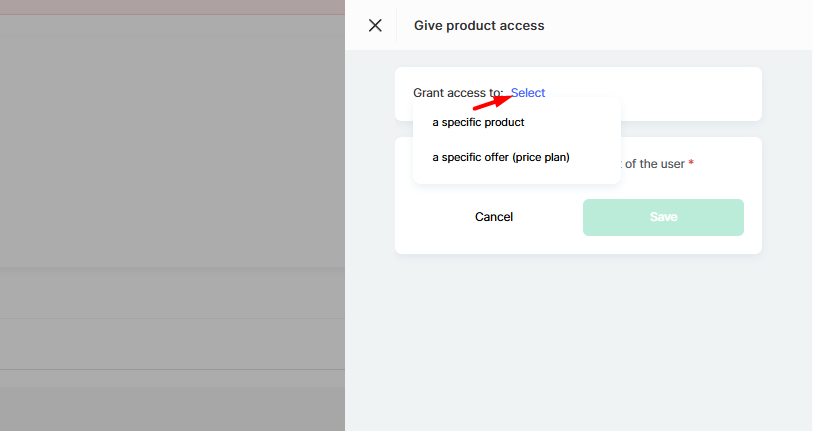
If you select the first option, the platform will open a list of all courses, bootcamps, closed groups, webinars, or products outside Kwiga, where you can find the required one and confirm your choice with the Save button.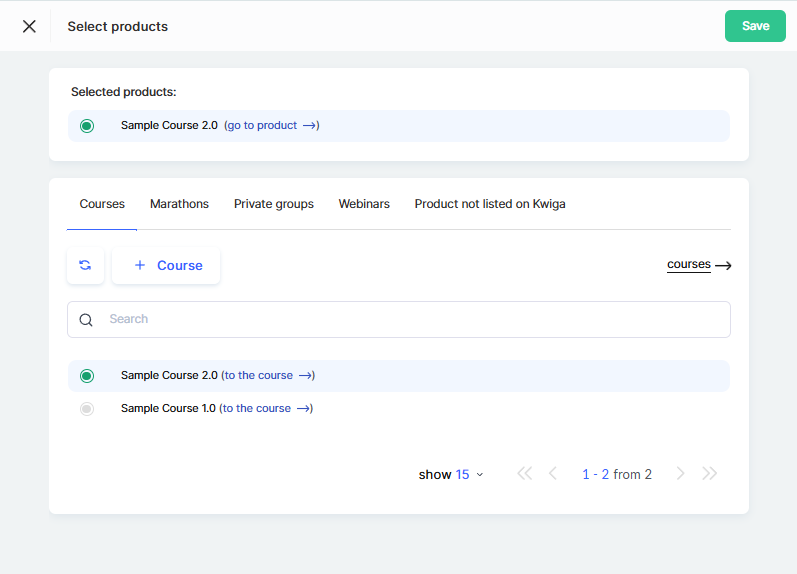
If you immediately select a specific plan, you can skip the product selection step: the system will immediately offer a list of plans not linked to a specific course. This is faster and especially convenient when a plan grants access to several products in a package, as you do not need to search for each product separately.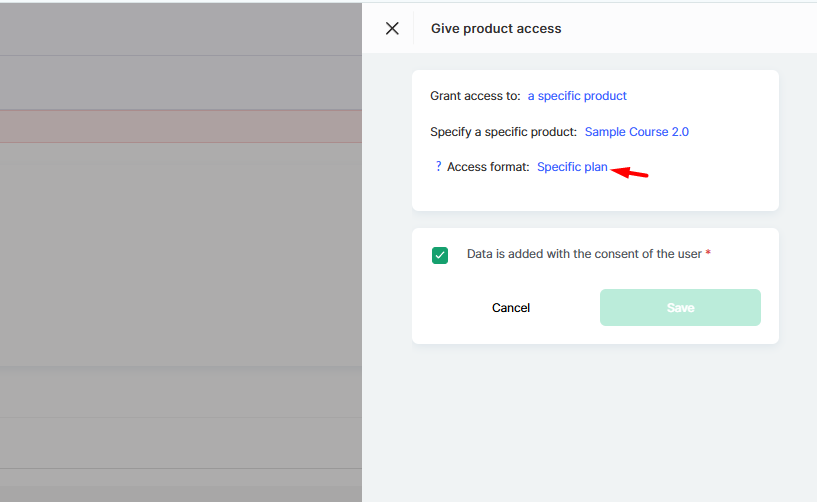
After that, the window will display the Access format field, where you need to specify under which plan (or offer) access is granted. A separate list of plans opens here, where you can select one or more options.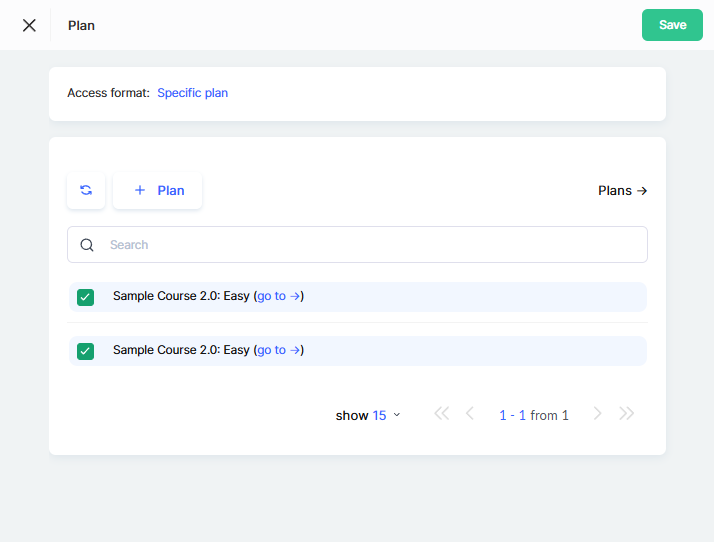
Once the product and plan are selected, all that remains is to specify the payment status in the Offer payment field and, if necessary, enable the Add payment transaction toggle if this payment needs to be included in reports.
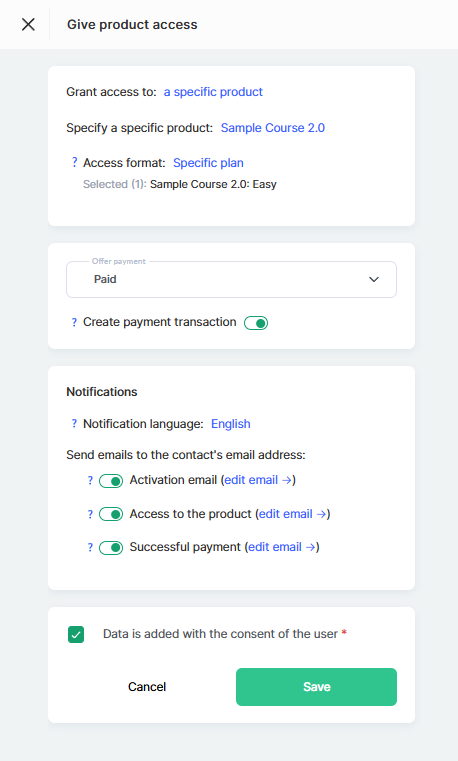
The notification language is set automatically based on the contact's profile, and the Product access and Successful payment toggles let you choose which emails the contact will receive. The process is completed by the mandatory checkbox Data is added with the user's consent, after which click Save, and the product will appear among the active ones.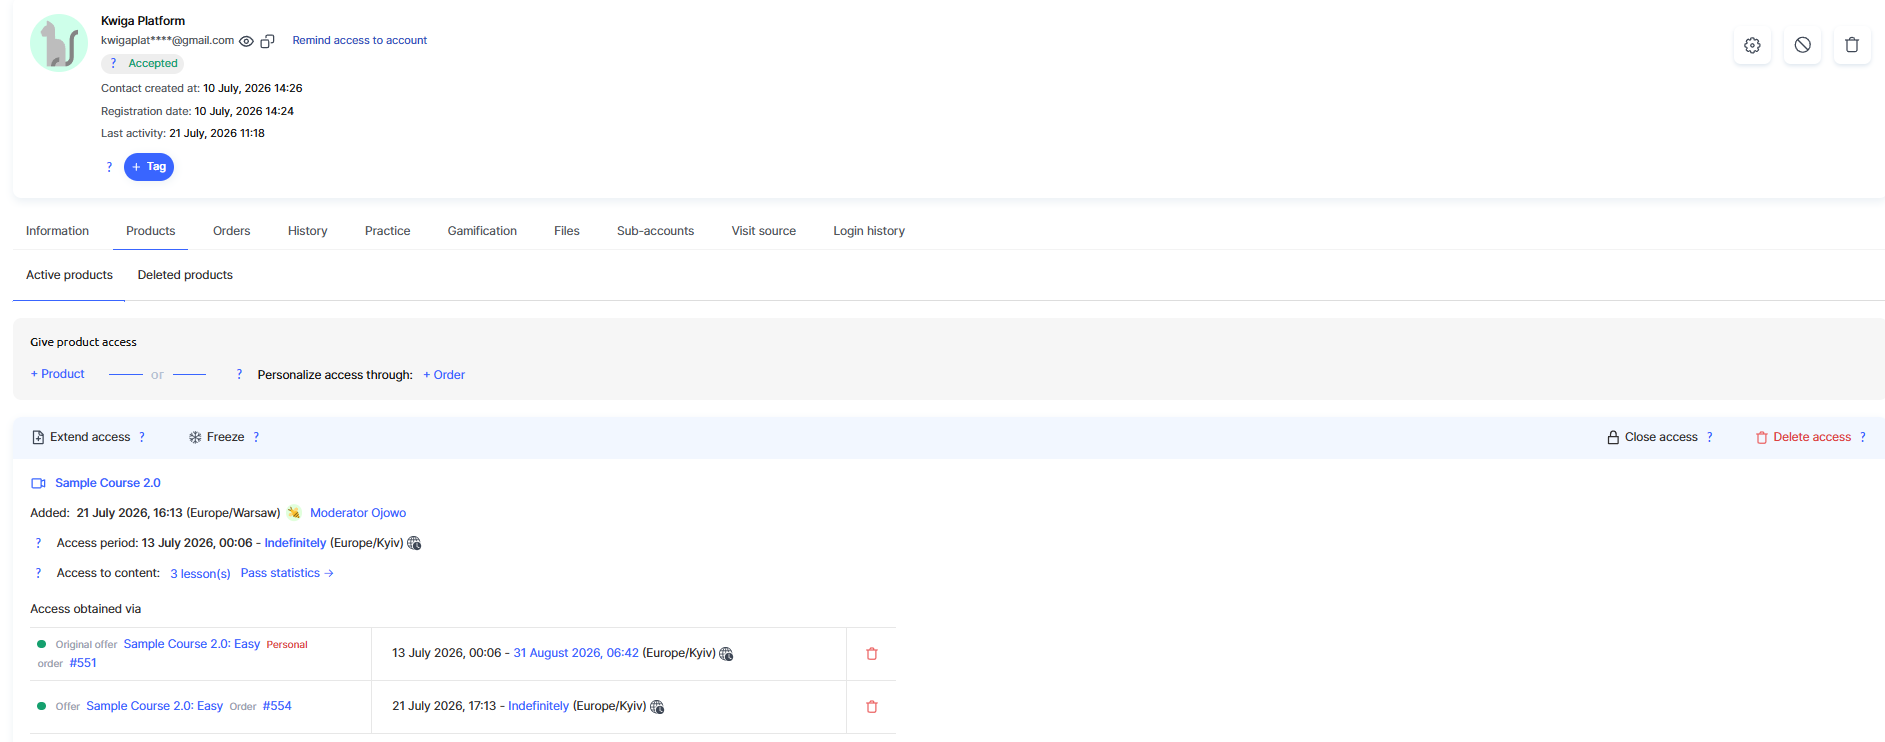
After saving, the product appears in the tab Active products with a detailed access card displaying:
-
Course name - with a link to the product itself.
-
Added - the date and time access was granted, as well as the user who provided it.
-
Access period - the access start and end dates; the end date can be changed directly here.
-
Content access - the number of unlocked lessons, as well as a link Completion statistics to check the student's progress.
-
Access granted through - the offer and order number through which access was granted; if necessary, you can add more access using the button + Add access.
Above the card is an action panel: Extend access, Freeze, Close access, and Delete access.
To learn how to use access extension, see the article Extending product access, and for freezing, see the article Freezing product access. Below, we will look at the actions Close access and Delete access.
Closing product access in a contact card
To immediately revoke a contact's access to a product without deleting the record itself, click Close access in the action panel.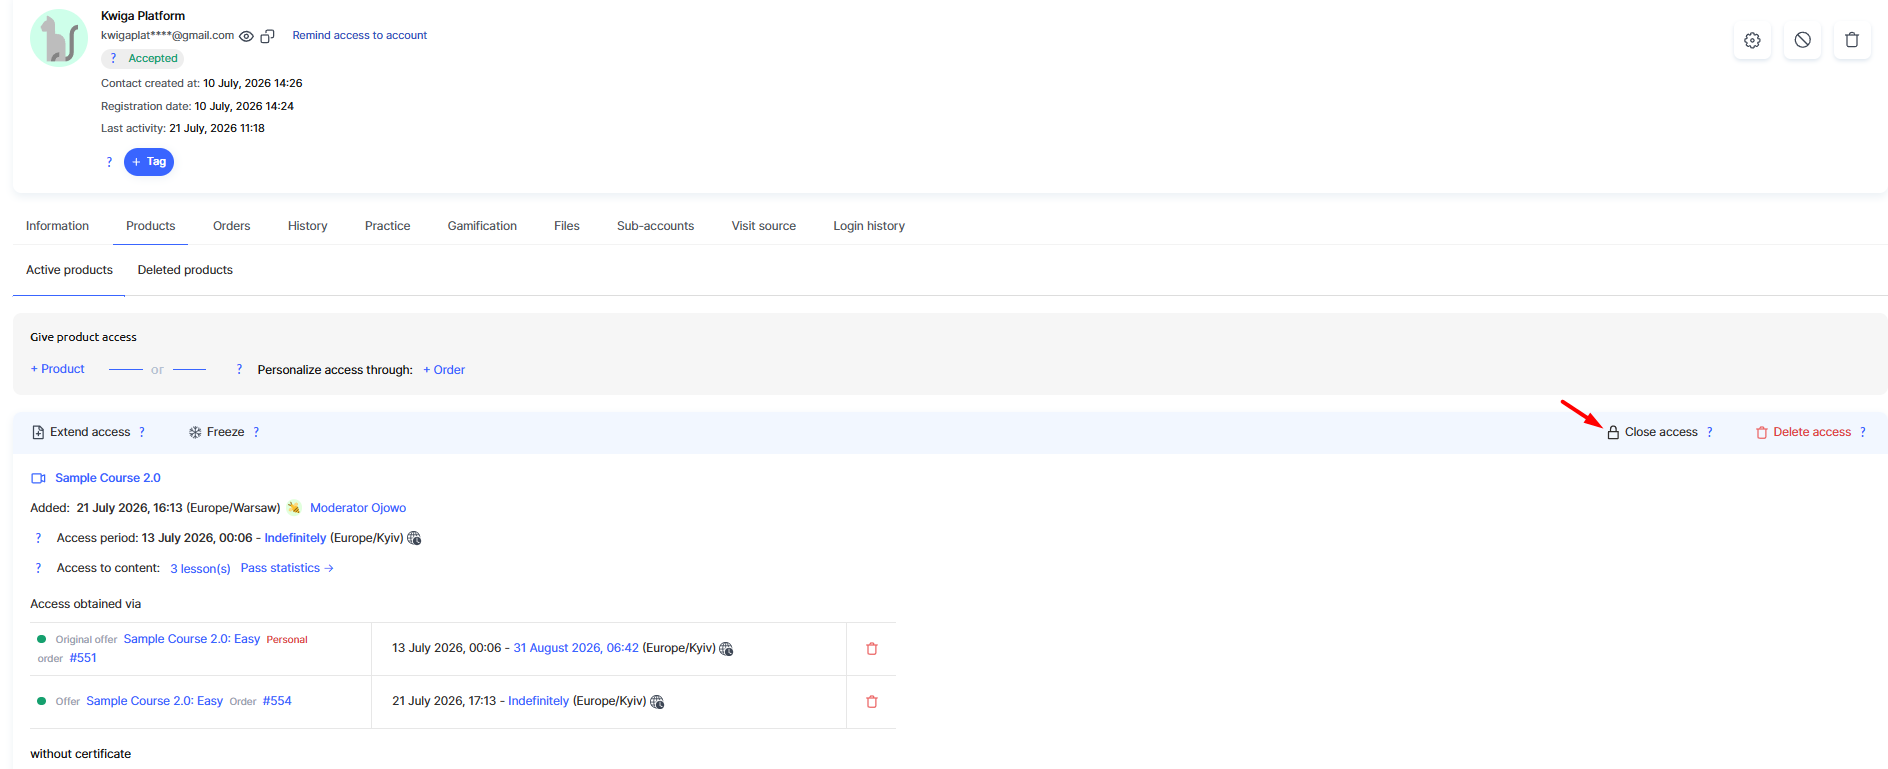
The platform will display a warning that the access end date will be changed to the current time, and the participant will immediately lose access to the product. 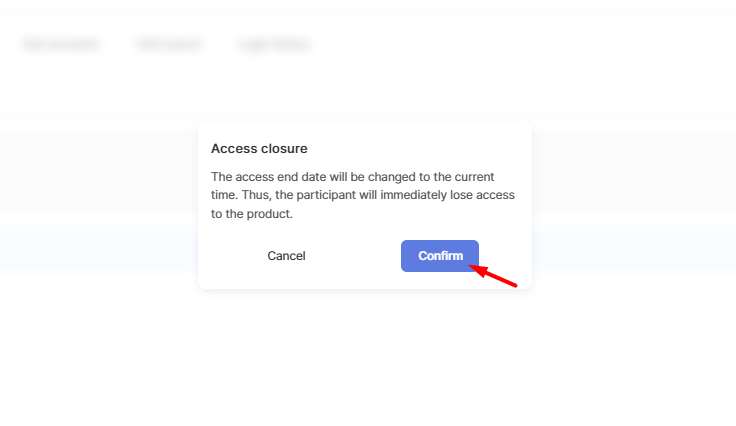
After confirming with the button Confirm:
-
Access period is updated — the end date changes to the time of closure and is highlighted in red.
-
Content access shows that the content is no longer available.
-
The indicator next to the offer in the block Access granted via turns gray with a red mark instead of a green one.
- The buttons Freeze and Close access disappear from the action panel, leaving only Extend access and Remove access.
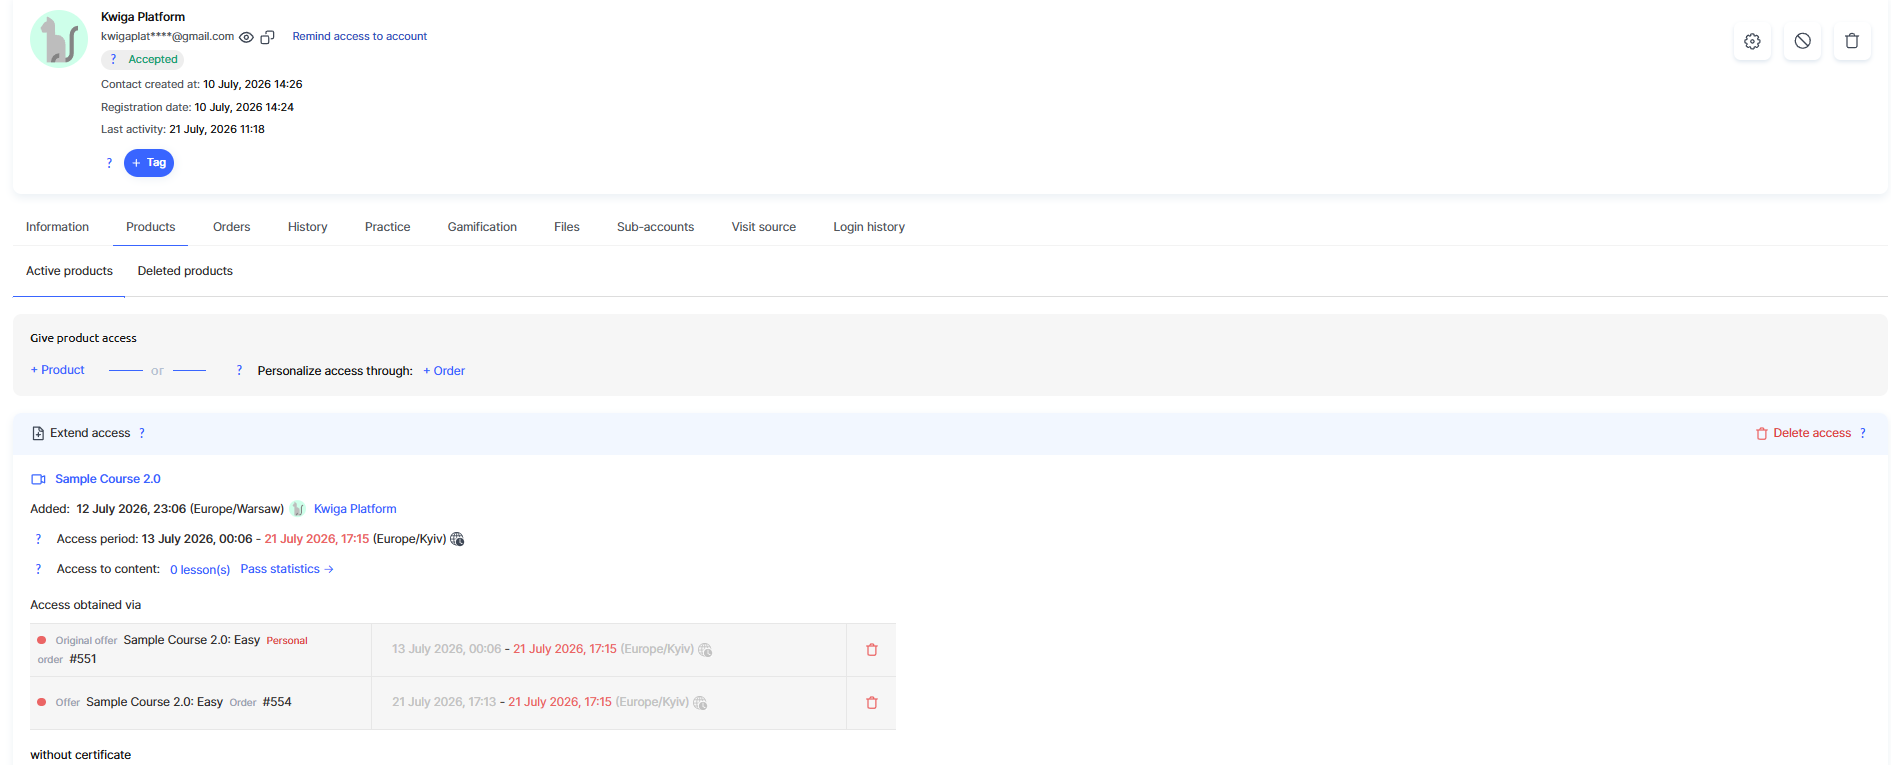
The product remains in the Active products tab — closing access does not move it to removed products; it only restricts the contact's ability to use the course.
Changing the access end date
You can manually change the access end date and time by clicking the date in the Access period field. 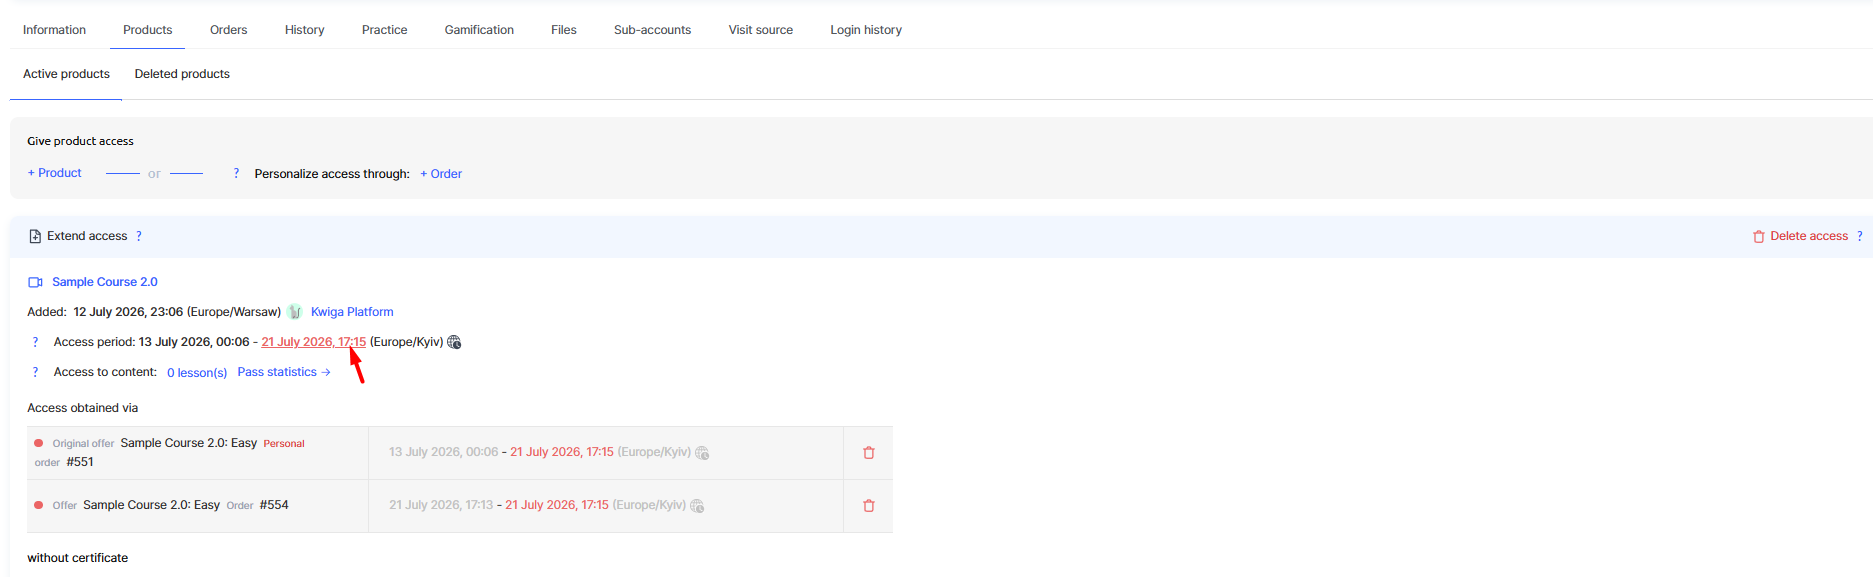
The Change access end datecalendar will open, where you can select a new date, time, and time zone, then save the changes by clicking Save.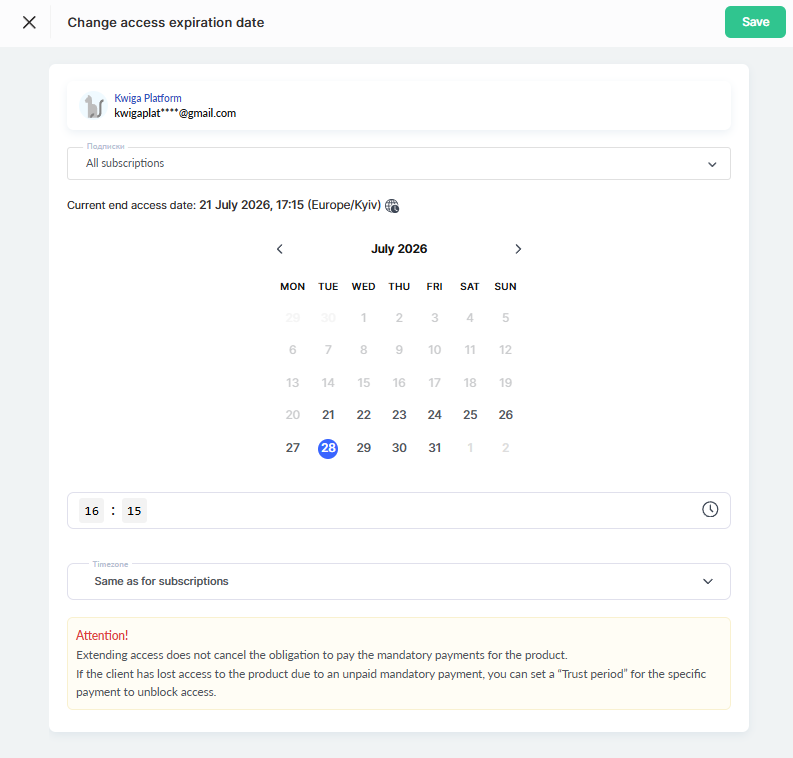
Note: Keep in mind that extending access this way does not eliminate the need to pay mandatory product payments. If the contact lost access due to non-payment of a mandatory payment, it is better to set a Grace period for the required payment to temporarily restore access. Grace period is the time after a payment becomes overdue during which the user retains access to the product and can make the payment without losing access. After this period ends, access will be suspended. If no grace period is set, access will be suspended as soon as the payment becomes overdue.
After saving, the new date will immediately appear in the contact card in the Access period.
Removing access in the contact card
To completely remove the product from the contact, click Remove access in the action panel.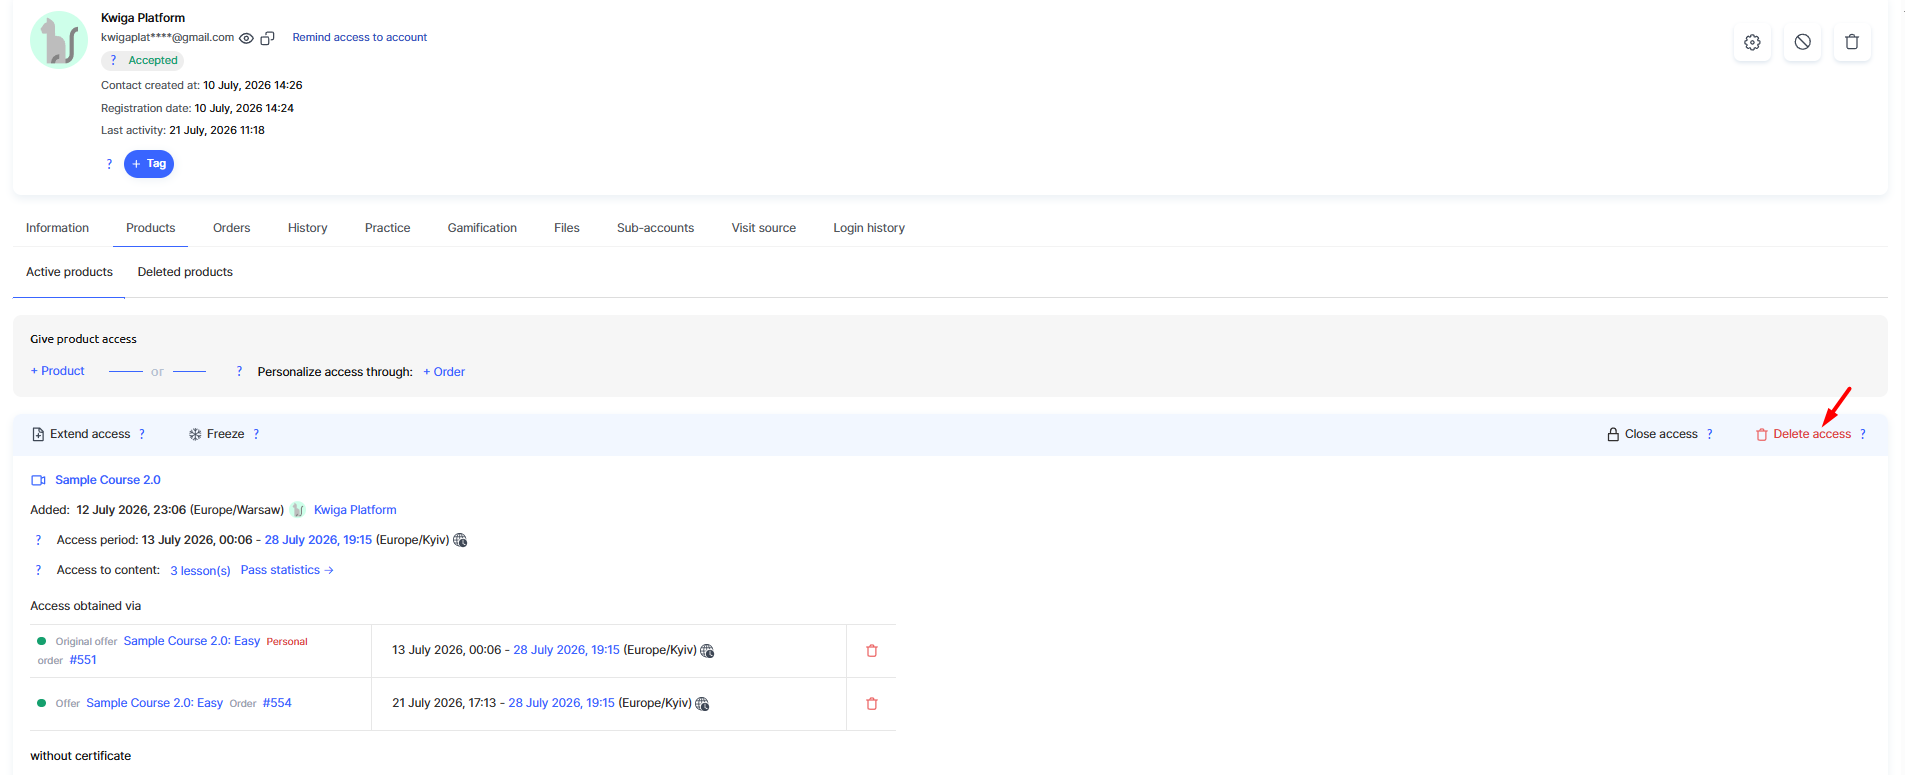
The platform will warn you that the product will be removed from the contact and display the name of the product being removed: the contact will lose access to it and will no longer see it in their account.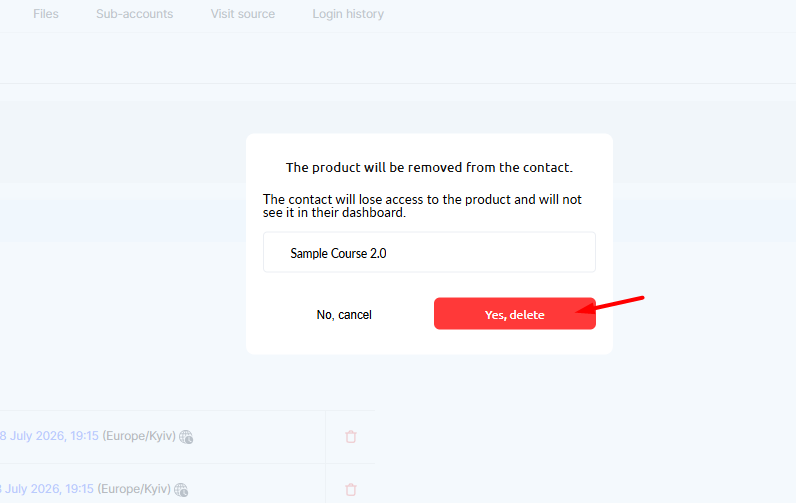
After confirming by clicking Yes, remove the product disappears from the Active products subtab and moves to the Removed products.
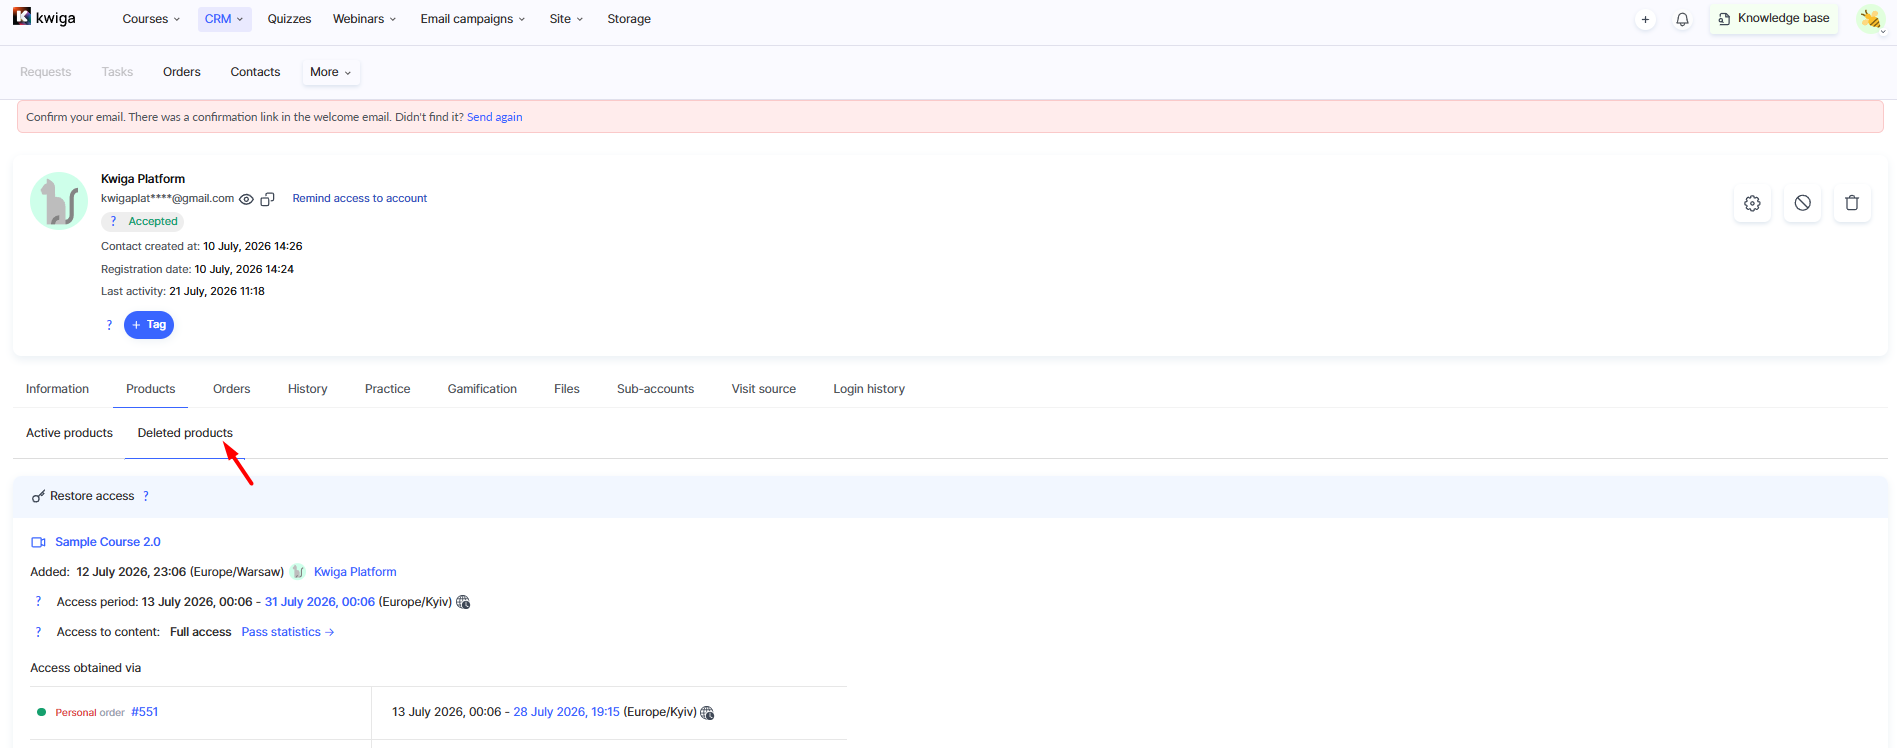
Restoring access to a product in the contact card
To restore a contact's access to a deleted product, go to the subtab Deleted products and click Restore access next to the relevant entry.
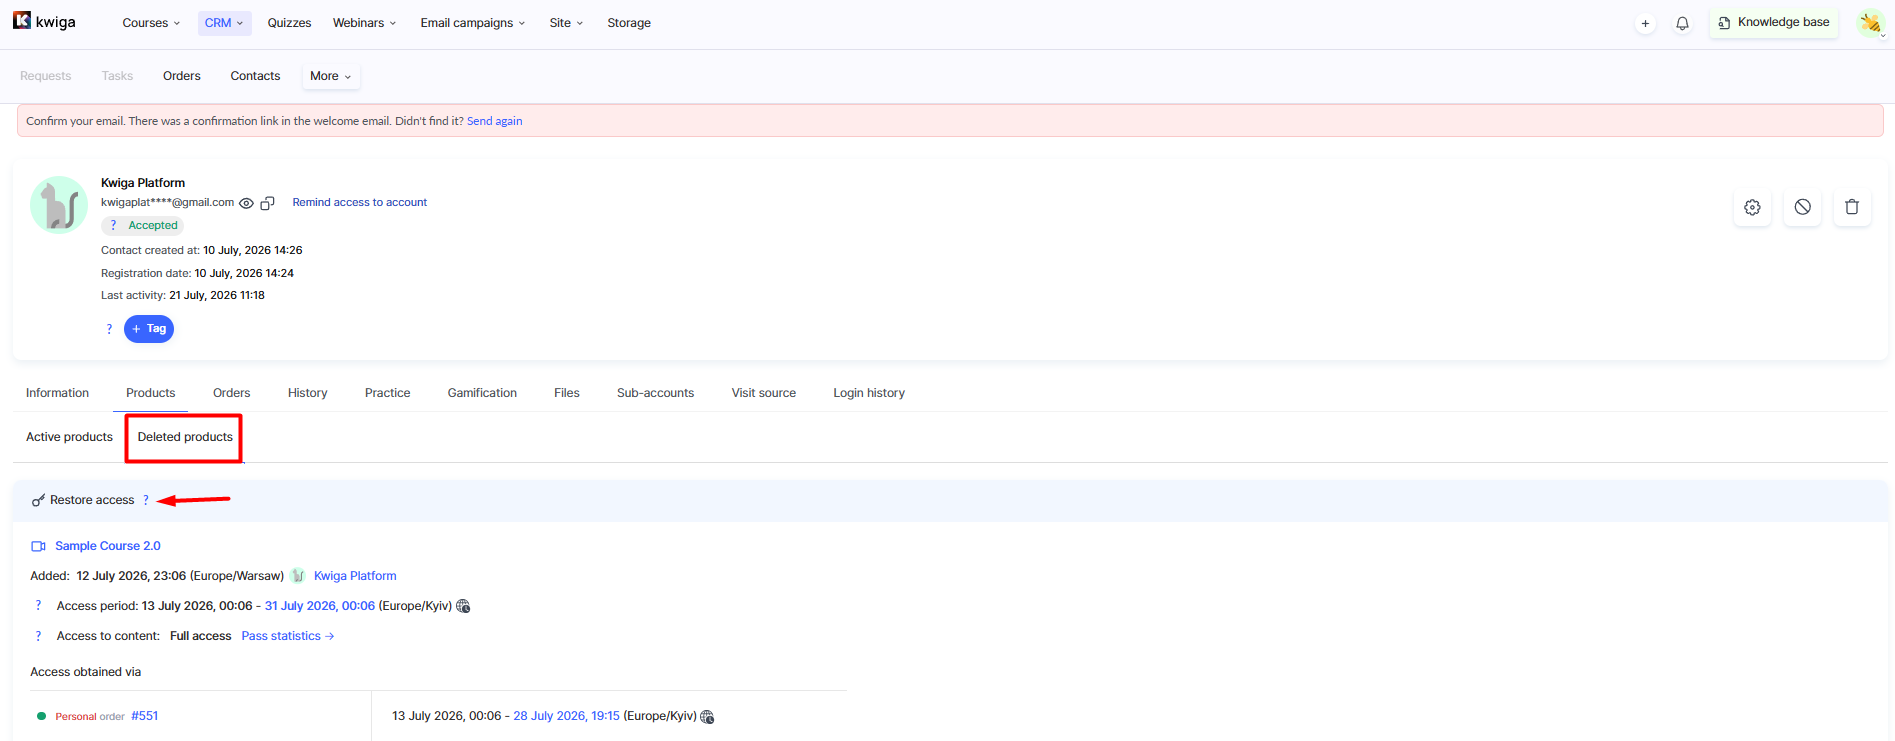
The platform will display a confirmation with the participant's name, product name, and the access end date that will be restored. 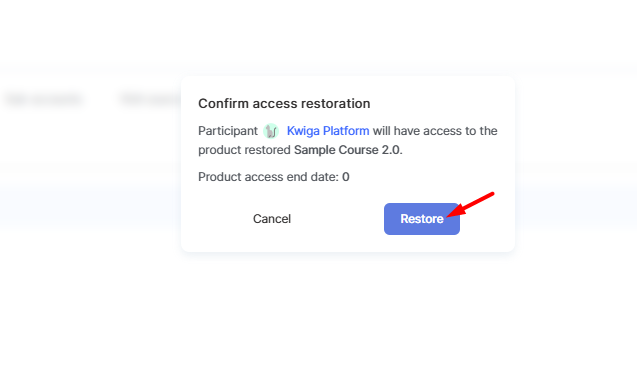
After confirming with the Restore button, the product will reappear among Active products with the same access period and amount of unlocked content as before deletion.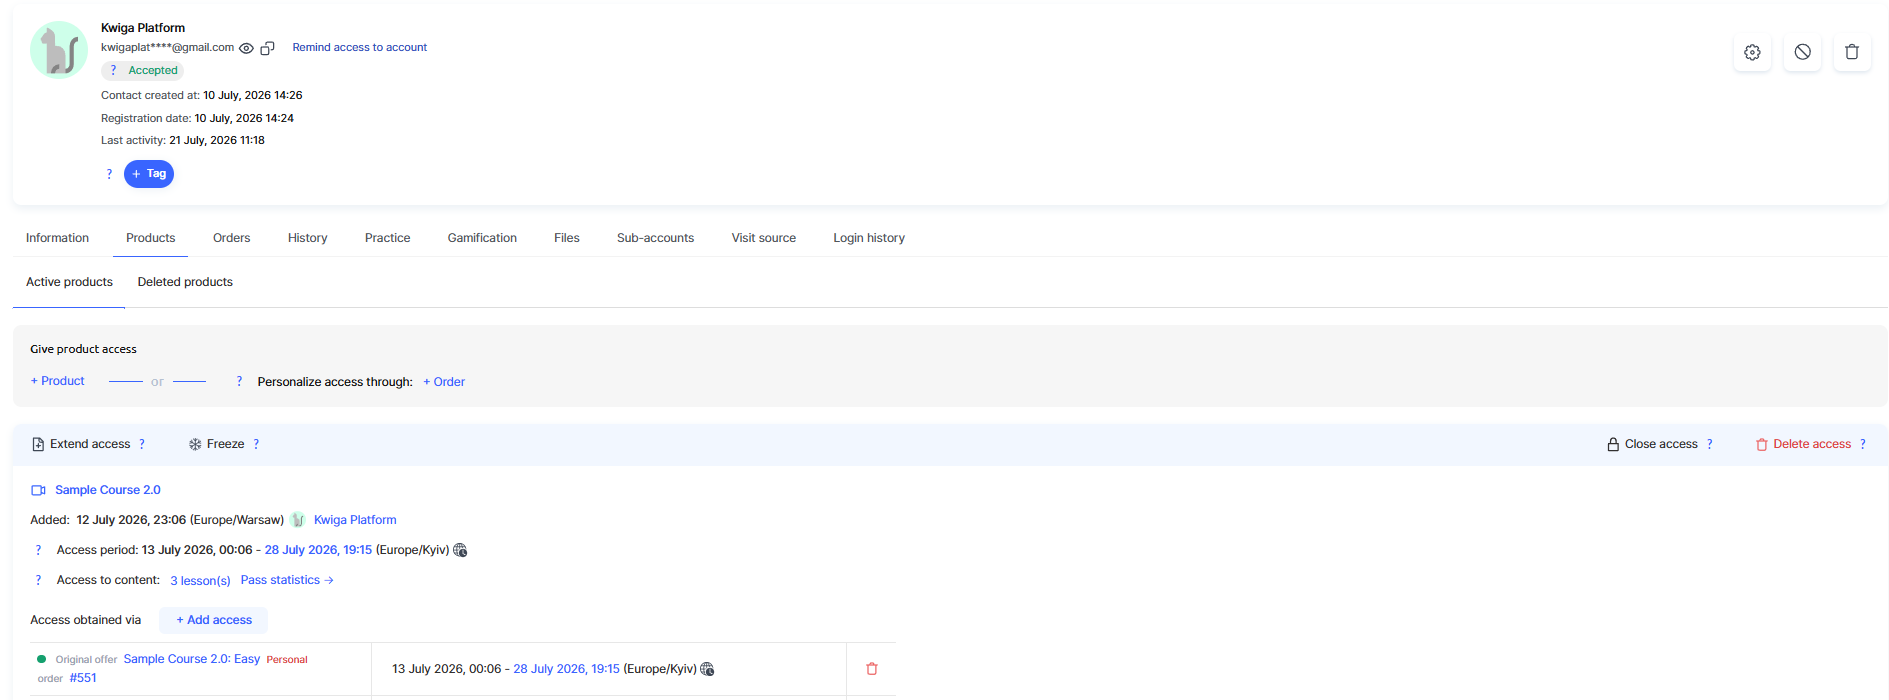
Overall, the Products tab in the contact card allows you to manage access manually with flexibility: grant access directly to a specific course or plan, temporarily revoke access without losing the entry, adjust the end date, and, if necessary, completely delete a product and restore it just as easily.
This is a convenient tool for a manager when access issues need to be resolved quickly without creating a new order.
Didn't find the answer? Contact the support service via online chat or Telegram