Articles:
- How to delete a course
- Copyright protection of your content on Kwiga
- Public or trial lesson
- How to change the status of a lesson to draft and hide it from students
- Usage of checkpoints
- How to Add Practice to a Lesson
- How to create a task with mandatory review by an assistant
- How to create a task for different offers
- How to create a test with scores and automatic approval
- How to create and conduct a quiz among students on the course
- Contents of the lesson, all types of activities in the lesson
- Downloading video files
- How to add time codes to the video
- How to add button to the lesson
- Inserting iframe code
- Adding fractions, mathematical functions, formulas
- How to add text with spoiler to the lesson
- How to create a course on the Kwiga platform
- How to create a marathon
- How to add a cover to a course
- Course Program Display Options
- How to add a public face to a course
- How to add a team to a course
- Course preview with different access levels
- Block above lesson or module pages (top banner)
- Setting delays, schedule for opening and closing lessons (dripping content)
- Report on student progress on the course
- Analytics of assignments completion on the course
- Course sales report
- How to create a copy of the course
- How to copy lesson content
- Assistant’s Access to Practical Assignments
- Student Can't See the Course (Marathon, Closed Group)
- How to set up a test so that students see comments after completion
- Letter delivery: why letters don't arrive and how to fix it
- How to Customize the Appearance of a Course
- Manage activity visibility
This article explains how to set up tests with comments on the Kwiga platform.
In this article:
Comments on test questions are an effective tool for fast feedback during learning.
Often, a student completes a test, sees the grade, but doesn’t understand where exactly they made a mistake and why their answer is incorrect. Comments to answers help turn a simple knowledge check into a full learning tool that explains the logic behind the correct answers and reinforces the material.
In this article, we’ll show how to add comments to test questions on the Kwiga platform and configure when students will see them.
Creating an assignment
First, you need to create an assignment that will be used in the course. Assignments are created separately from the course. Go to the “Quizzes” section and create a new assignment. You can read about different types of assignments available in Kwiga in the article Quizzes, practices: types of questions.
Specify the quiz name and add questions by choosing the required type — for example, text answer, fill in the blanks, or a multiple-choice test.
Tip: if you plan a large number of practice tasks in the course, add a number or lesson name right into the assignment title — this will simplify further structuring and editing of your course. And if you have many courses, it’s better to group quizzes into folders.
Add the first question by selecting its type. For all question types you can add comments: single choice, multiple choice, matching, fill in the blanks, sorting and others.
Add the question text and answer options using the +Answer button. If the question type implies a correct answer, mark it green.

You can also configure other parameters if needed: required completion, shuffling answers, time limit, and the number of points for a correct answer.
Adding comments to a question
After creating a question and adding answer options, it’s time to set up comments.
At the top of the question editor, find the comment icon and click it. The “Add comment” setting will open.
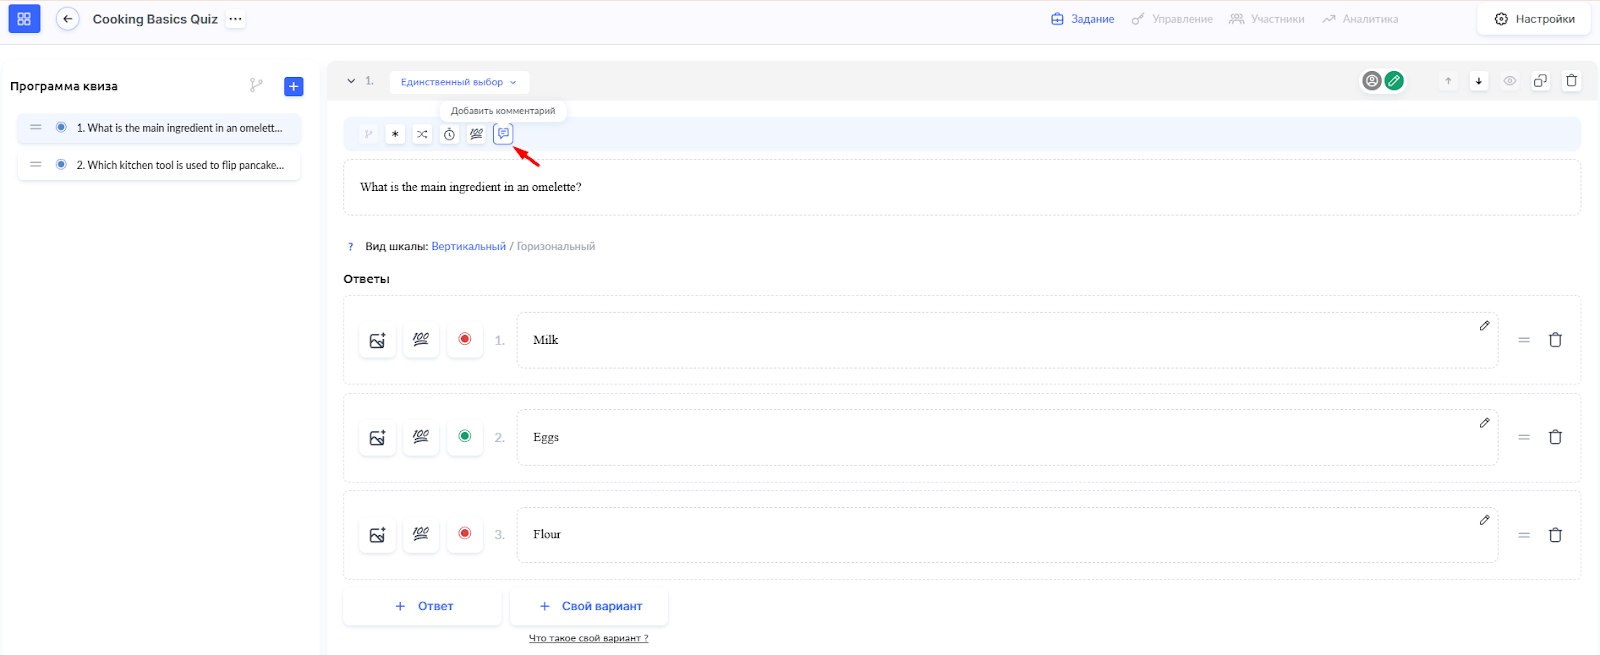
Here you will see two fields:
-
Comment text — enter the text that the student will see after answering the question
-
Show comment — choose when the student will see the comment: After completion (after the entire test is finished), Immediately after answering the question, or Immediately after answering and after completion

What to write in a comment: explain the logic of the correct answer, add additional information or an interesting fact about the topic. You can also explain why other options are incorrect, or add a link to material for revision, etc.
Click Save to add the comment to the question.
Pay attention! For students to see their answers and comments after completing the quiz, you must enable the appropriate result display settings. Read more in the article How to set up a test so that the student can see their answers.
How to add practice to a lesson is described in a separate article.
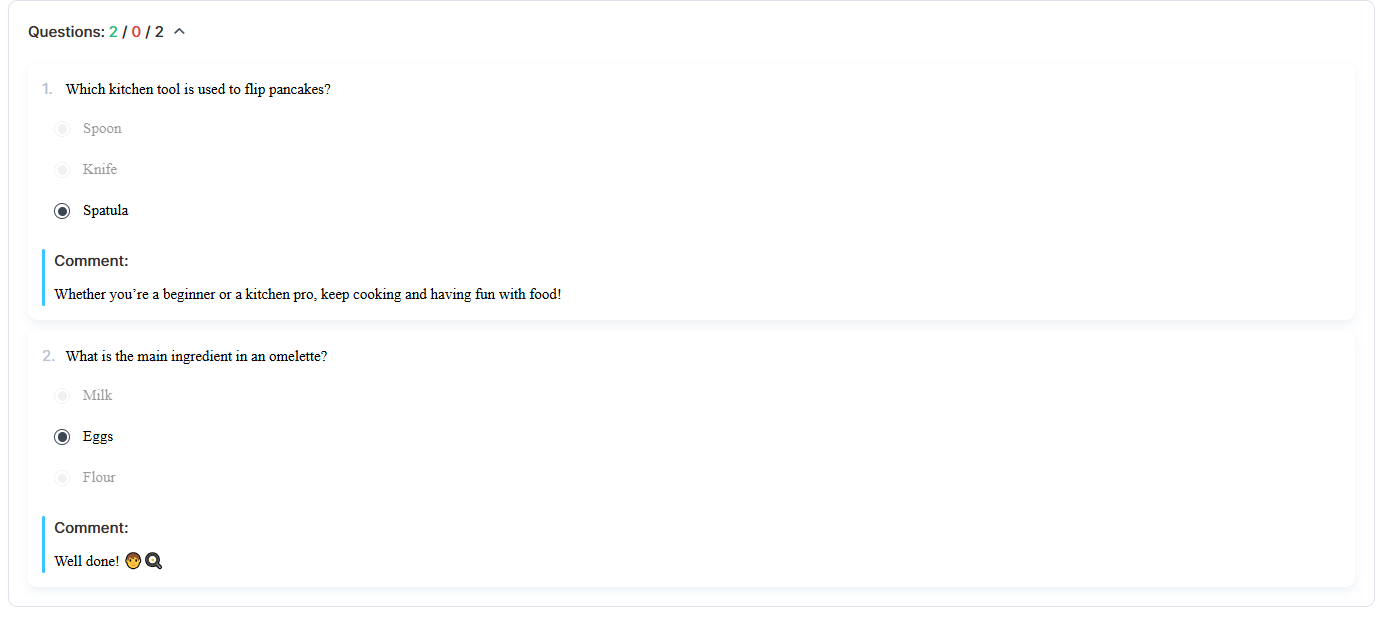
How students will see comments
Depending on the selected setting, students will see your comments at different times during the test.
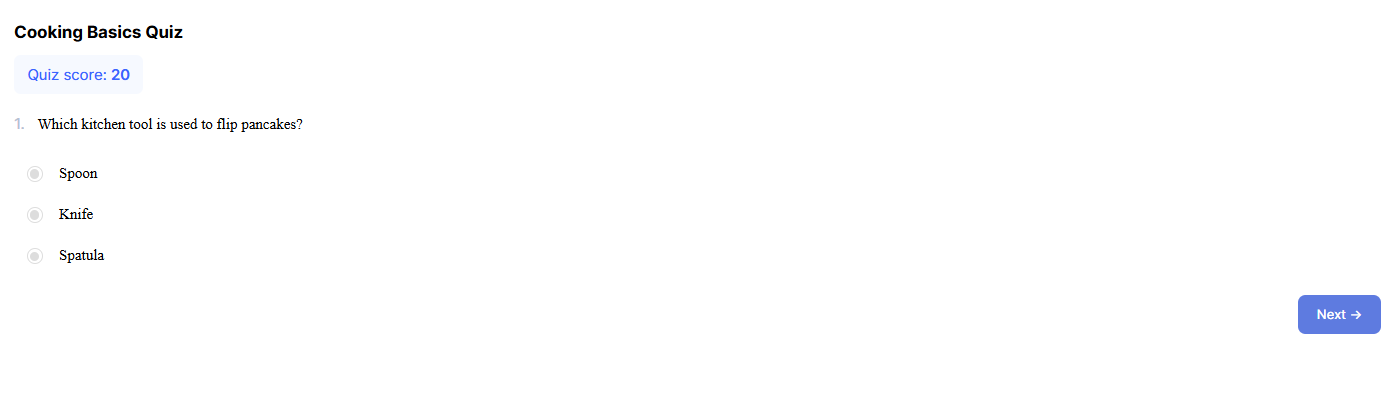
If you choose the option Immediately after answering the question, the comment will appear right after the student submits their answer. This allows them to get instant feedback and understand the logic during the test itself.
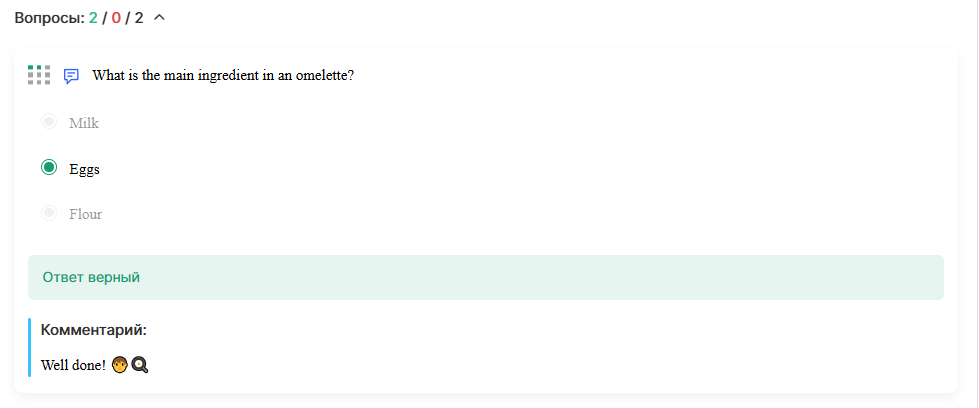
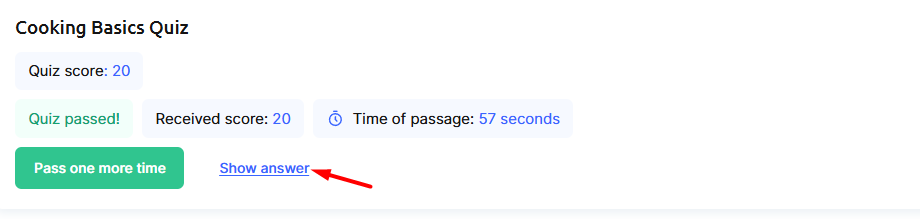
If you choose After completion, comments will only be displayed after the entire test is finished. To view comments, the student needs to click Show answer on the results page. After this, a detailed view of all questions with answers and comments will appear.
With the Immediately after answering and after completion setting, the student will see the comment twice: first immediately after answering the question during the test, and then again after completion by clicking Show answer on the results page.
Comments on test questions are an easy way to make knowledge checks more useful for students. They help understand mistakes, reinforce material, and receive additional explanations exactly when needed. Configure comment display according to your course goals — and your students will get more from each test.
Didn't find the answer? Contact the support service via online chat or Telegram