
Credits and installments, payment in parts
How to set up installment payments, deferred payments, and partial payments for a course, marathon, or other product.
On the Kwiga platform, you can configure various payment arrangements, including installment payments and in-house installment plans.
Please note: Kwiga is not a payment system, does not provide financing or installment loans, and cannot guarantee that a student will pay the remaining balance. For such guarantees, you should use installment financing or loans offered by a bank. The platform only allows you to schedule payments. It will track whether each installment has been paid, send reminders about upcoming payments, close access if payment is not received, and automatically restore access once the outstanding payment is successfully processed.
In addition to installment payments, the platform also supports subscriptions, where the same amount is automatically charged at regular intervals. This option is described in the article Subscription Setup (Recurring Payments).
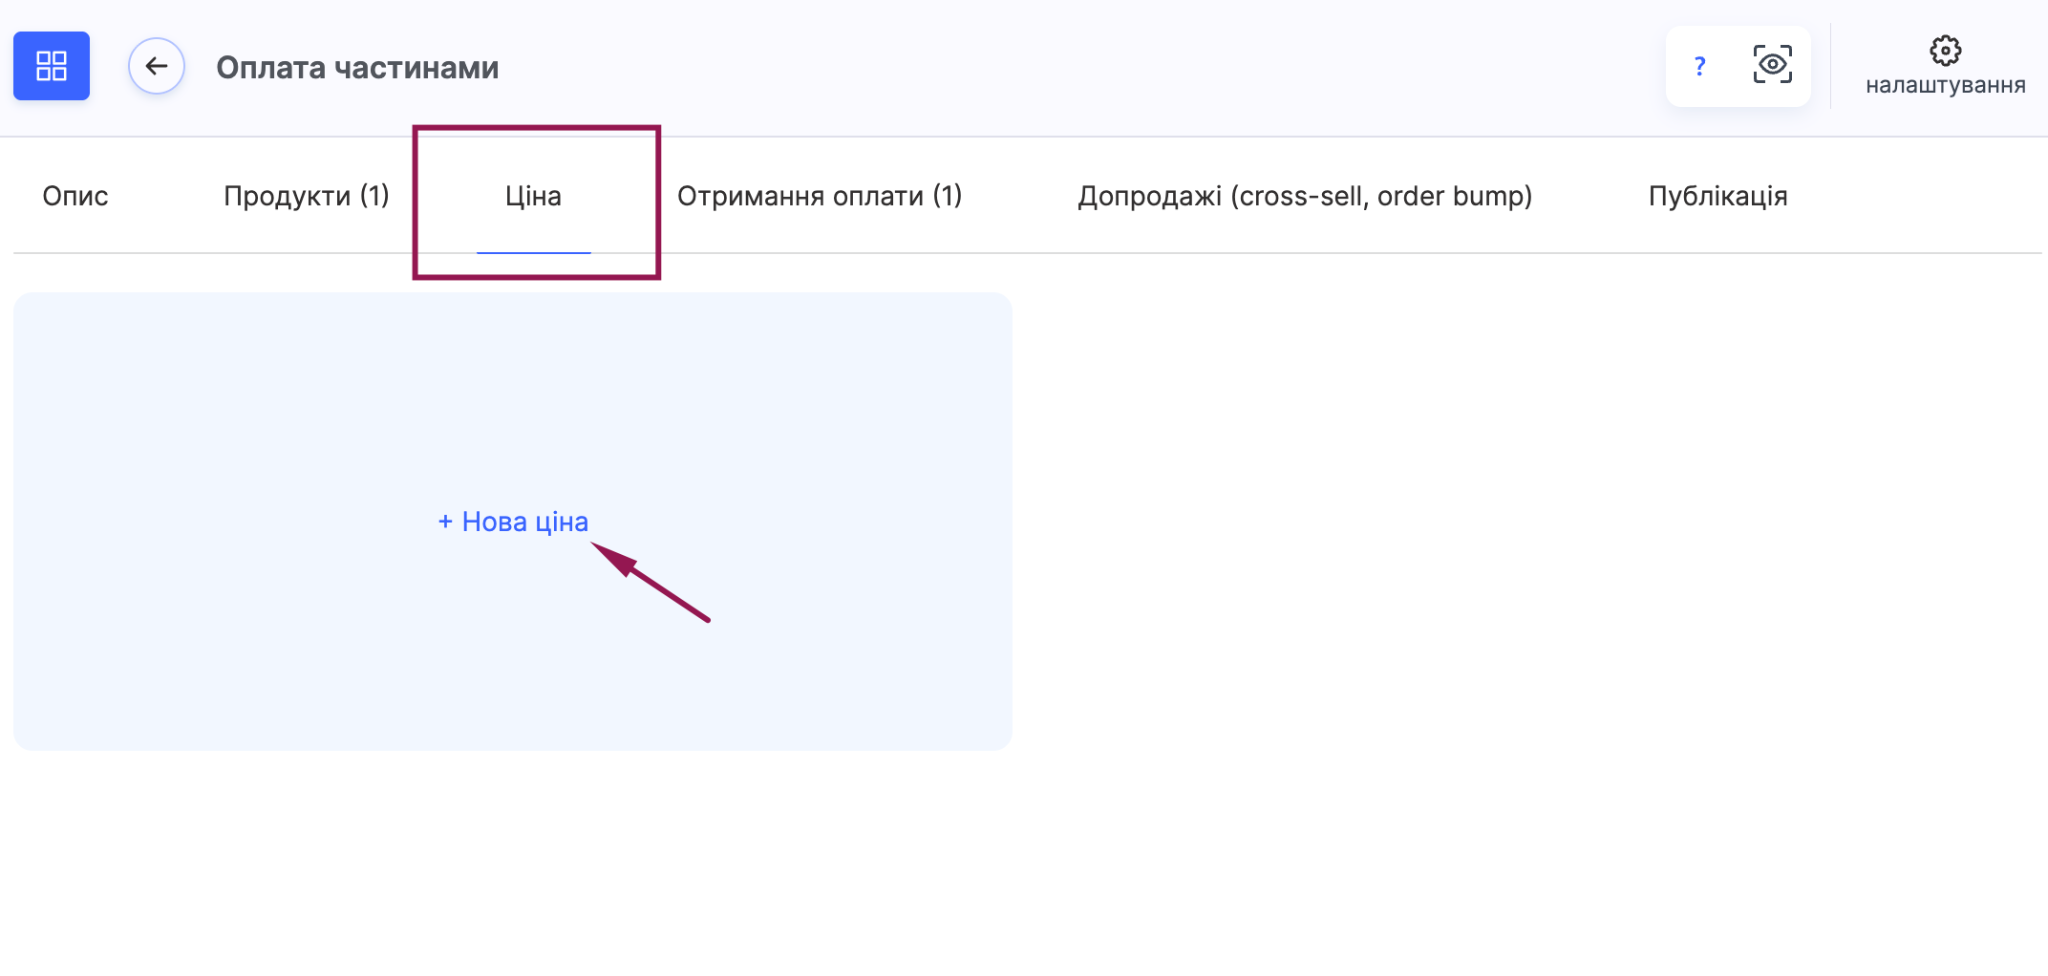
Installment payments are configured on the Price tab in the pricing plan editor.
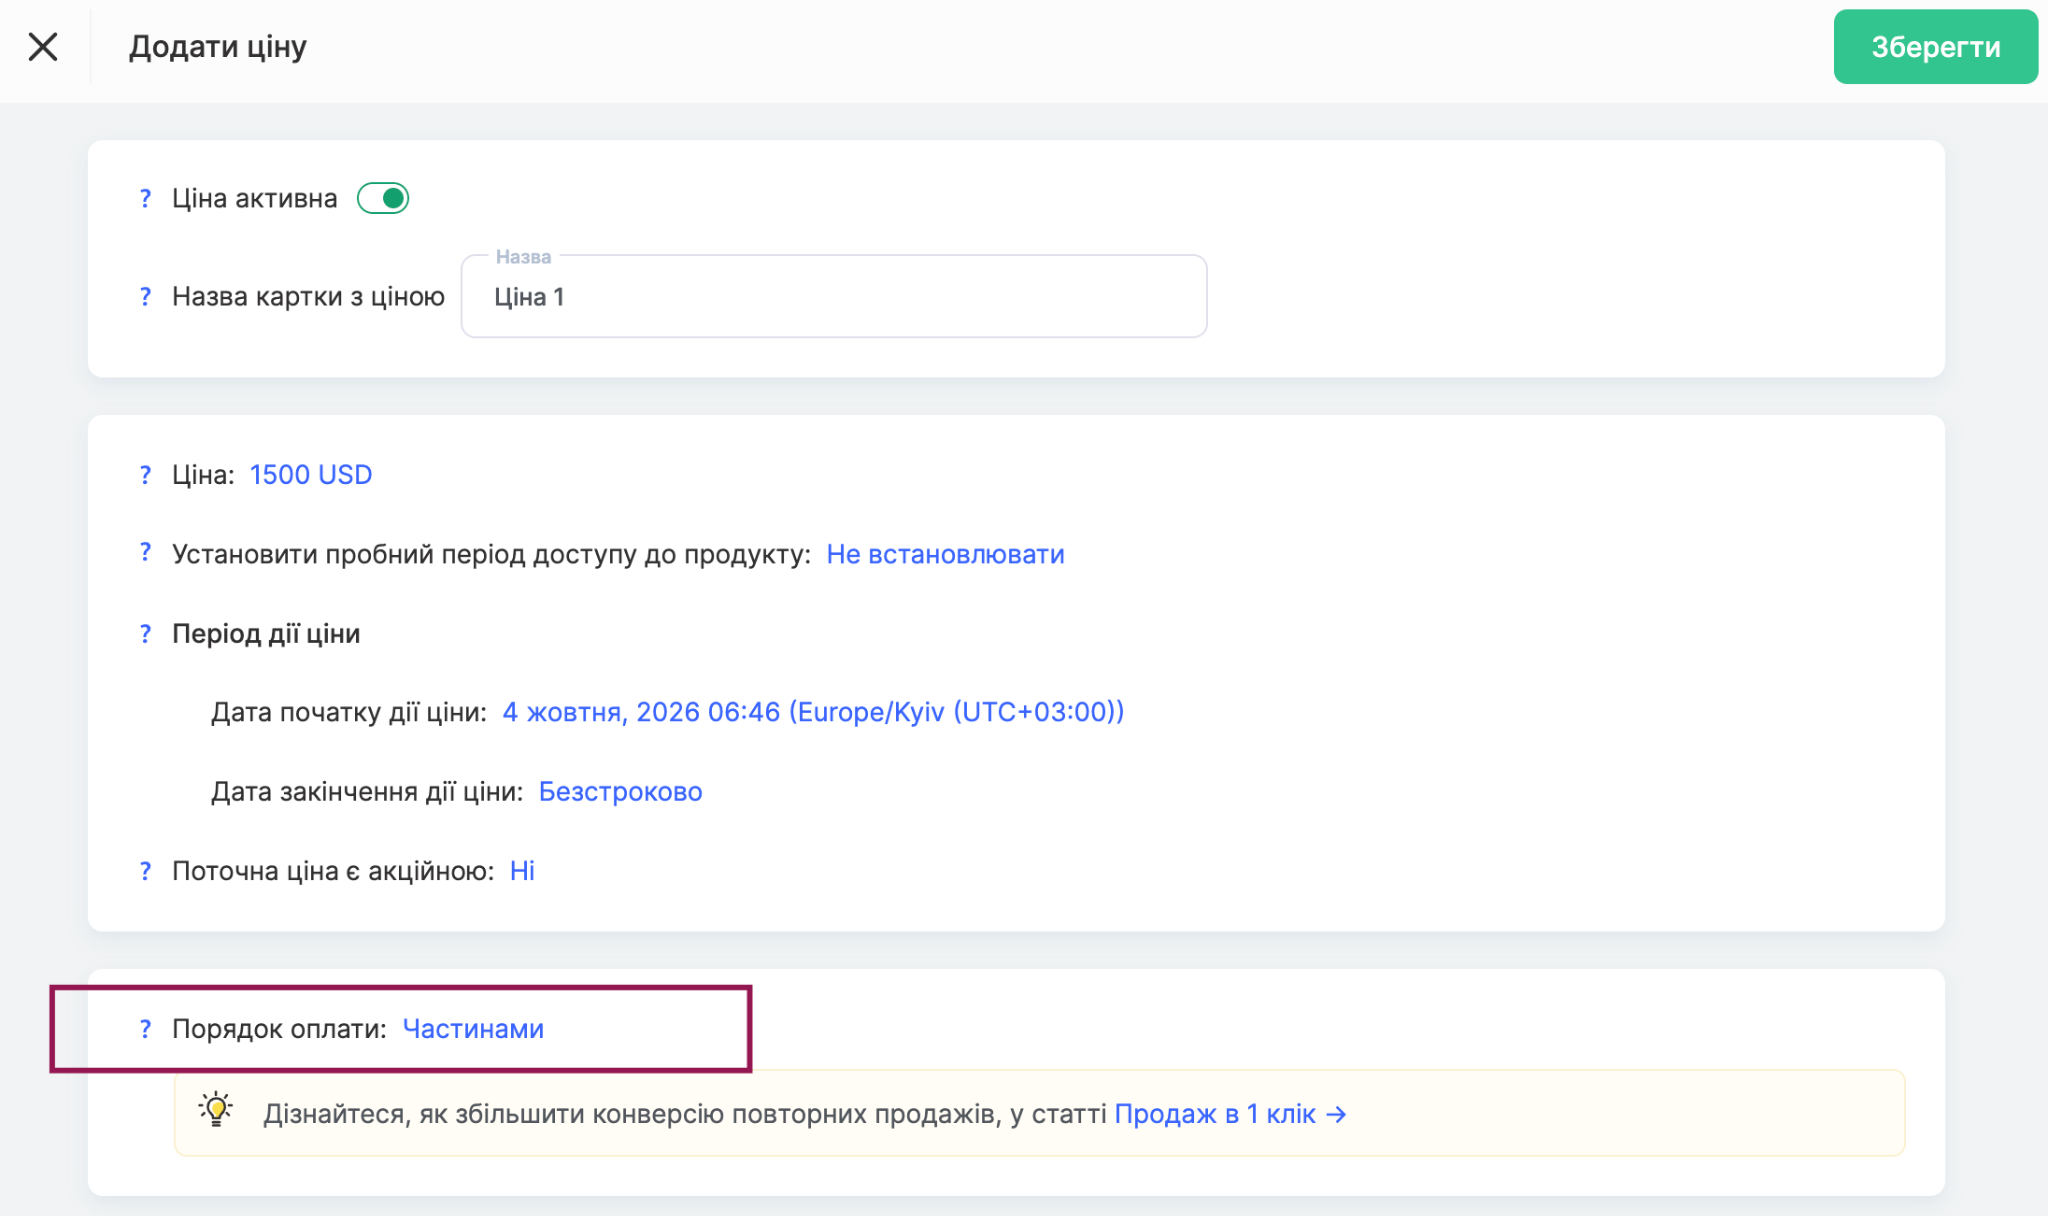
After entering the price, set Payment Terms - Installments.
Recommendation: Since the platform cannot guarantee that students will pay all installments on time, we recommend aligning the course content release schedule with the payment schedule. To do this, on the Products tab, use delayed access to modules, lessons, or sections. For example, if the course price is divided into 3 installments with a one-month interval, students should receive access to only the first third of the course after the initial payment, with the remaining content released gradually in line with subsequent payments. This prevents dishonest buyers from accessing all course materials without paying the full amount.
After selecting Installments, first choose the Payment Collection Method.
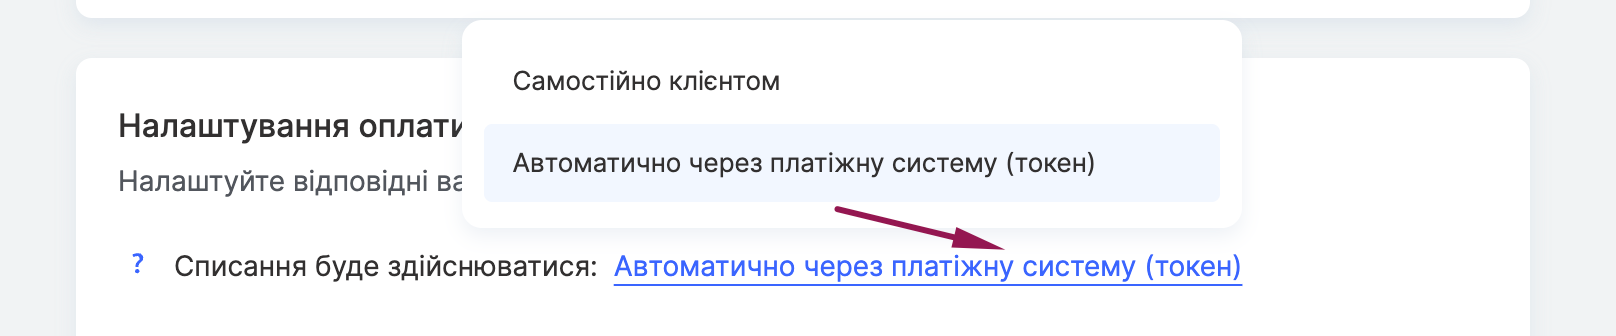
Manually by Customer means that the student pays each installment independently using a link from a reminder email or their personal account (Purchase History section). Automatically via Payment System (Token) allows subsequent installments to be charged without the student's involvement - the student only needs to participate in the first payment. Not all payment systems support tokens, so before configuring this option, check the list of supported systems and, for some of them (PayPal, WayForPay, LiqPay, Payment by Mono), additionally activate token storage through the payment system's support team. If the card or token expires, the next installment automatically switches to manual payment mode until the student updates their card details.
Below, in the Payment Schedule block, select which payment options will be available to students. Each option has a separate toggle and an editable customer-facing name.
Allow Full Payment Now - allows students to pay the full price in a single payment, even if the pricing plan offers installments. If you create a separate pricing plan for full payment, you can disable this option in the installment pricing plan.
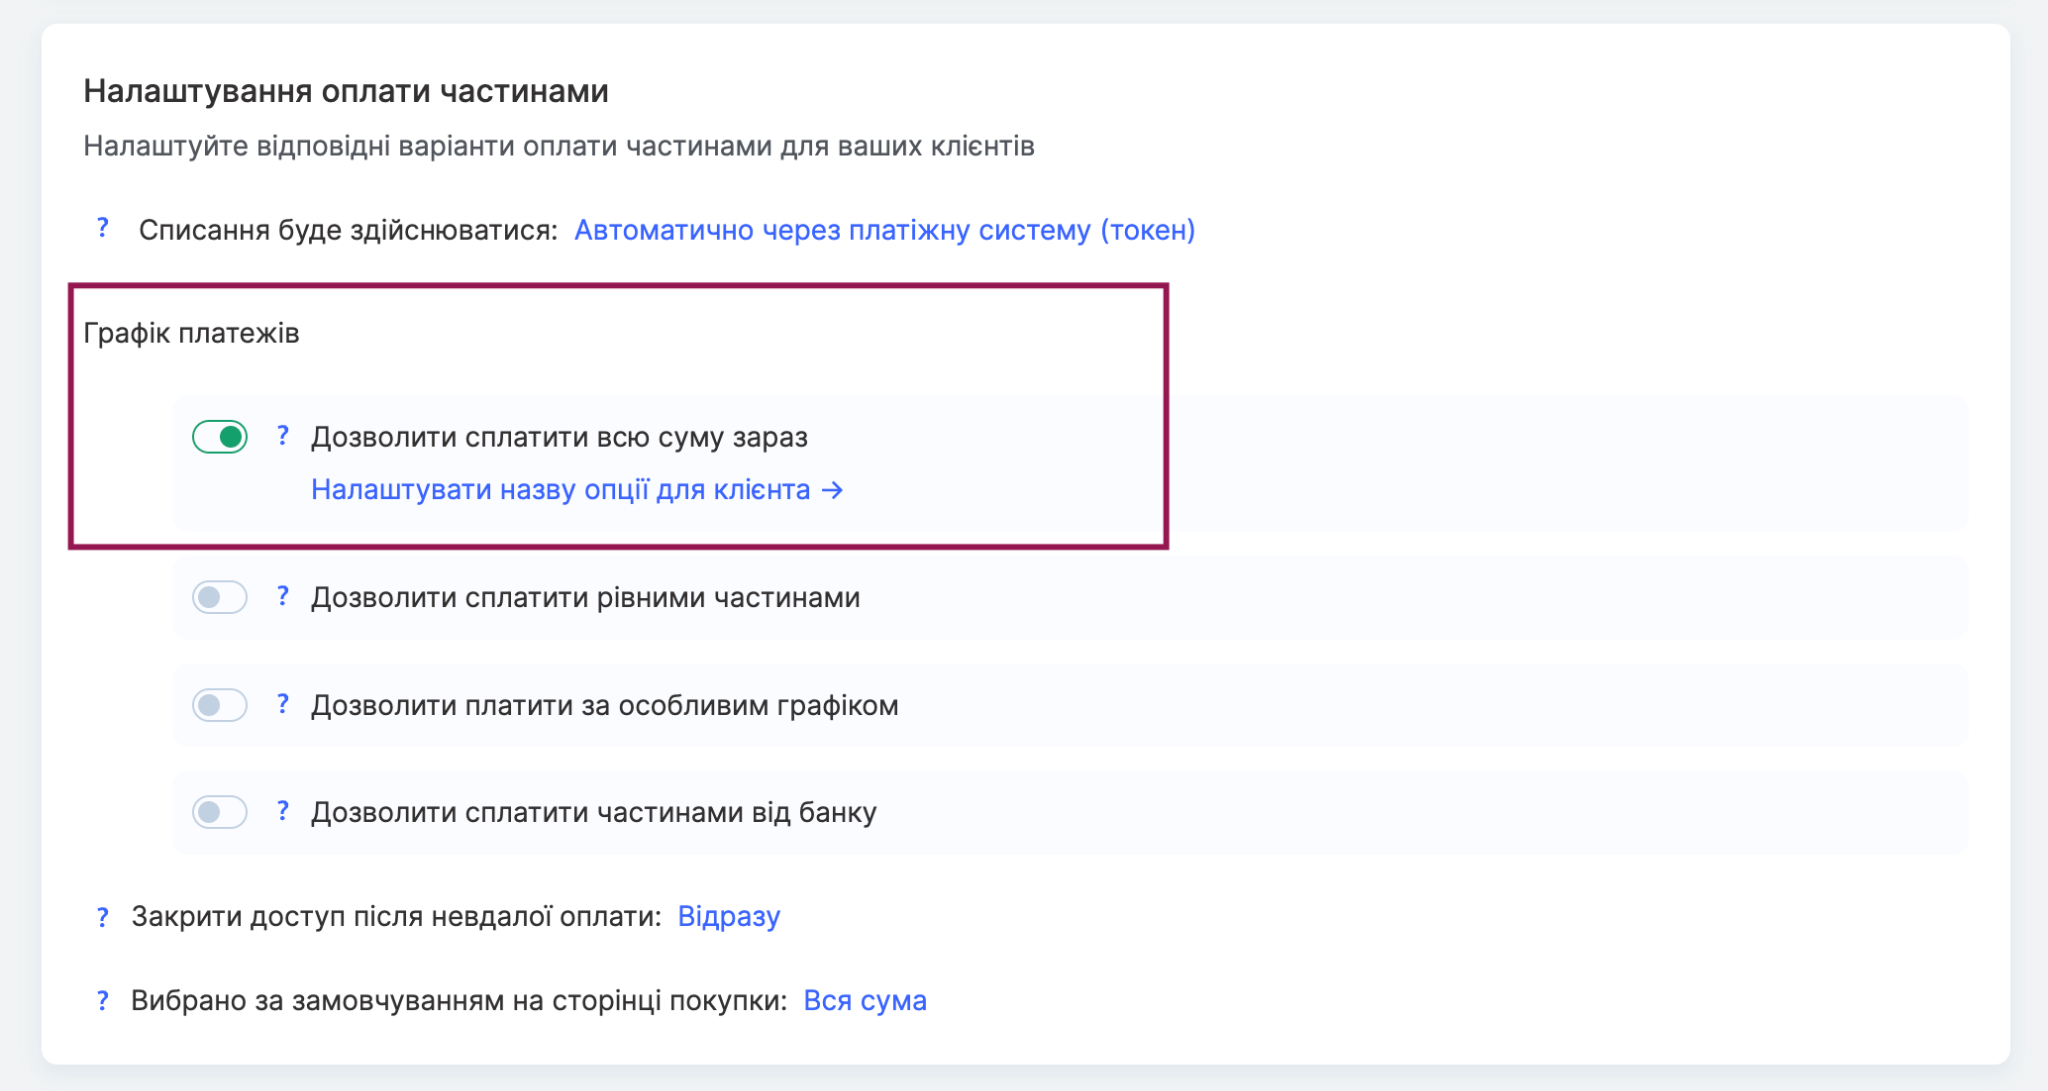
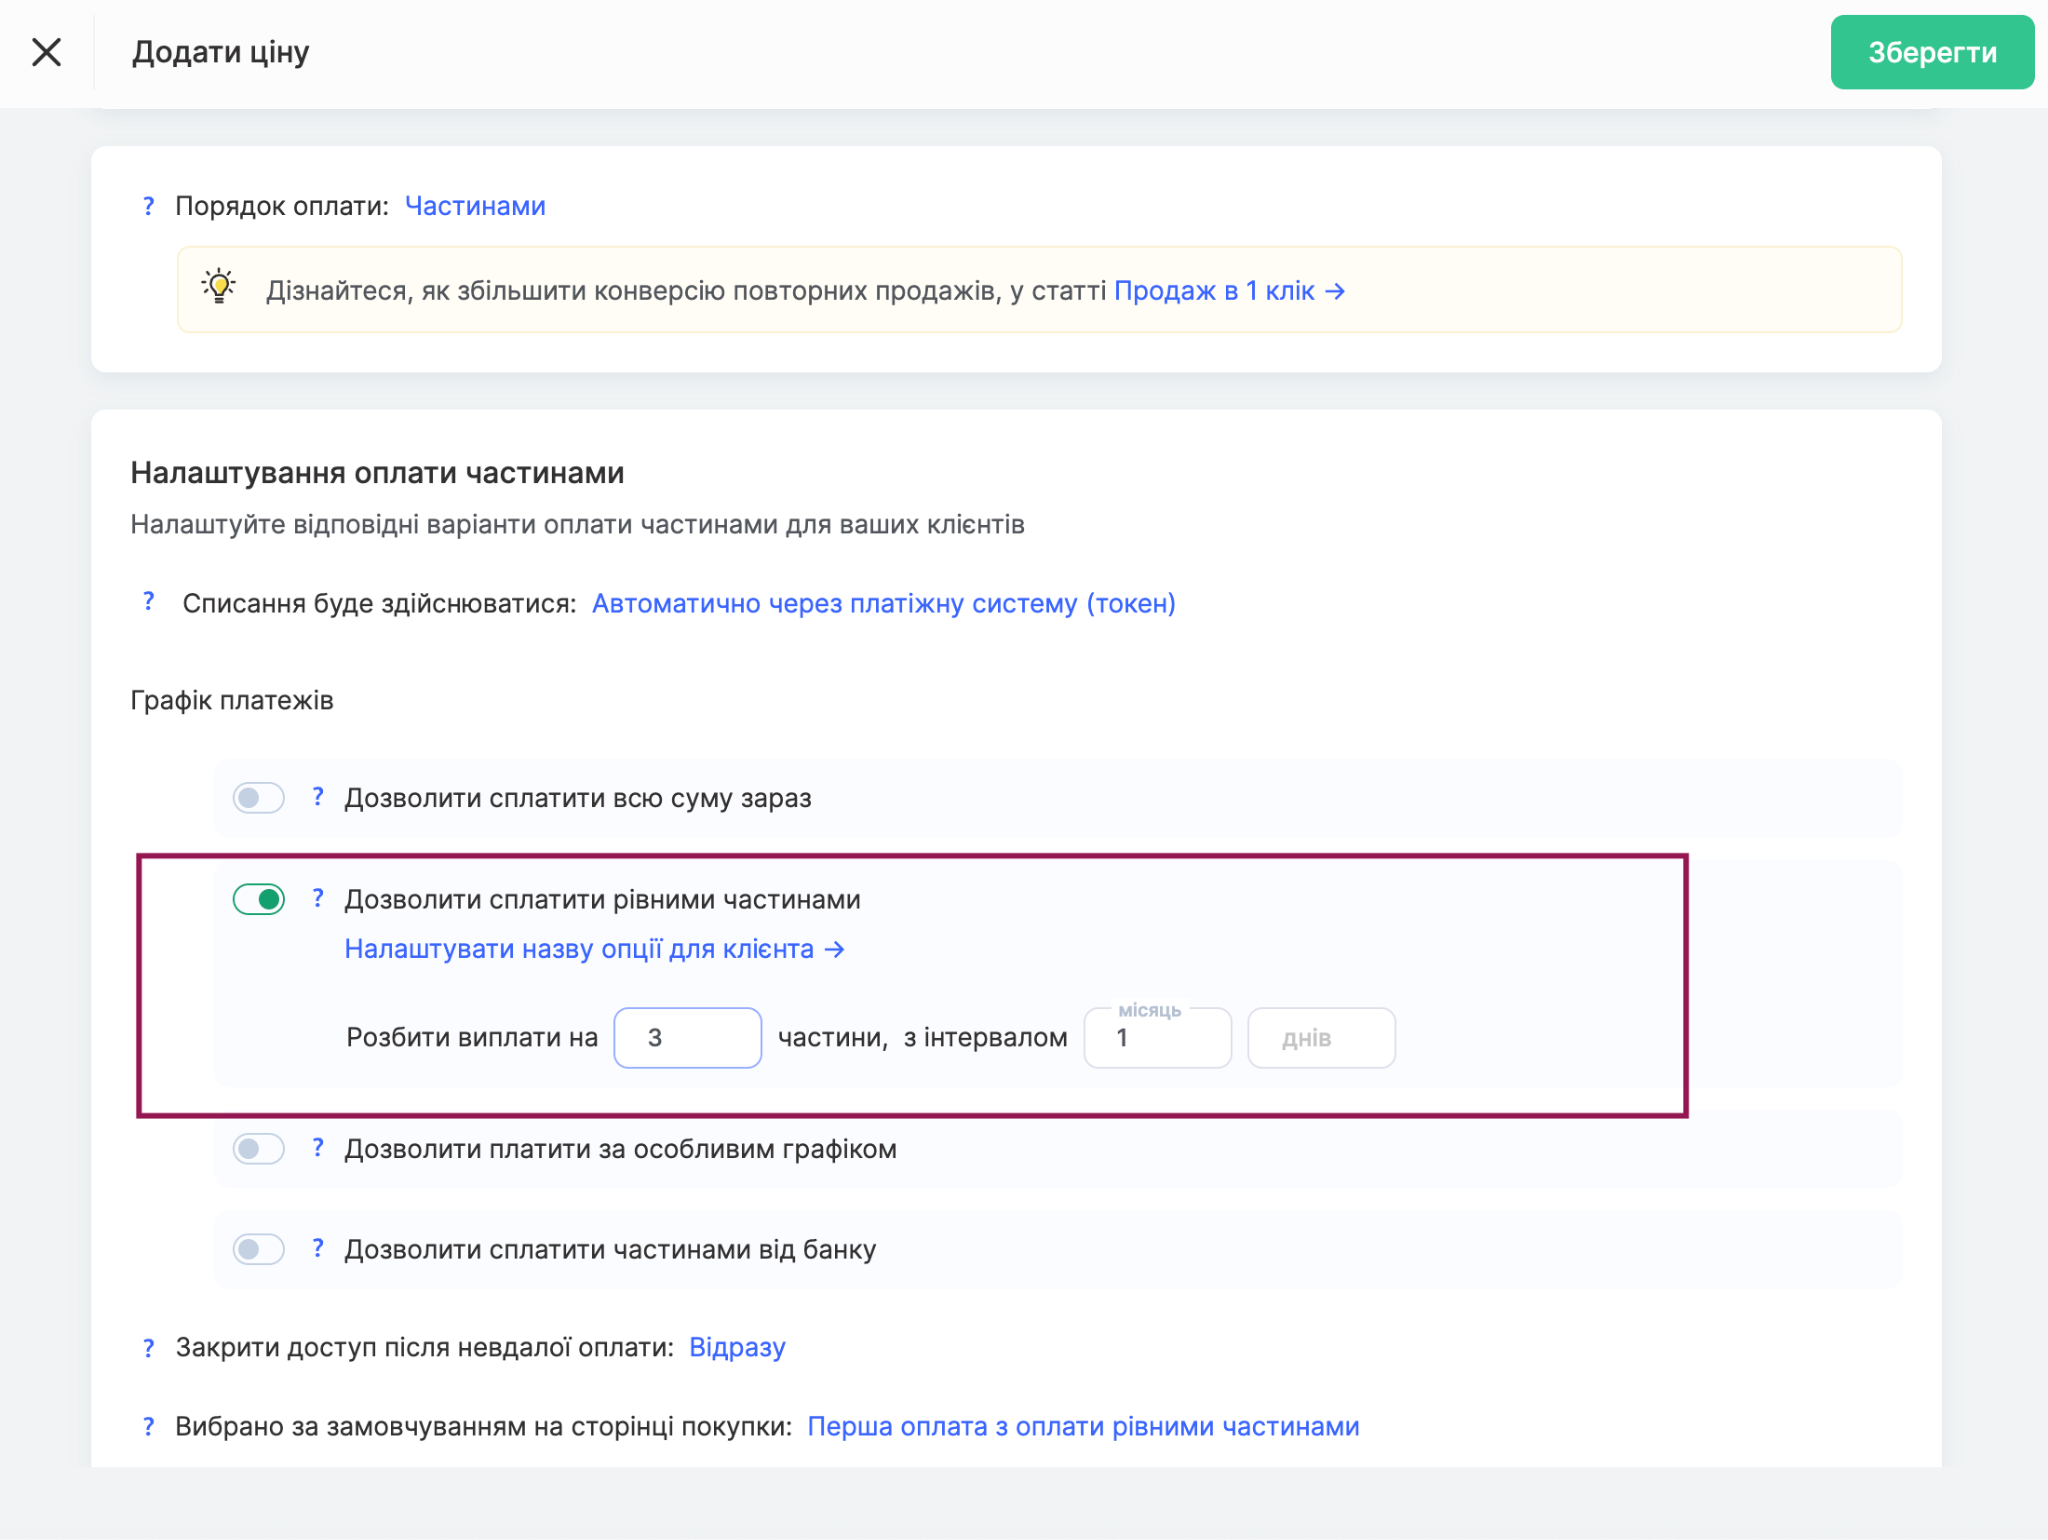
Allow Payment in Equal Installments - divides the total amount into several equal installments. Specify the number of installments and the interval between them, for example, 3 installments with a one-month interval. The maximum number of installments is 36. Intervals are calculated from the date of the first payment, and students can pay the next installment before its scheduled due date.
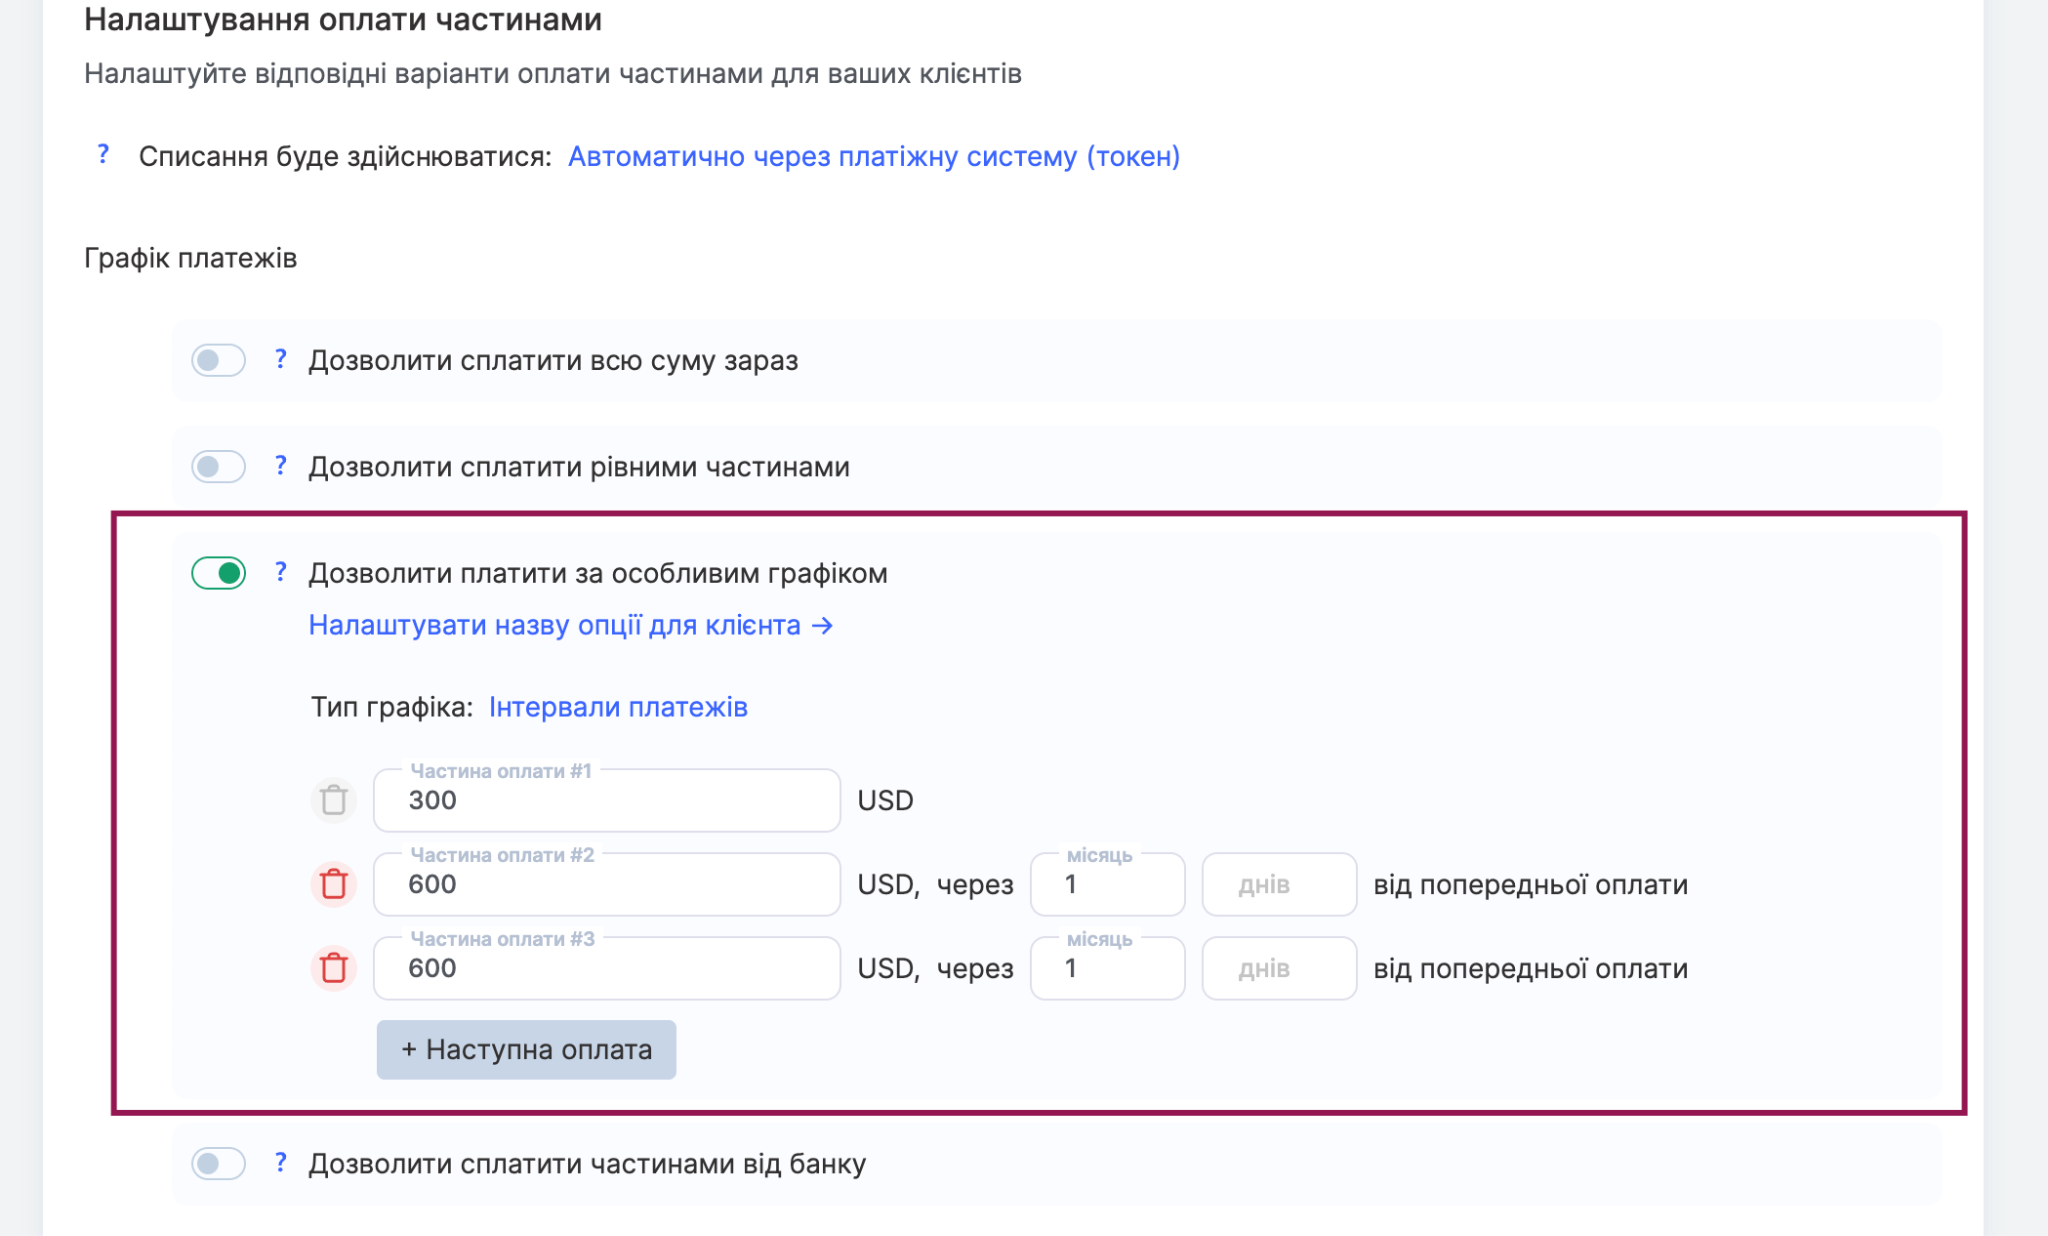
Allow Payment on a Custom Schedule is useful when you need to divide the total into unequal installments, set custom intervals, or link payments to specific calendar dates. There are two ways to configure such a schedule: payment intervals and a calendar-based schedule. Schedule Payment Intervals allows you to specify custom amounts and time intervals for each installment individually. The total of all installments must equal the full price of the pricing plan. Create a Calendar Payment Schedule allows you to assign each installment to a specific date.
Important: If a payment is overdue, the student will see an overdue payment indicator, and access to the product will be closed. The delay before access is closed is configured separately in the Close Access After Failed Payment field, for example, after 1 day. Students can still pay after the deadline: the payment link will remain available in reminder emails and in their personal account.
Allow payment in installments from the bank - a marketing option that informs students at the first step of selecting a pricing plan and payment method that bank installment financing is available: the “Pay in installments from the bank” option appears there. If a student selects this option, the full price of the selected product is sent to the payment system. On the payment system's side, the student can then either pay for the order in full or use bank installment financing, provided this option is enabled in your payment system.
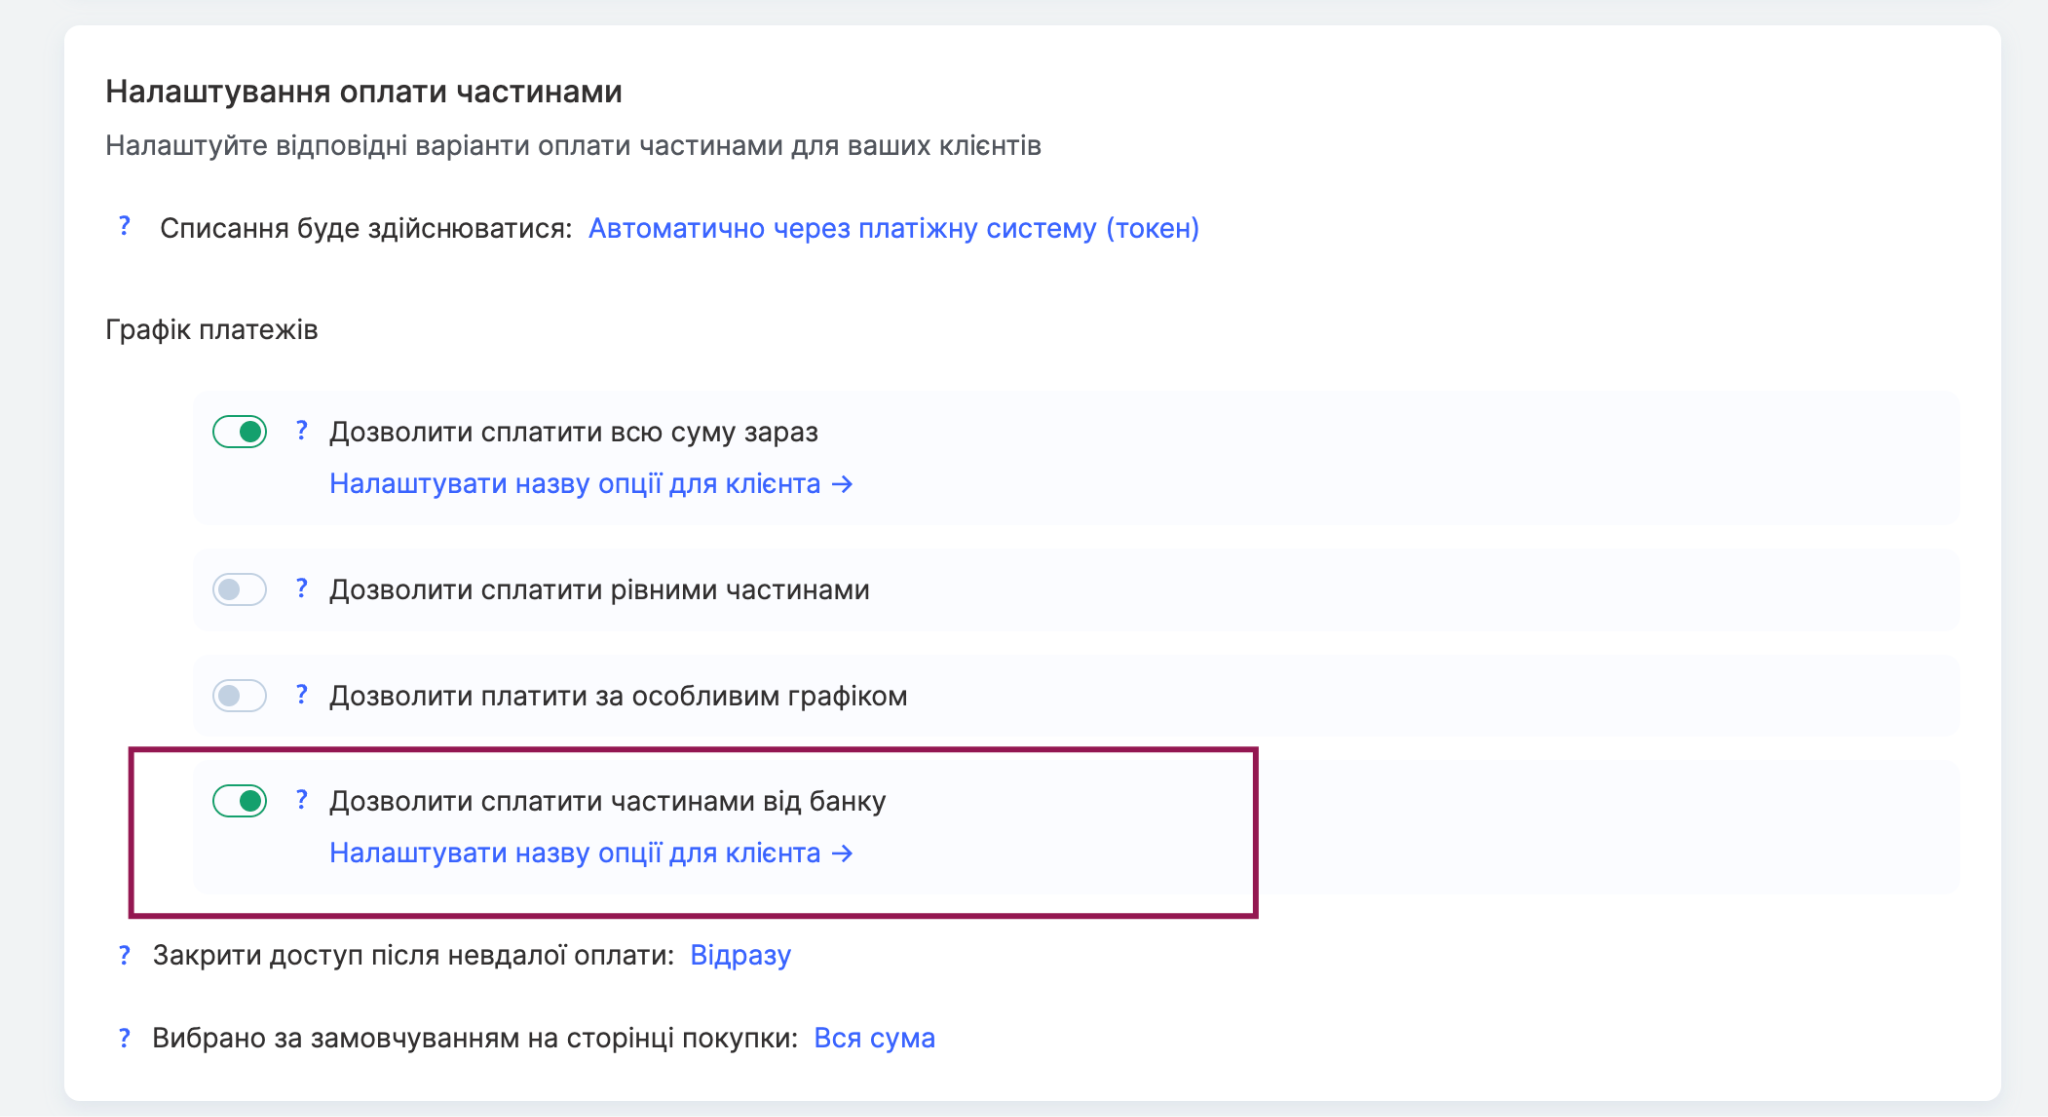
If several options are enabled at the same time, use the Selected by Default on the purchase page field to choose which option students will see preselected on the checkout page.
In the Close Access After Failed Payment field, specify how much time students have to complete the payment before access is closed. By default, access is closed immediately after the payment period ends, but you can set a grace period, for example, 1 day, to give students more time to pay.
If needed, you can also configure a trial period for product access on the same tab. The customer receives access simply by entering their card details, and the first payment is charged only after the trial period ends.
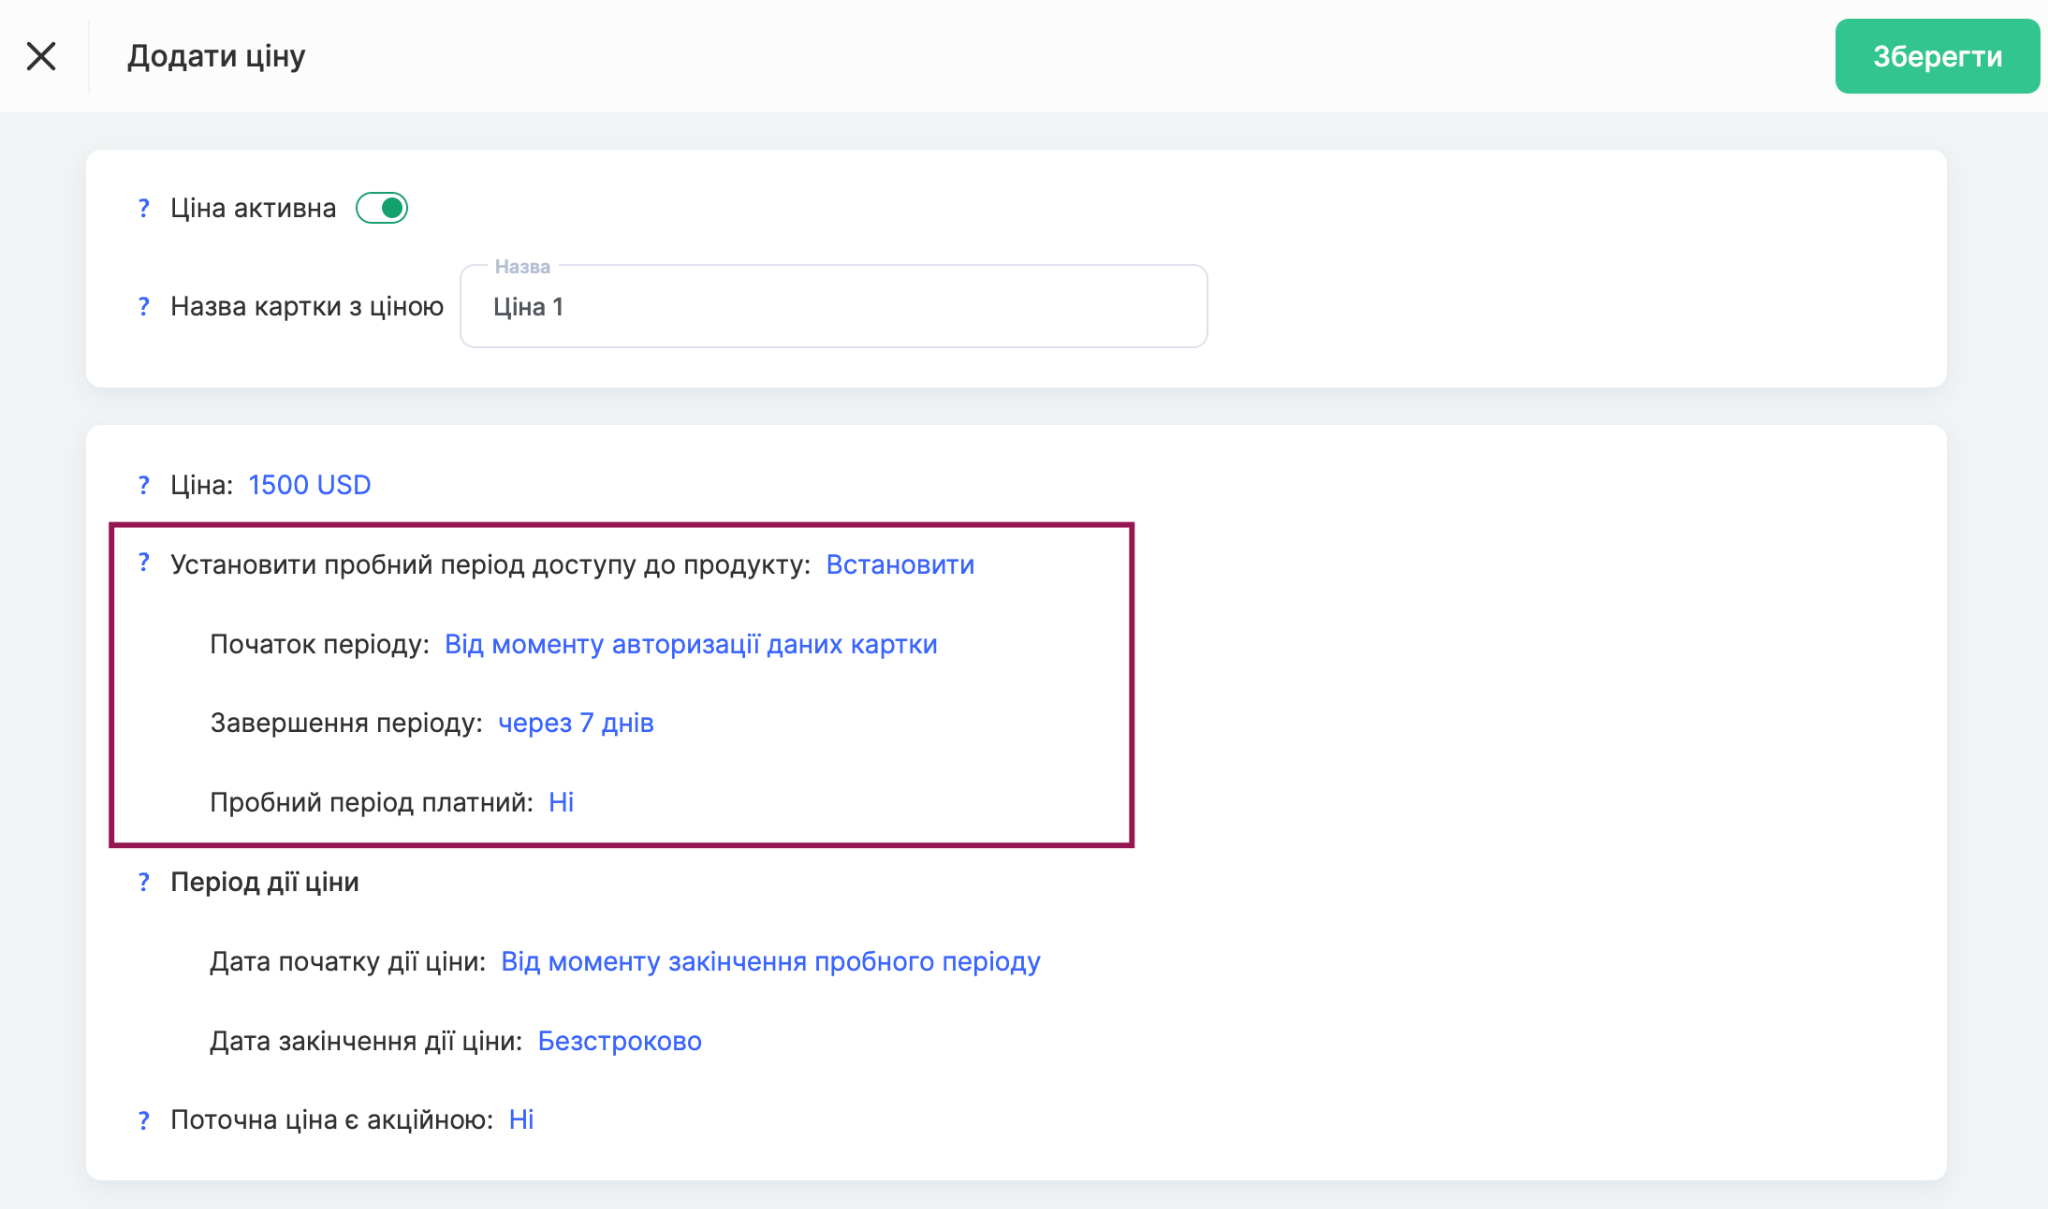
For this to work, the connected payment system must support card verification without charging a payment or token creation after the first payment. If neither option is supported, the trial period will be ignored, and the full price will be charged immediately.
Frequently asked questions
Does Kwiga guarantee that the student will make all payments when paying in installments?
No. Kwiga is not a payment system and does not offer installment plans. The platform only manages the schedule: it tracks each payment, sends reminders about the next one, blocks access if a payment is missed, and restores it once payment is received. For payment guarantees, use a bank installment plan or loan.
How many installments can I split the payment into, and can I pay early?
For payments in equal installments – up to 36 installments. Intervals are calculated from the date of the first payment, and the student can make their next payment before the due date.
Can I split the payment into unequal installments?
Yes, with a custom payment schedule: you can set any amount and interval for each installment or link installments to specific dates. The total of all installments must equal the full price of the plan.
What happens if a student misses a payment?
The student will see an overdue notice, and access to the product will close after the period set in the "Close access after a failed payment" field. The student can still pay after the deadline: the payment link remains available in reminder emails and in their account.
How can I prevent a student from accessing the entire course after their first payment?
Align content access with your payment schedule by delaying access to modules, lessons, or sections. For example, if payments are made monthly in three installments, open only the first third of the course after the first payment.
What happens if a student selects "Pay in installments through a bank"?
The full product price is sent to the payment system. The student can then pay for the order in full or use a bank installment plan, if one is enabled in your payment system. The "Allow payment in installments through a bank" option only shows the student that this payment method is available.
Thanks for your feedback!
Thanks! We'll update the article. Need an answer now? Contact support