Articles:
- Orders: creating and editing orders.
- How do I add an individual payment link to a student
- Transactions
- How to set up sending your own email after purchase
- Integration with the Sendpulse chatbot
- How to integrate a payment system on Kwiga
- How to set a specific language for an offer page
- Important Project Settings
- How to grant access to students if the sales were not made on Kwiga
- Payment without authorization
- How to create a new stream with your own schedule
- How to give access to one student
- How to change access for one student
- How to set up demo access to a course, open house day at the school
- Setting up subscriptions (recurring payments)
- Automation: Follow-up email sequences (unpaid orders and applications)
- Credits and installments, payment in parts
- Promotional offer
- Discount coupons and possible settings
- How to launch course registration with prepayment
- How to create cross-sell offers in Kwiga
- How to start selling on Kwiga: creating a price plan
- Creating multiple pricing plans
- Selling consultations and one-on-one sessions
- How to Change a Student's Plan (Additional Payment on Kwiga)
- How to sell (give access to) parts of the course
- How to implement access renewal sales
- Selling through a registration form on a third-party site
- Selling through a mini-landing page created on Kwiga
- How to add a video to a page (mini-landing, course page)
- How to create a link with an applied coupon
- Offers and Payments on Kwiga: How It Works
- Repeat Sales: Setting Conditions and Sending a Coupon Based on Purchase Count
- Setting up notifications in a Telegram channel
- Sending Emails with Promo Codes (Unpaid Orders)
- Course Store: Settings and Capabilities
- Setting Up the Public Offer Page
- Organization of CPD on Kwiga: step-by-step guide
- How to set up a thank-you page after payment
- Set up access to lessons, sections, and modules
The article outlines the key parameters that need to be checked and configured before launching.
In this article:
Before launching a course or bootcamp and inviting your first student, we recommend verifying the following settings in your project:
Name and Cabinet Address
Click on the avatar and select the cabinet settings option:
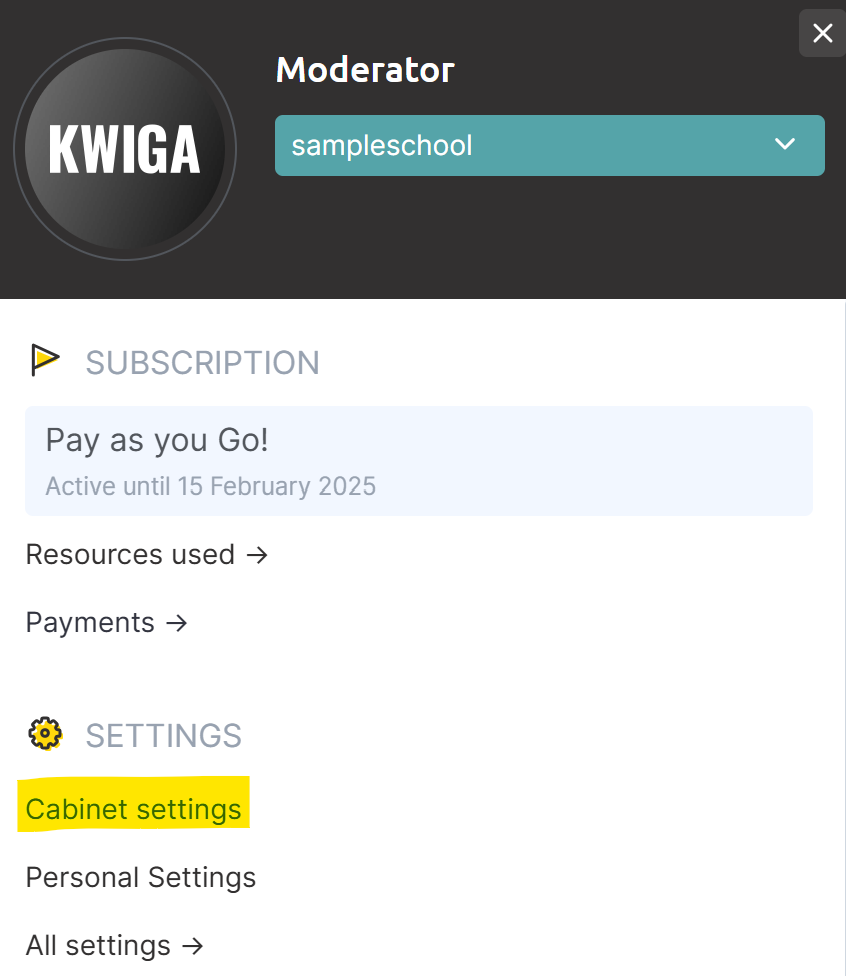
On the page that opens, check the account name and address:
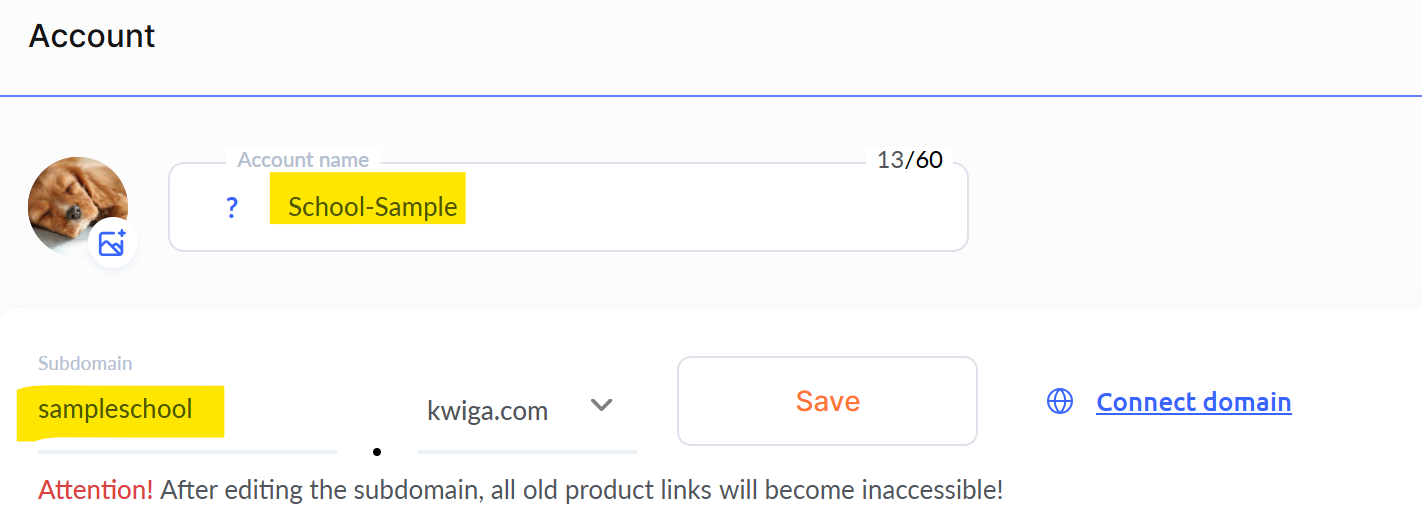
If you plan to use your own domain/subdomain, it is advisable to do so in advance, as changes may take up to 24 hours to take effect. This period is typical for major registrators and cannot be expedited. During the domain/subdomain linking process, your students will not be able to access the course, so it is essential to complete this step before launch.
Marketing Settings
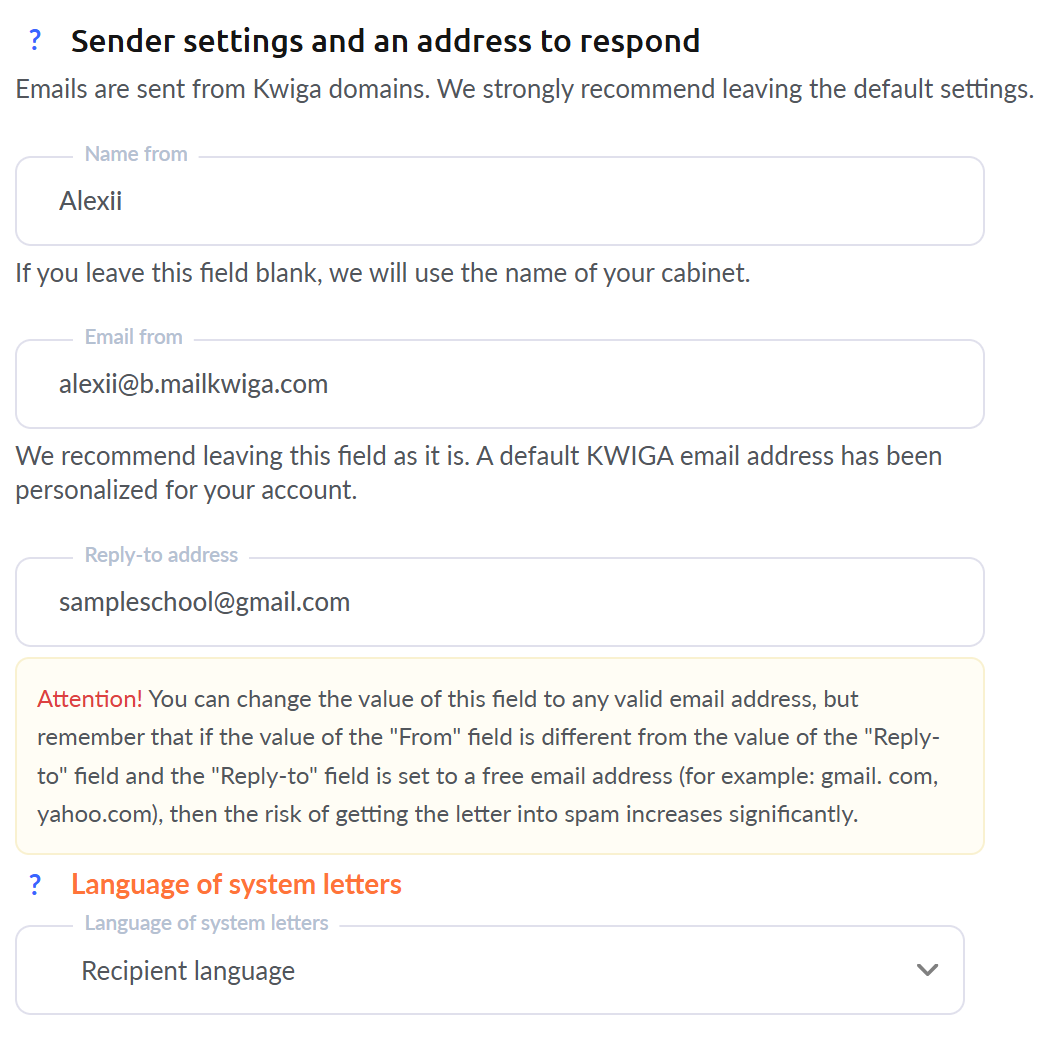
Marketing settings include the logo displayed in emails, the sender's name, and footer information. It is important to ensure these fields are filled out before starting sales or granting access. Additionally, you can set the language for emails: it can be a specific language or one that matches the student's interface language.
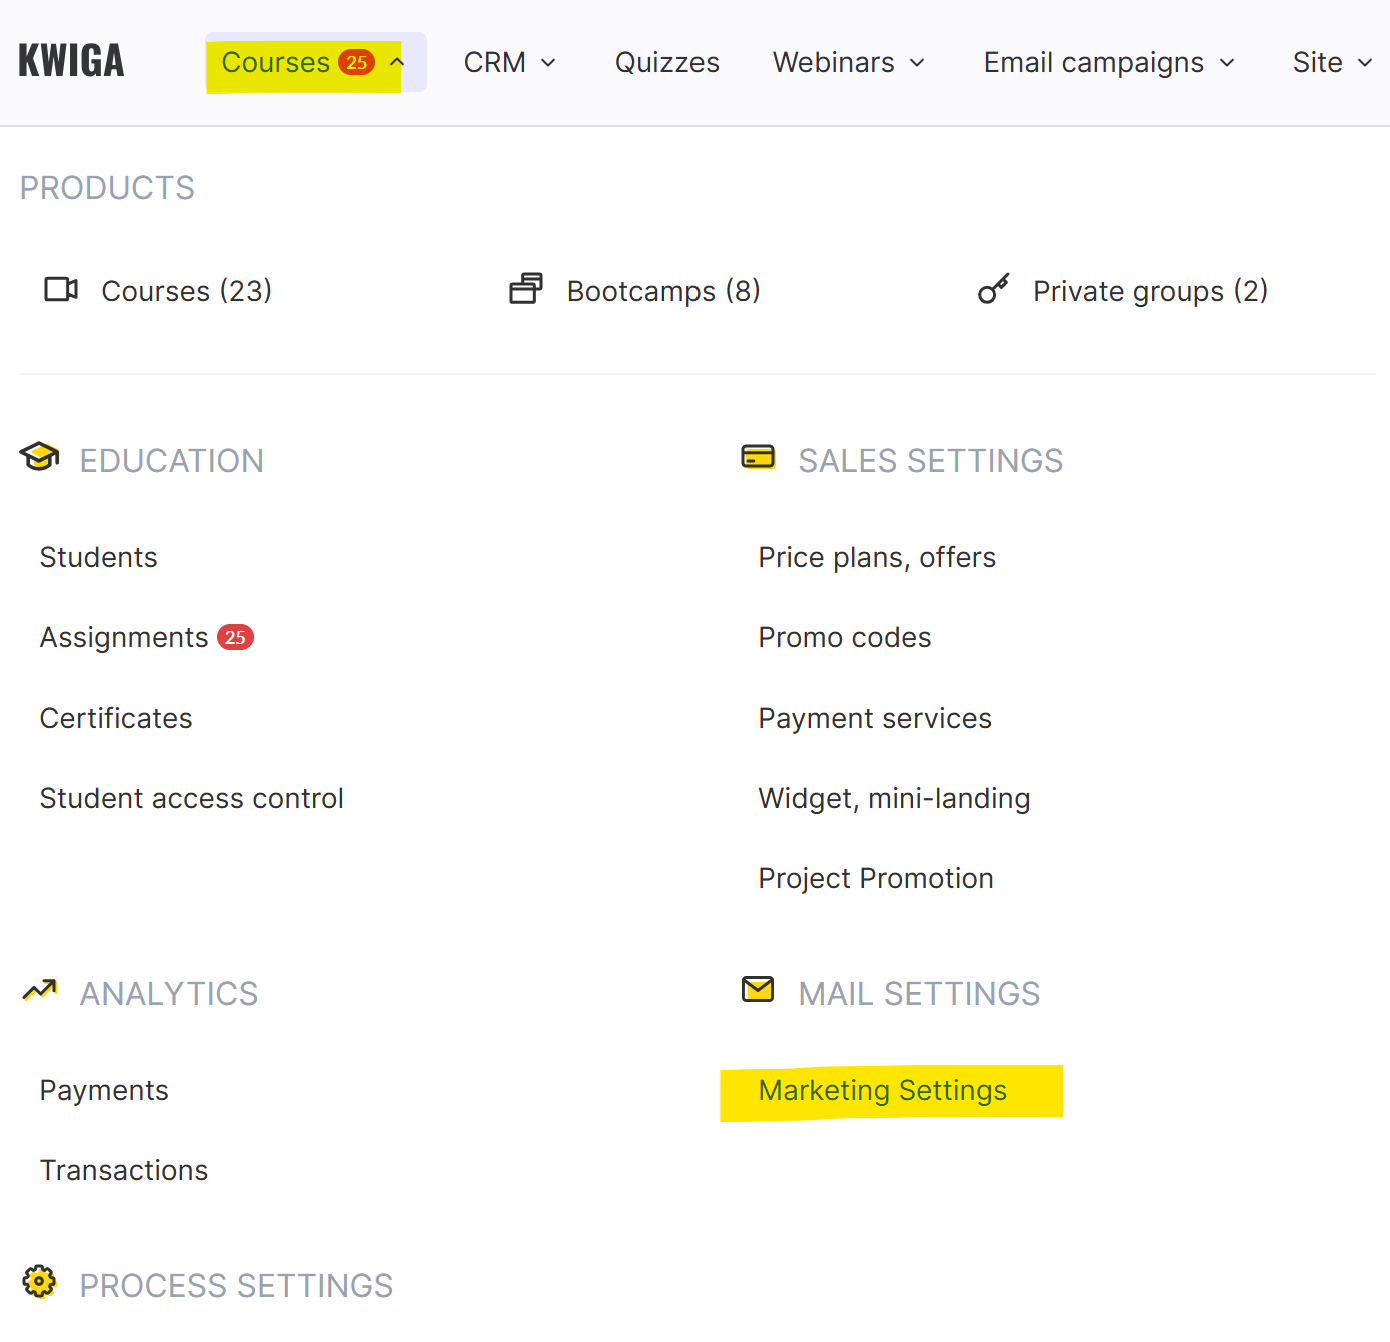
In the top menu, select Courses, then go to Marketing Settings:
In the "From Name" field, you can specify your name or the name of your school/project. This name will appear as the sender.
If you want to receive replies from students to your emails, it is recommended to enter the address where responses should be directed in the "Reply-to Address" field. The default value shown in your settings is a technical address, not monitored by support.
The contact information in emails includes details about the school or course author. You can fill this in multiple languages or just one, and use that language across all emails.
Full Address — this is the postal address of the school. You can enter only the country or the full legal address of a sole proprietor.
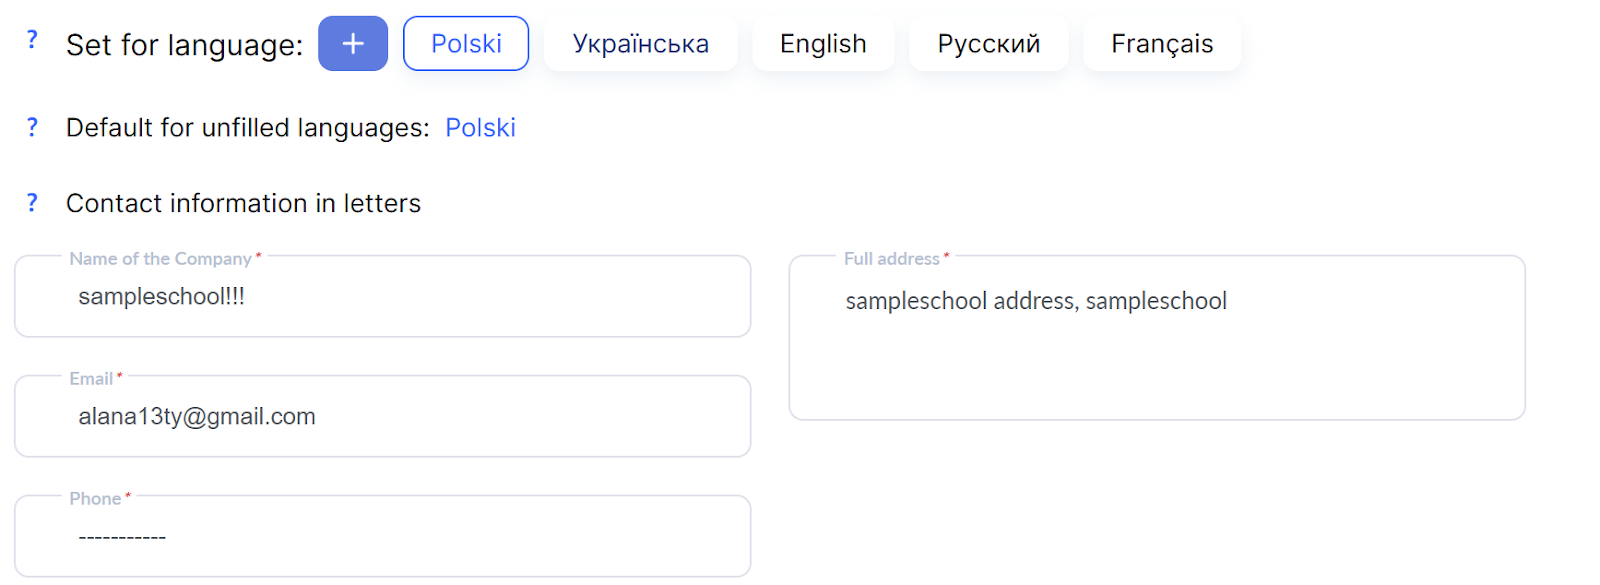
Logo — the uploaded image will be automatically added to emails.
Контроль доступов
Access Control
To enhance material protection and reduce the risk of pass-sharing (when clients share their login credentials with others), it is recommended to limit the number of devices that can access your courses. For more details about how this works and the necessary settings, read the article Access Control.
Didn't find the answer? Contact the support service via online chat or Telegram