
Articles:
- Orders: creating and editing orders.
- How do I add an individual payment link to a student
- Transactions
- How to set up sending your own email after purchase
- Integration with the Sendpulse chatbot
- How to integrate a payment system on Kwiga
- How to set a specific language for an offer page
- Important Project Settings
- How to grant access to students if the sales were not made on Kwiga
- Payment without authorization
- How to create a new stream with your own schedule
- How to give access to one student
- How to change access for one student
- How to set up demo access to a course, open house day at the school
- Automation: Follow-up email sequences (unpaid orders and applications)
- Setting up subscriptions (recurring payments)
- Promotional offer
- Credits and installments, payment in parts
- How to launch course registration with prepayment
- Discount coupons and possible settings
- How to create cross-sell offers in Kwiga
- How to start selling on Kwiga: creating a price plan
- Creating multiple pricing plans
- Selling consultations and one-on-one sessions
- How to Change a Student's Plan (Additional Payment on Kwiga)
- How to sell (give access to) parts of the course
- How to implement access renewal sales
- Selling through a registration form on a third-party site
- Selling through a mini-landing page created on Kwiga
- How to add a video to a page (mini-landing, course page)
- How to create a link with an applied coupon
- Offers and Payments on Kwiga: How It Works
- Repeat Sales: Setting Conditions and Sending a Coupon Based on Purchase Count
- Setting up notifications in a Telegram channel
- Sending Emails with Promo Codes (Unpaid Orders)
- Course Store: Settings and Capabilities
- Setting Up the Public Offer Page
- Organization of CPD on Kwiga: step-by-step guide
- How to set up a thank-you page after payment
- Set up access to lessons, sections, and modules
- How to change the contact in an order
- Accept payments through external WayForPay buttons
We will explain how to set up auto-renewing payments, recurring payments, and subscription-based payments.
In this article:
On the platform, you can set up subscription payments - a certain amount will be automatically charged to the student's card at regular intervals. If there are insufficient funds on the card or the card has expired, the payment cannot be processed, and access to the products will be closed.
Before configuring a subscription, create the products for which access will be sold. You do not need to fill them with content completely; it is enough to create the products themselves on the platform.
A subscription can work in two ways: with automatic payments, where funds are charged without the student's involvement, or with manual payments, where the student pays each installment using a payment link. Automatic payments, in turn, can be processed in two ways: using a token stored by the platform or according to a schedule managed by the payment system itself. Manual payments are more similar to membership fees. In both cases, access is closed if payment is not made on time.
Configuring a Subscription in a Pricing Plan
Subscription-based access can be configured for any product: a course, marathon, private group, etc.
As an example, we will show how to create a subscription pricing plan with monthly payments for a course and a private Telegram chat. Students will receive one month of access to both products at once. As long as payments are made on time, access will remain active. If a recurring payment fails, access to the course will be closed, and the student will be removed from the chat.
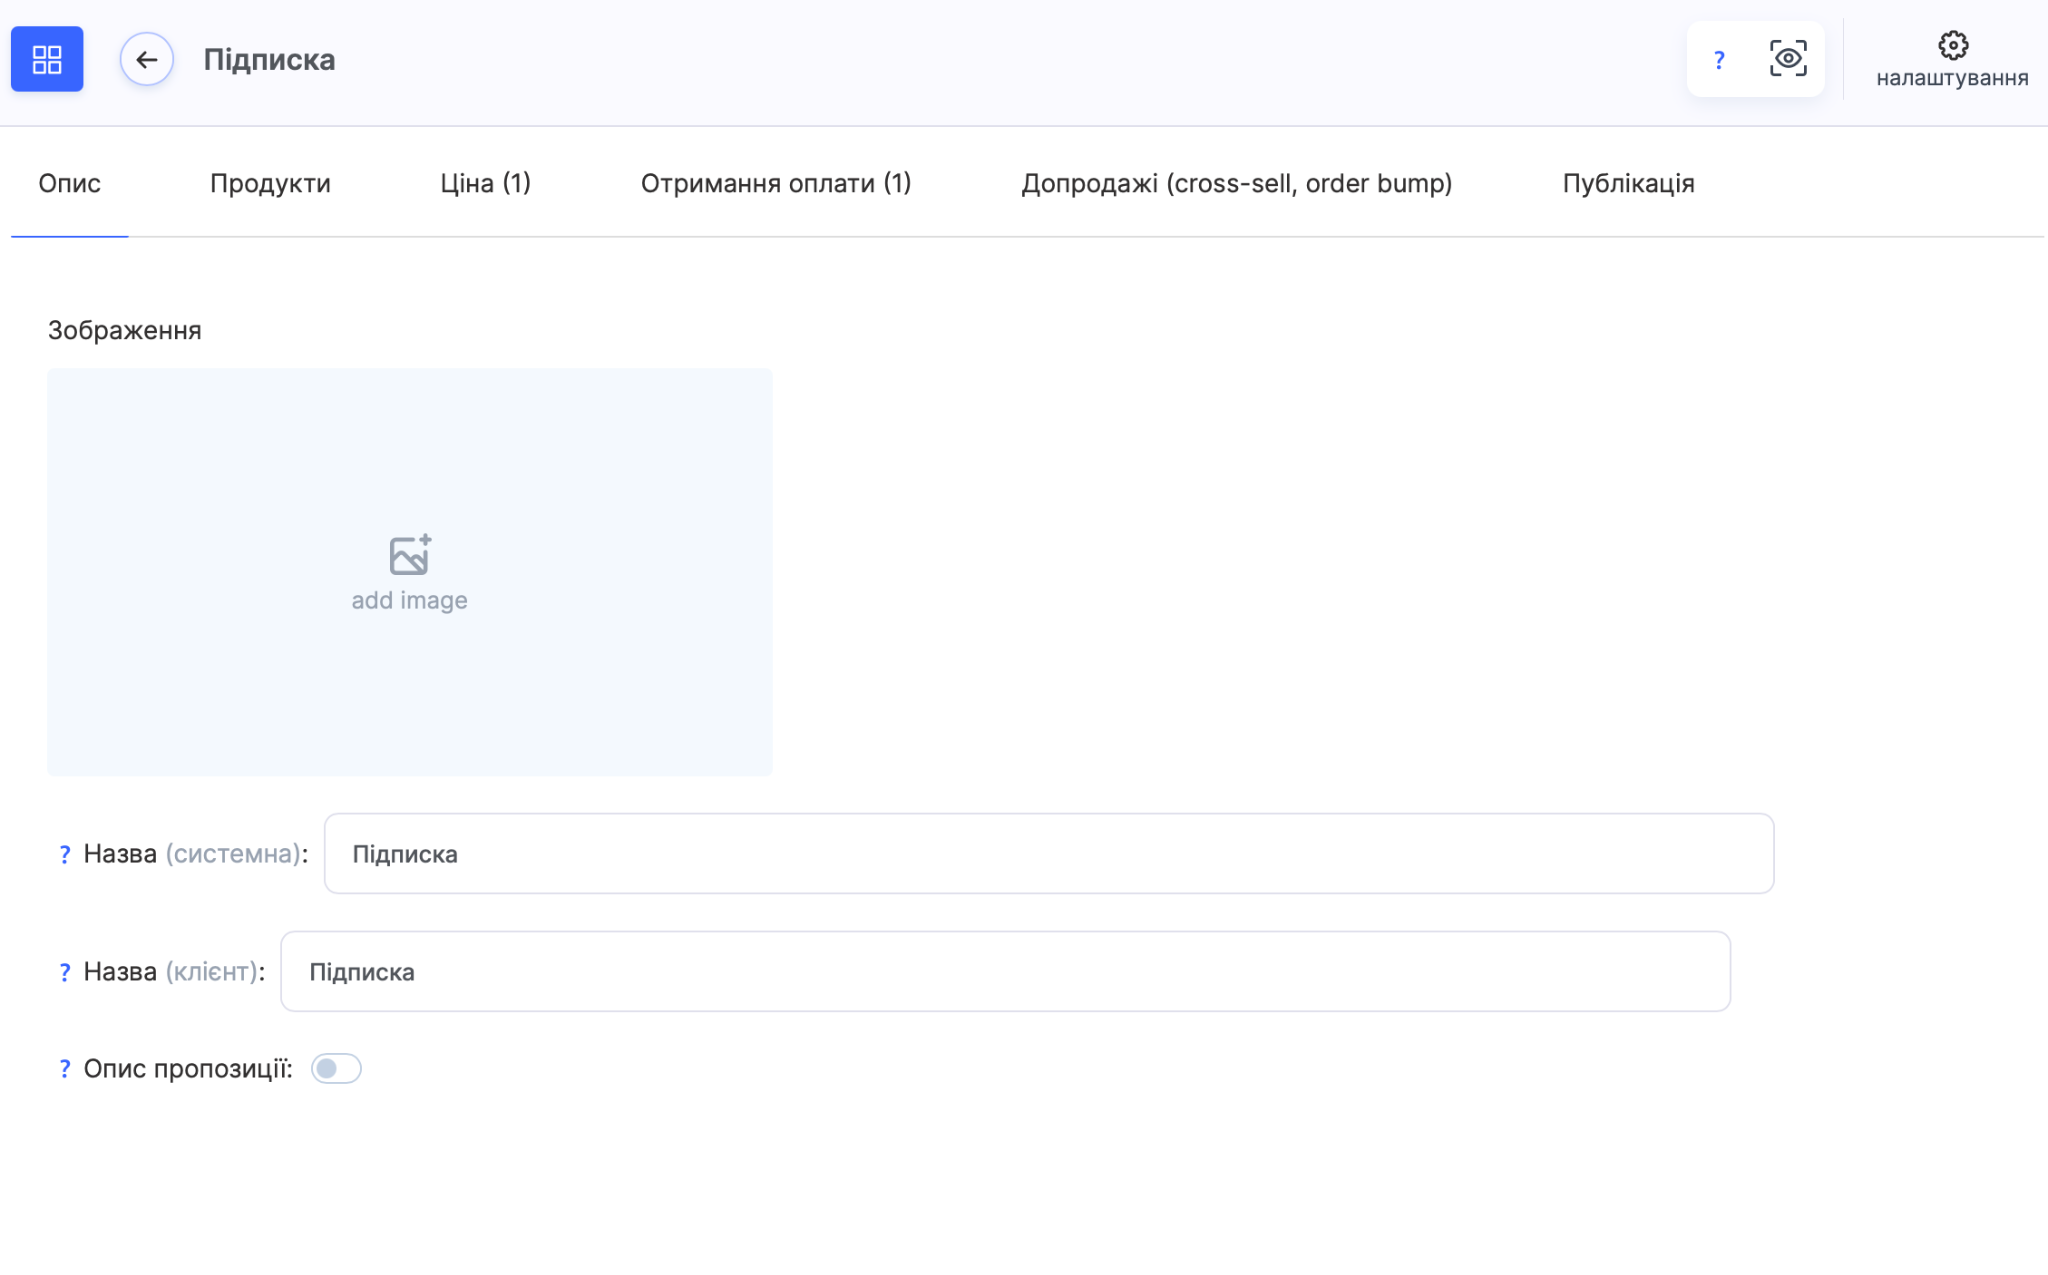
Create a pricing plan through the Courses - Pricing Plans, Offers menu or from the course card, as described in the article How to Start Selling on Kwiga: Creating a Pricing Plan. On the Description tab, enter the pricing plan name. It usually includes the course name, pricing plan name, and cohort name if sales are linked to a specific group. If necessary, add a description of what the student will receive.
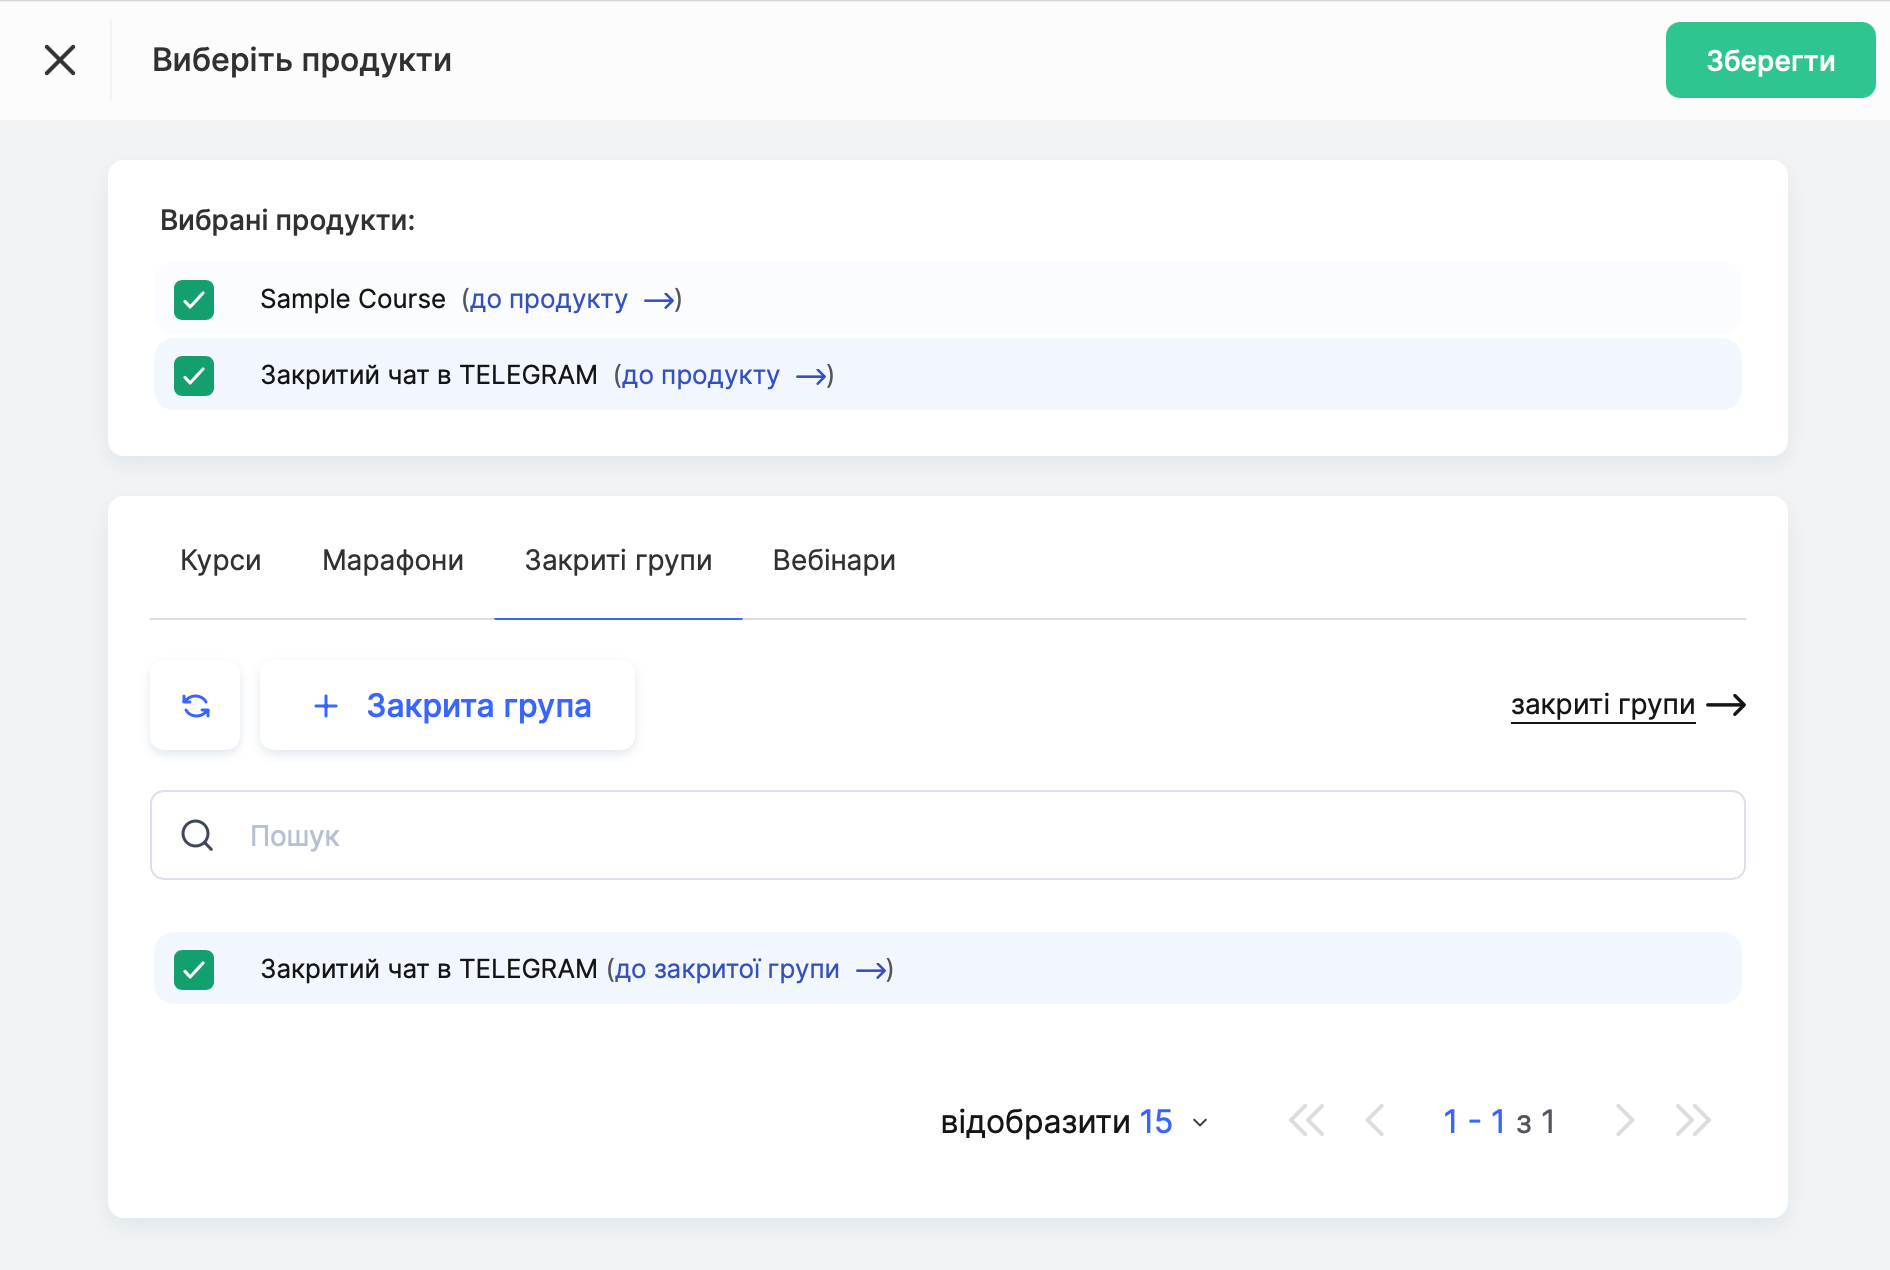
On the Products tab, add the course and private chat.
In the Access Period settings, specify the maximum duration of the entire subscription, not the duration covered by a single payment. If the course lasts one year with monthly payments, specify 12 months. If access to the chat is not limited in time, leave it unlimited.
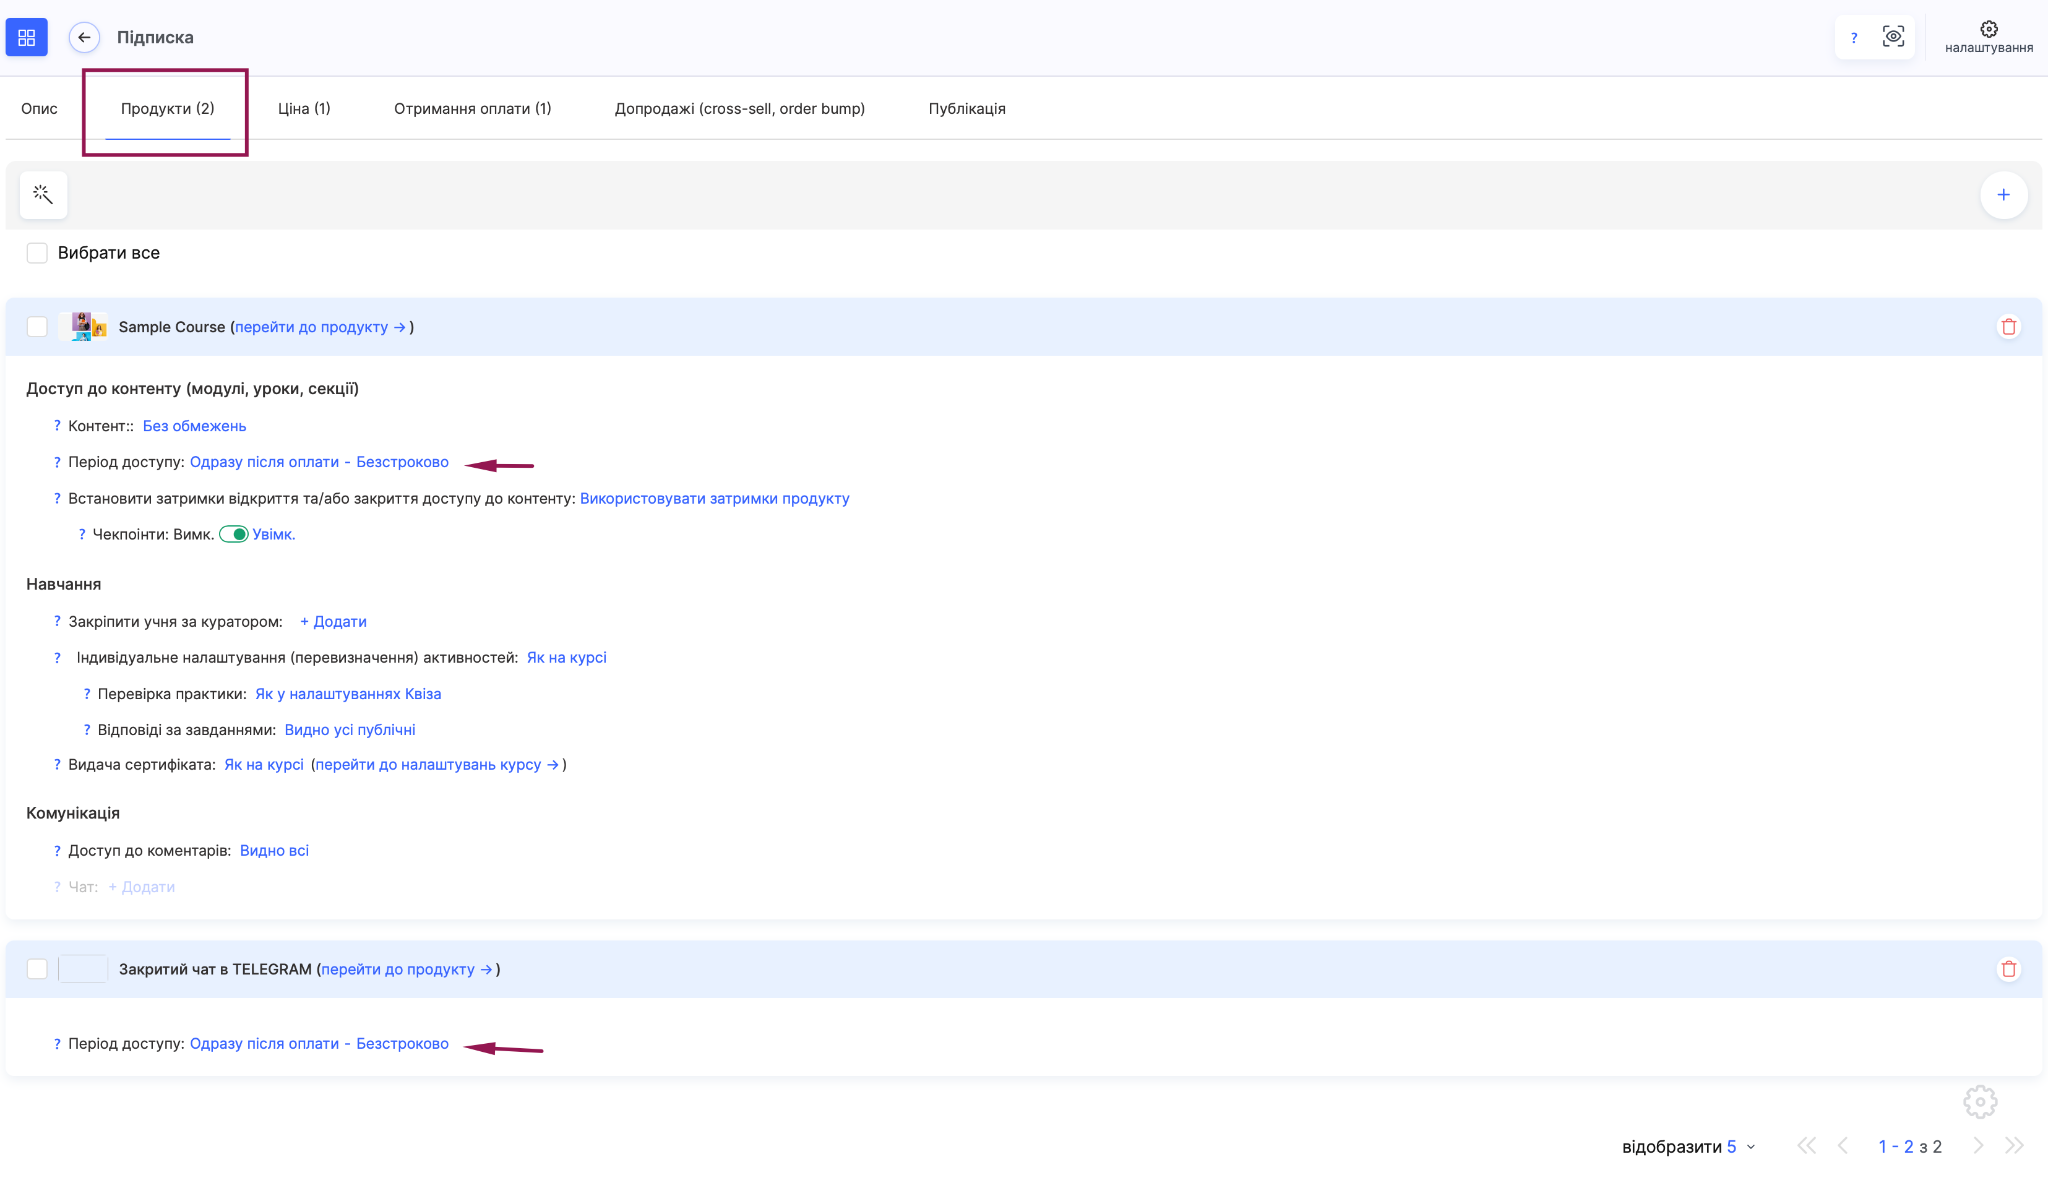
If a lesson release schedule is configured for the course, we recommend keeping the Use Product Delays option for subscriptions and managing the schedule at the course level rather than the pricing plan level. Configure the remaining settings on this tab (curators, practice review, certificates, comments) in the same way as for a regular pricing plan.
On the Price tab, specify the subscription price, meaning the amount of one recurring payment.
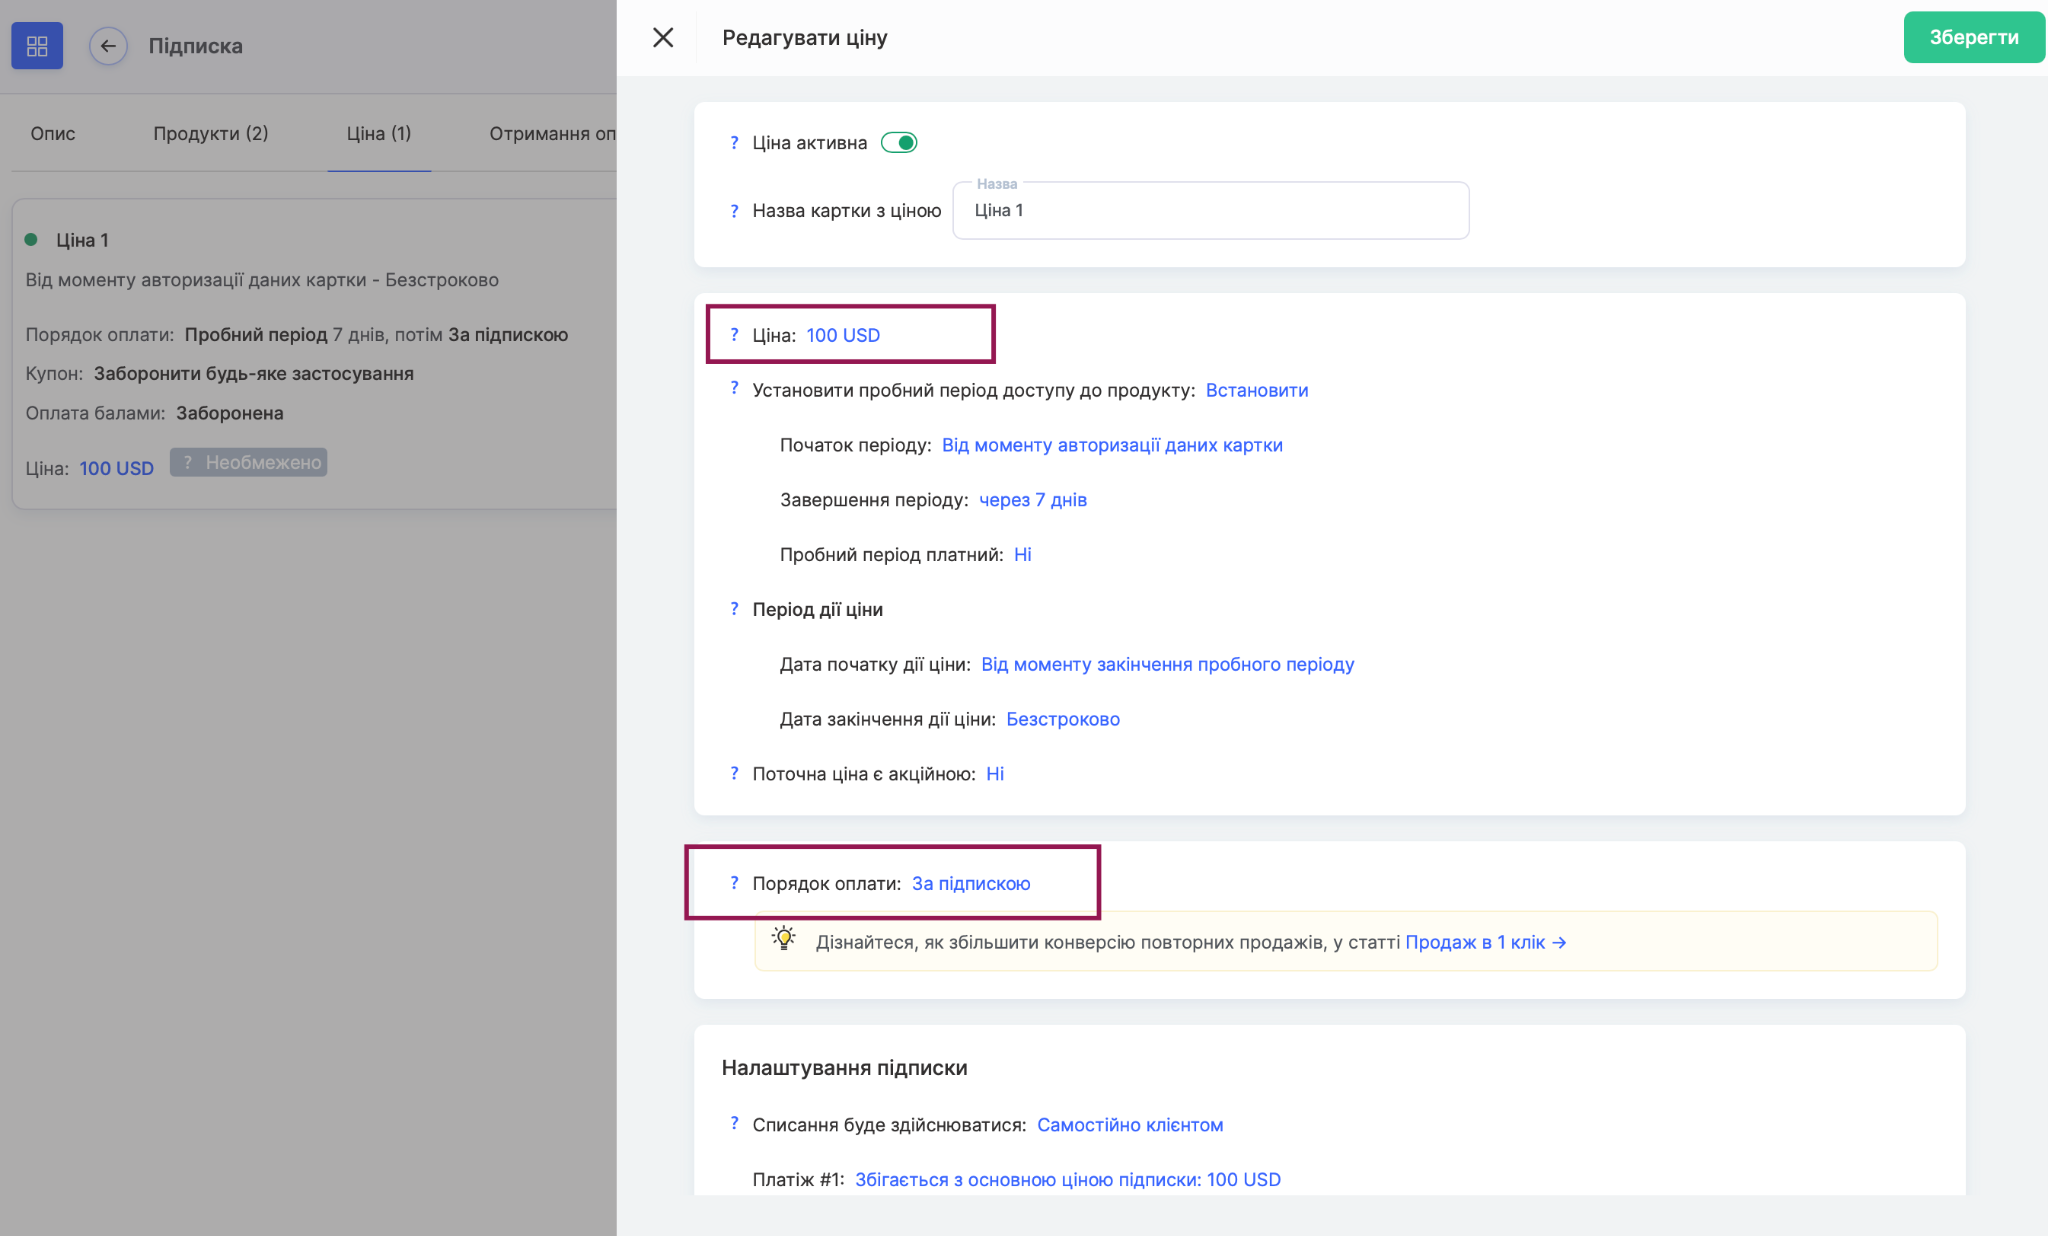
Under Payment Terms, select Subscription, and the Subscription Settings block will appear below.
First, select how payments will be processed: Manually by Customer, Automatically via Payment System (Token), or Automatically According to Payment System Terms.
The differences between these options are explained in the next section. Next, configure the payment schedule. Payment #1 - this is the first payment, which by default matches the main subscription price. In the Next Payment field, set the interval between payments, for example, one month after the previous payment. In the Payment Day field, choose whether the charge date should match the date of the first payment. Number of Renewals determines how many times the subscription will renew: leave Unlimited if the subscription should remain active until the student cancels it, or specify a number if the subscription should end automatically, for example, after the course is completed. In the Close Access After Failed Payment field, specify when access should be closed if a payment fails. By default, this happens immediately, but we recommend giving students a few days to complete the payment.
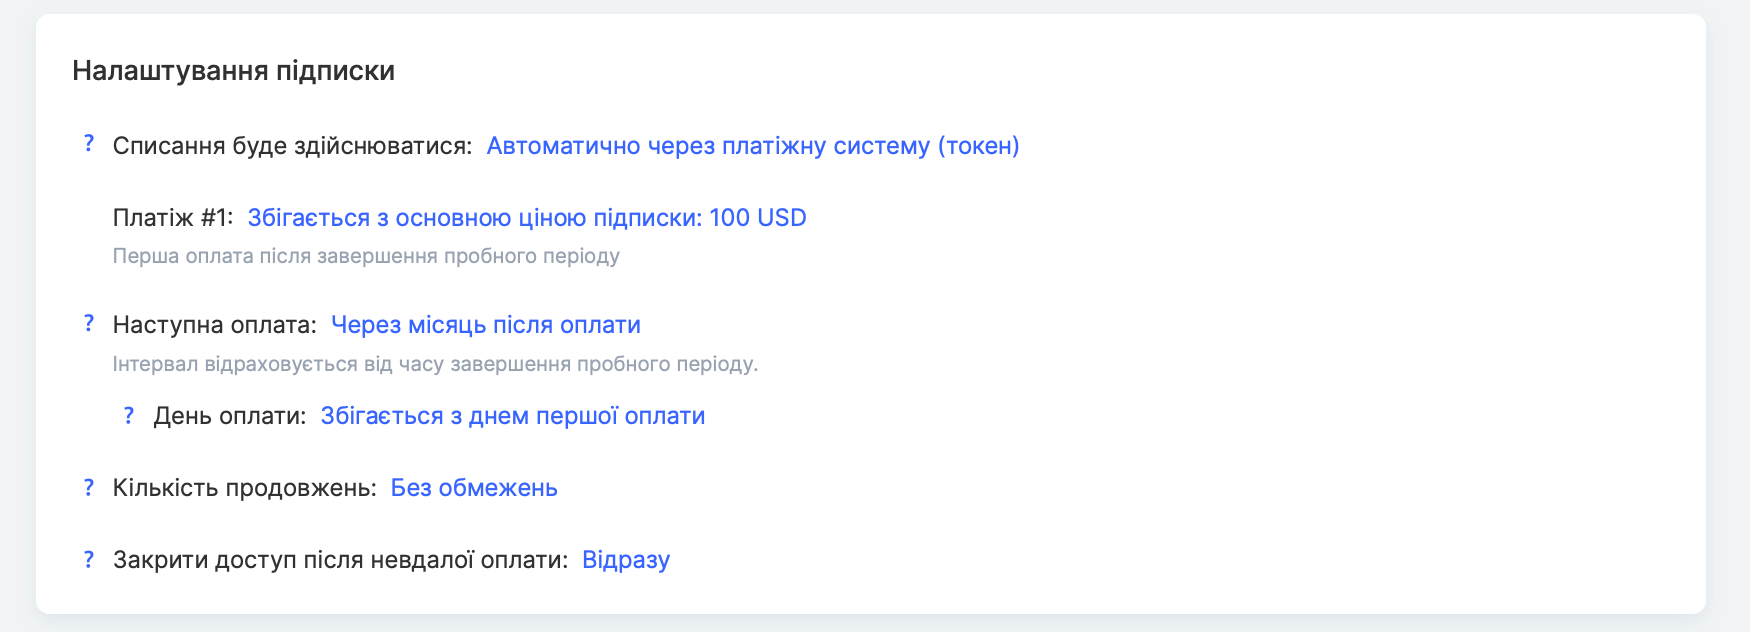
If a trial period is configured on the same tab, the first payment and the calculation of intervals between payments will begin after the trial period ends.
On the Payment Collection tab, connect a payment system.
How to Integrate a Payment System with Kwiga.
Payment System Features and Limitations
The subscription payment method depends on the connected payment system. Kwiga offers three options: Manually by Customer, Automatically via Payment System (Token), and Automatically According to Payment System Terms.
Manually by Customer - the simplest option, which works with any connected payment system, including those that do not support tokens. The platform does not charge payments automatically. Before each payment, the student receives an email with a payment link. The same link is always available in their personal account under Purchase History, next to the corresponding order.
Reminders are sent 7 days, 3 days, 1 day, and 1 hour before the payment date. If necessary, each of these emails can be disabled in the pricing plan settings. This option is well suited for membership fees and access to private communities when students are willing to confirm each payment themselves. If payment is not received on time, access is closed. You can also add a few extra days in the Close Access After Failed Payment field to give students time to pay without interrupting their learning.
Automatically via Payment System (Token) allows each subsequent payment to be charged without the student's involvement. The student only needs to participate in the first payment, when the token is created. Since payments are processed using a token rather than according to the payment system's own schedule, the intervals between payments can be set freely, without restrictions.
Important! For PayPal, WayForPay, LiqPay, and Payment by Mono, you must additionally contact the payment system's support team to activate card token storage. If the card or token expires, the subscription automatically switches to manual payment mode (Manually by Customer) until the student updates their card details. Also, check the integration settings on the Kwiga side to ensure that the Save Card Details for Future Payments option is enabled for the relevant payment system.
Automatically According to Payment System Terms works differently: payments are charged according to a schedule built directly into the payment system itself, so the available payment intervals depend on the payment system's capabilities.
Important! Klarna, Przelewy24, RedSys, CoinPayments, and Interkassa do not support built-in recurring charges on their side. Therefore, subscriptions using these payment systems can only be configured through Manually by Customer or Automatically via Payment System (Token).
Canceling a Subscription
Both students and experts can cancel a subscription. Cancellation does not close access immediately: the student can continue learning until the end of the already paid period (including any additional days specified in the pricing plan settings). Access is closed only after that period ends. Once the subscription is canceled, payment reminders stop.
How Students Cancel a Subscription
Students can cancel their subscriptions in their personal account: Purchase History - select the relevant order - Cancel.
The platform will ask the student to confirm the action and remind them of the date until which access will remain available. After confirmation, the Subscription Canceled label will appear on the order page.
How Experts Cancel a Subscription
Open the relevant order and click Cancel Subscription.
The button appears only for orders with subscriptions that have not yet been canceled and only if the payment system supports cancellation.
What Happens Depending on the Payment Method
If payments are processed using the Manually by Customer method, the payment system is not involved in recurring charges, so cancellation simply stops payment reminders.
If payments are charged by the payment system itself (Stripe, WayForPay, Monobank, Hutko, LiqPay, Fondy, Tranzzo), the platform first sends the cancellation request to the payment system and marks the subscription as canceled on Kwiga only after receiving confirmation.
If You Cancel a Subscription in the Payment System Dashboard
The platform receives information about such cancellations only from Stripe and sometimes from WayForPay. In all other cases, recurring charges will stop, but the subscription will remain active in Kwiga and the student will continue receiving payment reminders. Therefore, you should also cancel the subscription in the order details on the platform.
Making Changes to Existing Subscriptions
You can edit a pricing plan by changing its price, subscription terms, or payment system. However, all these changes apply only to new purchases. Subscriptions that students have already purchased will continue under their original terms. The platform will also display a warning about this when you save the changes.
To change the subscription price or terms, do not edit the existing price. Instead, add a new price card to the pricing plan on the Price tab. Then disable the Price Active toggle on the old card. It will remain in the pricing plan, but new students will no longer see it, while existing subscribers will continue paying under their previous terms. If prices need to change at a specific time, set a validity period for each price, and they will automatically replace one another.
If the access terms themselves change, such as the products included or the access duration, or if you need to offer new students a fundamentally different package, it is better to create a separate pricing plan. This way, you will always be able to see exactly which settings apply to payments made by different groups of students.
If you need to terminate a specific subscription, cancel it in the order details as described in the subscription cancellation section.
Didn't find the answer? Contact the support service via online chat or Telegram