
Articles:
- Orders: creating and editing orders.
- How do I add an individual payment link to a student
- Transactions
- How to set up sending your own email after purchase
- Integration with the Sendpulse chatbot
- How to integrate a payment system on Kwiga
- How to set a specific language for an offer page
- Important Project Settings
- How to grant access to students if the sales were not made on Kwiga
- Payment without authorization
- How to create a new stream with your own schedule
- How to give access to one student
- How to change access for one student
- How to set up demo access to a course, open house day at the school
- Automation: Follow-up email sequences (unpaid orders and applications)
- Setting up subscriptions (recurring payments)
- Promotional offer
- Credits and installments, payment in parts
- How to launch course registration with prepayment
- Discount coupons and possible settings
- How to create cross-sell offers in Kwiga
- How to start selling on Kwiga: creating a price plan
- Creating multiple pricing plans
- Selling consultations and one-on-one sessions
- How to Change a Student's Plan (Additional Payment on Kwiga)
- How to sell (give access to) parts of the course
- How to implement access renewal sales
- Selling through a registration form on a third-party site
- Selling through a mini-landing page created on Kwiga
- How to add a video to a page (mini-landing, course page)
- How to create a link with an applied coupon
- Offers and Payments on Kwiga: How It Works
- Repeat Sales: Setting Conditions and Sending a Coupon Based on Purchase Count
- Setting up notifications in a Telegram channel
- Sending Emails with Promo Codes (Unpaid Orders)
- Course Store: Settings and Capabilities
- Setting Up the Public Offer Page
- Organization of CPD on Kwiga: step-by-step guide
- How to set up a thank-you page after payment
- Set up access to lessons, sections, and modules
- How to change the contact in an order
- Accept payments through external WayForPay buttons
A step-by-step guide on how to create multiple pricing plans for sales or for granting access if sales are made outside Kwiga.
In this article:
Let's consider a standard setup with three pricing plans and use them as an example to demonstrate how to organize learning on the platform.
The first pricing plan offers self-paced learning with access to the course for 3 months and is available for purchase at any time.
The second pricing plan includes curator support, access for 6 months, and an additional module. Sales are limited to a specific period and tied to the cohort start date.
The third pricing plan includes direct support from the course author, access for 12 months, and additional modules. Sales are also limited to a specific period and tied to the course start date.
Important: You do not need to create copies of a course to offer multiple pricing plans, even if different lessons are available under different plans or one of the plans includes curator feedback. Technically, you can create several separate courses, but we do not recommend doing so. Managing a single course is easier and more convenient, and when a student switches from one pricing plan to another, their progress is automatically preserved.
What You Need to Get Started
First, you need to have a course created on the platform, along with at least a basic course program structure — you do not need to upload all the lessons in full. It is enough to create the module and lesson titles, which can later be linked to different pricing plans.
For more information about creating a course, see the article How to Create a Course on the Kwiga Platform.
Second, you need a connected payment system if you plan to accept payments directly through Kwiga. Please note that the platform itself is not a payment system, so you need to connect a payment provider in advance to ensure that students automatically receive access after payment. The process is described in the article How to Integrate a Payment System with Kwiga.
Third, you need to add a curator to your team if you plan to include curator support in your pricing plans. A curator — is a user who has been assigned a set of access permissions with the appropriate rights. Such users can moderate chats, review assignments and tests, and manage participant comments. For more information about adding users, see the article How to Add a Team Member.
Finally, it is worth checking the settings of assignments that require review in advance. If you want these assignments to be reviewed by a curator, select mandatory curator review in the quiz settings without assigning a specific curator directly within the quiz — the curator will be assigned to students at the pricing plan level, as shown later in this article.
Configuring a Pricing Plan with the Course Author (VIP)
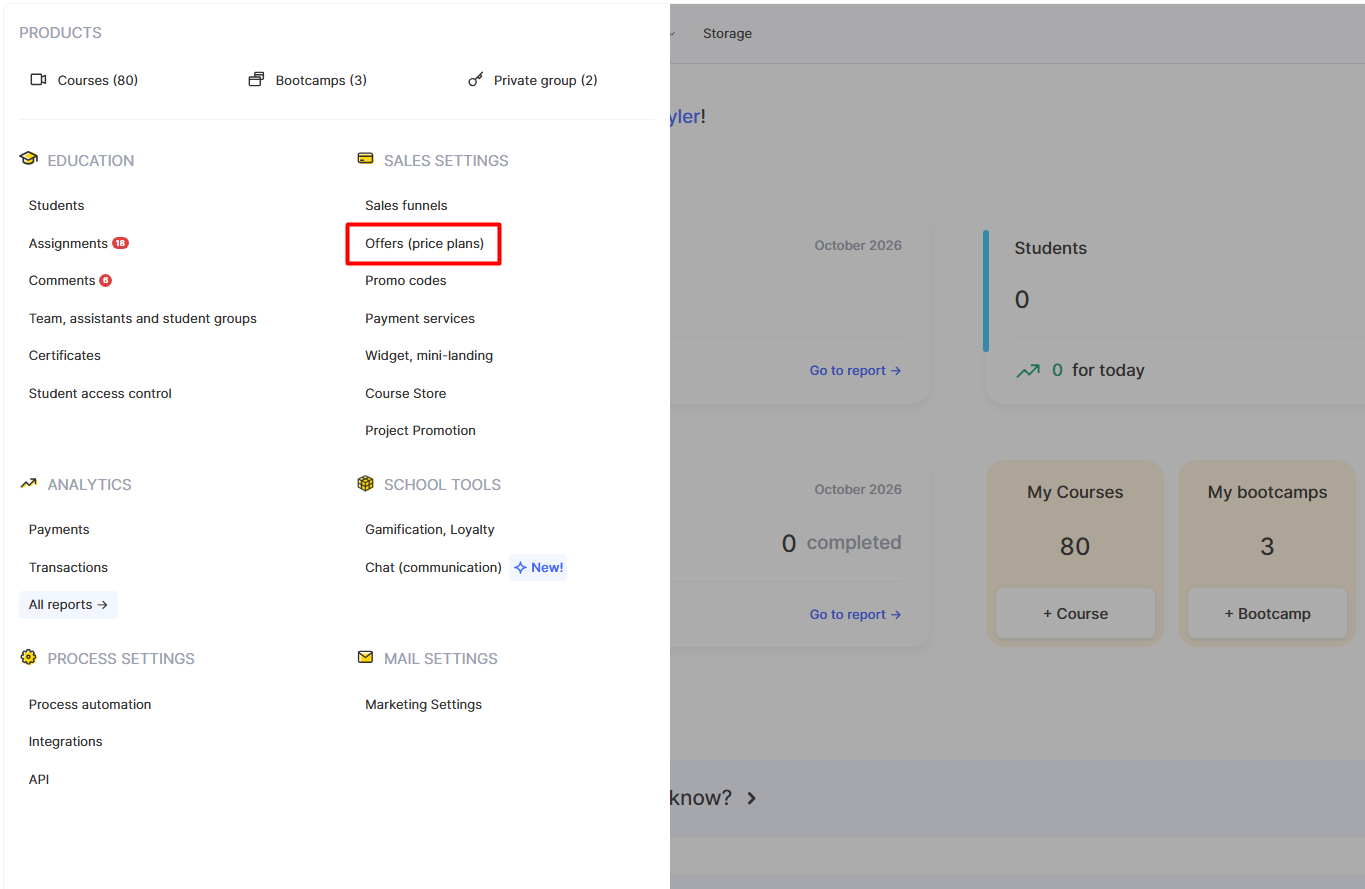
You can create a pricing plan through the top Courses menu by selecting Pricing Plans, Offers.
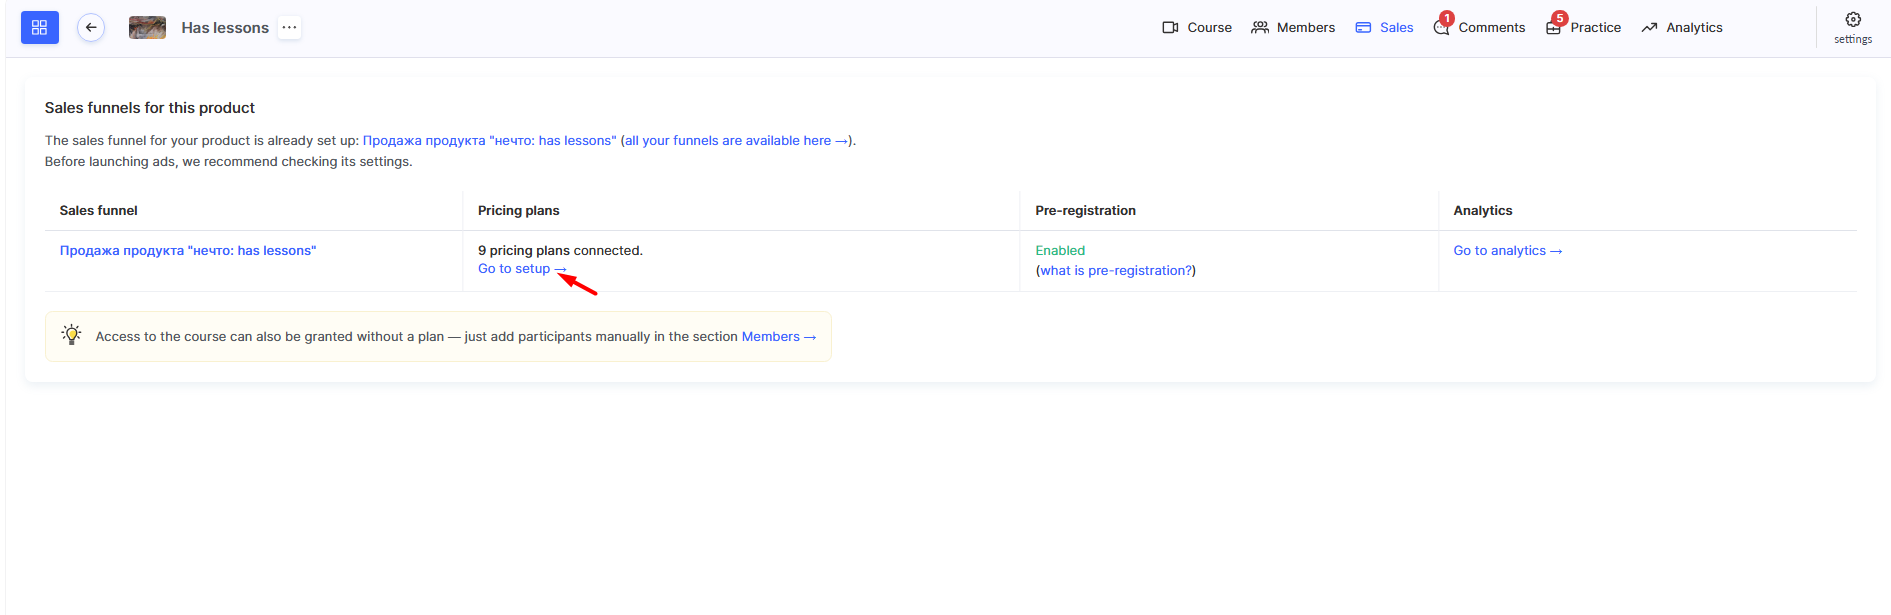
Alternatively, open the course's Sales menu, go to Connect Pricing Plan, and add a pricing plan.
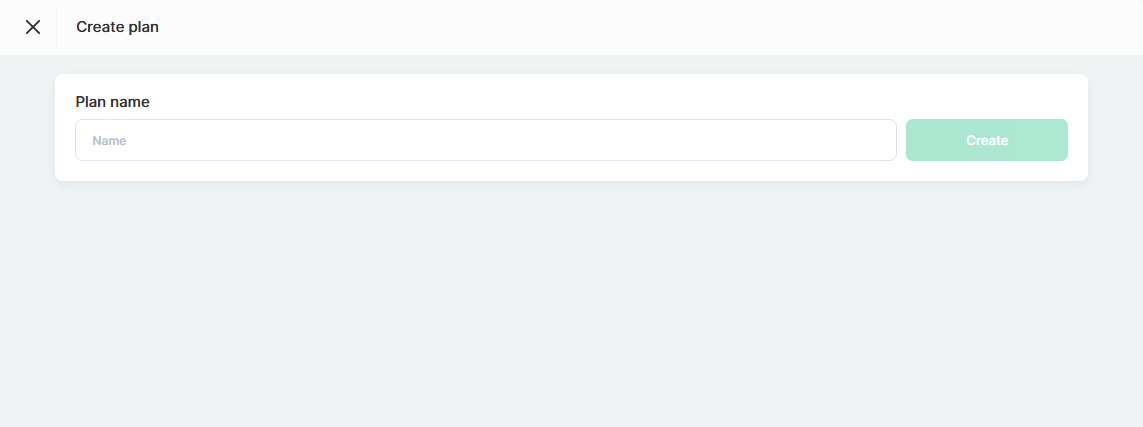
In the creation window, enter the pricing plan name — for example, VIP Package — and click Create.
The platform will open the pricing plan editor with several tabs: Description, Products, Price, Payment Collection, Cross-sells, and Publication. All pricing plan settings are configured through these tabs.
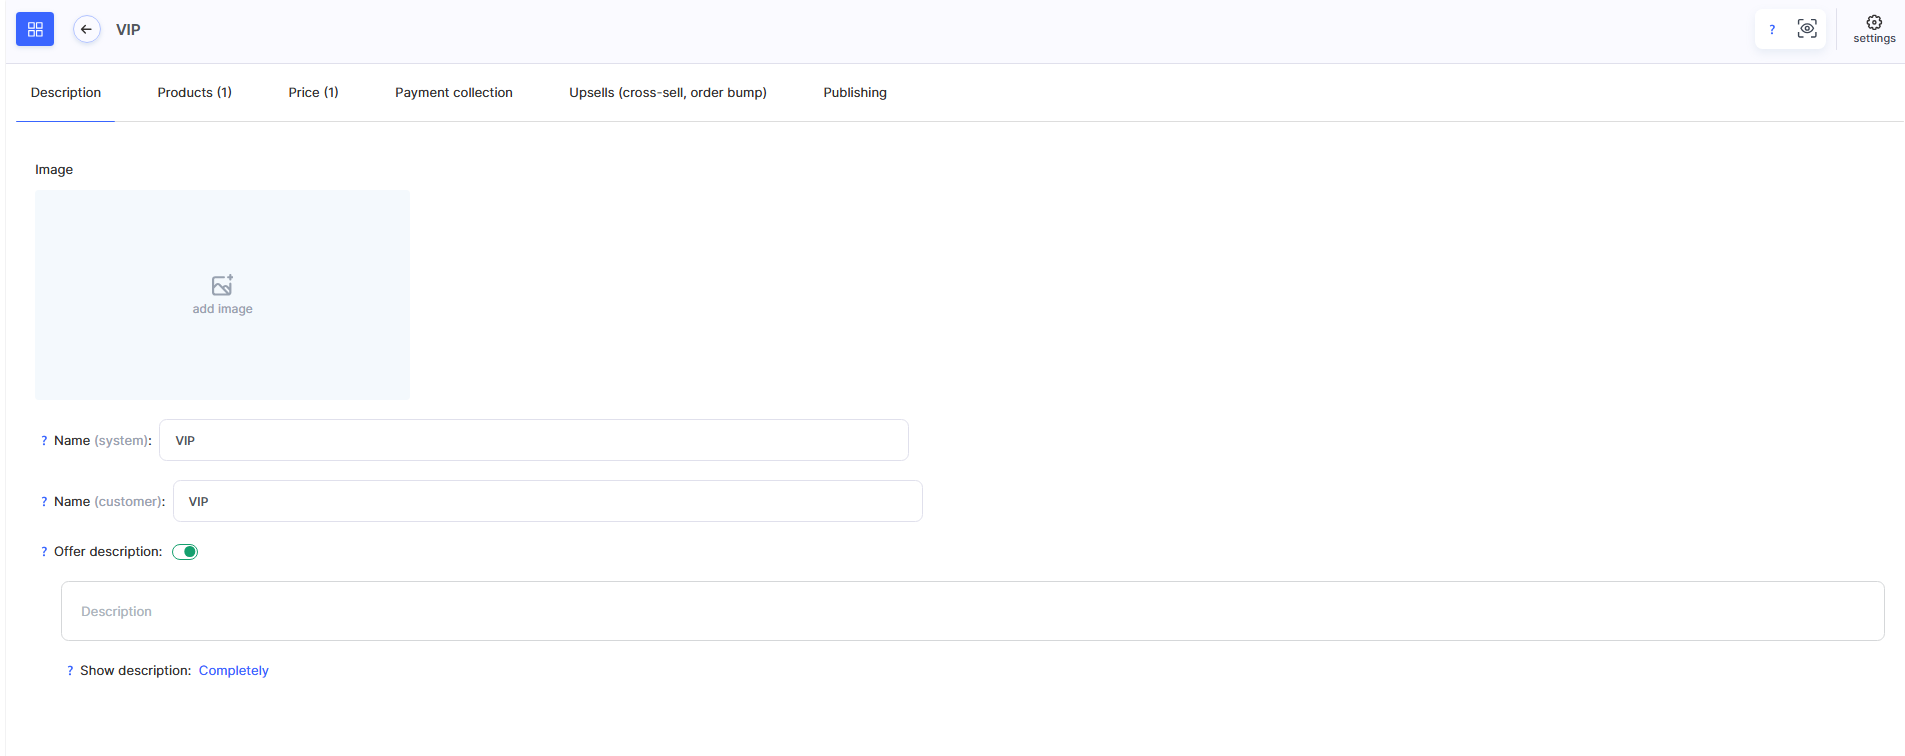
On the Description tab, the internal name is already set to VIP Package — this name is visible only to you in the admin panel. You can make the customer-facing name clearer and more appealing, for example, VIP with Personal Support from the Course Author — this is the name students will see in emails and on the payment page. Enable the Offer Description toggle and add information about what students will receive when purchasing the plan. For example, you can specify: access to all modules and lessons, access to additional modules, direct support from the course author, and full access to the materials for 12 months after the course starts.
On the Products tab, click the plus button and select the course for which access will be sold.
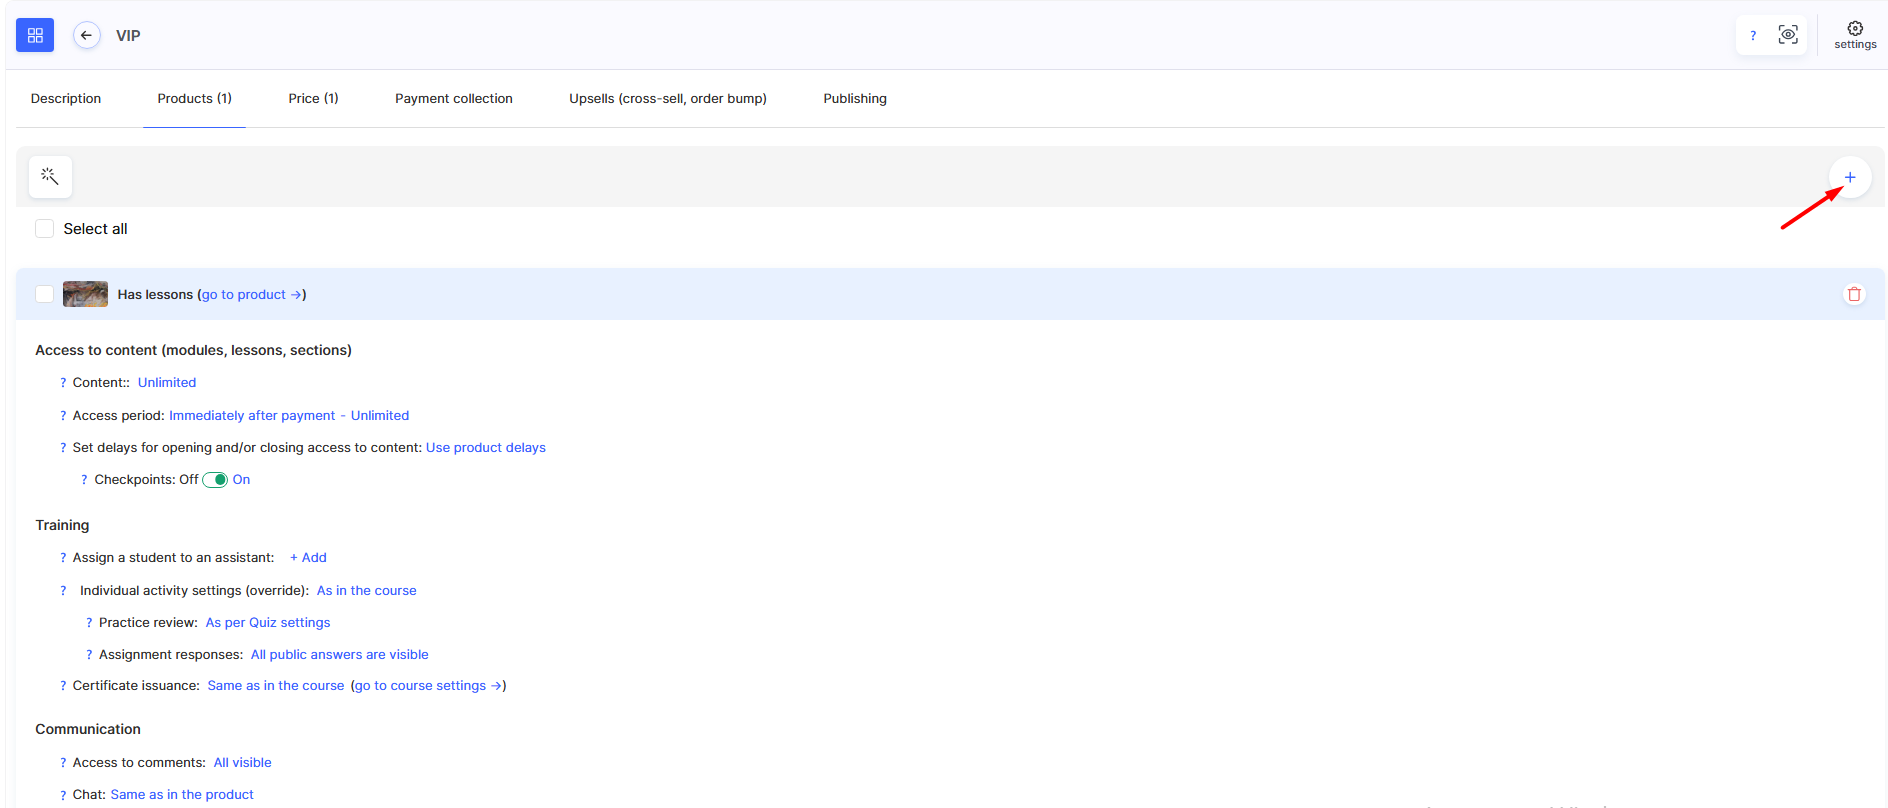
Since this pricing plan provides access to all course content, including additional modules, leave the Unlimited Content Access option selected. In the Access Period block, select From a Specific Date and specify the course start date, for example, November 1 — this date will be considered the start of access for participants who purchase this pricing plan.
Set the access expiration using the N Months from the Start of Access option, specifying 12 months. Below, in the Learning block, assign a curator to the pricing plan — in this example, the course author acts as the curator.
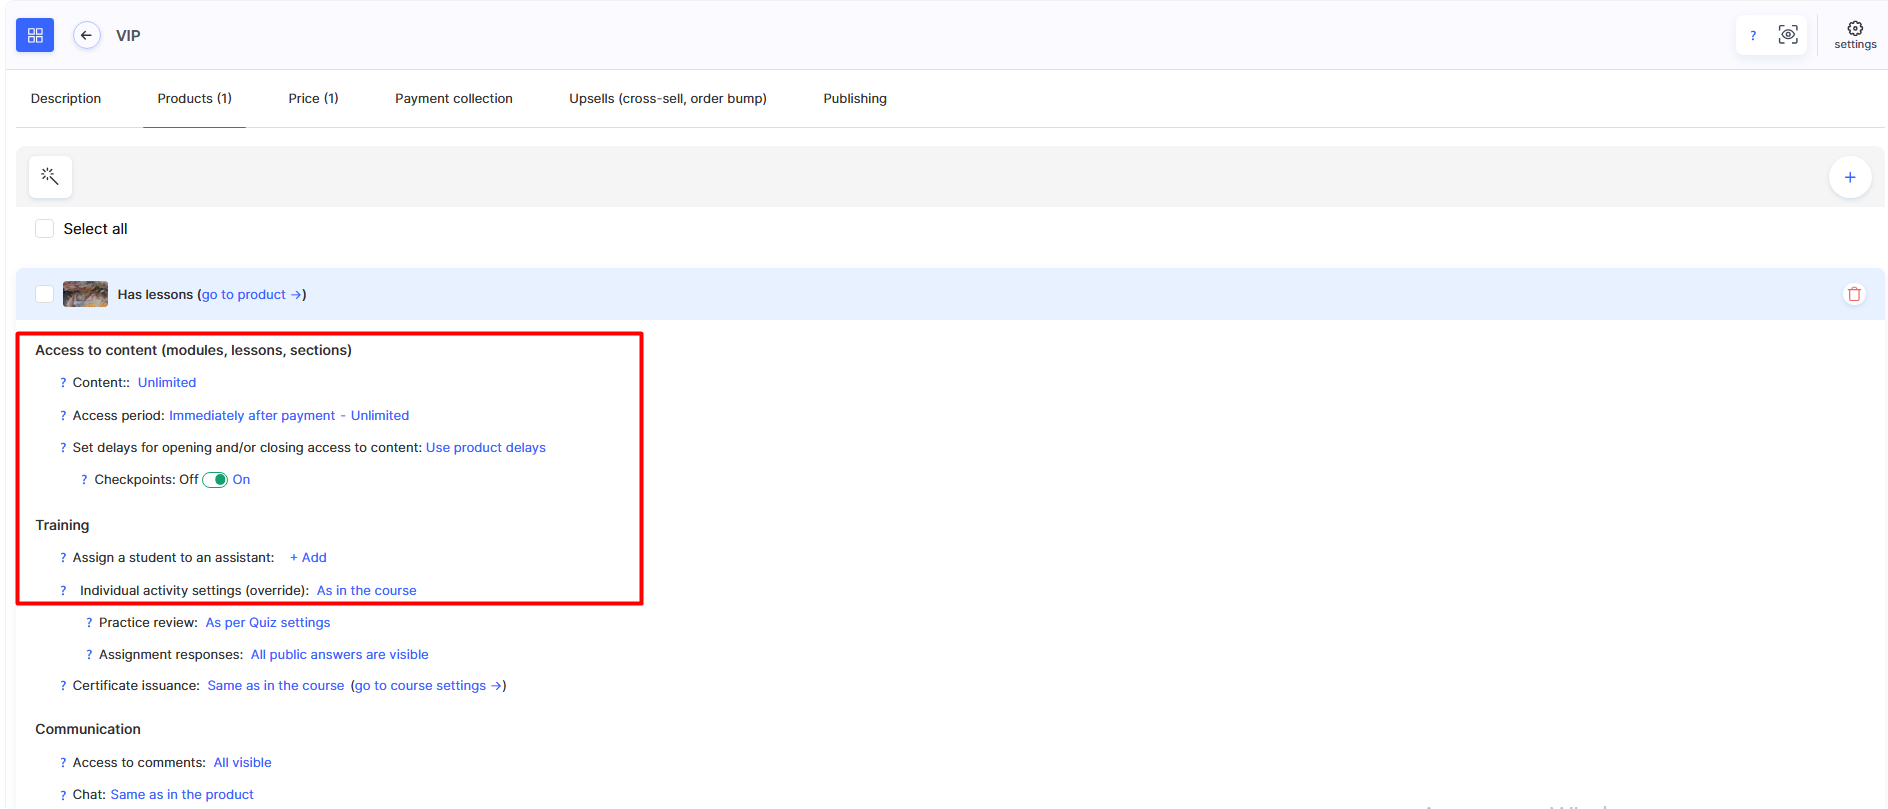
Please note: You can add several products to a single pricing plan, meaning students will gain access to all of them after making one payment. These can include other courses or private access to a Telegram channel.
On the Price tab, specify the price of the plan.
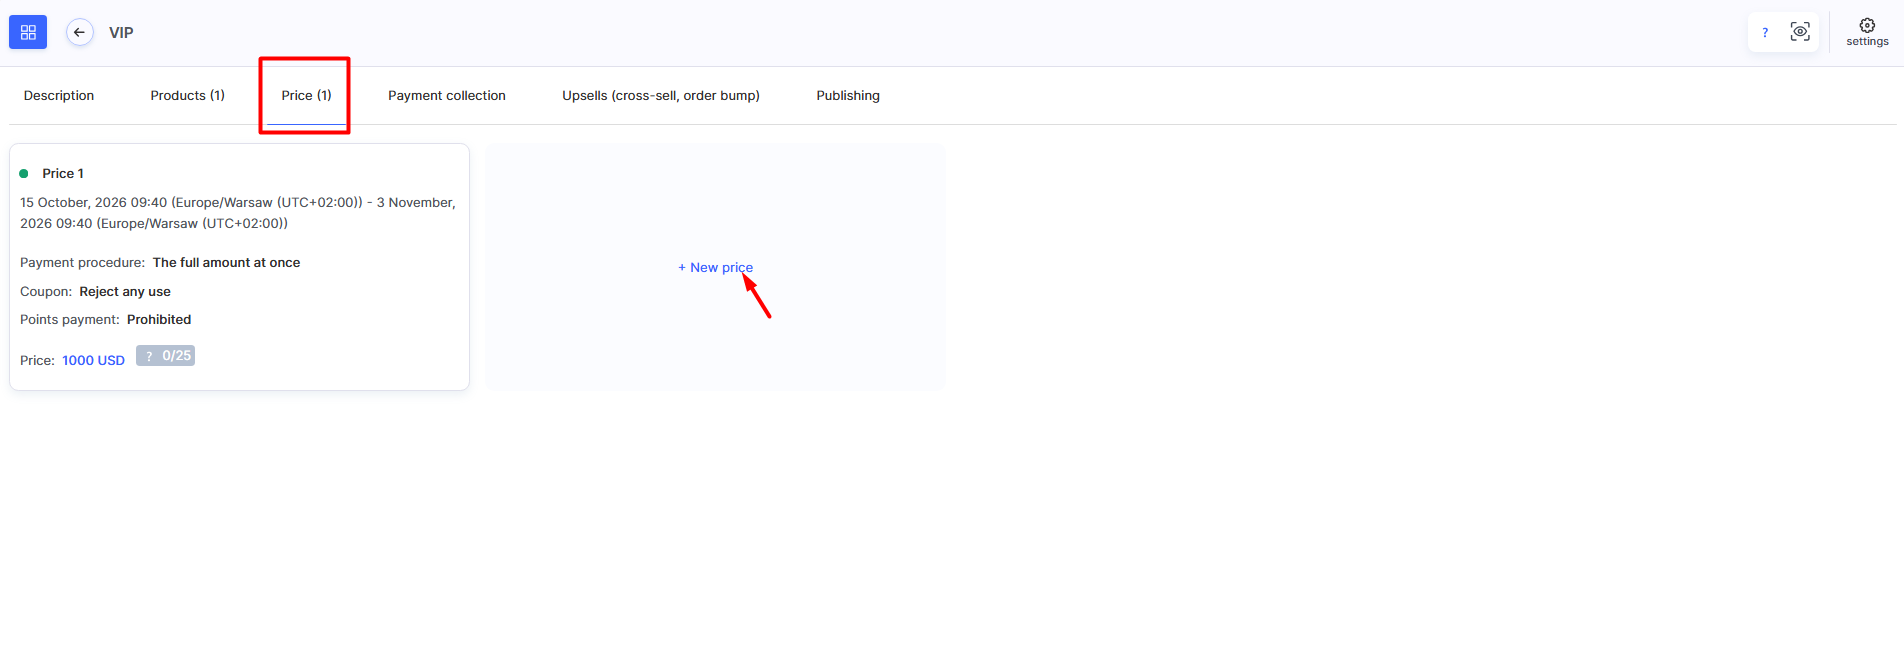
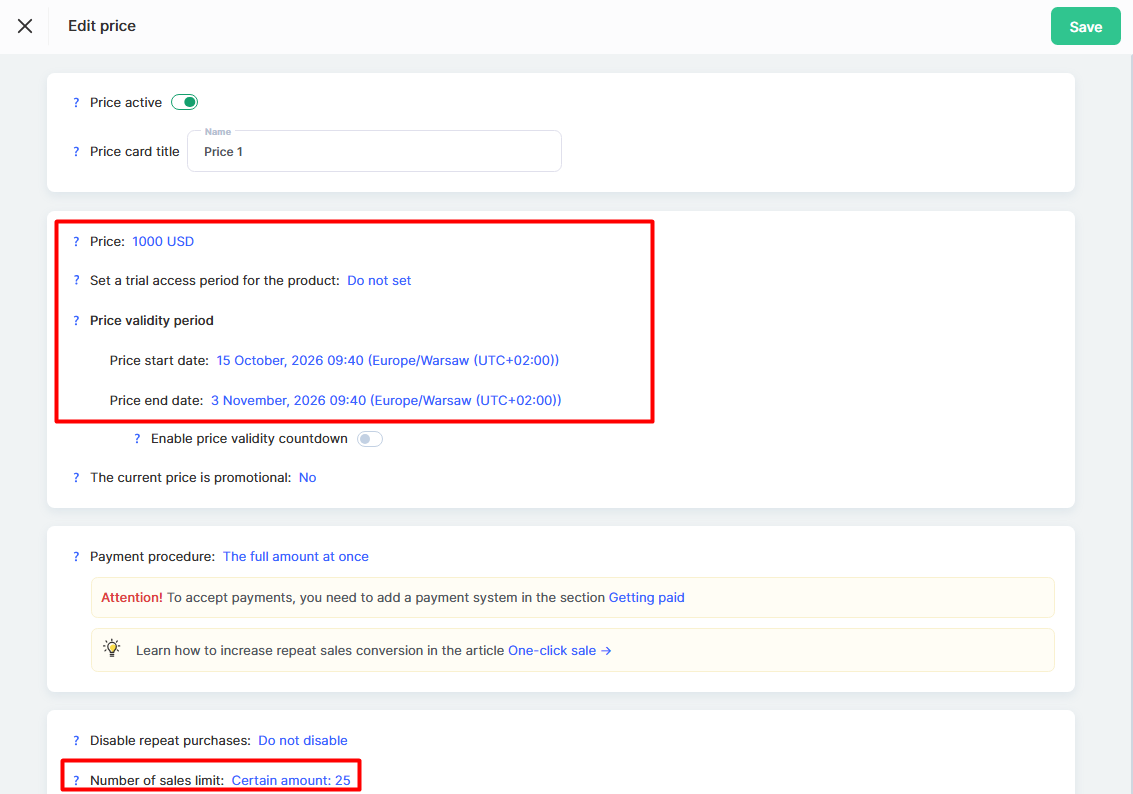
Since sales of this pricing plan are limited to a specific period and tied to the course start date, set the sales period here, in the Price Validity Period block: for example, from October 1 to November 3, if the course starts on October 1. This setting determines how long students can purchase the pricing plan and does not affect the course access duration you already specified on the Products tab — these are two separate, independent parameters.
Since the course author's time is limited, set a limit in the Sales Quantity Limit block, for example, 15 places. Students will see how many places are left, and once the limit is reached, they will no longer be able to purchase the plan independently, although you can still grant access manually.
On the Payment Collection tab, select the payment system through which you will accept payments for this specific pricing plan.
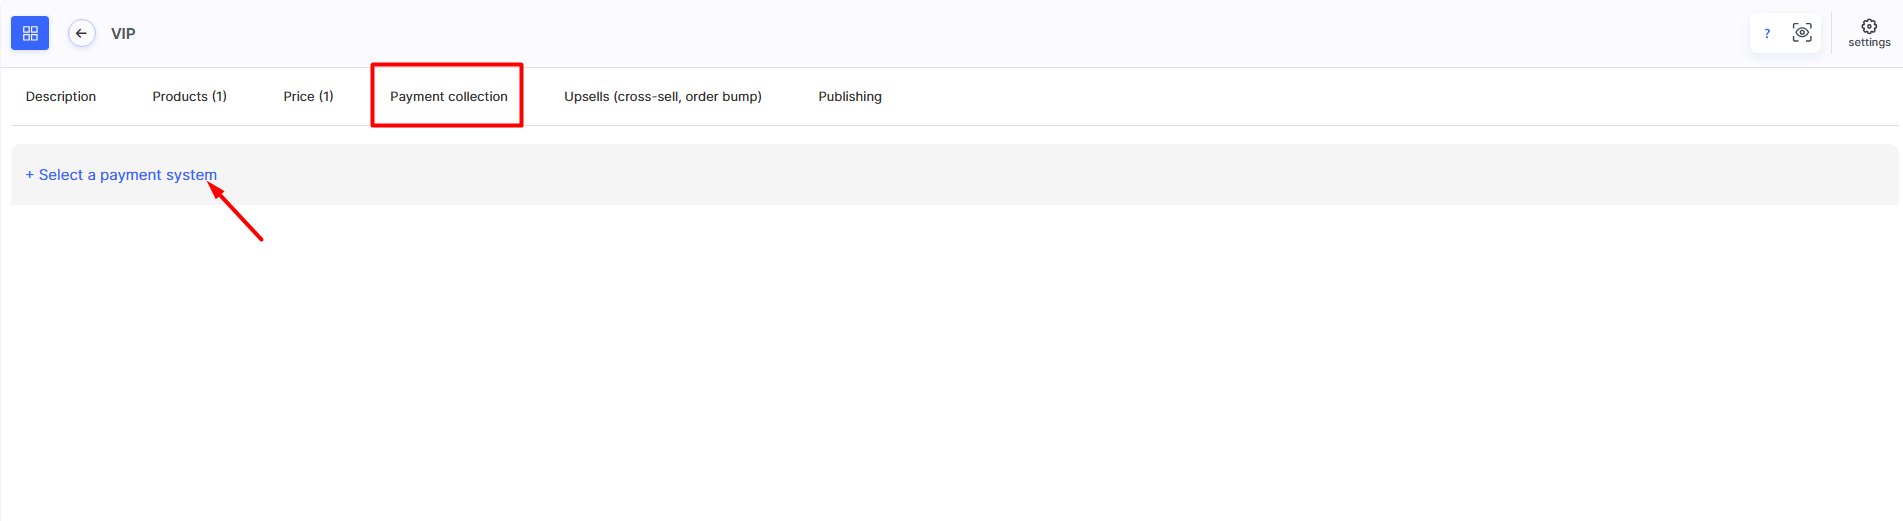
On the Cross-sells tab, we will not add anything yet — this is the first pricing plan for the course, so there are no additional products to offer as cross-sells at this stage.
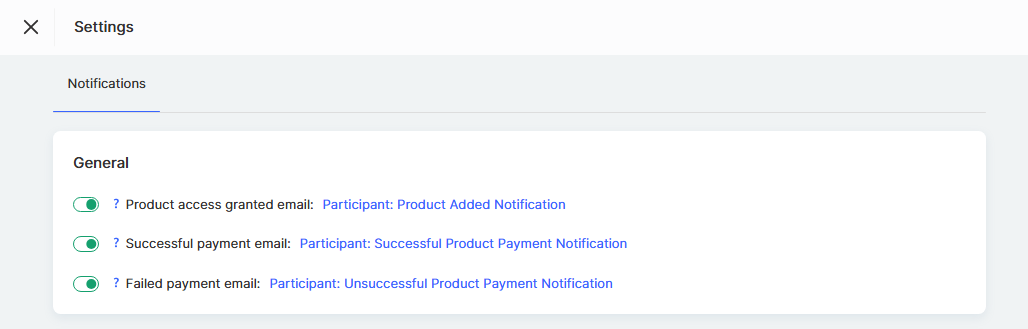
Automatic Emails that students receive after purchasing — notifications about successful or failed payments and access activation — are configured using the separate Settings button in the upper-right corner of the pricing plan editor. In this example, we will leave the standard notifications enabled without making any changes.
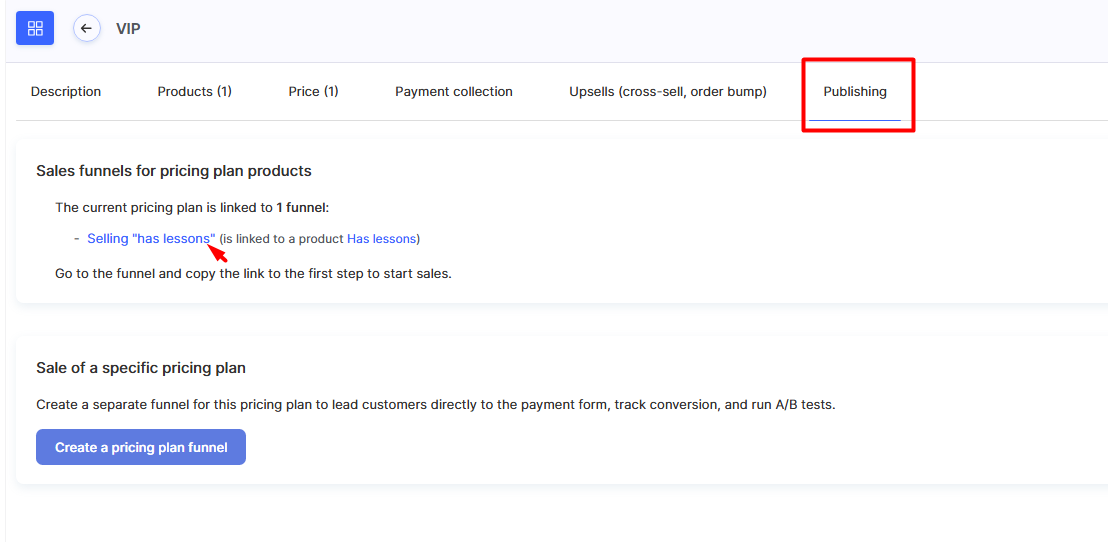
On the Publication tab, the pricing plan is linked by default to the course's system sales funnel, which is created automatically together with the product. Using the link to the first step of this funnel, students will be able to purchase the VIP plan alongside the other available course pricing plans.
Configuring a Pricing Plan with Curator Support
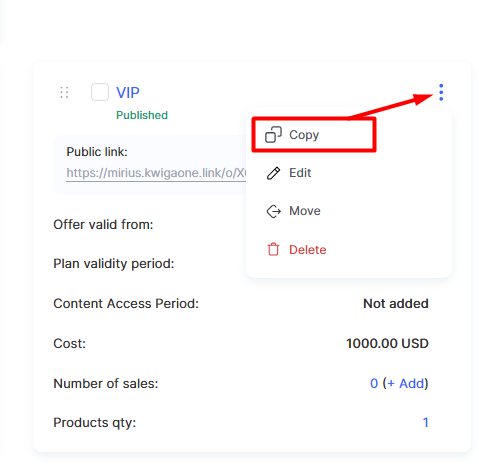
In the pricing plan list, you can copy an existing plan. Use this option and edit the copy — it is faster than creating a pricing plan from scratch.
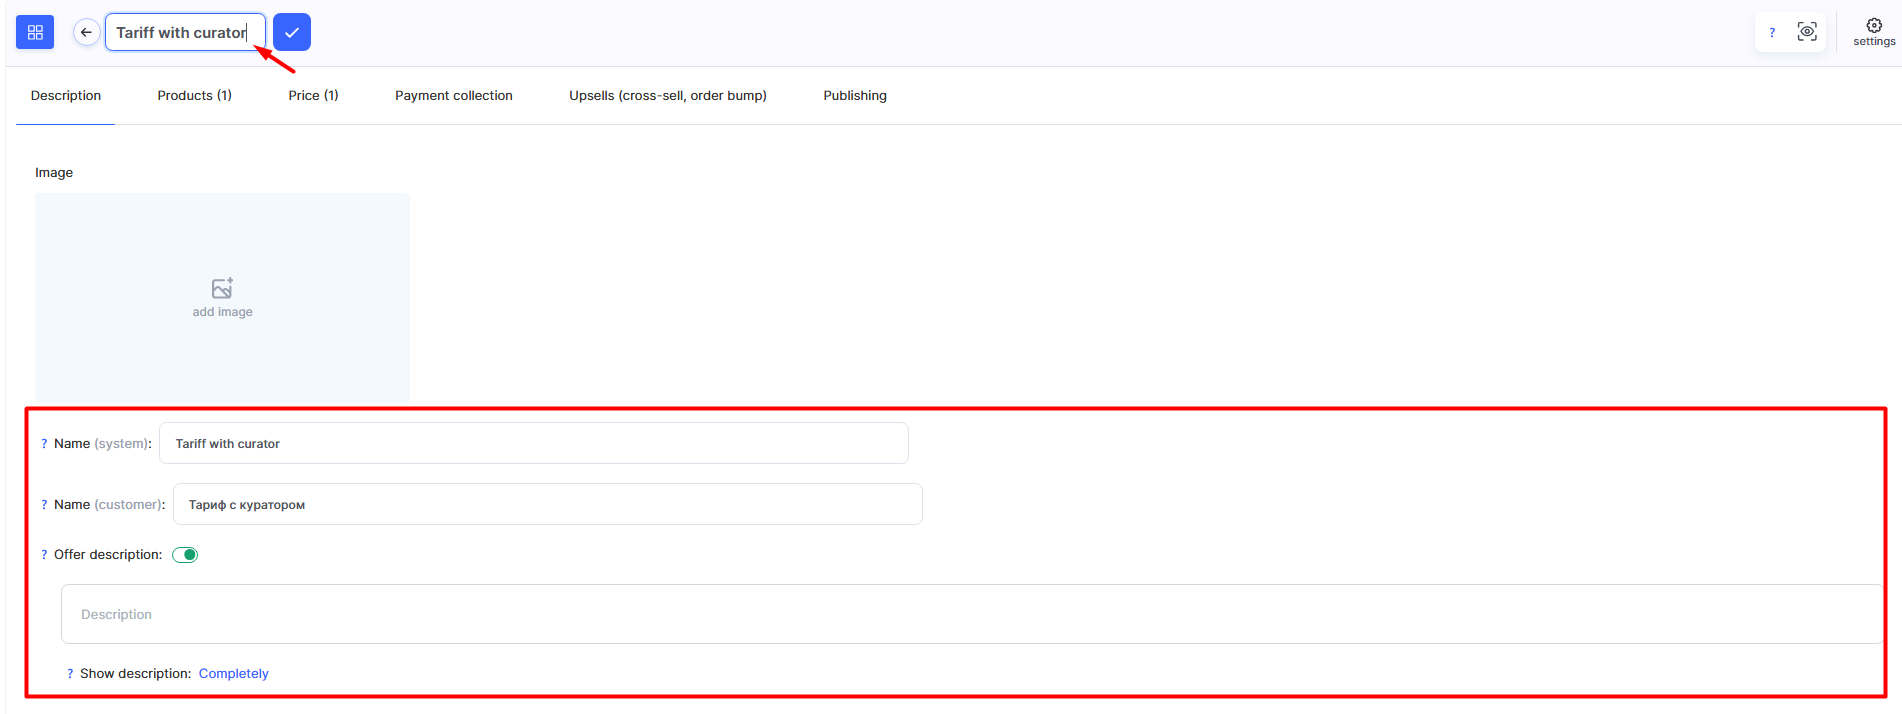
On the Description tab, change the name to Pricing Plan with Curator Support and edit the offer description according to the conditions of this plan.
On the Products tab, leave the content access settings and course start date (Access Period - From a Specific Date) unchanged, but reduce the access duration to 6 months.
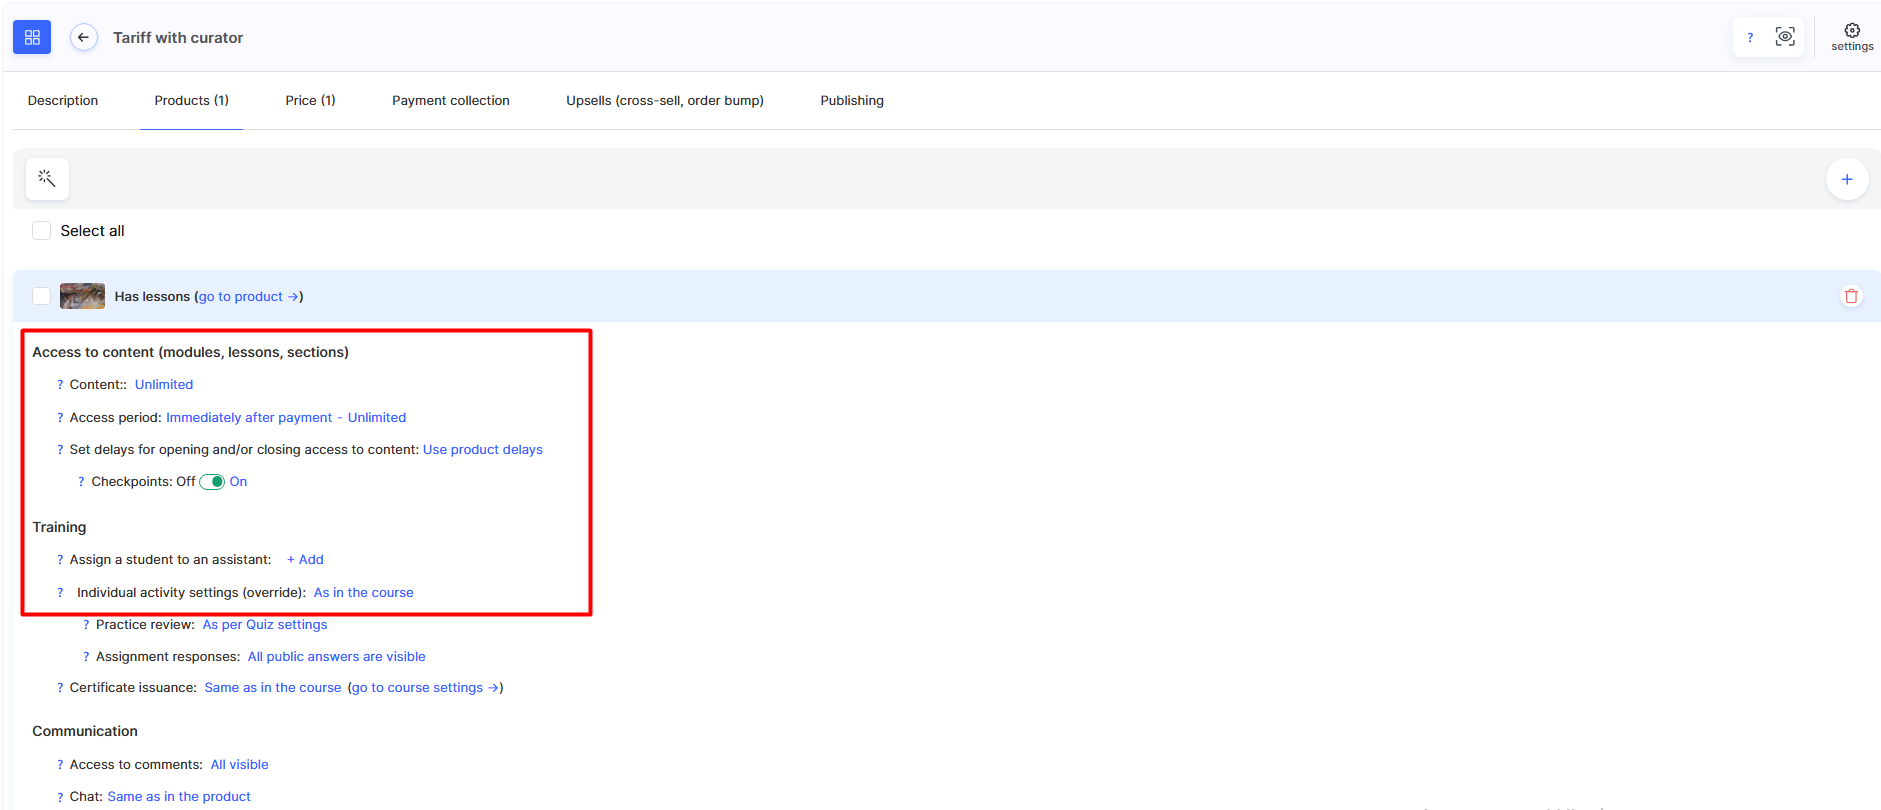
In the Learning block, replace the curator - the course author - with the appropriate curator or curators. You can assign a curator later, but we recommend doing it immediately. This way, students who purchase this pricing plan will automatically be assigned to curators without any additional actions on your part.
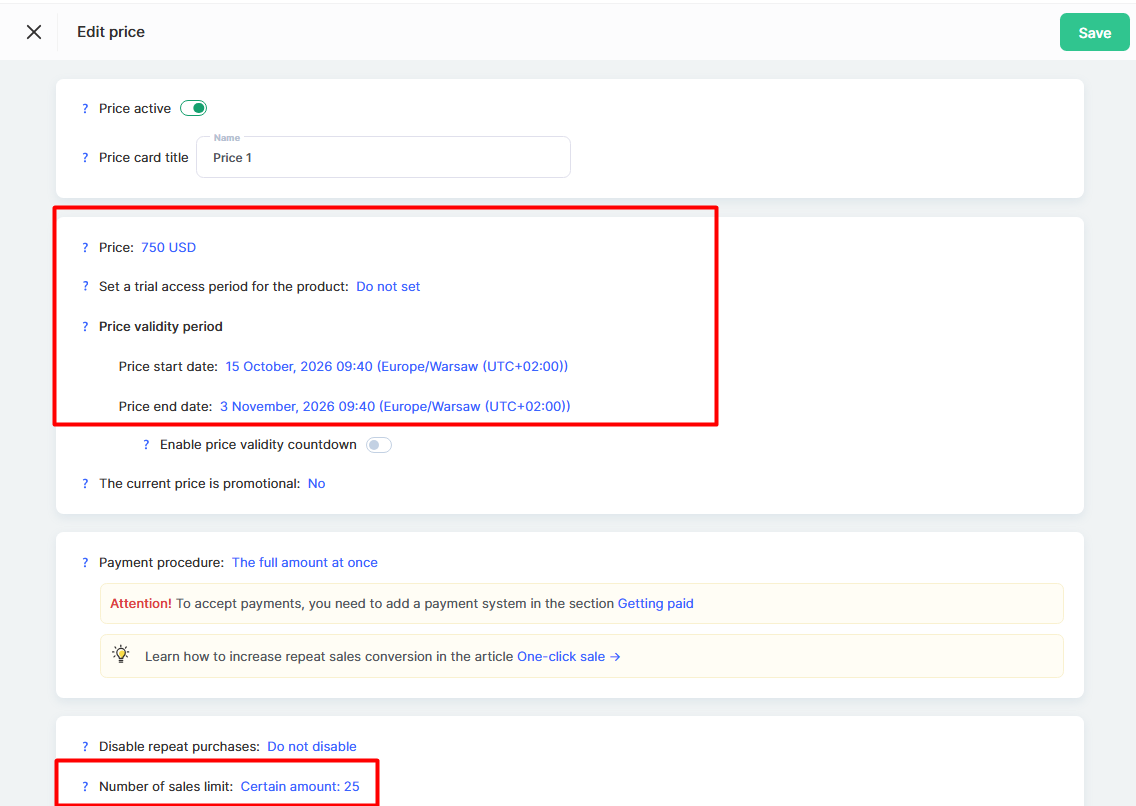
On the Price tab, set a price appropriate for the plan with curator support. You can remove the sales quantity limit entirely if you have enough curators to support more students than under the VIP plan.
Configuring a Self-Paced Learning Plan
This pricing plan is designed for students who are ready to complete the course entirely on their own, without support from a curator or the course author. It is therefore the easiest of the three plans to configure, and its price is usually the lowest - because the course team does not spend resources on reviewing assignments or supporting students.
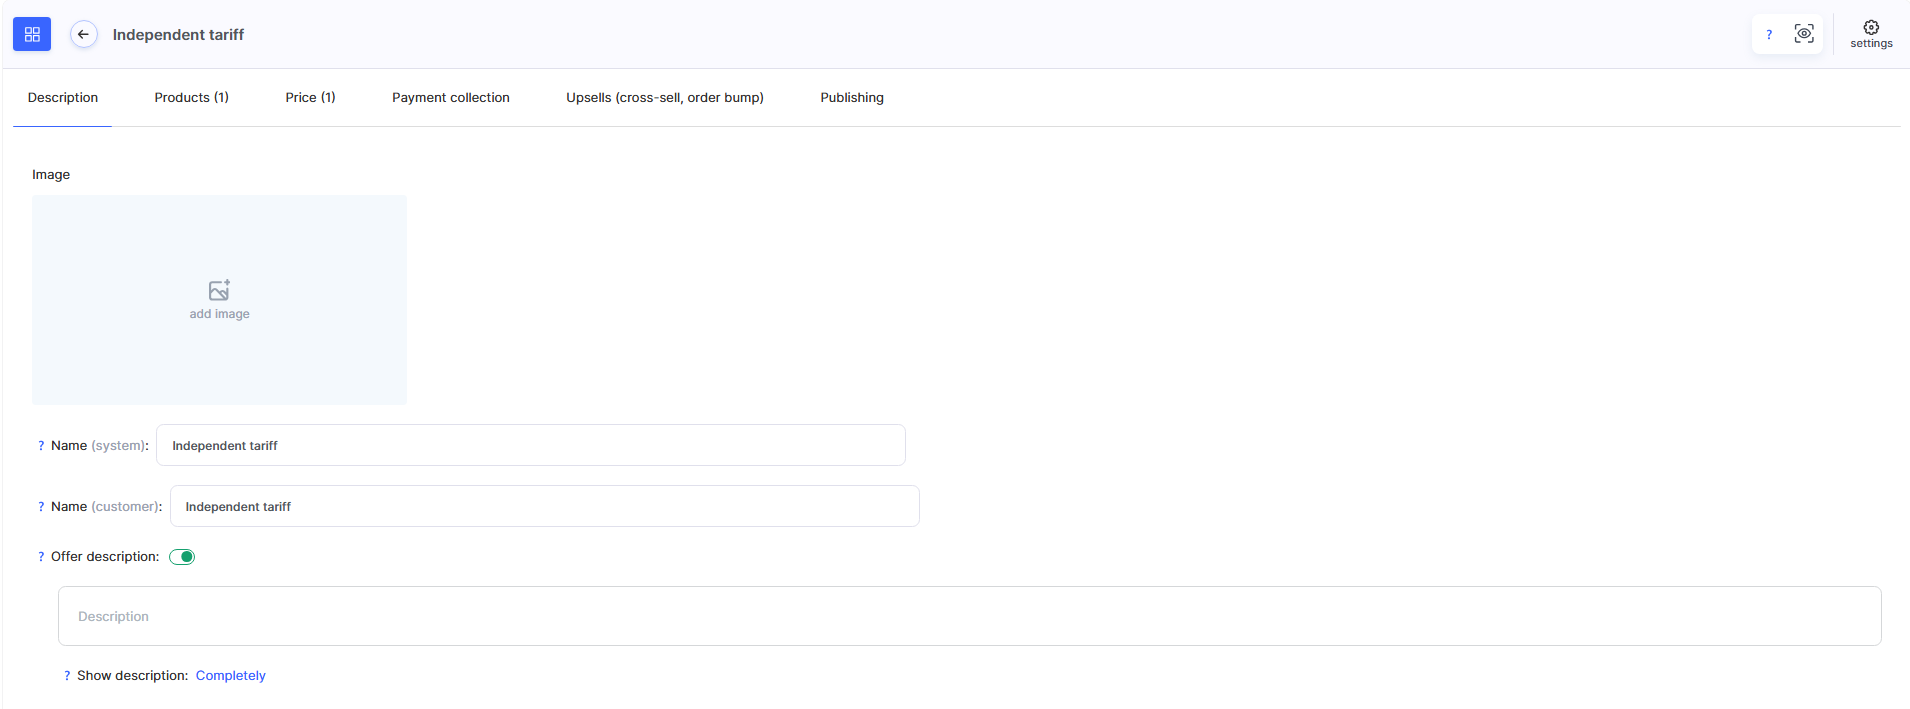
Copy an existing pricing plan again or create a new one, then edit the name and description to match this learning format - for example, name the plan Self-Paced Learning and explain in the description that students receive access to the main course materials without curator support, with automatic assignment grading.
On the Products tab, change the Access Period to Immediately After Payment - unlike the previous two plans, there is no need to link access to a cohort start date, since students complete the course at their own pace and can begin learning at any time. Set access to expire 3 months after activation - this is usually enough time to complete the basic course program independently.
In the Content Access block, select Specific Modules, Lessons, Sections and deselect the additional modules that should only be available to students on the curator-supported and VIP plans. This allows you to provide different amounts of content to different students within a single course, depending on their purchased pricing plan, without creating course copies or separate programs.
In the Learning block, remove the curator - no curator is assigned to this plan because students do not receive personal support. If a curator was previously assigned to this plan (for example, if you copied the VIP plan), make sure to check this field and manually remove the assignment.
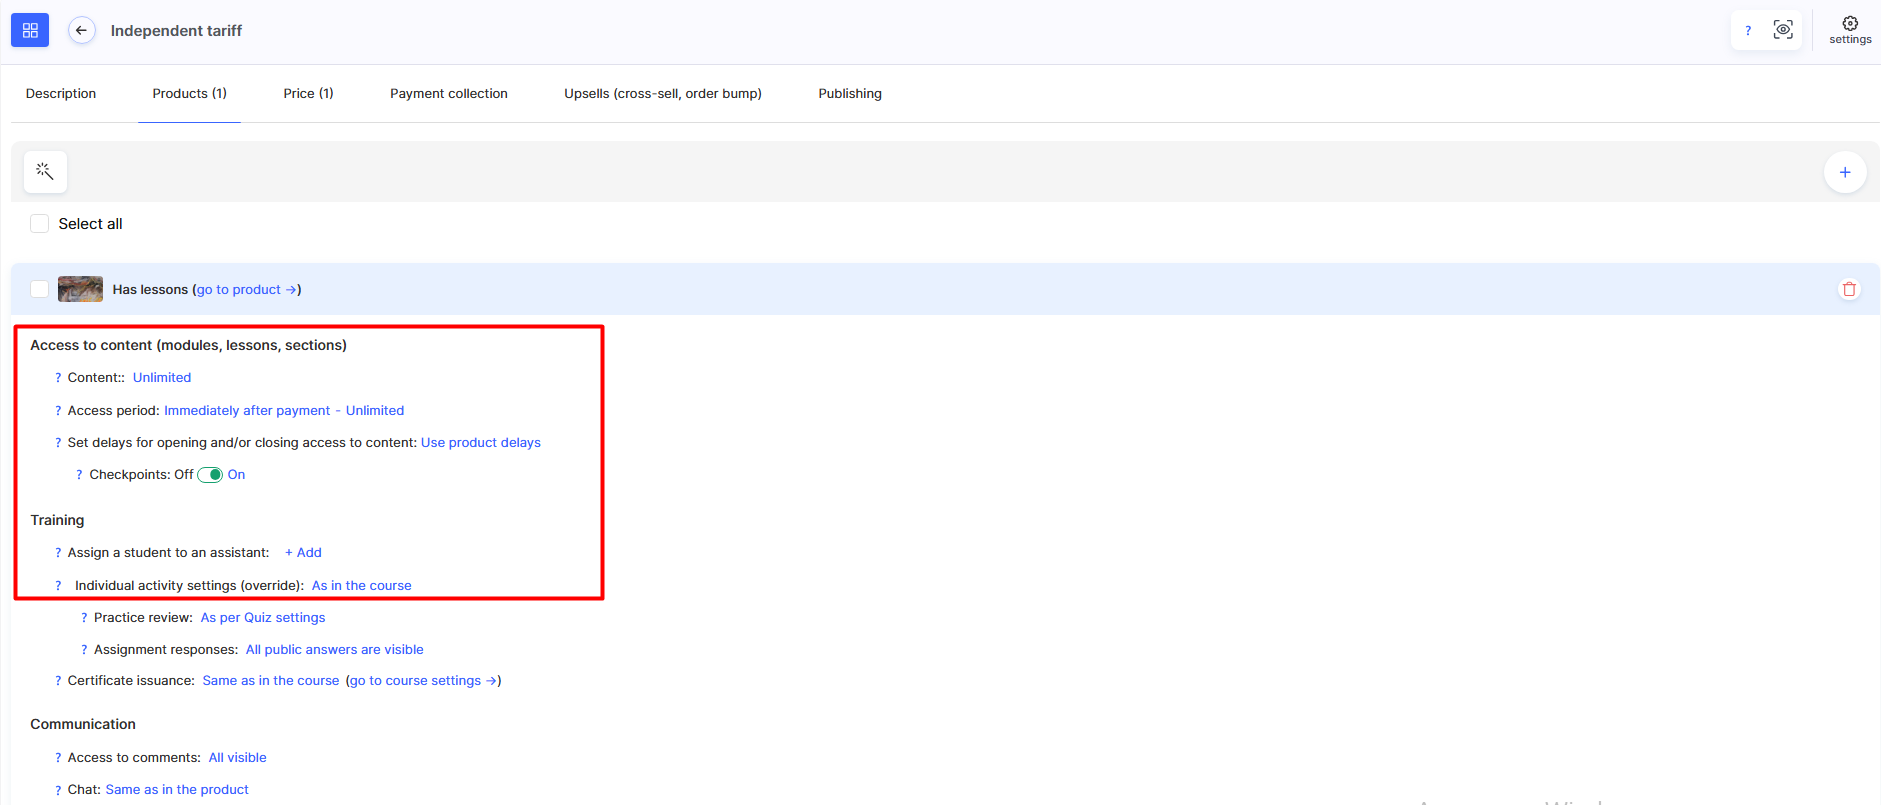
Practice Review for this pricing plan can be configured in several ways. If the assignments are simple and do not require curator involvement, select Automatic Review in the Practice Review block. In this case, the result will be recorded immediately, even if mandatory curator review is enabled in the quiz settings.
However, if the practical part of the course is specifically designed for guided learning and does not make sense without a curator, use the Individual Activity Settings (Override) option and select Cancel All Practical Assignments, leaving the rest of the content unchanged - students will retain access to the theoretical materials, while assignments and checkpoints will be hidden. There is also an intermediate option - Individual Settings (Override), which allows you to manually keep only simple tests with automatic grading while removing more complex assignments that require curator review.
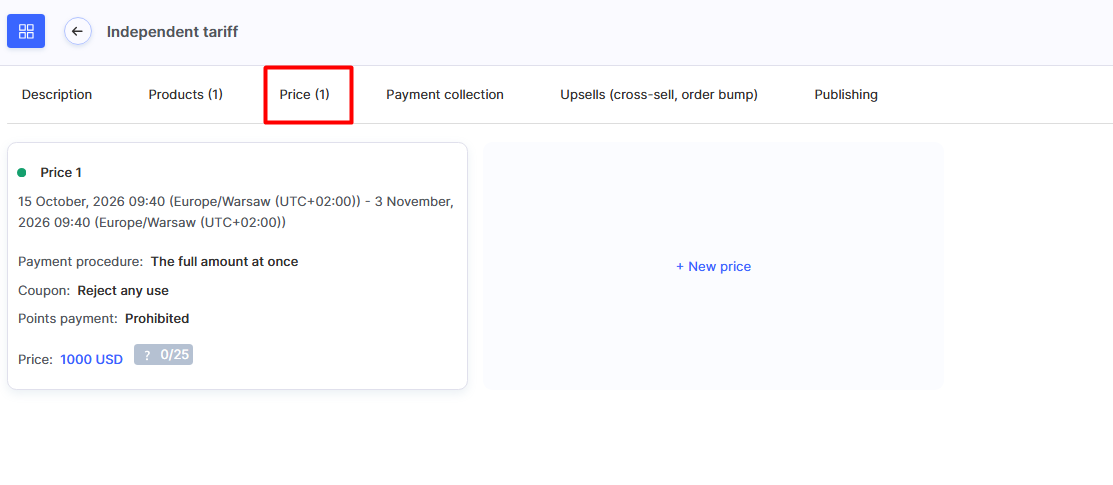
Complete the setup by specifying the price on the Price tab and leaving the Price Validity Period set to Indefinite - unlike the VIP and curator-supported plans, sales of this plan are not limited in time.
Checking How Pricing Plans Are Displayed
To check how the pricing plans appear to students, open the course page in another browser without logging in to the platform - this is the first step of the product's system sales funnel, to which all three newly created pricing plans are linked by default. Click the Get Access button - it leads to the next step of the funnel, the order form, where a page displaying all three pricing plans will open. This is where students compare the plans and choose the most suitable option.
If you want to change the text displayed before the full pricing plan description is expanded on this page, return to the Description tab of the relevant plan and use the Show Shortened Version First option, specifying the desired number of characters.
If you want to show students only one specific pricing plan instead of all three - for example, to direct advertising traffic straight to the VIP plan checkout, bypassing the course page and the selection of all available options - the system sales funnel will not be suitable because its order form always displays all connected pricing plans. In this case, use the Create Pricing Plan Funnel button on the Publication tab of the relevant pricing plan. The platform will create a separate funnel specifically for that plan, with its own order form displaying only that plan. Open the new funnel and copy the link to its first step - this is the link you can use in advertisements, email campaigns, or buttons on an external landing page.
Note: If you need to configure the automatic transfer of contacts to SendPulse or GetResponse after payment, this is done in the sales funnel settings, under the Automations tab, rather than in the pricing plan itself — regardless of whether you are using the system funnel or a separate pricing plan funnel.
Didn't find the answer? Contact the support service via online chat or Telegram