Articles:
- How to delete a course
- Copyright protection of your content on Kwiga
- Public or trial lesson
- How to change the status of a lesson to draft and hide it from students
- Usage of checkpoints
- How to Add Practice to a Lesson
- How to create a task with mandatory review by an assistant
- How to create a task for different offers
- How to create a test with scores and automatic approval
- How to create and conduct a quiz among students on the course
- Contents of the lesson, all types of activities in the lesson
- Downloading video files
- How to add time codes to the video
- How to add button to the lesson
- Inserting iframe code
- Adding fractions, mathematical functions, formulas
- How to add text with spoiler to the lesson
- How to create a course on the Kwiga platform
- How to create a marathon
- How to add a cover to a course
- Course Program Display Options
- How to add a public face to a course
- How to add a team to a course
- Course preview with different access levels
- Block above lesson or module pages (top banner)
- Setting delays, schedule for opening and closing lessons (dripping content)
- Report on student progress on the course
- Analytics of assignments completion on the course
- Course sales report
- How to create a copy of the course
- How to copy lesson content
- Assistant’s Access to Practical Assignments
- Student Can't See the Course (Marathon, Closed Group)
- How to set up a test so that students see comments after completion
- Letter delivery: why letters don't arrive and how to fix it
- How to Customize the Appearance of a Course
- Manage activity visibility
This article discusses the course customization options on Kwiga that help make the learning process more convenient and engaging for students.
In this article:
- 1. Setting Up the School's Presentation Page
- 2. Adding Information to the Page Footer
- 3. Adding Previews to Modules
- 4. Adding Previews to Lessons
- 5. Adding a Top Block with a Banner
- 6. Changing the Font in Text Blocks
- 7. Choosing Colors and Configuring the Display of Practical Tasks
- 8. How to Preview Your Course
The visual design of an online course directly affects how students perceive the material. A structured and harmonious design helps students better navigate the program, simplifies the learning process, and increases engagement. The Kwiga platform provides a set of customization tools that allow you to adapt the course to your own style and brand.
1. Setting Up the School's Presentation Page
Every project on the platform has a unique link in the format: schoolname.kwiga.com.
For example, a test page looks like this: https://sampleschool.kwiga.com/
If you plan to use the school link, it is important to set up the general presentation page of your online school. This is the first thing potential students see—the course catalog. This is not mandatory—the page can be left empty if you need to hide courses on the homepage.
The presentation page includes the school's homepage, the course catalog, and individual course pages. A properly designed presentation page creates a professional impression and helps convert visitors into students.
For more details on setting up the school's presentation page, read the separate article on designing public pages.
2. Adding Information to the Page Footer
The footer of the school pages serves to place important legal and contact information at the bottom of the page.
To configure the footer, click on the profile avatar and go to the Project Settings section.
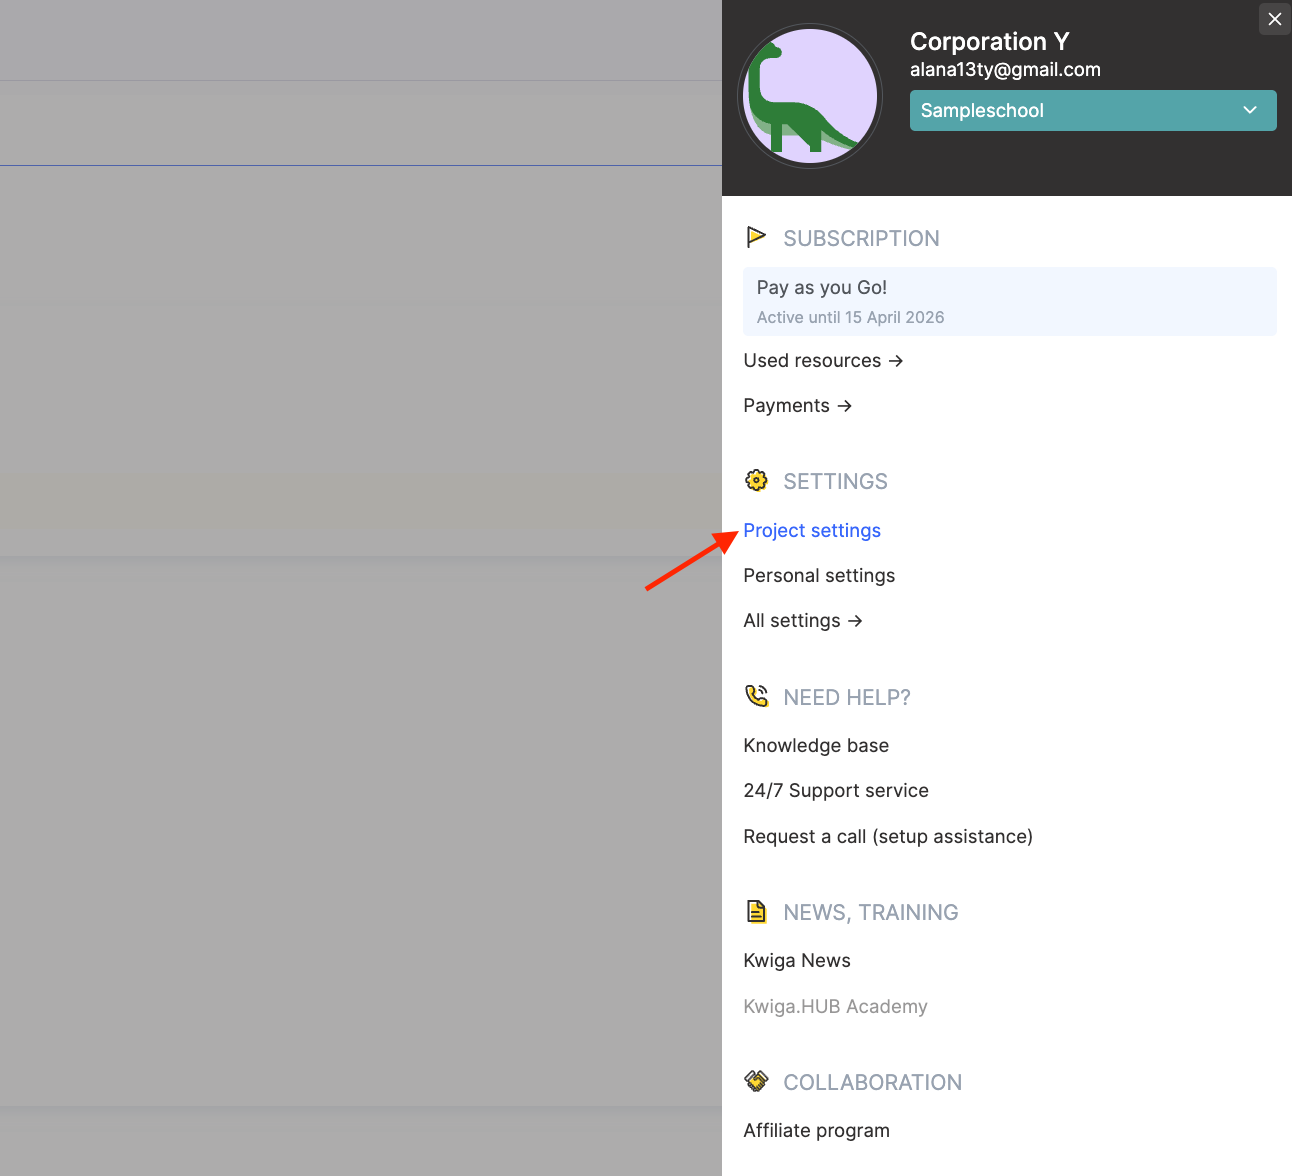
Then go to Public Information about the Company/Project and select the Company Data in the Project Footer option.

Here you can add an offer and terms of use, a privacy policy, company contact information, and additional links to important documents, etc.
The system allows you to configure language versions for an international audience, enable or disable the Company Information block, and add your own links using the Add Link button.
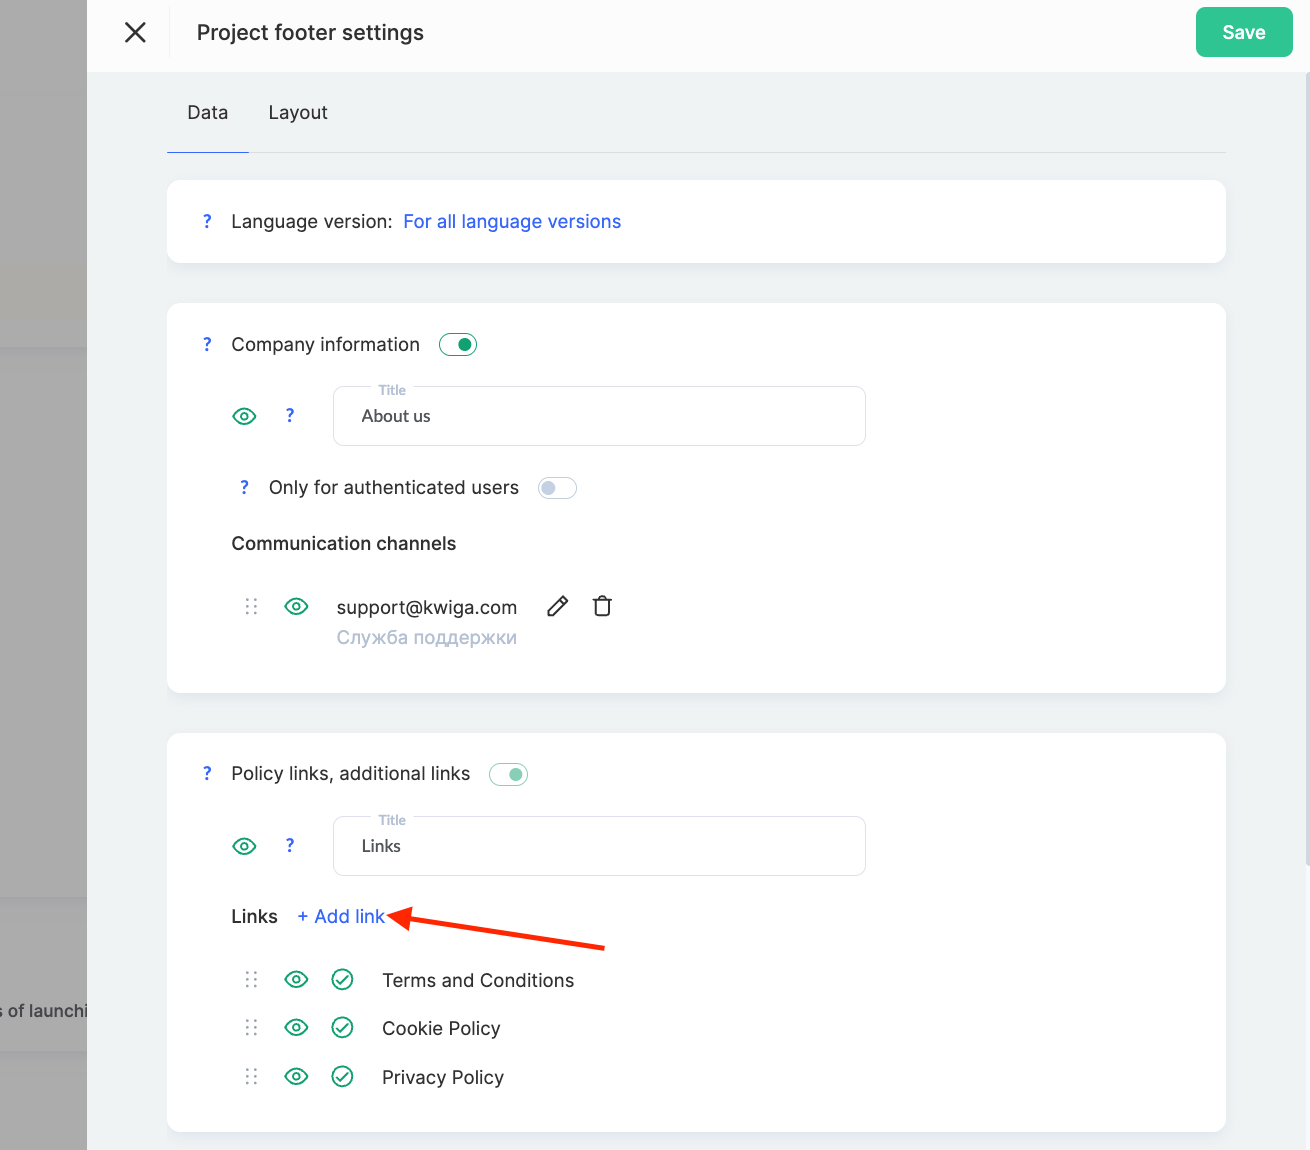
It is important to remember that some information, particularly the terms and conditions and the privacy policy, is mandatory to display and cannot be disabled for reasons of transparency and legal protection.
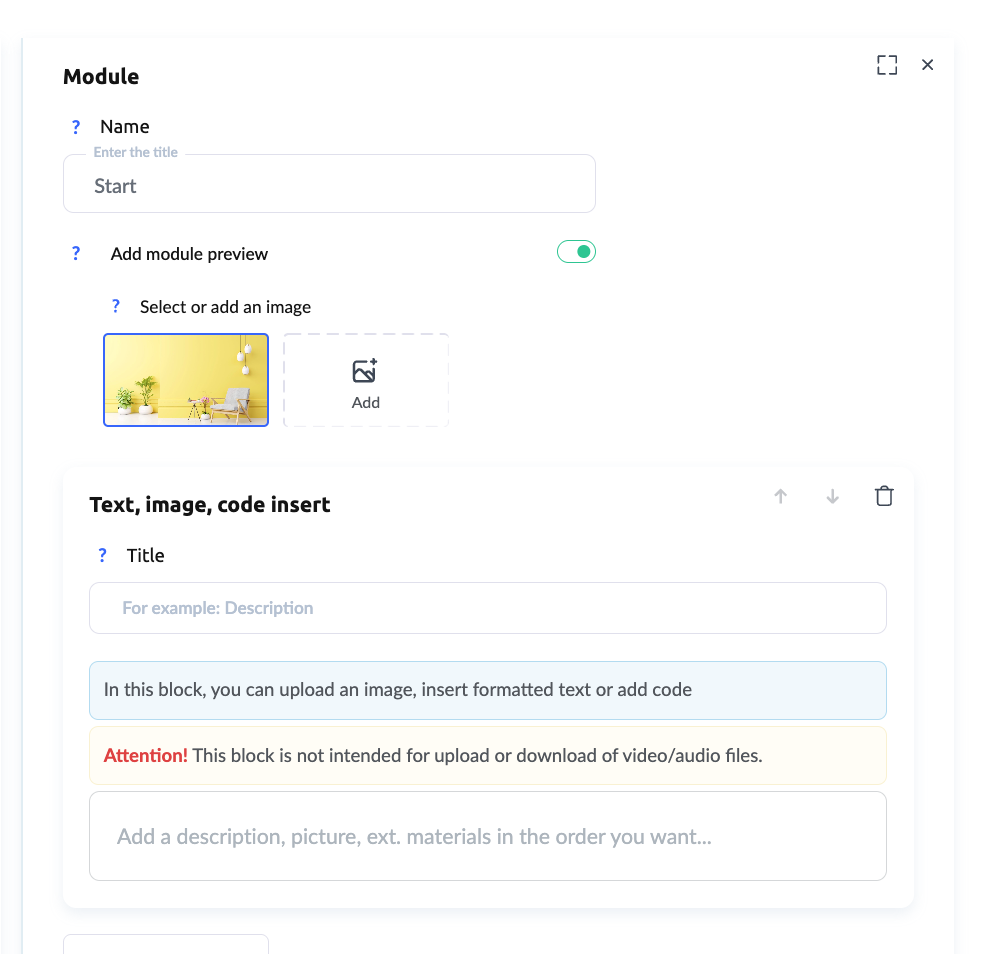
3. Adding Previews to Modules
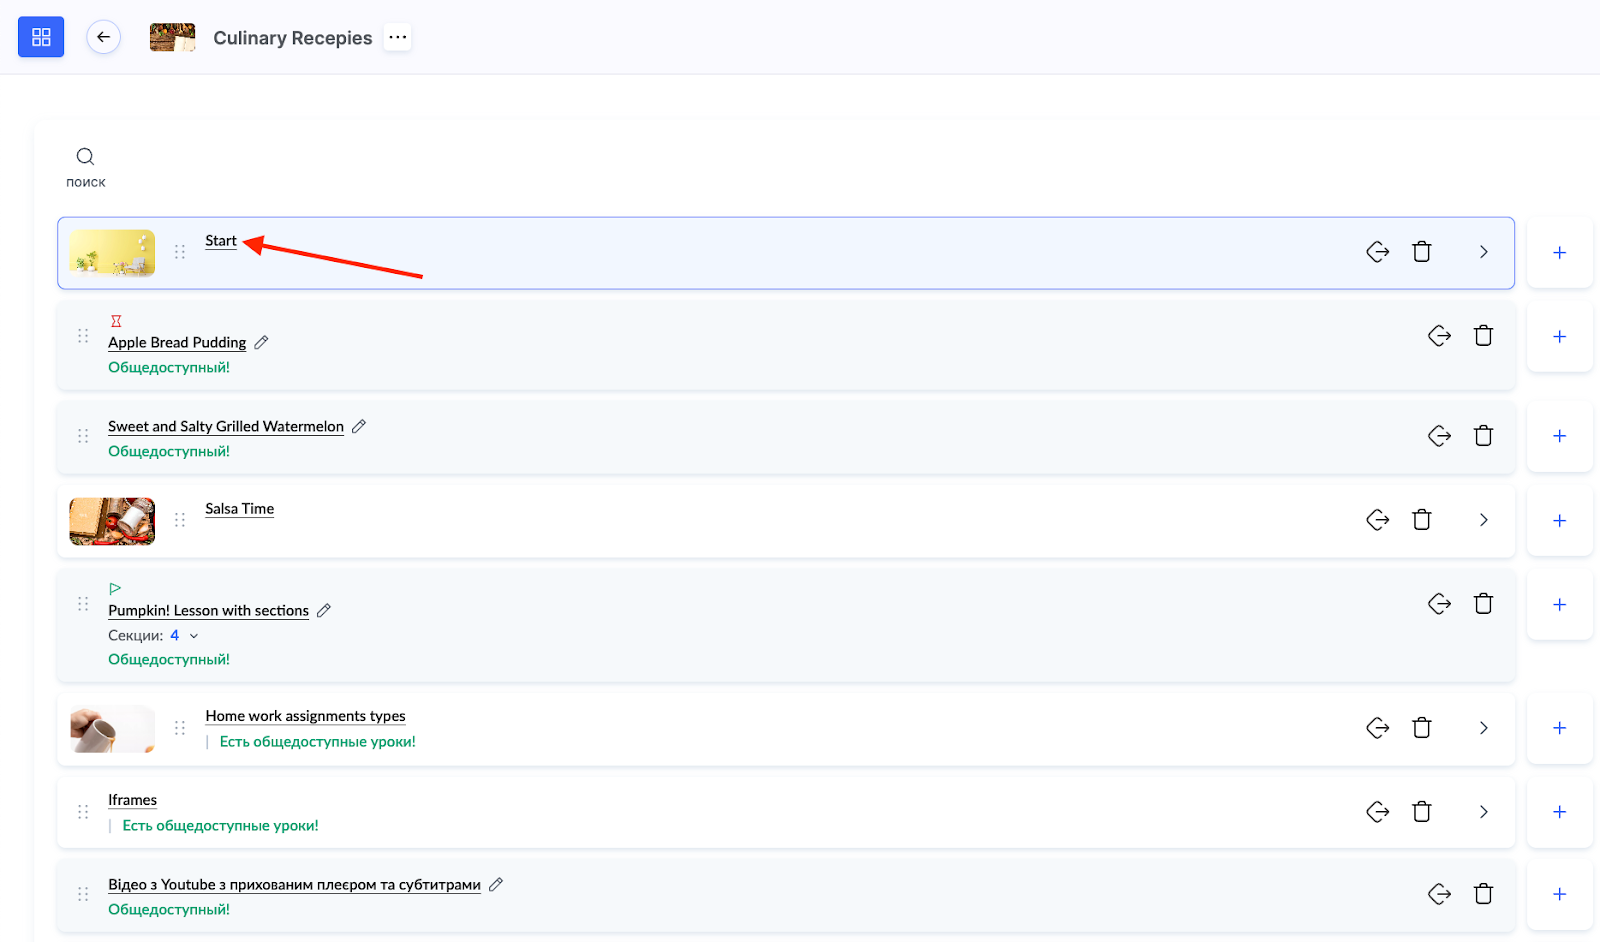
If a course consists of modules, you can make them more expressive by adding a preview image next to the title. This simplifies navigation through the course program and adds visual appeal to the product.
To do this:
-
go to Course Lessons and click on the module name
-
in the right block, specify or change its name and add a preview image, enable the toggle, and upload an image sized 1280×720, which will be automatically reduced to 75×42
You can also add a module description so that students understand what will be covered in this block.
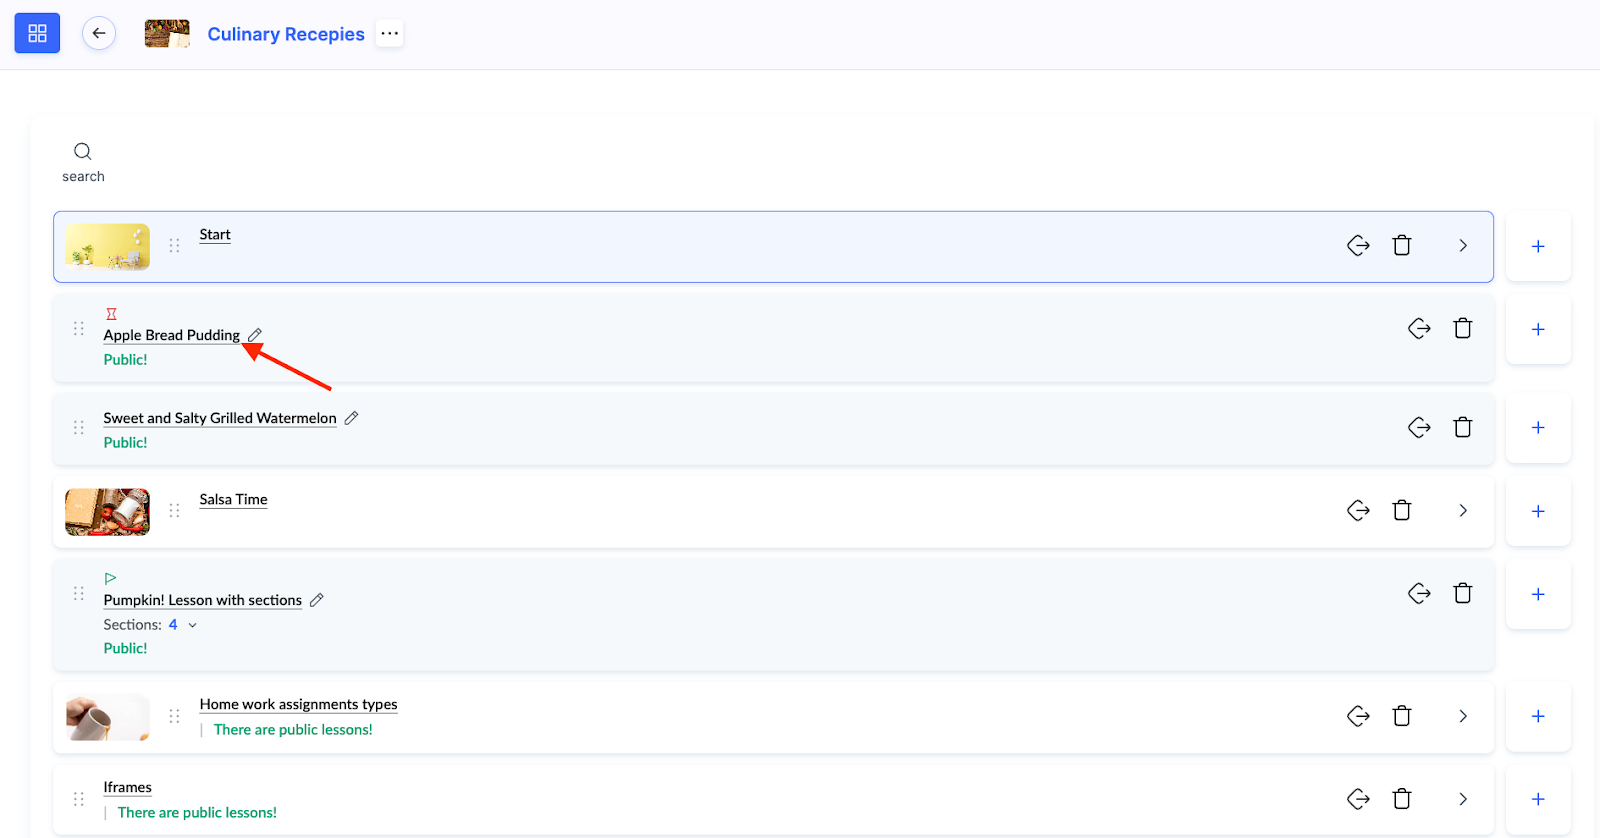
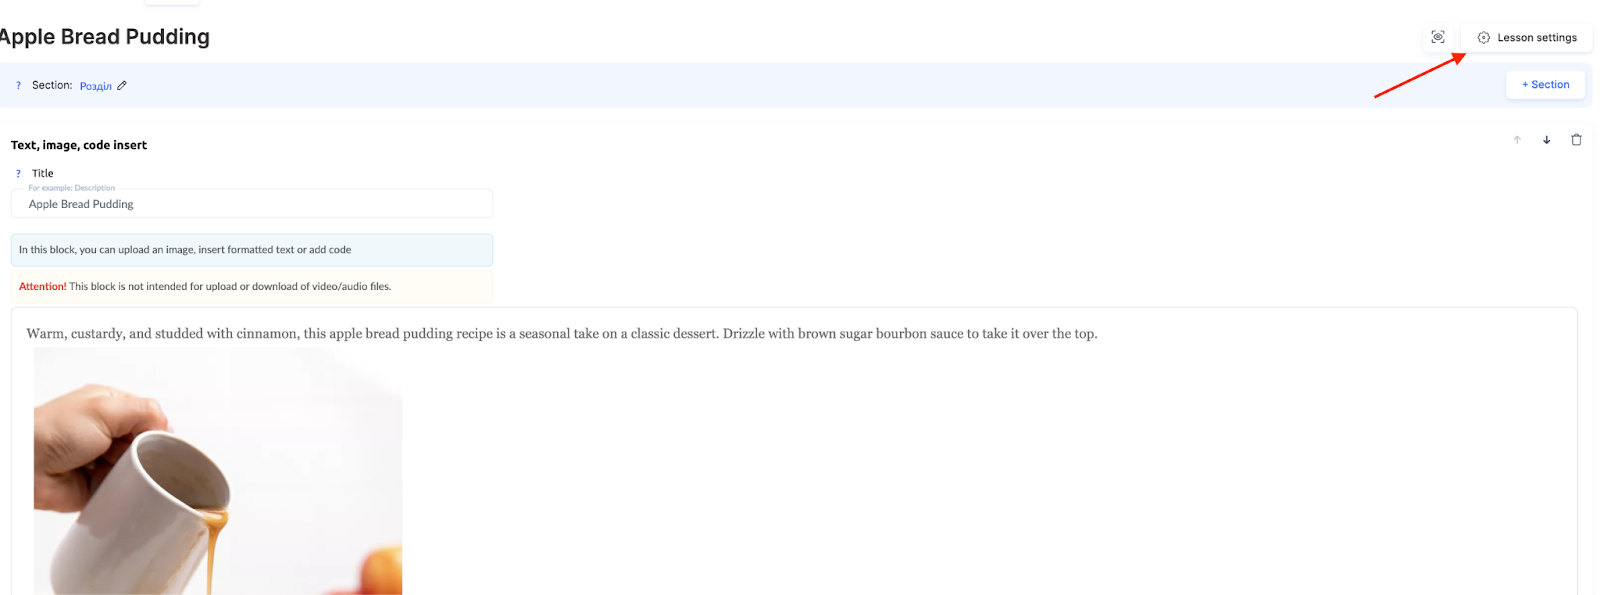
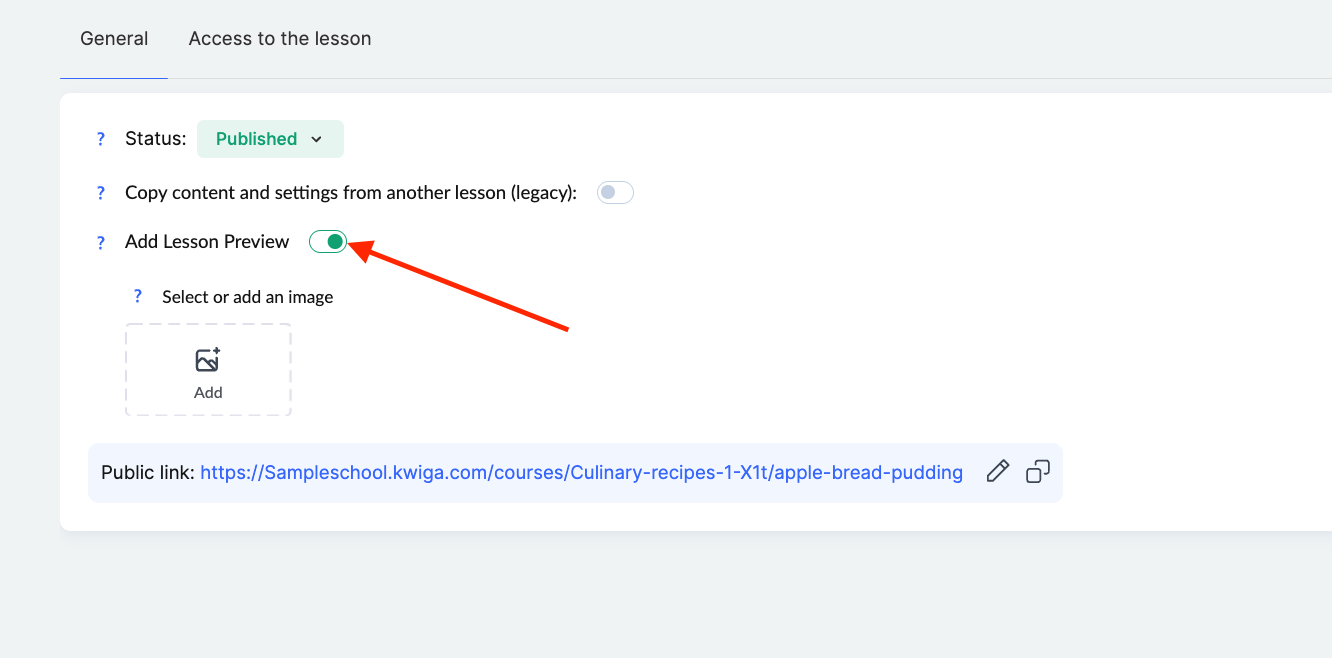
4. Adding Previews to Lessons
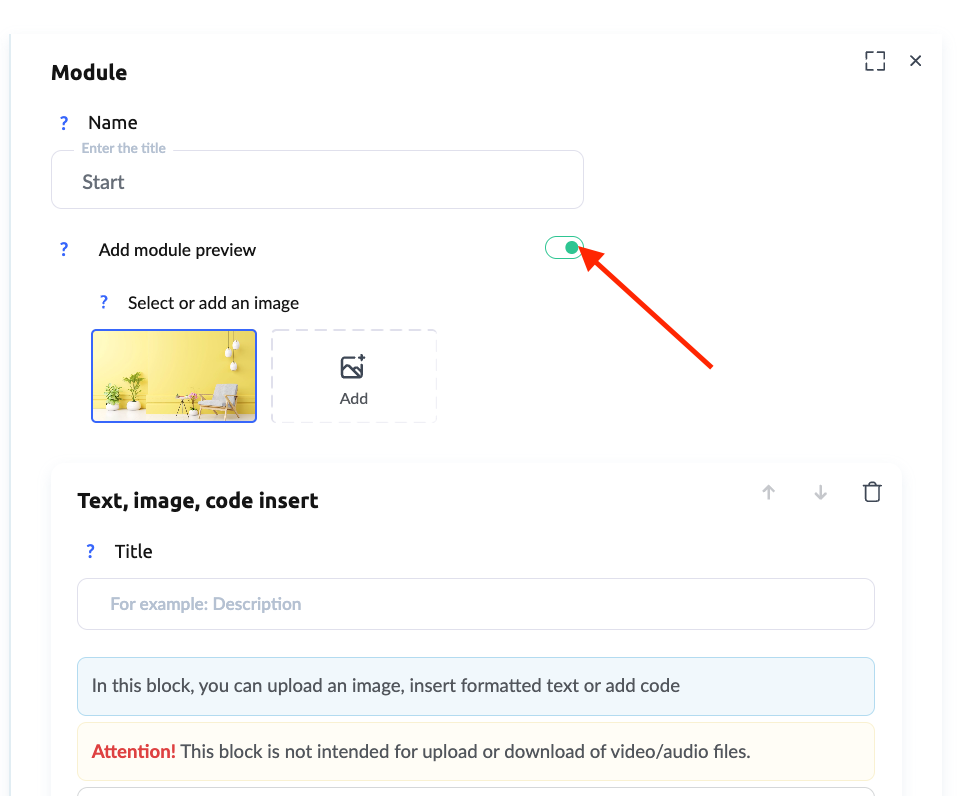
To make the course program even more structured, you can add a preview image to each lesson. It will be displayed next to the lesson title in the course program, helping students better navigate the material.
To do this:
-
go to Lessons and open the lesson builder
-
go to Settings in the lesson
-
add a preview image that, for example, visually matches the lesson
This is especially useful for courses with a large number of lessons, as it helps students quickly find the topics they need.
Additional information about configuring the course program can be found here.
5. Adding a Top Block with a Banner
To make the course more informative, you can add a top block that will be displayed above each lesson.

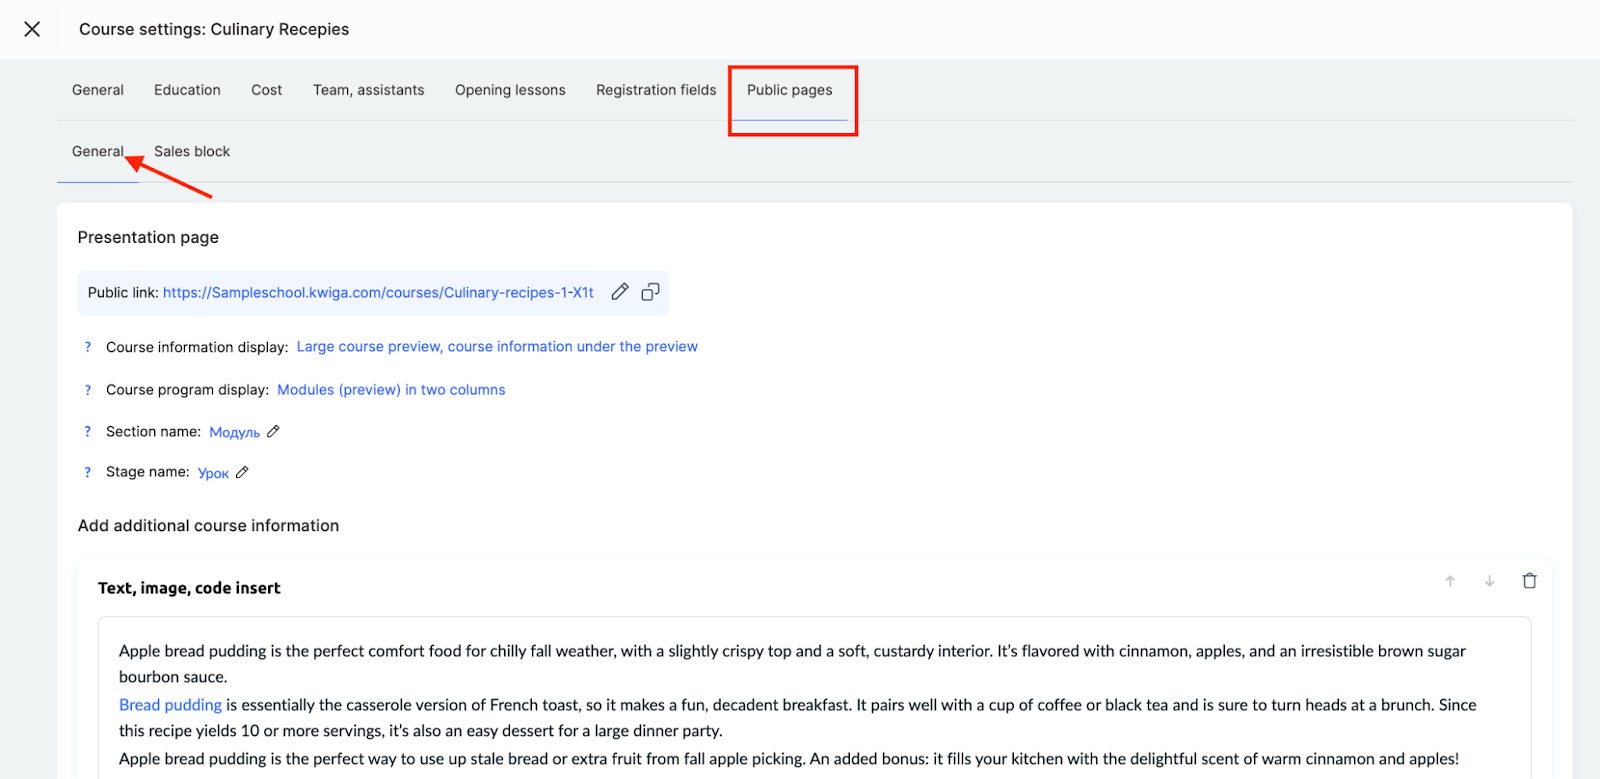
To add it, go to the course settings, select the Public Pages tab, scroll down to the Lesson/Module Page section — the Block Above Lesson field.

You can add any information here:
-
an image that highlights the main topic of the course
-
text with important details or reminders
-
buttons for quick navigation, for example, to Zoom or the class schedule
-
a video tutorial or welcome video via iframe
This allows you to create a consistent material presentation style and make the course more convenient. More details about this feature can be found here.
6. Changing the Font in Text Blocks
Font plays an important role in the readability of the material. On Kwiga, you can change the font for all text blocks, setting a unified style for the course.
To configure this, go to the course settings, select the Public Pages tab, scroll down to the Lesson/Module Page section — the Base Font option.

This allows you to adapt the course's appearance to match your brand.
In the settings, you can choose:
-
the base font for all text blocks
-
the font size to be applied to texts and quizzes in the course
These changes only affect texts that have not been manually edited, allowing you to maintain design flexibility.
7. Choosing Colors and Configuring the Display of Practical Tasks
On the platform, you can highlight practical tasks using style templates. This makes practice blocks more noticeable and helps students immediately understand where they need to complete an assignment.
A style template is a set of color, font, and button style settings that you can create once and then apply to any quizzes. You can create new templates, edit and copy existing ones, and select a default template for all new quizzes.
Recommendation: If the design of your quizzes is relatively consistent, we recommend creating one template and setting it as the default — it will then be automatically applied to all new quizzes, saving you from having to configure each one individually.
If you need to change the design only for specific quizzes, the platform provides several ways to do this:
-
in the quiz editor via the Settings → Design section
-
for several quizzes at once — via Bulk Actions in the quiz list
-
directly in the lesson — by overriding the template for the desired practice in the lesson builder
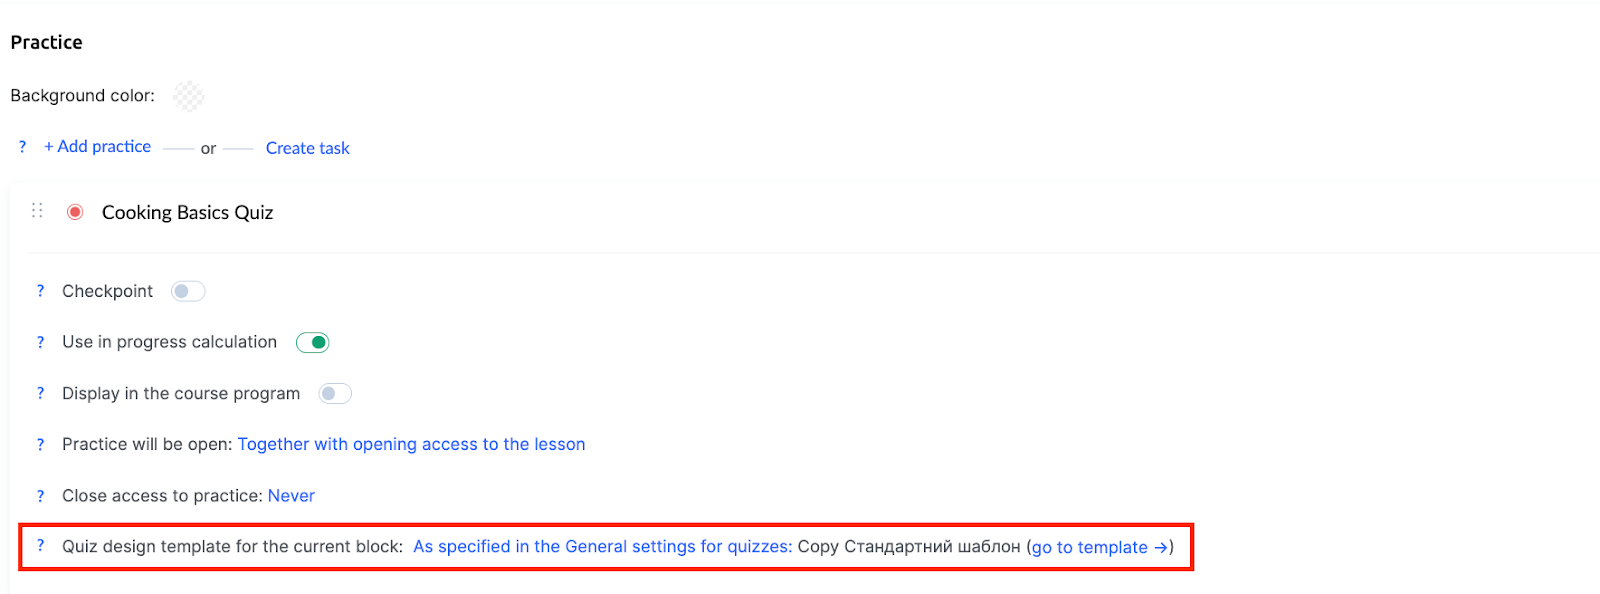
To check how quizzes will look to students, use the course preview.
For more details on creating and configuring style templates for quizzes, read the separate article.
For information on adding assignments to a lesson, read here.
8. How to Preview Your Course
Before launching a course, it is important to check how it will be seen by students. For this purpose, the platform provides a Preview function, which allows you to evaluate the design, check the correct display of materials, and ensure that the course structure is user-friendly.
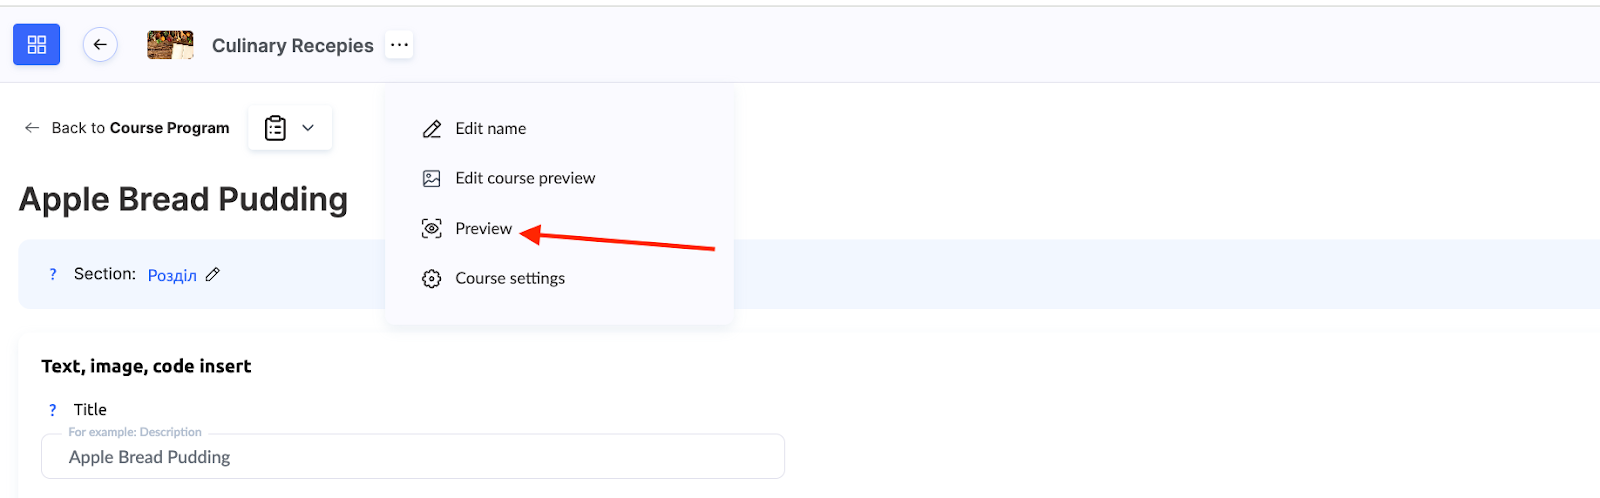
This function allows you to view the course with different access levels, which is especially useful if content is released gradually or depends on a subscription. More details about this feature can be found here.
Proper course customization helps create a professional educational product. By using all the tools described, you will be able to provide students with a comfortable learning experience that aligns with your brand and goals.
Didn't find the answer? Contact the support service via online chat or Telegram