
Articles:
- Orders: creating and editing orders.
- How do I add an individual payment link to a student
- Transactions
- How to set up sending your own email after purchase
- Integration with the Sendpulse chatbot
- How to integrate a payment system on Kwiga
- How to set a specific language for an offer page
- Important Project Settings
- How to grant access to students if the sales were not made on Kwiga
- Payment without authorization
- How to create a new stream with your own schedule
- How to give access to one student
- How to change access for one student
- How to set up demo access to a course, open house day at the school
- Setting up subscriptions (recurring payments)
- Automation: Follow-up email sequences (unpaid orders and applications)
- Credits and installments, payment in parts
- Promotional offer
- Discount coupons and possible settings
- How to launch course registration with prepayment
- How to create cross-sell offers in Kwiga
- How to start selling on Kwiga: creating a price plan
- Creating multiple pricing plans
- Selling consultations and one-on-one sessions
- How to Change a Student's Plan (Additional Payment on Kwiga)
- How to sell (give access to) parts of the course
- How to implement access renewal sales
- Selling through a registration form on a third-party site
- Selling through a mini-landing page created on Kwiga
- How to add a video to a page (mini-landing, course page)
- How to create a link with an applied coupon
- Offers and Payments on Kwiga: How It Works
- Repeat Sales: Setting Conditions and Sending a Coupon Based on Purchase Count
- Setting up notifications in a Telegram channel
- Sending Emails with Promo Codes (Unpaid Orders)
- Course Store: Settings and Capabilities
- Setting Up the Public Offer Page
- Organization of CPD on Kwiga: step-by-step guide
- How to set up a thank-you page after payment
- Set up access to lessons, sections, and modules
- How to change the contact in an order
Quickly change the contact in an order with simple steps.
Participants often use one email address when making a purchase but want to take the course using another. In such cases, it is convenient to transfer an existing order to the required contact without creating a new one.
To change the contact, open the required order and in the Client section on the right, click the Change contact.
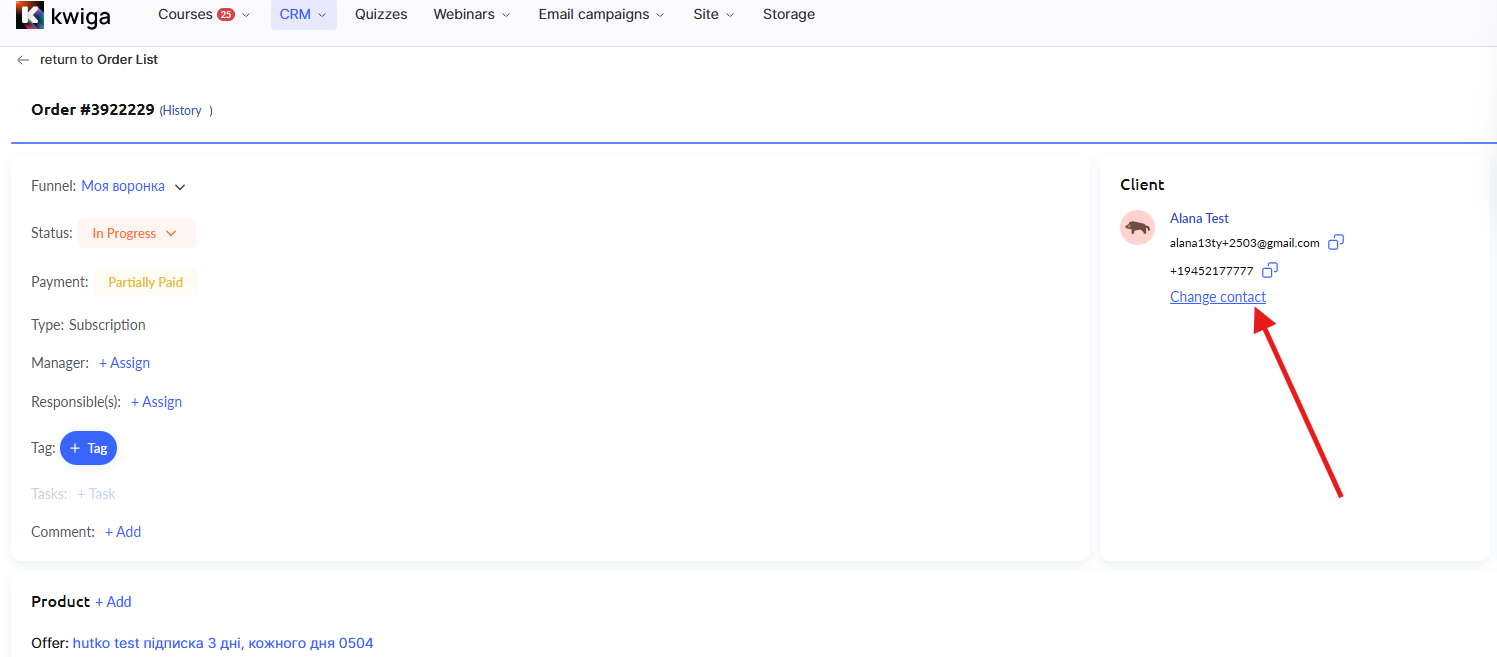
link. A window with a drop-down list will appear, where you can choose one of two options.
If the required contact is already in the database, select the Find option. A search field and a list of existing contacts will appear. You can scroll through the list or enter a name or email in the search to quickly find the required client. After selecting a contact, click the Add button to confirm the association.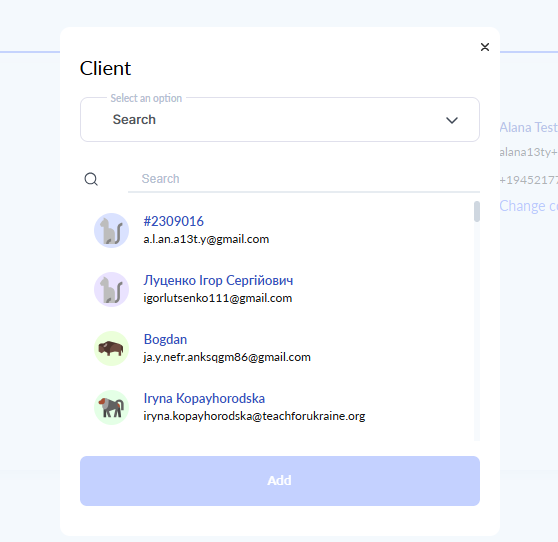
If the required contact is not yet in the database, select the Add option. A small form will open where you can enter the client's name, email address (this field is required), and phone number. You must also confirm that the data is being added with the user's consent; otherwise, the confirmation button will be inactive.
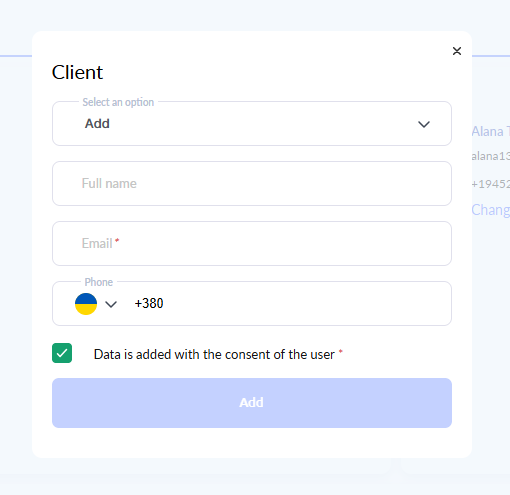
After filling out the form, click Add, and the new contact will be created and linked to the order.
After changing the contact, we recommend that you do not forget to click the Save button in the order itself.
This approach allows you to retain the entire order history, status, payments, and products while linking it to the contact with whom the client will actually take the course.
Didn't find the answer? Contact the support service via online chat or Telegram