Articles:
- Orders: creating and editing orders.
- How do I add an individual payment link to a student
- Transactions
- How to set up sending your own email after purchase
- Integration with the Sendpulse chatbot
- How to integrate a payment system on Kwiga
- How to set a specific language for an offer page
- Important Project Settings
- How to grant access to students if the sales were not made on Kwiga
- Payment without authorization
- How to create a new stream with your own schedule
- How to give access to one student
- How to change access for one student
- How to set up demo access to a course, open house day at the school
- Setting up subscriptions (recurring payments)
- Automation: Follow-up email sequences (unpaid orders and applications)
- Credits and installments, payment in parts
- Promotional offer
- Discount coupons and possible settings
- How to launch course registration with prepayment
- How to create cross-sell offers in Kwiga
- How to start selling on Kwiga: creating a price plan
- Creating multiple pricing plans
- Selling consultations and one-on-one sessions
- How to Change a Student's Plan (Additional Payment on Kwiga)
- How to sell (give access to) parts of the course
- How to implement access renewal sales
- Selling through a registration form on a third-party site
- Selling through a mini-landing page created on Kwiga
- How to add a video to a page (mini-landing, course page)
- How to create a link with an applied coupon
- Offers and Payments on Kwiga: How It Works
- Repeat Sales: Setting Conditions and Sending a Coupon Based on Purchase Count
- Setting up notifications in a Telegram channel
- Sending Emails with Promo Codes (Unpaid Orders)
- Course Store: Settings and Capabilities
- Setting Up the Public Offer Page
- Organization of CPD on Kwiga: step-by-step guide
- How to set up a thank-you page after payment
- Set up access to lessons, sections, and modules
Looking for a convenient way to host a CPD event online and automatically issue certificates to participants? In this article, you’ll find a step-by-step setup guide on the Kwiga platform.
In this article:
To conduct a CPD event with certificate issuance, you need to bring several elements together in one place: register participants, deliver the training, assess knowledge through a test, and automatically issue certificates to those who pass.
On Kwiga, this can be organized without third-party services. A webinar, a recorded course, a quiz, and a certificate — all in one dashboard. The participant completes the event and immediately receives a certificate via email, while you can view each participant’s results in the CRM.
Live webinar: where to start
If your CPD event takes place in real time, start by creating a webinar on Kwiga. During the broadcast, participants can write in the chat, see banners and buttons, and all their actions are automatically recorded in the CRM.
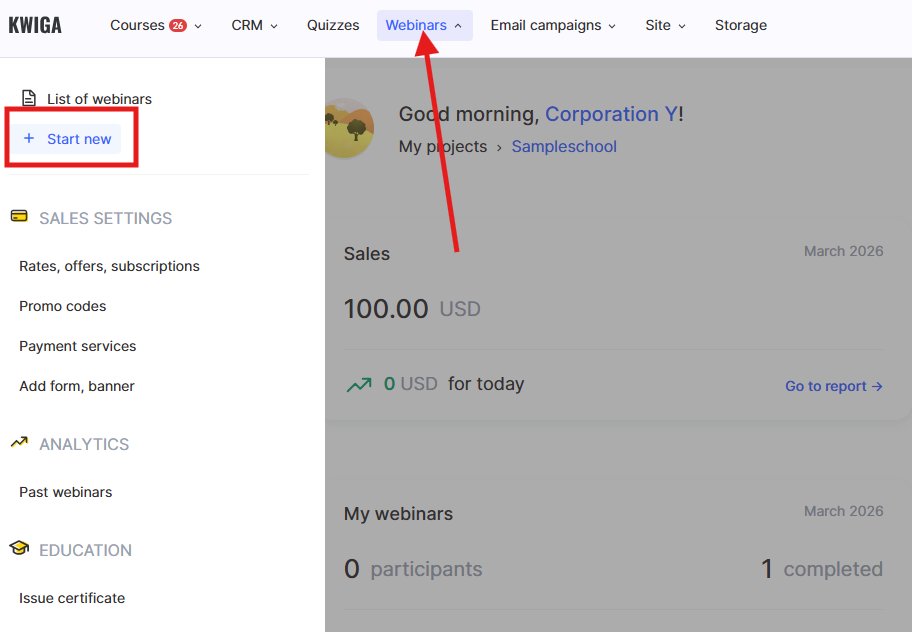
To create a webinar: go to the Webinars menu → + Launch New. The broadcast is conducted in integration with YouTube.
Note: If the event is conducted on a third-party service, import the list of participants into Kwiga. After that, they will receive access to the course with materials and the quiz.
The webinar has been created - proceed to setting up the course.
How to combine educational content, a quiz, and a certificate in one course
The course brings together all educational content: the webinar recording, additional materials, final assessment, and the certificate. To create a course: go to the Courses menu → click the + button in the right corner, or + on the top panel → Course.
Add lessons and fill them with content - videos (for example, a webinar recording from YouTube), files, and text materials.
Learn more about how to create a course on the platform in a separate article.
If you are conducting CPD for doctors, educators, or other professionals with hour verification, a quiz is a mandatory step before issuing a certificate. On Kwiga, it is встроено directly into the course.
For the final assessment, add a practical assignment using the Practice button within the lesson — quizzes are created separately in the Quizzes section.

Read about how to create a graded test.
The certificate is configured in Course Settings → Education → Course Result. There, you set the issuance conditions and, if needed, upload your own template.
How to create and configure a certificate
How to set up certificate numbering for CPD
For CPD, it is important that each certificate has a unique number in the required format — this simplifies record-keeping and the export of participant data.
The number consists of two parts: a fixed part (usually includes the provider code and the sequential number of the CPD event) and a variable part (the individual participant number).
For example: 2026-2789-1023456-000001.
Step 1. Prepare the CRM
Create a custom global field for the certificate number: CRM → Contacts → Settings → + Global field.
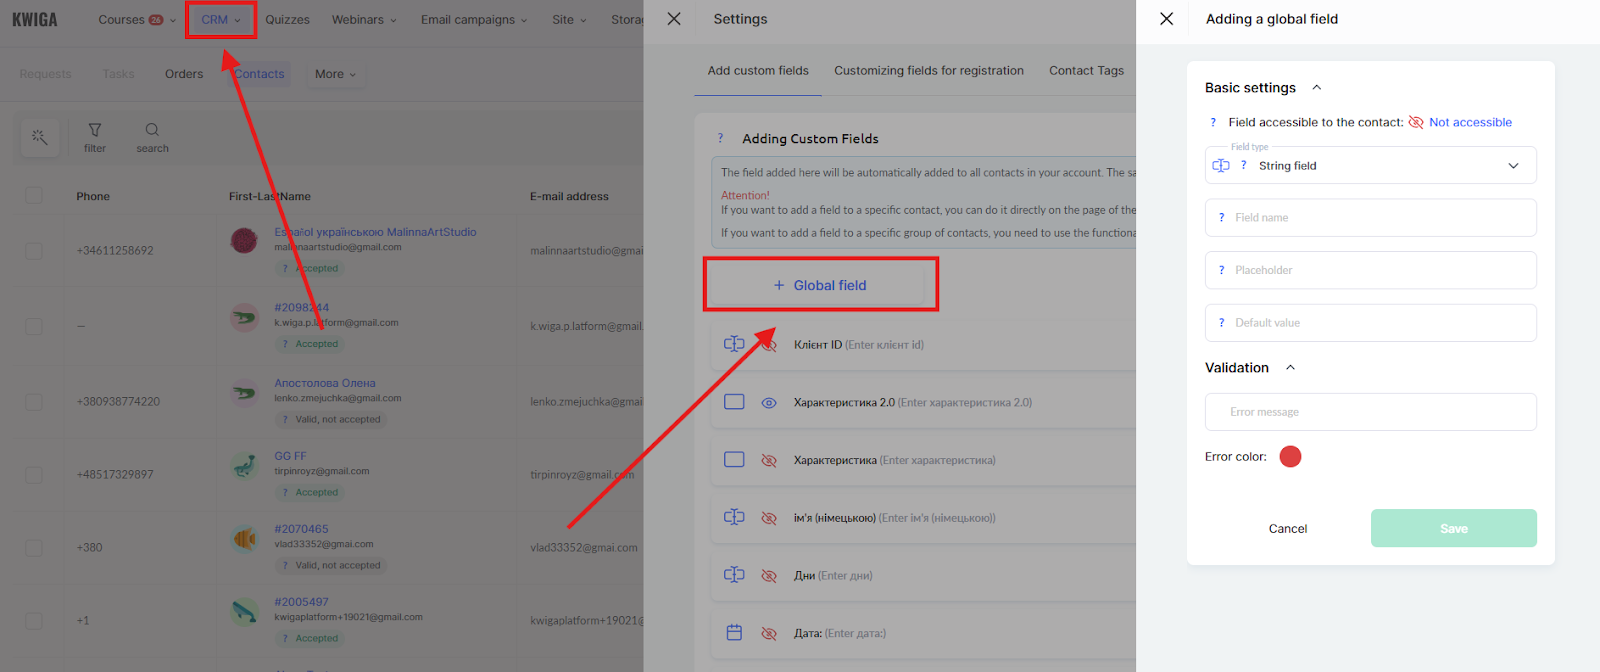
Select the “Text field” type and give it a clear name, for example, “Certificate Number.”
Keep participant access restricted — the field is filled in by the administrator.
Learn more in the article How to add a global field in CRM.
After creating the field, enter the numbers manually in contact cards or via import.
Step 2. Prepare the template with the fixed part of the number
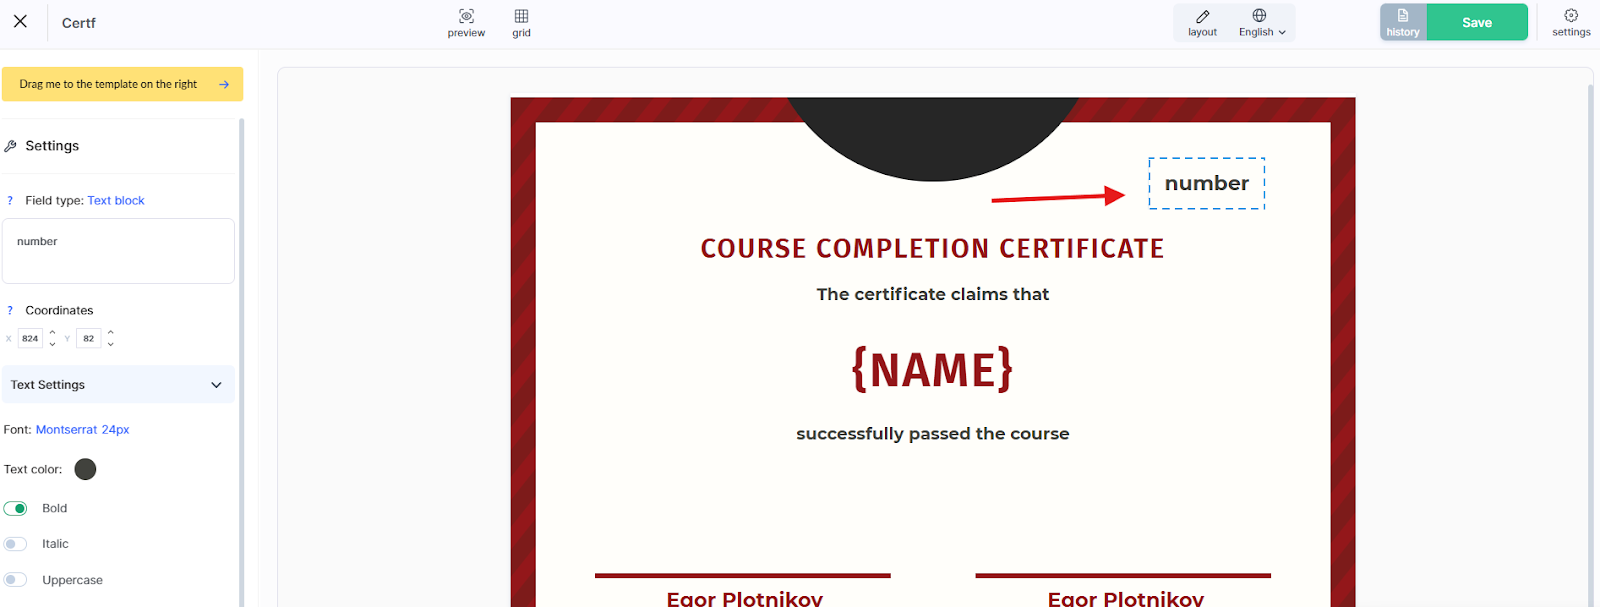
It’s more convenient to include the fixed part of the number directly in the template before uploading it. Then, in Kwiga, you’ll only need to add the variable with the participant’s individual number.
If the template is already ready without a number, drag a text block from the left panel and enter the fixed part manually in the editor.
Step 3. Add the variable with the participant number
Drag another text block and place it рядом. In the block settings, instead of regular text, select the custom field you created in Step 1.
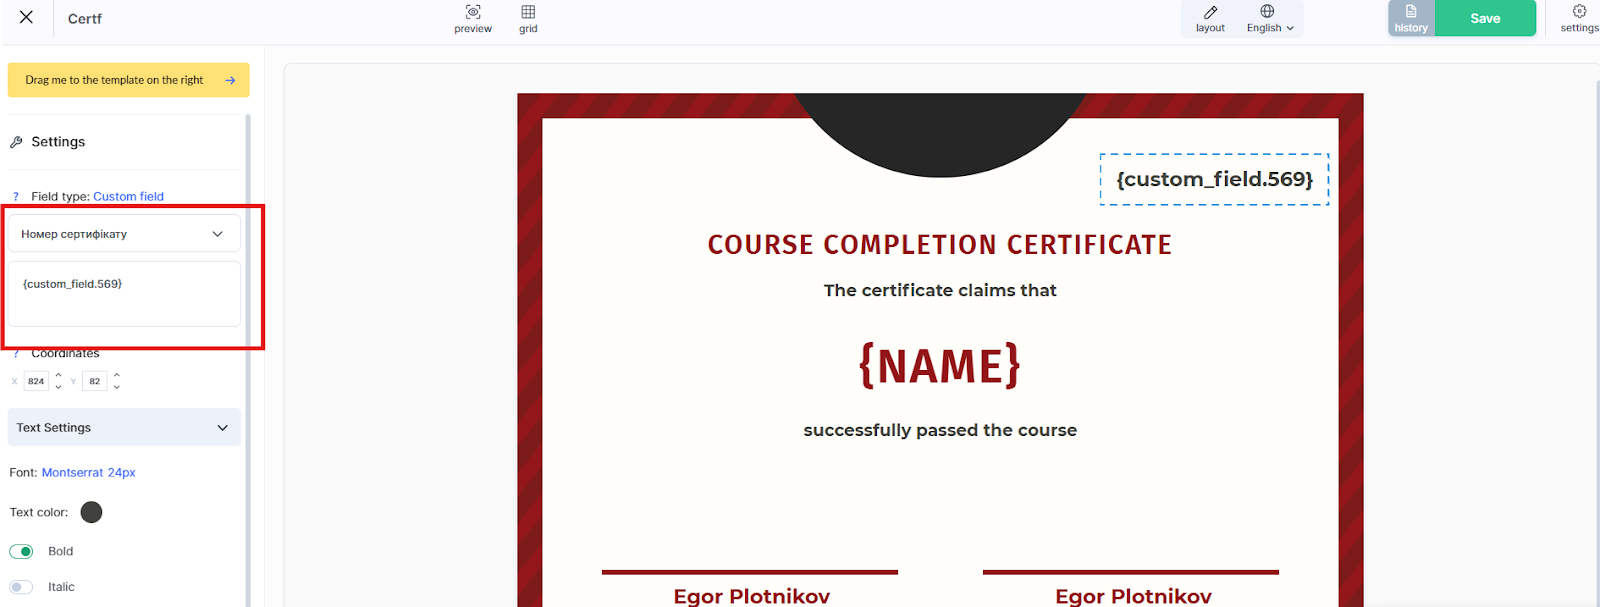
The platform will insert each participant’s individual number — the one added in their contact card.
Once the course with materials, quiz, and certificate is set up, proceed to the offer so participants can gain access.
How to manage participant access through an offer
An offer defines the conditions of access to the course: whether it is free or paid, for how long, and with what start date. It is through the offer that a participant gains access after registration or payment.
For example, for CPD with a fixed start date, the offer allows you to automatically grant access at the right time — without manually confirming each participant.
To create an offer: go to the Courses menu → Pricing, Offers → + Offer. Add the course in the Product section, and set the price and access conditions.
More details on how to set up an offer can be found in a separate article.
An offer can be bundled — meaning it can grant access to both the webinar and the course with materials at the same time. To do this, simply add multiple products to one offer. This is convenient if you are selling participation in a live webinar along with access to the recording — the participant pays once and receives both products.
Recommendation: Even if the event is free, create an offer with no price. This allows you to properly manage access and track participants. A free offer makes it possible to collect a participant base and track who registered, completed the test, and received a certificate.
The offer has been created — proceed to setting up the registration page.
How to collect participants: landing page, registration form, or payment button
A mini landing page is a separate registration page for a CPD event with its own link, which can be shared with participants or размещено on the organization’s website.
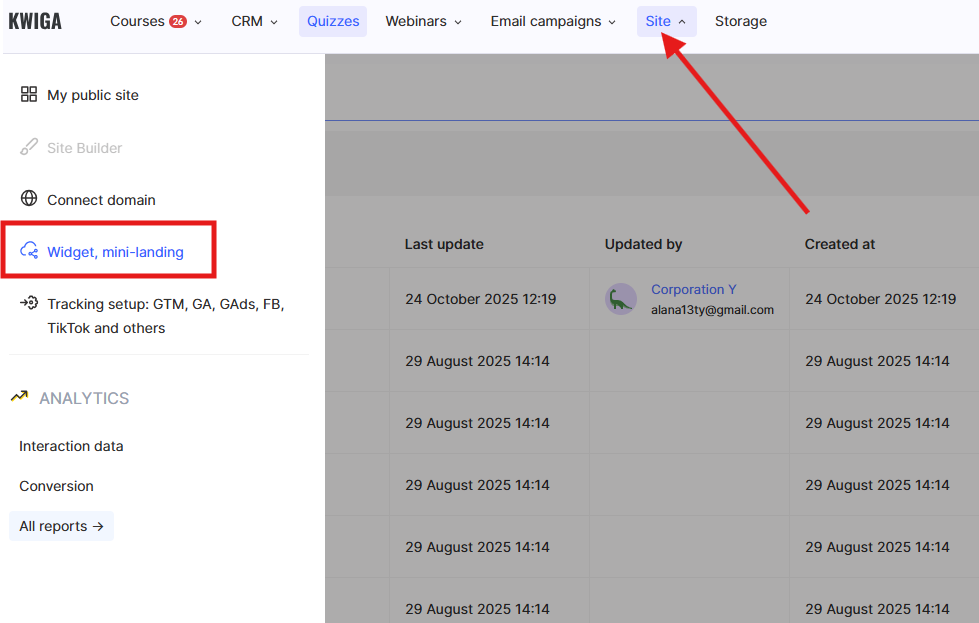
To create one: go to the Site menu → Widget, Mini Landing → +. In the builder, add text, images, and a button or form depending on the scenario:
● registration form — the participant leaves their contact details and gains access
● button to the offer page — the participant first sees the details, then makes a payment
● direct payment button — for quick enrollment without extra steps, provided that without authorization is set up
The mini landing page link can be copied after saving in the settings: Publication → Widget or Mini Landing tab.
Learn more about selling via a mini landing page in a separate article.
If you have your own website, the registration form or payment button can be embedded there as a widget, without redirecting to a separate Kwiga page.
The registration page has been created. Copy the link and send it to participants or place it on the organization’s website.
After setup, the participant registers on the landing page, attends the webinar, completes the quiz, and automatically receives a certificate. The organizer can see all participants, their results, and statuses in one Kwiga dashboard. Once everything is configured, running a CPD event with certificate issuance becomes much more convenient: registration, access to materials, testing, and certificate issuance — all in one place.
Didn't find the answer? Contact the support service via online chat or Telegram